I hope readers will by now have had plenty of time to read Part Two. Apologies for the delay caused partly by my holiday and mostly by my changing this battlefield for the one we needed for the next one (Althorp in December 1745 - much more on that later).
2.45 pm - A new French advance
 |
| Wellington, by his elm tree, casts a worried gaze along Mont St Jean (MSJ) to his left flank... |
 |
| ....where a renewed French infantry attack is under way. He has ordered the British main line back from the hedges to minimise fire from the Grand Battery |
 |
| Luckily the fire from that will diminish in the next couple of turns as Donzelot's Division is now on the move from its central reserve position |
 |
| La Haye Sainte still holds but the KGL are constantly suffering casualties from Quiot's attacks and artillery fire |
 |
| Looking across the French attacking infantry it can be seen that Nassauers and Dutch-Belgians are still holding the left hand shoulder of MSJ. Some of those rear French battalions are trying to reform |
 |
| Above and below: At the moment the Allied defence looks fairly strong but they are angled to meet a French brigade. Nassau skirmishers continue to harass Durutte's right flank |
 |
| And the result of the close action was not favourable to the Allies who have retreated off the table and onto the map |
 |
A number of French battalions were also repulsed so the front line on MSJ
is still held by Allied skirmishers |
 |
| A look at the table about 1130 real time. At this stage Richard asked Charlie if everything was OK on his flank and received an affirmative reply. |
 |
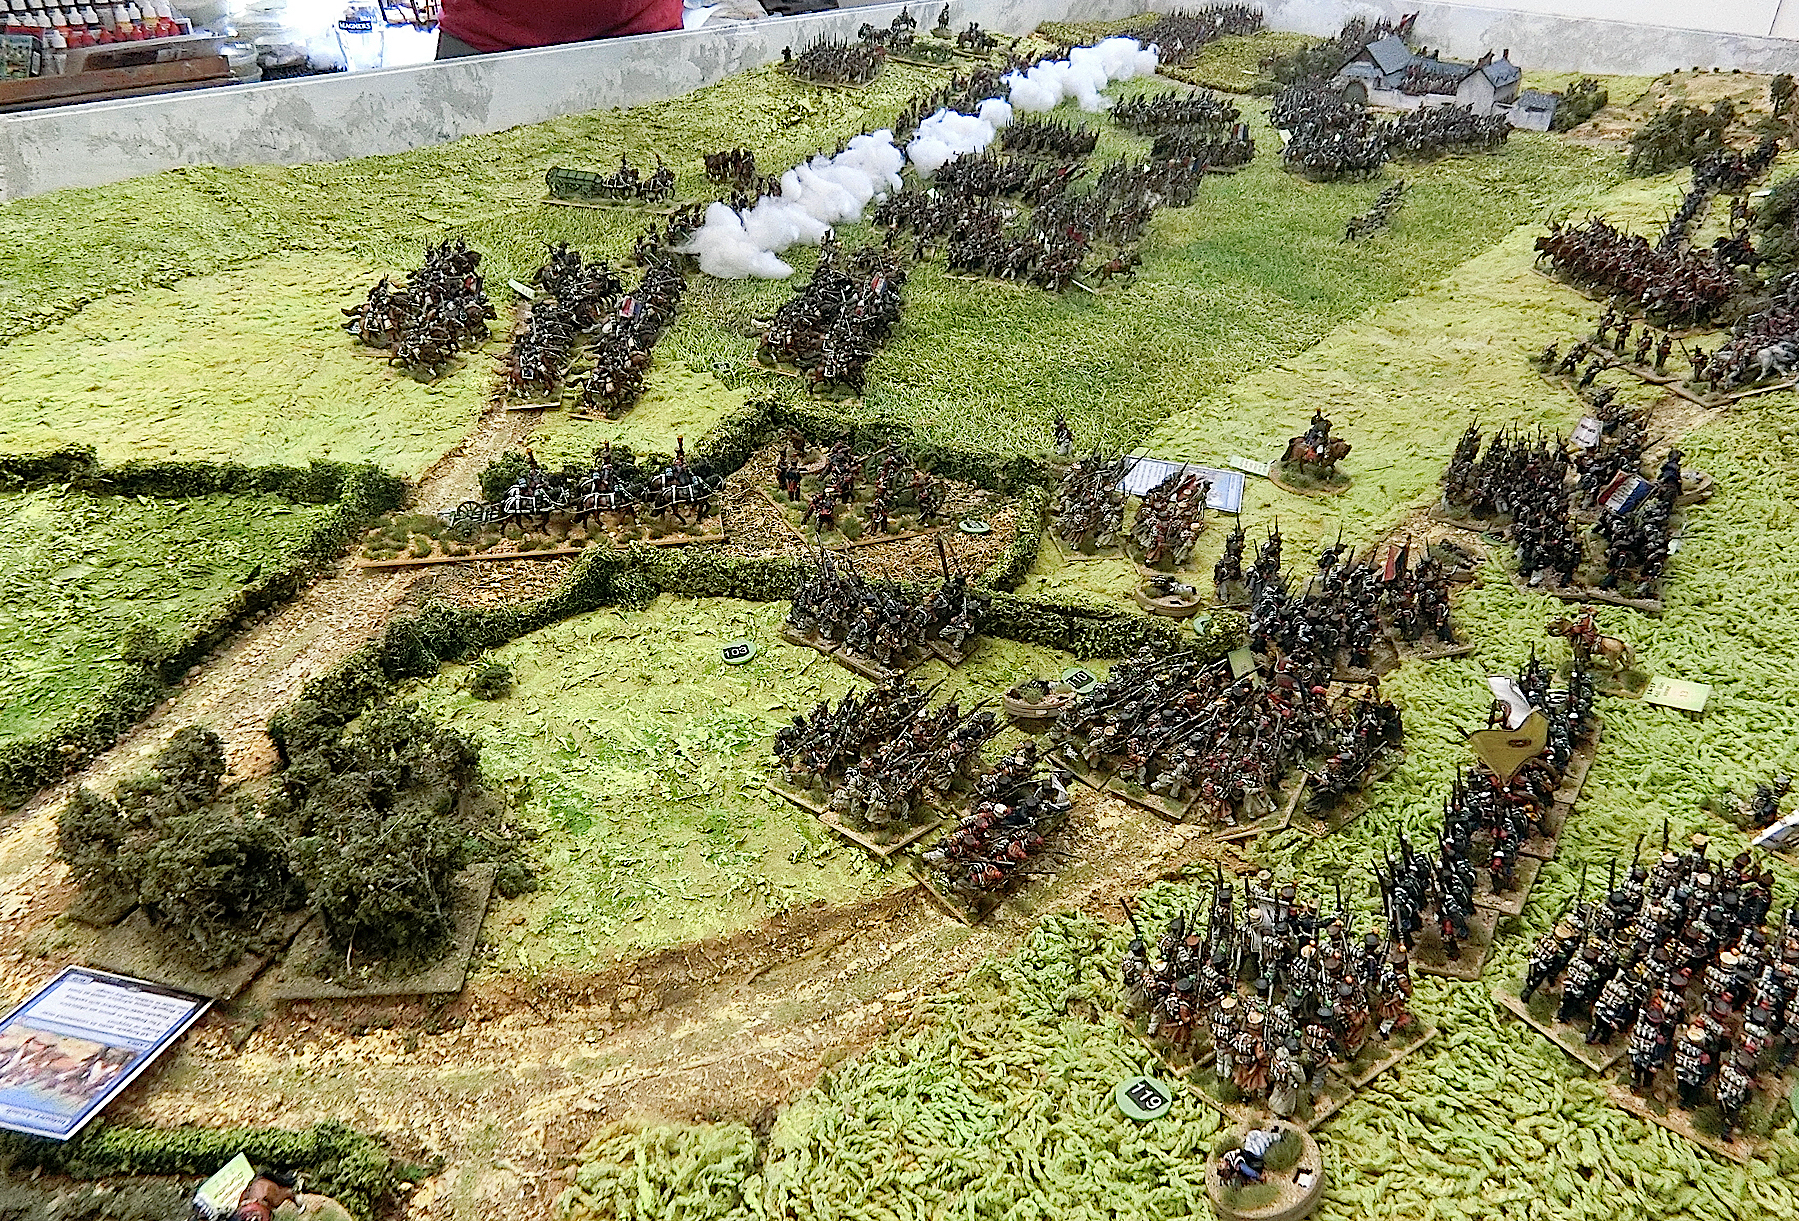
| Now the smoke has cleared round the Grand Battery it can be seen that Donzelot's nine battalions are resolutely heading for the British centre. Astute eyes will pick up Delort's Cuirassier Division has entered behind the remaining cannon smoke. |
 |
20 minutes later poor Charlie had an uncharacteristic very low
die roll for a Destiny test on Ompteda's KGL brigade, and he can
be seen removing the troops! He is up on a stool so he can reach! |
 |
| So around 3pm game time LHS is deserted along with most of that part of the Allied line |
More threats to MSJ left flank, and LHS falls to the French
 |
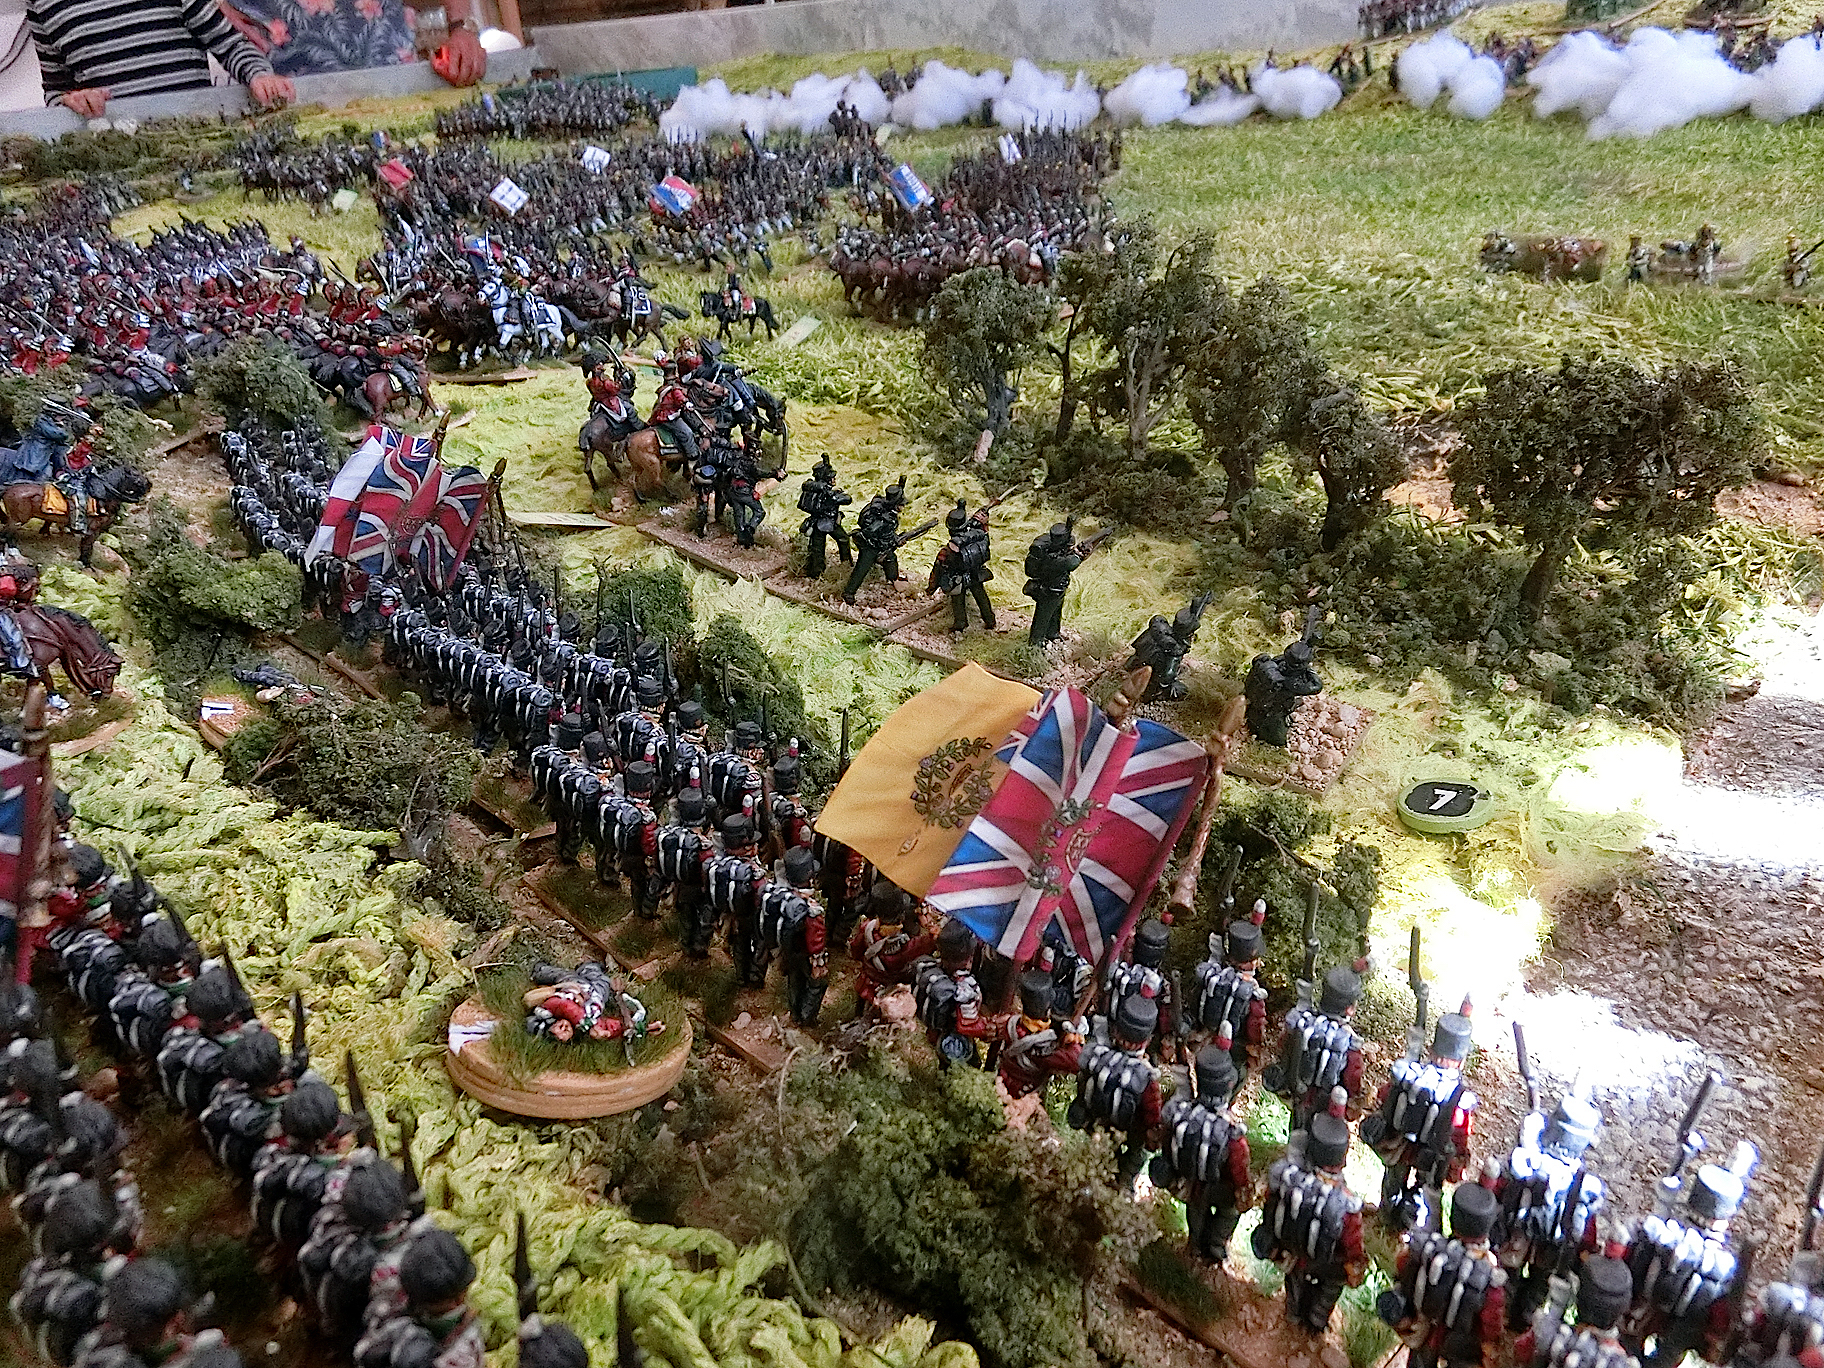
| Above and below: Time for drastic action and Wellington has ordered forward the Union Brigade through the deliberate gaps in the hedges. The speed of their advance over the crest catches a unit of French skirmishers |
 |
| But on the Allied left Paul has his hands full trying to find enough good units to keep up some kind of line. So far the Dutch-Belgian and Nassau resistance has been surprisingly effective and the French columns keep thinning out too |
 |
Behind them Watier's Cuirassiers are zoning in on the newly
arrived British cavalry. They could do with a double or triple move! |
 |
| Donzelot's view of the Union Brigade to his front |
 |
| On the extreme flank of MSJ exuberant infantry of Durutte's Division are about to chase up the retreating Dutch-Belgians |
 |
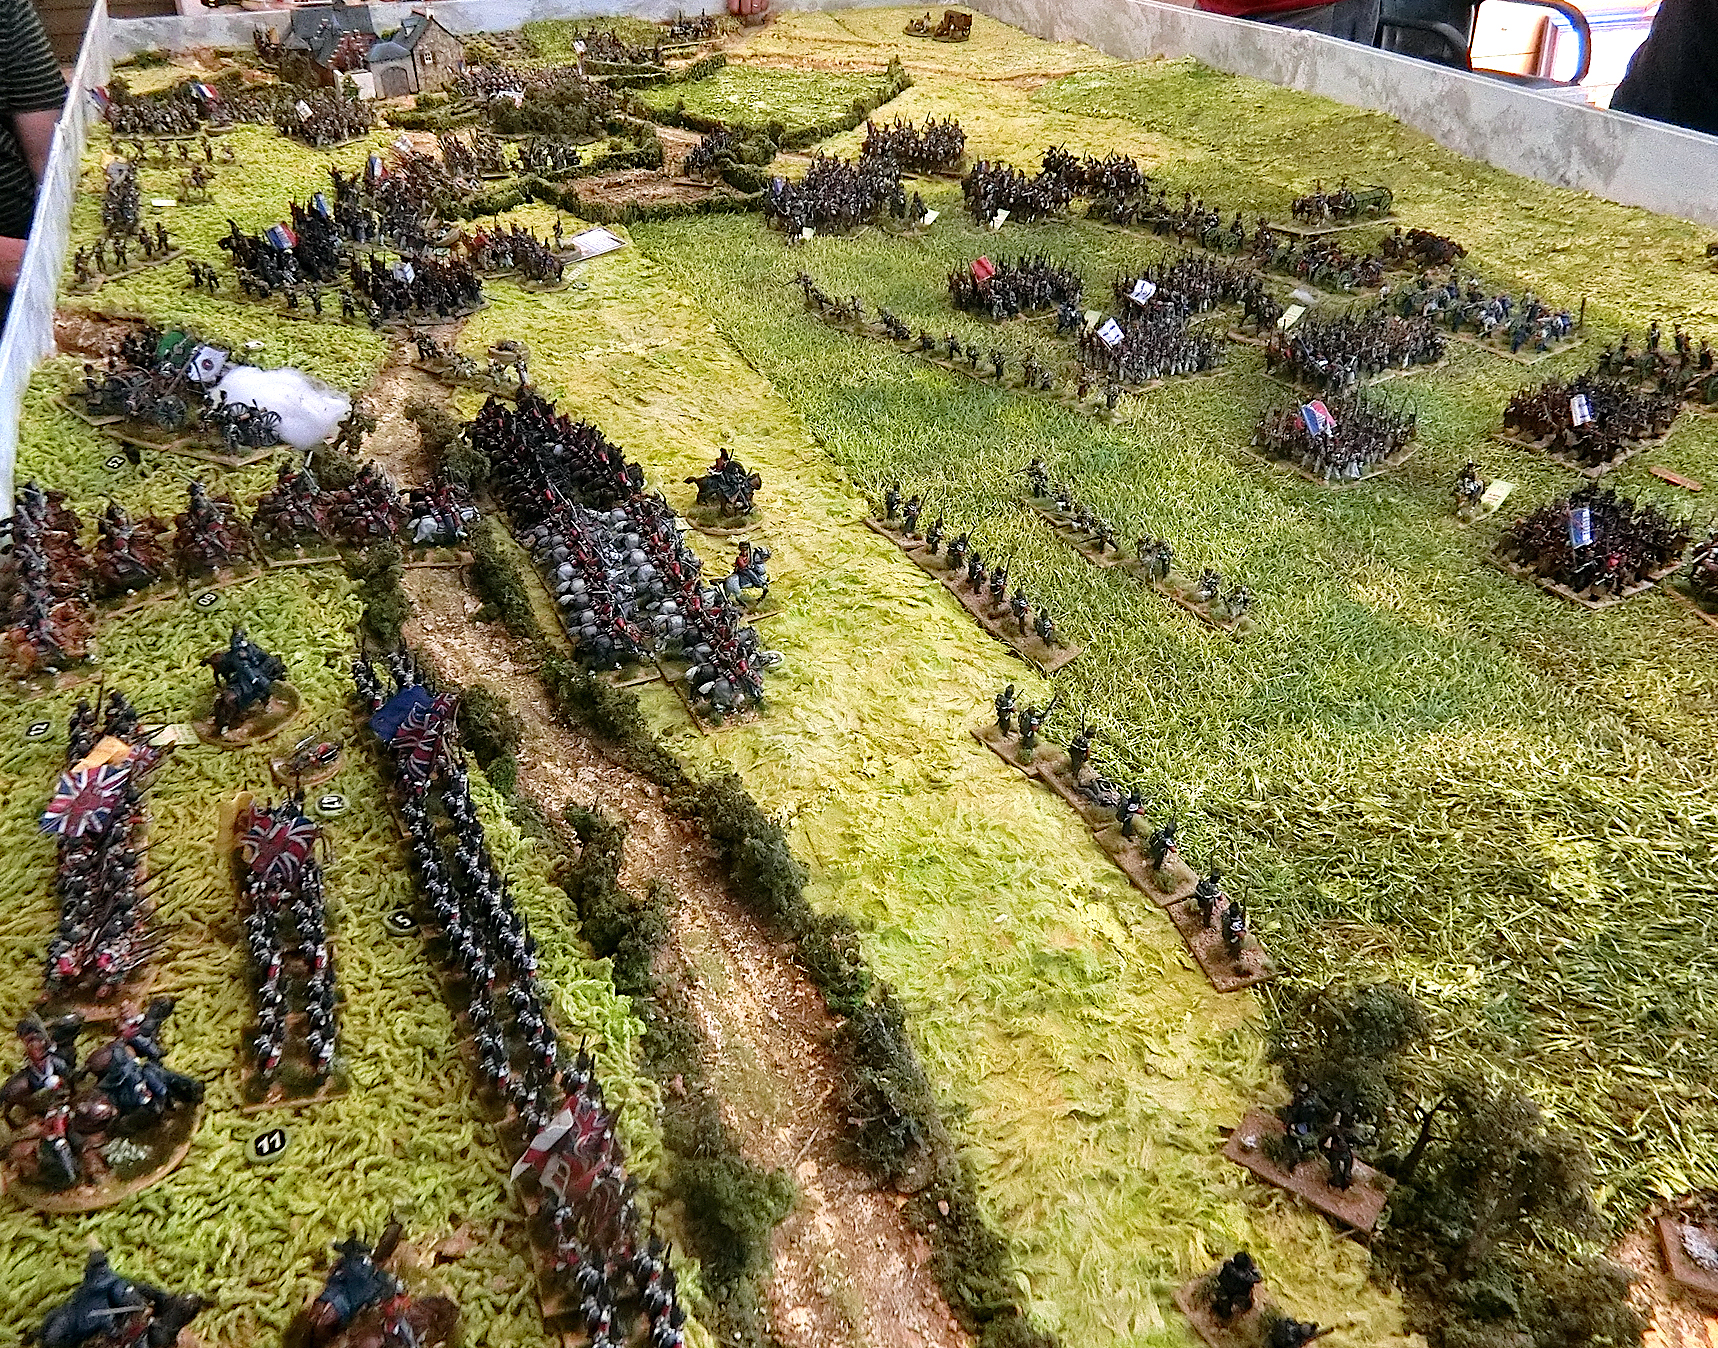
| Overall view about 3.15pm game time. In the foreground the French are masking Papelotte and La Haye, refusing to be drawn to attack them. Best's and Vincke's Hanoverians are trying to hold off Marcognet's Infantry. The Union Brigade, and Picton's and Lambert's British infantry are making the central position look strong....but Donzelot and Delort's Divisions are getting dangerously close. |
 |
JP desperately wants a good initiative roll for Watier's Cuirassiers......but he doesn't get it yet
|
 |
| Here is the view from the other direction...... |
 |
| Beyond all that Delort's Cuirassier Division continues to advance across the valley bottom |
 |
Scots Greys cross swords with the 1st Cuirassiers who are
closely supported by the 4th |
 |
| The Royal Dragoons were not going to take the eagle of the 45th this time! They were repulsed and had to fall back beyond the sunken road |
 |
| One of those Hanoverian battalions has gone and the brigade is being outflanked by a battalion of Durutte's Division |
 |
| Given the weight of numbers the Scots Greys look fated to go the same way.... |
 |
| ....and the battle noise rages round them....... |
 |
| ....as the Grand Battery has fully resumed its firing at targets on Mont Saint Jean |
 |
| Wellington anxiously awaits the result of the critical cavalry encounter........ |
 |
| .......mirrored in the look on D'Erlon's face too! |
 |
The clash ends in mutual withdrawal. Some relief to the Allies perhaps but
the Inniskillings now look vulnerable to Delort's heavy cavalry |
 |
| Here is a view of the magnetic map about this point. Just off the table on the north-east Jacquinot's cavalry are about to give Bijlandt's recovering Dutch-Belgians a hard time. My camera seems to have overlooked the remains of Pack's brigade joining the way-off-field recoverers |
 |
| The view from Watier's Horse Artillery just after the cavalry engagement |
3.45 pm - End game on Mont Saint Jean
 |
| Excitement rising - all the players have a view of how to proceed |
 |
| JP intervenes to bring up Delort's French Cuirassiers |
 |
| The Inniskillings don't stay long under a flank attack! |
 |
| Grenier's Brigade marches on towards the sunken lane under fire from Whinyates Battery, while the Scots Greys consider how to react to their fellow Dragoons' departure..... |
 |
| .....they counter-attack |
 |
| Brue's Brigade are seeing off the final Hanoverians from MSJ front slope |
 |
| Now Wellington brings forward the Household Brigade to try to get the better of Delort's Cuirassiers |
 |
| The wider view at this time shows the French pincer movement closing in. Delort front and left, backed by Donzelot's infantry, and Watier's cavalry coming in again at the right, all supported by the Grand Battery |
 |
| Although these pictures show the Life Guards had not yet made contact, the tension was palpable |
 |
| Above and below:Two great shots along MSJ with action at its height |
 |
| To some extent destiny hinged on the already weakened Scots Greys at this stage. If they beat back the Cuirassiers then the Lifeguards might complete a rearward surge through the French ranks. If not....... |
 |
| Destroyed Greys back in their box! |
 |
| ....the way lay open for Delort to sweep in among artillery and reforming Dragoons on the rear slope of MSJ - the French had done it! |
 |
Good natured hand shakes all round
after a hard "fight" |
 |
....and Tony brought up his Napoleon's carriage - ever the optimist
(well, he is a Liverpool FC supporter!) |
Off the table I used my simple map combat rules and, hardly surprisingly, Jacquinot's cavalry destroyed the ill-fated Dutch-Belgian Brigade of Bijlandt who had started the battle under Grand Battery fire, got away, fought hard on MSJ then withdrew to lick their wounds, and later got sabred and lanced by marauding French cavalry! Sad but heroic.
Bear that in mind when you look at this final battlefield overview and the map
Despite all their valiant efforts the Allies had been comprehensively beaten this time. Yes, there was some chronic bad luck, but the French plan was thwarted by dice too on occasion. I must give credit to the French plan. The only bit I saw in writing was by Tony as D'Erlon, but I think the grand design was refined by JP and Kevin who mostly put it into action. Our scheduling a two day game gave them the luxury of letting the Grand Battery do the pounding while exploiting the relatively weaker area between MSJ and Papelotte by a less direct infantry advance (the right hook). The Light Cavalry were used as the extreme end of that hook but took a lot longer to achieve it than expected. La Haye Sainte fell far too easily and too early, allowing the heavy cavalry pincer attacks to proceed, as we have seen.
Easy with hindsight to say Richard should have sent reinforcements to his left flank earlier, but he was not familiar with the consequences of some of the General d"Armee rules and maybe did not see the collapse coming soon enough. I would have loved to have seen the Lifeguards actually engaged, but time had beaten us and no one disputed the result!
Grateful thanks to JP and Kevin for their wonderful armies and game design and much of the execution of the action. As a spectator/map movement manager I found it very exciting and wonderful to watch a Napoleonesque attack plan unfold. I hope you've enjoyed the report and pictures.
Well worth 10 minutes or so to watch JP's wrap up of the second day on his great YouTube channel
And if you haven't had enough yet JP has put together an absolutely marvelous video tour set to music through many of the photos I sent him of the game. Give yourself a treat, watch it on a desktop computer or a big TV - fantastic!
Thanks to all concerned for a really fun weekend and a satisfying wargame result.
Chris G