Showing posts with label Nassau. Show all posts

Tuesday, 25 September 2018

West Country Quatre Bras: Wargame refight conclusion and project review


Rather belatedly I can now give a full appraisal of our mammoth project to refight the whole of Quatre Bras at 1:20 figure scale. Thank you to all who have given us massive support through comments and interest on the many blog posts, it has helped keep us motivated.

Quatre Bras Part Two - Wargame Conclusion
This has been contributed by Kevin East who masterminded the whole thing and even ended up playing, as General Reille. I'm illustrating it with some great photos taken during the event by Tony Dillon.
The reports on the two-day game can be accessed here


Kevin writes:

<<In conclusion:
Wargame result points systems are always going to be flawed and some might see that in those collated here. However, it was a game and we needed some measure of accounting when our playing time ran out. The total tally was to read:
 Allies: 16 points. 
French: 66+1 points (the plus 1 is the sabres edge lead from Quatre Bras Part 1).
(see points chart  below  for details - apologies for the format but this is the best copy I can get into blogger. "Rows" refers to areas on this battlefield map - CG)


The Battle Of Quatre Bras (2) 
21/22 April 2018 
POINTS Calculation 

EVENT

ACCUMULATION

POINTS
ALLIES   
FRENCH
NOTES
POINTS FROM DESTROYED UNITS (ON TIMECHART)

2
(per unit)
4
(2 French units routed off field)
36
(9 allied units destroyed)
(9 allied units routed off field)

EVERY UNIT IN GOOD ORDER 
(row ‘I’ :Allies) 
(row ‘E’: French)            
2
(per unit)
0
14
(7 units in row ‘E’)

POSSESSION OF QB BUILDINGS

2 (per
building)
4
0

NORTH GEMIONCOURT BRIDGE

2
-
2

SOUTH GEMIONCOURT BRIDGE

2
-
2

EAST OF BOSSU BRIDGE


2
-
4

GEMIONCOURT FARM


4
-
4

LA BERGERIE


4
4
-

NIVELLES ROAD WEST OF QB

4
4
-

NIVELLES ROAD EAST OF QB

4
-
4


TOTALS


ALLIES
16
FRENCH
66+1


VICTORY: In control of the majority of victory points by 6.00pm on end of Sunday. 
DRAW: EQUAL POINTS.
MARGINAL VICTORY or loss: 1-6 points difference. 
MAJOR VICTORY or loss: 7 points or more difference.


Whilst the Allies lost in points, and particularly in the number of units destroyed (10 to 2), by dusk the French had still not captured Quatre Bras which was their ultimate goal, and it's also interesting to note that the Allies held onto all the terrain points they started the game with – quite a feat! This weekend's gaming showed a surge in French forces northward but the going was tough and eventually each side fought themselves to a standstill. Later in day two the 4 battalions of British Guards arrived fresh and were looking to drive the French south into Bossu wood (just like in 1815!) The French Guard Lancers and Chasseurs light cavalry (not used in 1815 by Ney due to an order from Napoleon) were also fresh and threatening the Allied centre and left flank respectively. However, they were without significant infantry support and would not have succeeded very far as an Allied rearguard force of artillery was waiting and the 23rd and 11th British Light Dragoons were just entering the field to put a halt to it.


So I concluded that the Allies did keep the village of Quatre Bras but at a great cost. Realistically they would now retire to lick their wounds and fight another day. The French infantry units were also worn and would have mirrored the Allies’ activity. The French cavalry would continue to press the Allied rear guard for a short period until nightfall. 


Points are one thing, but a reflection upon history is another, and with this in mind I judge that by the end of the game the French have pushed the Allies much further North than they did in history at the parallel time, therefore they score a marked victory in the wargame. However, this gain would soon have ebbed away as tired French infantry would not be able to push further in taking Quatre Bras. So it might be said that the ‘high tide’ mark for the French had in our game proved to be about 8.15pm rather than the 2.30pm on the actual day of battle fought all those years ago. How games and times change!


Some number crunching on both games:
The Quatre Bras duo of games were to reveal some sizeable wargames numbers: 
At 1:20 ratio a total of 3700 Allied and French figures in 133 units were used over the 4 day's gaming, involving 6 players, an umpire, plus reporter/photographer/adviser (Chris) over a combined table/map gaming space of 308 sq/ft.  This was two specially designed and sculpted terrains with the addition of outside (off table) gaming space via map moving and combat which increased the size (in game One) to 18’x17’ to allow off table flanking manoeuvres.  Is this the most detailed wargamed version of Quatre Bras on the planet to date?  Who knows? Perhaps Google will reveal? >>

Thanks a lot Kevin.


Wargaming Quatre Bras as a two year project.

In over 50 years of wargaming this is probably the most satisfying endeavour I have ever been involved with (that's not to say there haven't been some other great ones!). Especially for those who may not have followed this blog for long I think it is worth reflecting on how it came about and why it worked. (This section illustrated by some of my own Quatre Bras photos).
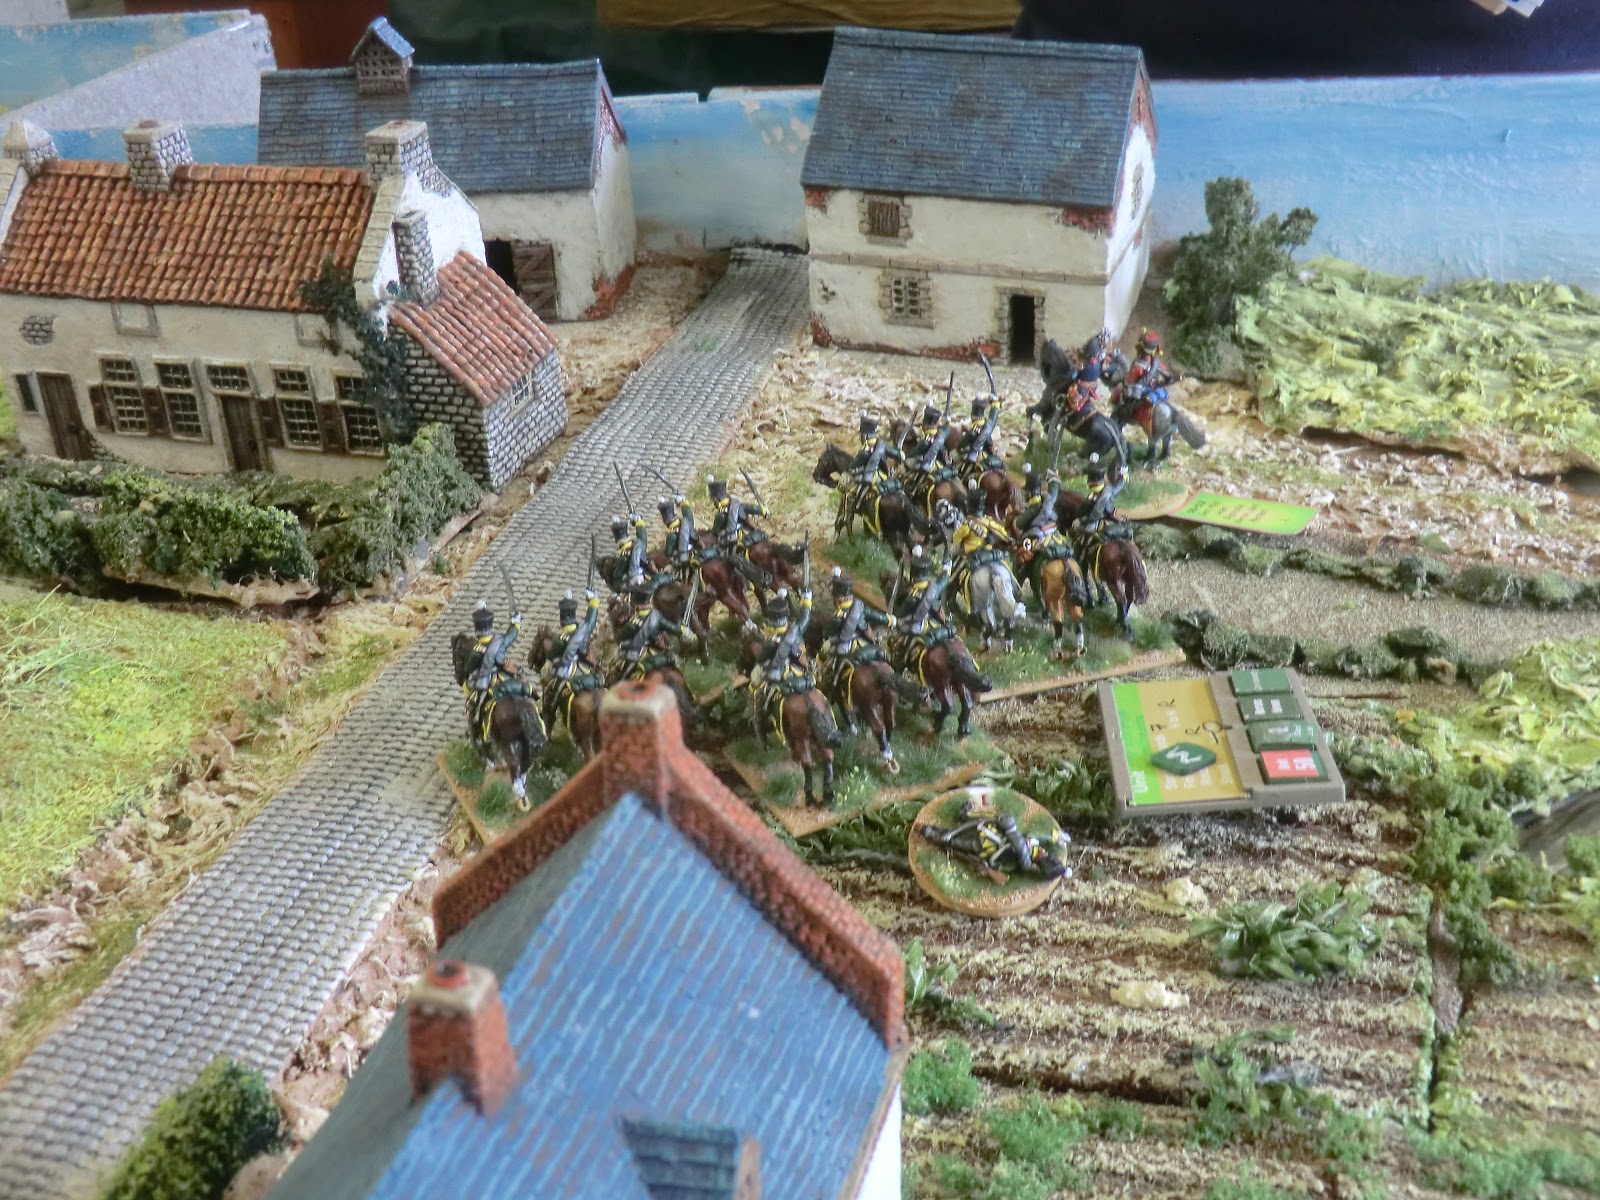
Dutch-Belgian casualty in Bossu Woods
When Kevin came back into my life after a 36 year gap he was a bit of a lost soul collecting beautiful 28mm historically accurate Waterloo armies at 1:20 figure:man ratio but not knowing his way to get to a game. Paul D. and I steered him towards massing his forces to be a major element in our West Country refights of La Haye Sainte and Hougoumont at 1:3 scale in 2015. This scratched the  Waterloo itch in the biennial year but Kevin and I still hankered for the grand tactical 1815 game with battalions as the main tactical units, and, against my practical advice, he was intent on 1:20 scale.

First we had to find, or write, a set of rules to suit us and that search began in January 2016 at our joint-birthday game - testing-rank-and-file-rules-for-1815. Thanks to Simon Millar and John Rich I had been introduced to a Seven Years War version of "Rank and File" (R and F) the year before and since R and F covers most of the black powder era I thought they might work using the Napoleonic adaptations.


Enjoying the feel of this small scale test we realised the project could have legs but the 3000-4000 figures required was a daunting task even for the painting machine that is Kevin East. I volunteered to repaint many of my 1:3 scale units and create more, but we badly needed help. The experience of the massive 1:3 refights had given us new contacts and practical big-game organisational opportunities. Also my wargame room and terrain sculpting skills had proved adequate for hosting up to the 8 players at a time we hoped for. Paul H. had kindly lent his ready-made Waterloo armies for LHS and Hougoumont and was keen to "do" Quatre Bras but his base sizes were not compatible with R and F so work would be needed before they could be used. James Fergusson had proved a stalwart supporter of 1:3 and was very willing to come to Gloucestershire regularly to be involved in QB. It was a no brainer to invite Richard Newcombe to join the team as he had been involved with 1:3, had some British Guard Battalions to prove it, and as a retired barrister is just great at getting under the skin of any set of wargames rules!

Kevin and I renewed our reading, trying to dissect the historical Quatre Bras in forensic detail to figure out what we really needed at 1:20 scale. He masterminded the orders of battle and produced a super-detailed list including our existing figures and all those that needed creating/repainting. For my part I played with unit footprint sizes and distances and ranges and tried to come up with the optimum tabletop battlefield to make. We had the following aims for this project:
1. See if, by taking all available historical elements into account, the French could make a decisive victory, as they so nearly did in 1815.
2. Honour the brave inexperienced Dutch-Belgians, Nassauers, Hanoverians and Brunswickers who held off the veteran French for longer than anyone could reasonably have expected. They are so rarely properly represented in refights of QB where the British dominate.
3. Once again enjoy a lot of toys on a big and beautiful tabletop terrain, this time in a classic style Napoleonic battalion level game, the kind we'd dreamed of in our boyhood!
4. Share the joy with as many players as practical and the world via this blog.
Those were long term tasks but we had to keep up momentum and interest and prove various concepts.  First was a two day test game in April 2016. Never mind the QB historical units let's just have an 1815-themed imaginary game. It only involved Kevin, James and me but was a great success and tremendous fun so we were really on....The rules were not perfect but gave us a good framework on which to build the QB detail we needed.

Next we wanted to give Paul a chance to use his figures, so scheduled a game about 6 months hence which felt like plenty of notice. Sadly his work, family life, and community commitments meant Paul had to pull out and with him the prospect of about 1000 of the figures we had hoped to use. This left a hole in our team that took a while to fill in various ways. Nothing daunted we pressed on. Spring 2017 brought the opportunity for another test, this time involving Richard too and so we were off to a good start with verifying the rules modifications so far made. You can see lots of pictures and read the project outcomes of that game here encounter-at-kaaskerke. The most significant changes were:
- better balance of weapon ranges, especially artillery
- need for a very much more nuanced structure in defining differences in unit quality
- historical sized French battalions were too small to stand the pressure they would get in 7 hours or so of historical time in our QB, so compromises on the orbat were needed.

Meanwhile we had managed to revise the figure painting schedule: James took on the Herculean task of creating the whole of the Brunswick Corps and I volunteered to make a four-battalion brigade of Hanoverian landwehr, Kevin took up the slack as best he could but it looked woefully as if sacrifices would have to be made on artillery and all those French skirmishers we needed. That was until I found, via the A Military Gentleman Forum, a dyed in the wool veteran Napoleonic wargamer in Tony Dillon from Birmingham. Tony was also prepared to travel to the Cotswolds (getting lost round Stroud!) for the tests and the real events. Tony's arrival transformed our project, which had looked like having to be put off, as he had considerable quantities of compatible figures and a gung-ho attitude to doing whatever it took to help, including redesigning our playsheet to a more user friendly format.

Some of Tony's Guard Horse Artillery moves in at the gallop
I had warned Kevin at the outset that trying to do the whole battle in 1:20 would outgrow my facilities and the amount of playing time we had.  So around the turn of 2016-17 we made some major decisions. We would fight not one but two weekend games, and split the historical Quatre Bras affair into one game from about 2pm to about 5.30pm taking two days to play, and a second weekend game covering from about 5.30pm to nightfall. This had a number of advantages:
- We could split the terrain to cover most of it in two correctly scaled chunks. The southern section first to represent the Prince of Orange's Corps' stand and retreat towards the crossroads, then this would overlap with a northern section allowing reinforcement by Brunswick, Hanoverian and British troops. Thus we hoped to do justice to history and not just wing it as so many wargames have to.
- First half in September 2017 and the second in April 2018 would give me sufficient break to dismantle and rebuild the 96 square feet of sculpted tabletop terrain
- Though we still had to make every unit they were not all needed at once, so it gave us all another 6 or 7 months to finish painting figures.
- Two weekends gave the potential for more people to be involved overall.
The QB2 build at an early stage - reusing a large chunk from QB1
Recycling some roads and fields from earlier Waterloo terrains.....
....and adding new ones
So our next step was a bigger two-day battle than we had so far done to test the cavalry rules in particular and how units would fare for durability over a long hard-fought game. In May 2016 we staged The Battle of Hoeke Valley reported here hoeke-valley-day-one and here hoeke-valley-second-days-play with a wrap-up here hoeke-valley-wrap-up.  This involved all the project team plus Ken, Roy and Graham for a day each. It prompted huge email discussions afterwards which helped Kevin and me crystalise our thoughts how to conduct the real thing - which was next!

We got there OK and had 5 players for the first event but poor James was ill and had to miss the first serious engagement of his wonderful Brunswick figures. Links to my After-Action- Reports on it via the second one quatre-bras-part-1-second
James got to command most of his Brunswickers personally in QB2


And hopefully you've just read the parts detailing Part Two, and so it's all over.....though I think Kevin is now planning a Prussian force for The Battle of Wavre in about 2020 - 21.........:-)
The River Dyle and Moulin de Bierge near Wavre,
photographed during Kevin's and my trip to Waterloo in 2014
Wargame Project Tips 
New wargamers, or even experienced ones might benefit from a few (fairly obvious) pointers if thinking of undertaking a project like this:
- Establish your aims at the start and try to keep them within the resources you believe you can manage (figures, space and time to play, and sufficient time to organise everything)
- Do engage a number of kindred spirits as early as possible and get agreement to how and when the activities will be shared. Give those people priority to participate, and a share in the decisions on when the games will be. 
- Make sure you have a "completer-finisher" type like we had in Kevin who has the authority and enthusiasm to set everything out clearly and keep driving and encouraging till it's all done.
- Try to ensure all the project team will check emails/texts regularly and respond when required.
- Be prepared to tailor your rules and game system to suit what you want to do, not be unduly ruled by "official" doctrine or outside influences. Have test games as frequently as seems sensible. Best not to have these resemble too closely your eventual scenario, but to illustrate points you know you need to sort out.
- A bonus of this approach is that you keep up team enthusiasm as well as have the chance to get game/rules practice with others outside the team and exposure to fresh ideas.
- Provide plenty of beer, port, chocolate, cake, meals out to the host(s)! (Especially if it's me).
CG gets an end of move briefing from James (Photo by Richard)
Kevin gives directions
Supporting Documents
You can find PDFs of all the Quatre Bras briefings and rules QRS in the Napoleonic Download link in the right hand sidebar, but here is a quick link
Feel free to download them for your own use and if you find anything useful please let us know by Comment on this blog or emailing me, it's what makes the effort of social media/blogging more satisfying.


French wounded being attended to at Tony's field hospital vignettes
French dead along Gemioncourt stream


Wednesday, 2 May 2018

West Country Quatre Bras Part Two: Day One - 5.45 pm to 7 pm

My previous two posts set the scene - the terrain and a snapshot of pre-game deployment.  Those unfamiliar with our project might care to read the accounts of the first part of this refight going back via the final report played in September 2017.

However, a very brief recap. We set out from about 2.15 pm historical time representing practically every unit present at 1:20 scale. The sparse Dutch-Belgian and Nassau line crumbled pretty quickly but reinforcements soon came up and by the time the French reached Gemioncourt stream and the outskirts of Bossu wood they had a real fight on their hands. Consequently a brigade of infantry and one of Chasseurs a Cheval were sent to outflank the Allied left but as they got in position the whole Allied line was being reinforced by British, Hanoverians and Brunswickers.  In the centre repeated attacks by French Lancers achieved nothing significant but eventually the quantity of French skirmishers and artillery began to push the Allies back onto their own newly established gun line North of the stream. Significant progress was made by the French in Bossu Wood and by close of our first weekend Prince Jerome's Division was in a serious threatening position on the Allied right flank.

Kevin East, as game organiser, took advantage of what seemed a natural joint exhaustion to give himself an umpire's privilege of a move with no charges and "reset" some of the positions for the start of Part Two. One good reason for this was to allow for the fact we had turned the battlefield through 90 degrees and stretched parts of it to make the whole thing a more accurate scale for the units, of about 12 inches = 200 metres. Here is the map of the dispositions he would use at the start of Part Two
As shown in the previous parts we modeled the large inner area and played reserves on the map in the two outside rings of squares.

Those who are keen can read the full briefings, orders of battle and reinforcement timelines for Part Two here, or else from the Napoleonic Download sidebar at right. If you find any of them useful for your games please let us know. There will be a link to the rules later.

Richard and James take stock of the refreshed Allied positions round Quatre Bras
Kevin suggests some options to Tony for the French guns on Gemioncourt Ridge

Kevin has written a short personal introduction:

<<From Umpire to Player:

Due to 2 players being unable to make the game at the last moment I actually got to game as General Reille!....a chance to game the final weekend of QB2 as part umpire and also player! Reminding ourselves of the rules from 6 months ago proved a slow start for move 1 but the pace soon picked up. This resulted in 11 moves being completed over the weekend (5.45 – 8.30pm). Tony Dillon (Ney) and I (Reille) worked the West and East side of the Brussels road respectively and Richard Newcombe (Prince of Orange) and James Fergusson (Duke of Wellington) did the same. It proved an easy landmark with which to transfer control of units to the appropriate player. (and the historical chain of command made this dual command structure practical - CG). 

Chris’s game narrative will provide the detail of battle but plans were as follows: 

The French plan:
Plans for the left and centre were to push hard in Bossu Wood with Prince Jerome Bonaparte, fill the centre left with fast moving Guard horse artillery to support cavalry attacks from Kellerman’s Cuirassier Brigade swiftly followed by the Dragoon brigade. Available units from Bossu were then to follow the cavalry to exploit any holes. Troops East of the Brussels road were to storm across the Gemioncourt stream and continue to drive westwards from the Namur road to take Quatre Bras. Only two artillery batteries were available on the East flank to support this, and one of those was damaged.

The Allied plan:
The main plan was to use the existing forces to hold the French on the left and in the centre and hold up the French across the Gemioncourt stream. (However, I heard James express himself to be strong enough on the left to try a counter attack, especially with his Brunswick cavalry - CG). Reserve units arriving on the Brussels road were to be used on the right flank (West of Quatre Bras) to counter attack through Bossu woods, pushing the French back and outflanking behind their position. 

You can see whether either side achieved their aims!>>

A quick visual tour of some of the main areas at the start:

Prince Jerome had about 9 battalions in Bossu Wood, pressing the Allies hard
Two British battalions were all that blocked the open fields next to Bossu Woods
Opposite them the remains of the two French Lancer regiments
 are still just about battle worthy
In the centre the Allies had consolidated a formidable line of British, KGL,
 Brunswick and Hanoverian batteries, but no longer much infantry to cover them
Large numbers of French skirmishers faced them astride the Brussels -
 Charleroi cobbled chausee........
...........and on either side of Gemioncourt stream
Apparent strength in depth along the Allied left flank, but quality was lacking in
some battalions
Reasonably good French infantry but very much weakened Chasseurs a Cheval
 faced them around the Bati St Bernard ridge
A close up from the rear: (from foreground) Brunswick infantry by JF; a wing of Brunswick Hussars by JF: Hanoverian Landwehr by CG: more of JF's Brunswick infantry: Highlanders and Dutch-Belgian Cavalry by KE. In the distance French infantry and cavalry
 At the end of each move I got a briefing on significant events from the players and took notes, so they might be a little cryptic but my plan is to report the narrative from my notes and supplement them with hopefully useful photos. To keep things manageable I will limit myself in this post to describing what happened on the first day of our weekend refight.

16th June 1815
5.45 - 6.00 pm
Since Kevin had made an arbitrary Umpire's Move in getting to our start positions, and there were no melees,  we limited ourselves just to firing and morale for this move.
On the Allied left the weakened Verden Landwehr were forced to retire. In the centre a heavy exchange of fire between the Allied cannon and the skirmishers saw the latter lose a stand but morale held, while Roger's battery and the KGL Horse Artillery both suffered hits but without becoming critical.  The Brunswick artillery caused heavy losses to the French line on the other side of Gemioncourt Stream but amazingly they achieved the desired morale score to hold.
Continuous but not significant firing continued through the foliage in Bossu Woods but the 2/1st (Royal Scots) in the open across the road found themselves just in range of one of Tony's Medium batteries on the ridge and lost a stand - they laughed it off with a high morale dice (for now).

Tony's batteries at bottom right still proved to be in range of the British battalions
down the slope
Rogers' battery was already at 50% from QB1 but the rules allow it to fight on
until the next Morale test - which would be its last with one stand left.

6.00 - 6.15 pm
Now it all began to kick off.....
Furious cavalry charges by both sides on the Allied left saw the 6th DB Hussars halted by tremendous volley fire from the 3/2nd Legere who maintained their line. Brunswick Lancers pushed back the weak French 6th Chasseurs and as shock troops failed the restraining dice and would follow up. Next to them the reverse happened with the 1st Chasseurs beating the 5th DB light Dragoons and pushing them back.  Down by the stream a few weak Allied units were vainly trying to stem the renewed tide of French infantry now storming across in columns of attack. The skirmishers preceding them caused enough casualties on the remnants of the 28th Foot (my local North Gloucestershire regiment) to reduce them to only the command stand remaining of this valiant unit;  still they fought on with General Picton inspiring them.

1st Chasseurs and DB Light Dragoons charge each other.
Beyond the 28th Foot fights on under Picton's direct command
DB Hussars are stopped by the French Light Infantry volley fire
Overview of the left flank from QB crossroads
Nearer the centre Moll's Brunswick foot artillery got lucky with an Event Card. This added to their effect in hitting 1/92 Ligne such that even the two lines of thick hedge were not enough to prevent sufficient casualties to cause loss of morale and a retreat back off the table and onto my map. They were not to return until reformed well over  4 moves later. Further along the stream, nearer the bridges, the 2nd Brunswick Light Infantry pressed forward regaining some ground by pushing the French skirmishers back.
Brunswick artillery and their Event card..........
.......and their victim
On the back table James was reforming some of the stronger Allied battalions that were forced to retreat at QB1. Major General Bylandt was with them and able to order a couple of battalions out to reinforce the left flank.
A Nassau and a Dutch-Belgian battalion bravely march eastwards to rejoin the fray
Baron Guiton's Cuirassier Brigade now put in an appearance with three units - 2 wings of the large 8th, and a 6-stand regiment being the 11th Cuirassiers. They topped Gemioncourt ridge and advanced steadily across the stream in column of march formation to the West of the bridges, intending to form for an attack on the waiting British battalions. This gave heart to the Lancers who advanced in parallel, and to their left the two batteries of French Imperial Guard Horse artillery galloped up the road and then to the right of Bossu wood. They had been released earlier as targets in Bossu wood disappeared.  The whole thing was building up to a formidable classic Napoleonic cavalry attack, one could almost feel the ground tremble!

French Guard Horse Artillery on the move (classic figures by Tony Dillon) 
Cuirassiers and Lancers advance
All the French left flank Cavalry and Artillery so far 
In Bossu Wood itself the Allies were mostly outclassed by Jerome's men where the three battalions of the elite 1st Legere were now in action. Lively fire was exchanged with each side losing casualties, including significant losses from the relatively fresh Brunswick Avant Guard,  the already badly battered battalion of Nassau Elite companies, and some Green class Dutch-Belgians.

Bossu Wood overview (before the arrival of the Cuirassiers who as a "map reserve " came on last). In the foreground the Brunswick Avant Guard battalion is heading West, off the playing table into an outflanking position.

6.15 - 6.30 pm

Overall view during the movement phase of Move 3. Cuirassier Brigade has changed to lines, followed by Dragoons. Guard Horse Artillery are beginning to deploy and Richard is beginning to consolidate a line of British battalions to the West of QB
On the Allied left major developments continued with both sides' cavalry. The weakened Dutch-Belgian 6th Hussars bravely shattered themselves on the muskets and bayonets of 3/2nd Legere. The Brunswick Uhlans followed up the disordered 6th Chasseurs a Cheval and routed them, and in the same fashion the French 1st Chasseurs followed up the 5th Dutch Belgian Light Dragoons and turned their retreat into a rout.
DB Hussars and Brunswick Uhlans
Heinemann's battery and the 28th Foot face an onslaught of French infantry
A Left Flank overview in which more Allied reinforcements can be seen in the foreground
The Allied artillery superiority on this flank took a few blows this move starting with the destruction on the chausee of Sympher's battery KGLHA by heavy volley fire from 1/93rd Ligne. Then Heinemann's battery failed to get any hits of consequence when firing canister at the skirmishers continually popping away at them from near the stream. 
The Brunswick Light battalion in a brisk firefight with skirmishers near the bridge
The remaining few guns of Rogers' battery turned to fire canister into the flank of the Cuirassiers changing to line near them but there were not enough left to make much difference any more. They could only watch disconsolate as Baron Picquet's Dragoon brigade advanced to back up the Cuirassiers.
General Kellerman leads his two brigades - Cuirassiers........
.........followed by Dragoons
One of Kevin's wonderful dismounted Horse Artillery vignettes
To the left of the heavy cavalry two batteries of Guard Horse Artillery were deploying
(figures by Tony Dillon)
At last the 6th Chevaux Leger Lanciers successfully charged the Royal Scots, beat them only in the second round of the melee (thus losing their Shock status) and had to be content with just pushing them back down the road bordering Bossu Wood and breathing a sigh of relief that they did not need a morale check as they were already below 50%.
Led by General Pire the 6th Light Horse Lancers were able to hit the 1st Foot
while they were severely distracted in a volley exchange with a French infantry battalion
Probably the presence of the Prince of Orange was making these British battalions
 uneasy, with Lancers oncoming :-)
The sparsely held Allied centre  - but Wellington is on the spot! Rogers' remaining gun model can be seen having turned to threaten the Cuirassiers while still surviving skirmisher fire - only 2 hits remaining till destruction!
In the wood itself there was more French success as Tony attempted to use his weight of column of attack, albeit at slow speed through the undergrowth, to press the less resolute among the facing Allied units. 3/2nd Nassau had to give way across the woodland road in the face of 1/100th Ligne.
1/100th Ligne storm through the trees to the road in Bossu Wood
Not all gloom for the Allies though as Major General Sir Colin Halkett's 5th British Brigade began to filter off the chausee at Quatre Bras and gradually deploy to fill the gaping hole to the West of the village.

To the right of QB the gap is being filled by more British battalions

6.30 - 6.45 pm
In James' words "not much happened" on his flank this move! In fact a wing of the Brunswick Hussars counter attacked and beat back the formerly successful 1st Chasseurs. The attack of the Brunswick Lancers was blunted as they were held off by fire from a French square. Fortuitously this gave the French 6th Chasseurs more time to rally.

By now the DB Light Dragoons were fleeing through QB to add to the congestion
...and the 6th Chasseurs  had also fled from their assault by Brunswick Uhlans....
....who went on to be held by a French square and their horses blown,
but in the background 6th Chasseurs have rallied
The 1st Chasseurs were now blown and suffered a counter attack from
Brunswick Hussars
A dramatic struggle took place round the colour party of the 28th Foot. The single remaining stand of stalwart Gloucestershire men (yeah, I know they were mostly Irish really!) took 2/61st Ligne to three rounds of melee before they were destroyed in a glorious last stand! Picton survived the dice check for hits on an attached general and managed to get away.
Picton and the 28th Foot at extreme right just about to go down (below).

Around the stream in front of Gemioncourt Farm Kevin now concentrated the French resources of artillery, volley and skirmish fire against the over-extended Brunswick Light Infantry battalion who lost two stands in this Move and had to fall back, unsteady, to their original position, much weakened by their attack.
2nd Brunswick Light battalion, falling back at 50% lost
(figures by JF)
Rogers battery, such as it was, succumbed to an overwhelming charge by 2/4th Legere in a skirmisher mass. This meant the Allied blocking strength up the centre was melting away and now an artillery battery in front of La Bergerie with the Duke of Brunswick was the most effective forward unit left.
The wreckage of the KGL Horse artillery battery......
(original Hinchliffe figures by TD)
....and the last gasp of Rogers' RFA battery
(Victrix plastic figures by CG)
Having galloped past Rogers a wing of the 8th Cuirassiers bore down on the 44th Foot who were in line. Richard was gambling on British firepower stopping the cavalry but even he could not succeed with lousy firing dice! That let the Cuirassiers charge home and poor Richard rolled 1,1,1,and 2 in the melee thus not inflicting any casualties at all, and infantry beaten by shock cavalry were automatically routed.

The 44th Foot about to be hit.......
....and the result
In a very similar circumstance, with more poor firing and melee results, near to Bossu Woods the 42nd Highlanders were broken by a desperate attack by 6th Light Horse Lancers. At last, after being in battle since 2.15 pm, the French Lancers had achieved something!
Staggeringly the weak 6th Lancers won against the full strength Black Watch in line
British comrades close ranks to shield the demoralised highlanders, but they had
done enough to finish off 6th Lancers who had lost a stand and could not
 pass their morale test so retreated below 50% strength
The battle raged in Bossu Woods. While holding firm centrally against a surprising Allied surge, the French were making key gains towards the northern edge and 1/100th pressed on in column and routed its Nassau opponents. Richard had executed one crafty move though which was to move his elite Brunswick Avant Guard battalion off the table in fast moving skirmish order onto the flank of Prince Jerome's infantry and they just got into position to open up and cause Tony to hold back his advance here to cope with the telling fire.

Above and below: isolated French successes were beginning to break
 apart the Nassau, Brunswick and DB hold on Bossu Woods

On the "extra bit" of terrain, or back table, more Allied reinforcements just began to arrive in the form of Kielmansegge's large Hanoverian infantry brigade. They would be restricted to one unit per Move though as Kevin was allowing in his game design for the QB to Brussels road being by now (as historically) jam-packed with wounded and fleeing troops and baggage carts.

The Grubenhagen Light Field battalion leads the Hanoverian brigade on the
road from Brussels (figures by CG)
6.45 - 7 pm
In the centre the French had made a significant breakthrough as the successful Cuirassiers began to follow up the fleeing 44th Foot who were making up the chausee towards Quatre Bras. The whole area SW of QB was now alive with French heavy cavalry eager for blood and, sensing this, Richard and James formed any battalion within striking distance into square, this was not to be without its own problems though.  Although the Cuirassier wings were being spread out by their potential targets the Dragoons were forming in a coherent column of squadrons behind them.

Above and below: Dragoons advancing and forming up

All players were eyeing up the new possibilities presented by the cavalry breakthrough
Artillery could only cross Gemioncourt stream by the bridges, so for the last hour there had been a constant traffic of limbered guns riding up the left flank of the cavalry advance. Tony had found that his Medium and Light guns were now out of range so it was vital to move forward with the attack. All the Horse Artillery tried to get to the front (we had made their maximum effective range 48 inches [800 metres] for this game) and the Foot Artillery slightly behind up the slope with a 60 inch maximum range. There was a 12 pdr Heavy Artillery battery 20 inches off table on Gemioncourt ridge which could just hit some of the squares at extreme range (84 inches).

Some of the off-field fire had already hit British units near La Bergerie earlier but now, as each new battery unlimbered, Tony was able to concentrate on particular squares SW of Quatre Bras. Being made of stern stuff the British infantry were not giving into it just yet!

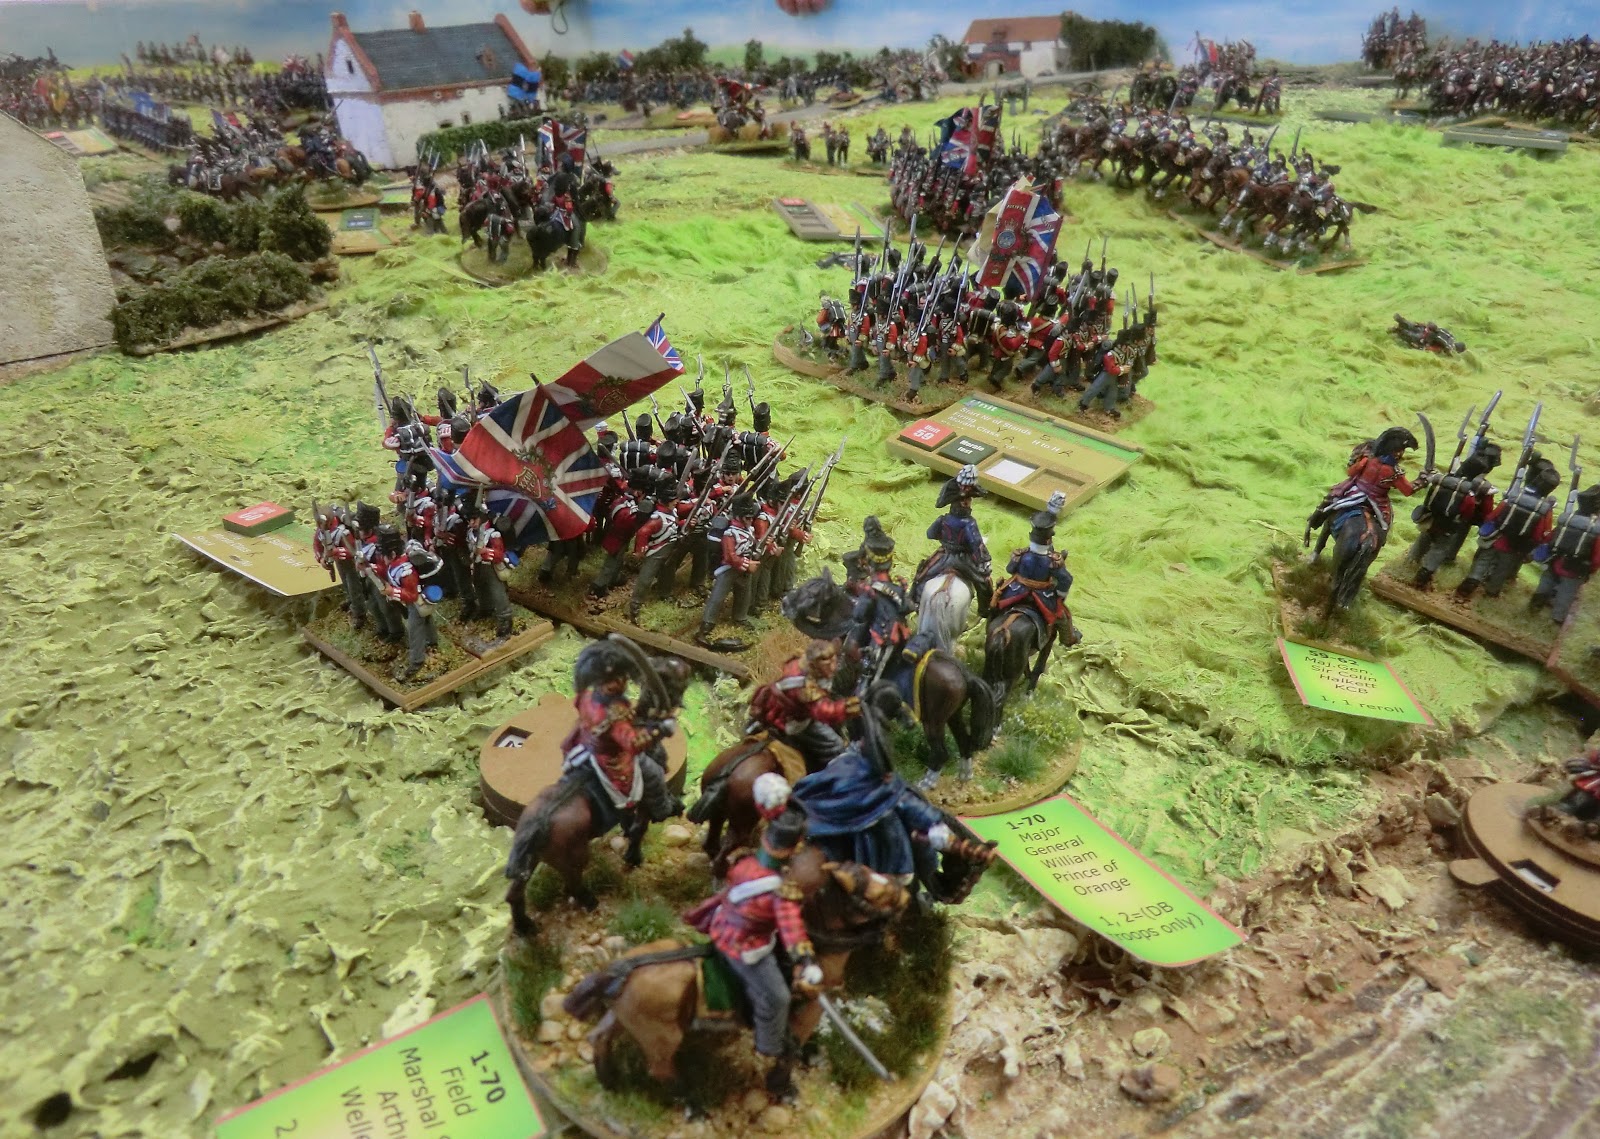
A good view of the British squares, with both Wellington and Prince Billy near at hand
However, next to where the 44th had died the 79th, Cameron Highlanders,  were too close to a wing of their 8th Cuirassiers opponents to form any other than a hasty square and forfeited their fire, and they were also overcome and routed.
The Camerons square under attack
Sadly for the highlands this Move also saw the demise of the 92nd, Gordon Highlanders, who had become separated from their brigade in the QB1 game and were now way out on the Bati St Bernard ridge. Their prominent position made them a target for Kevin's supporting battery on the high ground behind Gemioncourt stream. So they were suffering badly and finally folded under a charge from 2/108th Ligne. This was one of the many veteran battalions of Bachelu's Division which had finally succeeded in crossing the difficult hedges of Gemioncourt Stream and were now coming uphill en masse with the intention to outflank the Allied left towards QB. Such was the importance of this to Tony and Kevin they had placed both Ney and Reille at that point of the front line.
A good view of the Allied extreme left. James is to be complimented on managing to form two defensive lines though scrutiny of the Wargamer ADC status stands will reveal their low quality. Gordon Highlanders at top right.
Gordon Highlanders at top left; Brunswick Hussars; Hanoverian Foot Artillery
French columns come up from crossing the stream
On the back table, behind the Allied centre, the surprise success of the French cavalry had put the nearest regiment only 18 inches away from the Grubenhagen battalion, who formed square rather than await the same fate as the 44th, whom they could see fleeing up the chausee along with the DB Light Dragoons, too shattered to rally and spreading panic like their historical counterparts. The Luneburg Light Field battalion now marched on to support their fellow Hanoverians.

In Bossu Woods 2/3rd Ligne managed a full blooded flank attack on 1/2 Nassau who were engaged in a fire fight frontally, and pushed them back across the woodland road. It was not going all the French way though as the off-table Brunswick Avant Guard were inflicting telling casualties on the French Legere skirmisher screen who had deployed at 90 degrees to fend them off. They were strong enough to pose a significant hindrance to Prince Jerome's supremacy in the woods.

Flank attack in Bossu Woods
Now we were at the end of the wargaming day there was a general feeling of concern on behalf of the Allies, and this was compounded by the arrival of the Imperial Guard Lancer Brigade on the other side of the stream behind the Dragoon Brigade.

Above and below: Two views of the Guard Lancers

Two photos put together to give an idea, with the blue line, of the extent of French success during Move 5
Things were shaping up for an exciting finale since Richard knew that at some stage the North of Bossu Wood would be recoverable with the arrival of his own Foot Guards Division - 4,500 crack infantry and more artillery. He had issued them with marching orders and I had been plotting the progress of both sides' reserves throughout the day on my magnetic map.

My off-table map monitoring at a point when Kielmansegge's brigade, the Imperial Guard Lancers, and Colonel Jean Trippe's French infantry brigade are all due to get on the table
We were all in good spirits though as we went for dinner at the local pub and later sat round reminiscing over wine and port till the early hours about wargaming in times past.....