Showing posts with label Jacobites. Show all posts

Monday, 12 December 2022

Battle of Althorp - 26th December 1745: Part Three - Boxing Day Desserts

 I hope you have enjoyed this short series so far. If you need a reminder of this, the biggest battle in Guy's "what-if" Jacobite Rebellion, the previous part is here.

(As before - main text by Guy Barlow, explanations in picture captions, and helpful asides in italics (!), by me)

Day Two

The first five moves  on this mid -Winter "Boxing Day" had taken us from 8am to mid morning, but with 1200 figures for the two players and their "umpire-assistants" to deal with it had taken us all of the first day 's play to get that far. "Bonnie Prince Charlie" for that Day One was Ken Marshall who could not manage a whole weekend this time.  So Steve Johnson came up from South of Bristol for the day and picked up the Young Pretender's "Crown". 

At this point the Scots/French force, though it had suffered a lot, was gaining momentum and merely lacked overwhelming strength in any one sector.  Richard/Duke of Cumberland was defending well but his line was shrinking. Guy and I had to figure out what to do about the reserve brigades we had lined up for each side. With Steve/Prince Charlie obviously wanting a good game I was in favour of bringing the French reserves on very quickly so he would have the confidence to attack. To balance this I proposed that Cumberland receive a message telling him his reserves had been delayed and suggesting that he save the army by an orderly withdrawal. Knowing Richard of old I guessed he'd make a professional, well controlled and 18th century style attempt at this while being heavily pressed.

Guy had other ideas though, and he wanted to prevent an outright victory for either side in order that his campaign could continue on to his desired dénouement somewhere nearer London. So Guy wrote two hand written messages (see them here) which we gave to the respective commanders, who obviously had no idea of our actual deliberations. Neither did I really, as Guy kept his "neutral" intention close to his chest and trusted in the players' interpretation of his solicitor-speak letters and the fate of the dice! He knew neither side would get reinforced today!

CG

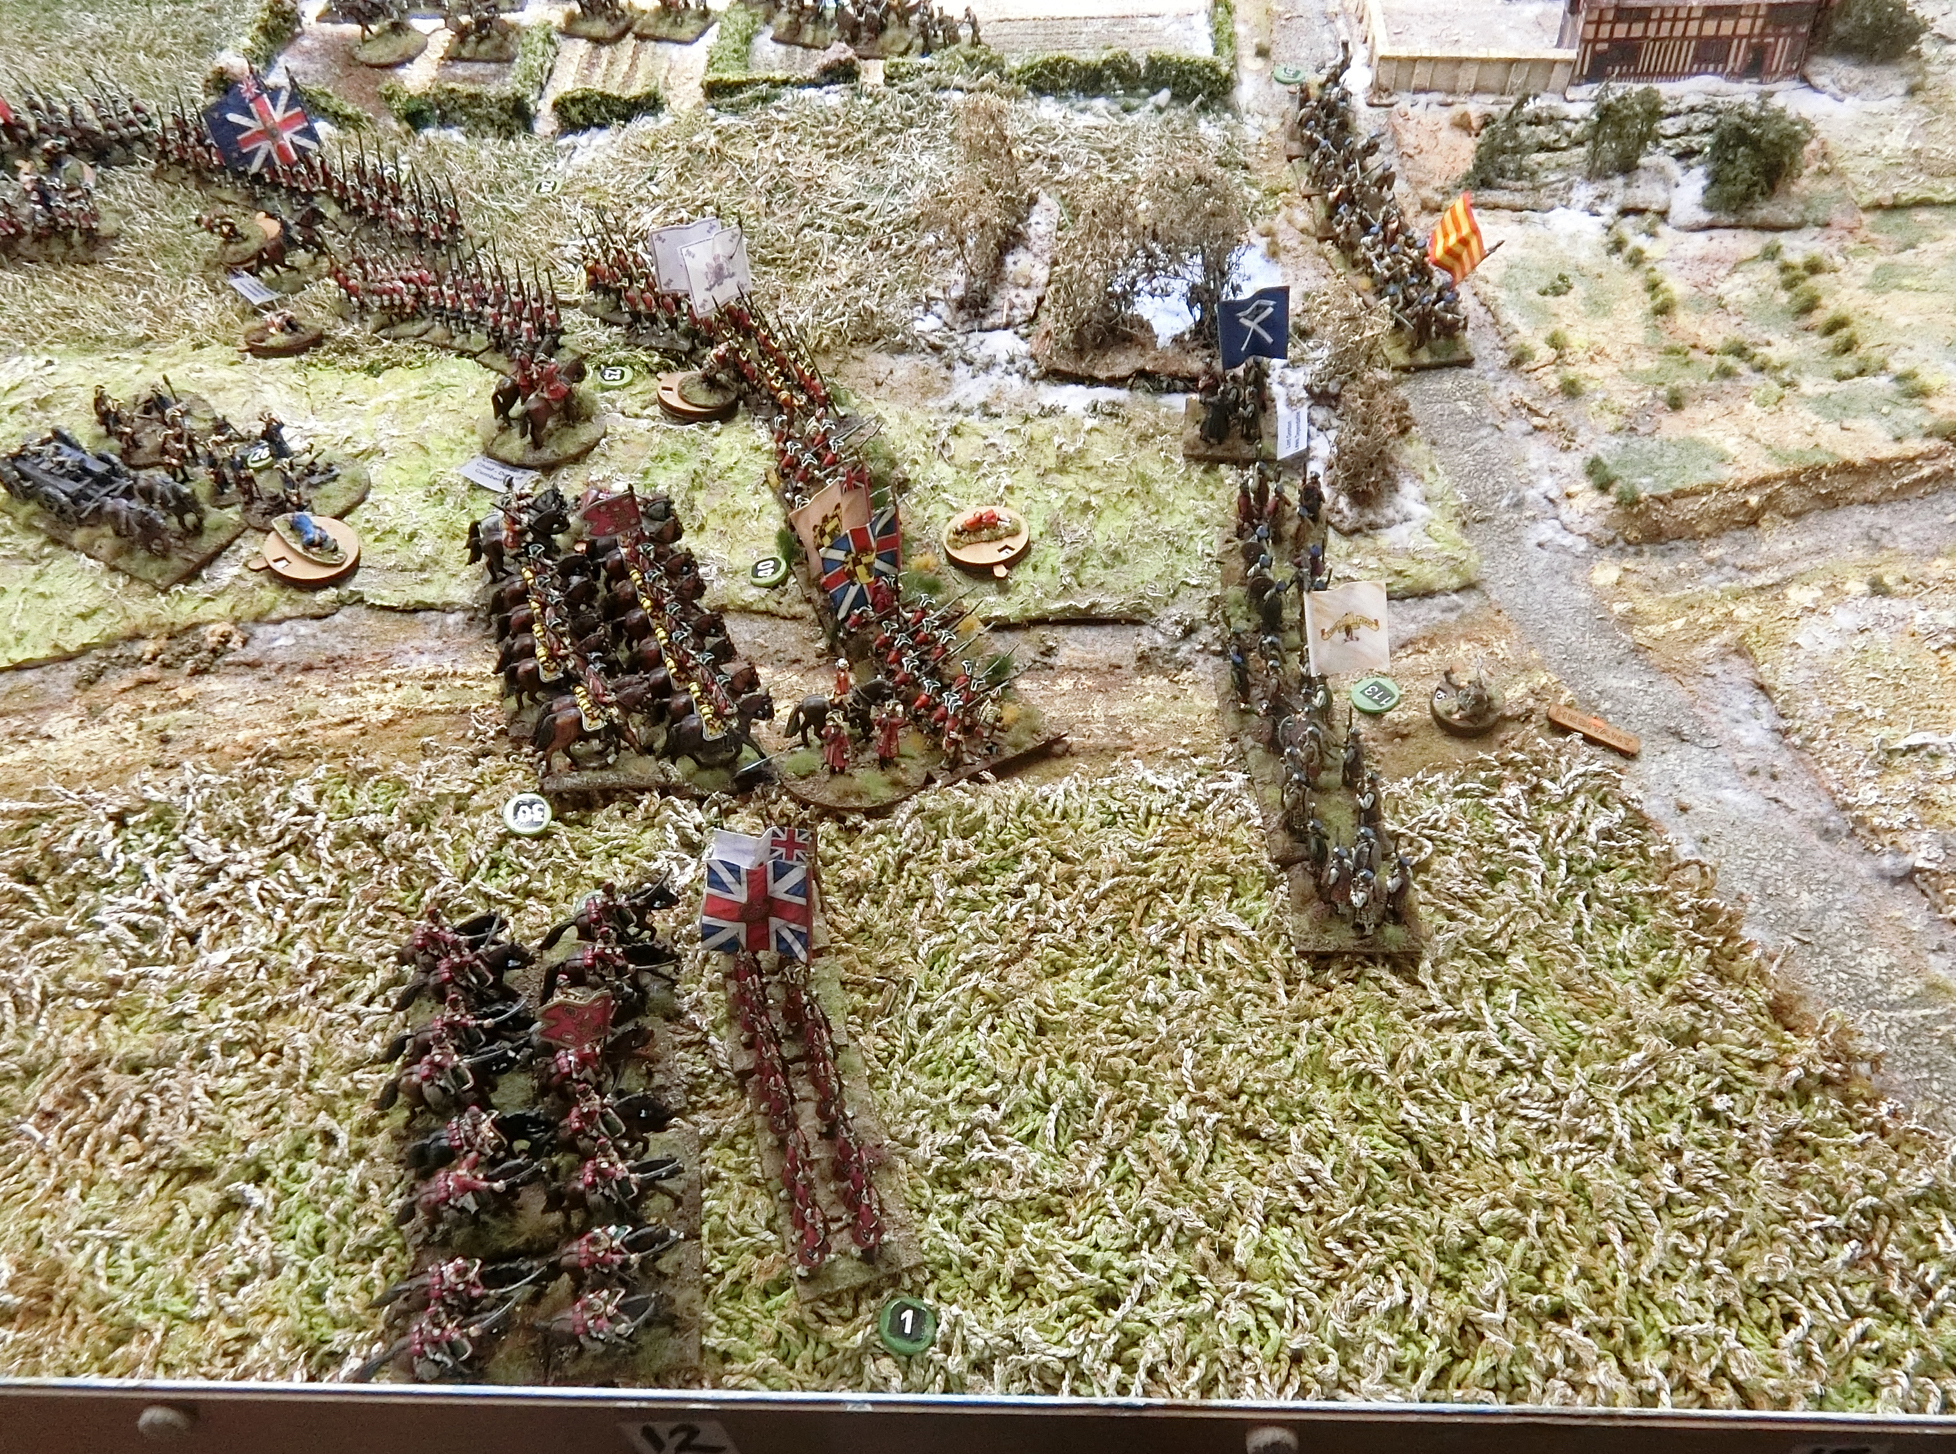
View near the start of Day Two, a detailed tour in the photos below
No matter how "serious" the game it seems to be laughter all the way when Steve's at my table!

The government left flank cavalry had either died, fled or were just retreating disconsolately. The villagers of Harleston were now the last bastion holding the flank!

The line of regular troops ended at Harleston Church with a worn Grenadier battalion

Reforming government units form the second line near Duke Ferdinand of Brunswick's left-central position

On the other side of the frozen village pond some Highlanders are eager to return to the fray, but behind them other battered clans are collecting muskets and reforming. In the distance small cavalry units are using the sunken lane to shelter from artillery fire while the two French line cavalry regiments are brought up. At this point they face a very thin-looking British defence
At the government right-centre the "Advance Guard" which had come on as reserve and moved towards Althorp Manor, has been withdrawn to form a second line and hold the flank. In the Manor Garden the mortar battery is under attack
At the extreme right flank it actually felt a bit precarious for Cumberland. The exultant mix of Highland and Lowland clansmen were looking for opportunities to pick off weakened and isolated government units. The Scots 43rd Foot are in the foreground as the government right flank holders

On with the narrative by Guy:

Turn 6

<<We were then moving towards the climax of the battle. Despite winning the initiative, the French commander allowed the government forces to move first. This was unforeseen and led to much rather rude Gaelic mutterings from the flanks (by CG as assistant!). The government forces had received orders that their overriding mission was not to imperil the army or allow it to be defeated. Further, a message had arrived saying that the government reinforcements had sighted and were shadowing the French reinforcements and both sides were unlikely to see fresh troops.


The Government forces therefore started a modest withdrawal to strengthen and consolidate their lines. The shortened frontage only made the task of the Jacobites harder. Meanwhile, the Jacobites pressed on by attacking the mortar battery, but in a true Samson v. Goliath moment the plucky British gunners picked up their muskets and somehow survived to be able to withdraw and reform. 


There was further ongoing considerable attrition in the Franco/Jacobites ranks. In the West, inferior lowland units tangled with the 1st Foot Guards in the gardens and exchanged volleys, with the inevitable result. More French units were lost in the centre from ongoing artillery attrition.  The result was that gaps started to appear in the French lines which had to be plugged by reserve infantry and some small Scots and French cavalry units . 


In the centre the Grenadiers de France break under canister fire from two light batteries

Steve's allowing his opponent the initiative meant Richard had the chance to bolster up that weak point  opposite the French cavalry......

......who would soon be taking casualties from long range artillery fire

At Harleston the one remaining government cavalry regiment heads towards the centre to find more fruitful cavalry ground 

Each government brigade had a battery of light guns. Combining with the threat of musketry volleys it meant that nowhere in the central area was safe for the French to attack


By the Hunting Lodge woods a German mercenary battalion was the next unit to break from long range attrition


On the government right flank, however,  the loss of units and the need to contract was causing a bit of confusion. Cumberland in person is organising the line and he has no units spare here to back up the Guards and Grenadier brigade which is suffering a Scots charge. The mortar battery has retreated safely with 4 Hits and is saluted by the nearby generals for blunting the Scots advance.

View from the French - it looks like their opponents are in a bit of a mess - if only they were nearer!
 Note the Lowland unit with yellow saltire flag is engaging a Guards battalion at the corner of Cumberland's line.......


.....but they were easily pushed back by the elite infantry

French casualties from an earlier hour are being recovered from under the influence of the French Commander in Chief

Reformed Highland clans on the Jacobite right now return to the scene of action. The villagers of 
 Harleston await the onslaught with trepidation 

This arial view shows the reforming government line very well.
Beyond Harleston church, fields and woods Richard has created an L-shaped
 killing ground in anticipation of multiple French and Scots mounted units trying
 to break his line there

Above and below: The rather sad state now of the whole French central line. All the brigades have suffered units lost and none feel strong enough to advance across that open ground into artillery and musket fire. A couple of double moves on Command Initiative dice would be good! Even so the French guns have forced back one of the redcoat battalions to their front.

Turns 7 -8


Artillery continued to fire along the lines with the government guns rather more effective than the inferior Jacobite ones. At the NW corner of the battlefield there was a last highland charge against the 43rd Foot (an inferior regiment here today and subsequently became the Black Watch). The 43rd were supported by 2 units which allowed them to send the highlanders back, although they also had to retire. A fresh British unit filled the line. 


A Highland clan attacks the good folk defending Harleston who held the hairy Scots at bay for one round of melee but went down on the second. This was still enough to put the Highlanders going back to reform on 4 Hits


On the other extreme flank a similar Jacobite charge went in against the loyal Scots 43rd Foot.....

.....however this wider view shows that a mixture of setbacks, reforming and close terrain had inhibited Steve's ability to get enough troops up the ridge quickly. That icy pond was a nuisance.

This clan under the Earl of Cromartie was broken, and so too was the 43rd. But the government line had plenty of reinforcements at this end

Richard doesn't look very happy, but in fact by late morning
on this Boxing Day the battle was turning in his favour

Slow but steady losses from the Jacobite guns was reducing units on the
government left so the line could  no longer reach beyond the church and
still retain that "killing ground" angle. Opposite, the French cavalry are
 hopeful of an opening

View from the French cavalry's position, where the front unit has already sustained 3 Hits.........

.....with de Saxe Lancers by their side and Baggot's Hussars and the Princes Lifeguard waiting to give support; meanwhile the Scots guns pound away wherever there is a gap

Near the centre the French are once again on the advance, trying to support the faster moving Scots

Le Duc de Grammont backs up the advance bringing forward his reformed battalions

Above and below: the advance from the Hunting Lodge of the Foreign Service brigade under the Marquis de Souvre  constantly met a wall of British fire. Now Lally's Irish regiment falls victim to it

The French Guard Brigade had not been able to make any progress, maybe now there was a gap for them?

Turns 9 - 10


In the rest of the line, the government commander continued to hold his position and the Franco/Jacobite force after a modest advance against the village of Harleston to eject some troublesome yokels armed mostly with scythes, came to the conclusion that victory was not going to be achieved that day. 


All, however, was not lost. The Jacobite army was still between Cumberland and London. The Jacobites had severely mauled the government cavalry which meant there was no pursuit. In the fading light the Franco/Jacobite army withdrew, and the 2 armies lost contact. 


Looking West up the battlefield from Harleston pond the observant viewer will see that one of the large French cavalry regiments has been forced to withdraw from artillery fire losses. The Jacobite and other cavalry are all small and/or inferior so I think we all knew now that Prince Charlie's efforts on this flank were doomed


On the Althorp Manor flank the Jacobite thrust up the ridge was looking distinctly lacking too


The Chisholms had lost a Hit when Cromartie's ran through them giving them 3 Hits and therefore a Minus on everything till they could recover. I denote three Hits with an orange marker for quick reference


Cumberland has managed to steady his line, but it's still scrappy and nearly all these battalions have suffered hits. It's now about 1 pm and several have been in action since 8 am


Aftermath

The government forces were left in possession of the field which allowed Cumberland to claim a victory but………..


It was certainly not a crushing defeat of the rebels as demanded by the King. Large quantities of ammunition had been expended and supplies were running low. The Jacobites were now between them and London, their principal point of supply. 


The result was also not particularly satisfying for the Prince. Whilst the combined Franco/Jacobite army had fought well, and at one stage certainly seemed to have the government forces on the ropes, it was perhaps illusory. The government battle lines had never really been challenged and a number of fine French infantry regiments had been destroyed. For the first time in the campaign his troops had not achieved an overwhelming victory. The British/Hanoverian government troops from the continent were certainly a far tougher nut to crack than the troops he faced at Prestonpans and Brampton. The Prince could only claim that they had given Cumberland a bloody nose and the army had withdrawn intact to fight another day. 


However, he has nagging doubts whether the French are trusted allies and will continue to support him? Whilst the route to London is effectively open, if a council of war proposes a retreat to Scotland, this may now be problematic from a purely geographical perspective. Retreat northwards may not be an option.  


One way or another, the campaign continues. The rebels are still loose in central England and the throne is still threatened. 


Above and below: Guy conducts "post match" interviews with the team captains (not the Managers, Royalty is above that):
Duke Ferdinand of Brunswick : <<Vell, I did not catch zee stag for zee Weinachten Jagd but zee high point für mich zis day woz to see zee Grenadiers de France fall beneath mein guns, and to be part of zee masterful control of zee game battle by My Lord zee Duke of Cumberland. It woz, as you sagen in English, "a team effort">>
Lord George Murray: Eh well, the lads surely gave those Sassenach Dragoons a seein' to, jus' like we did tae Johnny Cope. Can't trus' the Frogs o'course, they did naught a' day, what dae ye expec'? As fer that bloody assistant referee runnin' up an' doun oor touchline, he was f***** useless (pardon mae French!). An wen yon mortar crews started tae fire back wi' muskets!!? Och Aye, we shudda bin given' a penartie, nae question aboot it! As fer my high point? Why, that barrel o' 1720 malt whisky "rescued" from yon Earl Spencer's cellar!>>

Man (Unit) of the Match - the British mortar crews for saving the penalty that their demise would have represented on the flank of Cumberland's line.


Postscript


Ferdinand of Brunswick once again received glowing compliments from the King and the army for his steadfastness. 


The Hon John Spencer crawled out of his priest’s hole to survey the devastation of his house. He took the decision that day to rebuild Althorp. The stable boys and villagers called him Hon Cringeling behind his back. He became aware of these derogatory comments and the villagers Christmas boxes were cancelled in 1746. For decades the stories of the stable boys and villagers’ valour multiplied in the local public houses to the extent that in the local folklore, the battle was solely between the hearty sons of Northamptonshire and Scots. 


The British cavalry were again the subject of much criticism. A duel was fought after a Guards subaltern referred to them as donkey wallopers. The name stuck.


The Jacobite troops in the main were further emboldened by their performance and the success of the highland charge. They failed to appreciate one of the lessons of the battle, i.e. the Franco/Jacobite units had great difficulty advancing and breaking a formed British infantry line supported by artillery. They continued to maintain the effectiveness of the highland charge as a battle winning tactic. 


Post battle - the campaign goes on


The Franco/Jacobite forces manoeuvred to join with their covering forces at St Neots and a Council of War was called to decide which direction the army should move. Various options were proposed – a fast advance and attack on London, an indirect advance through East Anglia which would have the advantage of resupply by the French ships, a withdrawal to Scotland, or a march towards Oxford and the Southwest. 


The Government forces dispatched their remaining cavalry to discover where the Jacobites had gone. No conclusive news was forthcoming. Cumberland therefore ordered a forced march towards London. Perhaps the truest indication of what happened was seen in the City of London. The value of Government securities lurched downwards, and gold was in huge demand. Hysteria gripped the streets as rumoured sightings of hairy Scotsmen on Hampstead Heath circulated. The ladies of fashion dusted off their Parisian decolletage gowns and the gentlemen their bottles of Sauternes...........  


The game record shows that the Jacobites won the initiative every turn (Plus 1 as designated attacker) Although the game was not just about army destruction this is a useful indicator (using my 1-5 Army Points per unit system) - In terms only of units on the table "Done For" the Jacobite/French 37 points represents about 30% losses, and the Government 23 is in fact about 20% losses. So bad enough for each commander to be glad of the natural break in fighting allowing a withdrawal

(by CG) Finally, I need to pay tribute to Guy. He deserves great credit for putting together such a complicated scenario, providing most of the ideas and 95% of the figures which made it to the tabletop, compiling the briefs and orbats (under guidance from me), and being lead umpire for two days.   Thanks a lot Guy, wonder what next year will bring?


Tuesday, 16 March 2021

18th Century Mini Campaign - The Raid on Vestisle Part 7: Wrap up and Conclusions

 (NB: Tabletop game over but the following narrative is compiled from post game role-play and discussion and several player emails putting forward suggestions of what might be the outcome of this, far from insignificant, slice of alternative history. Please forgive the differing formats as I've copied passages from emails - too good not to share verbatim. This follows on directly from Part 6 and is interspersed with some close up photos from various parts of the mini-campaign. Towards the end are some reflections on the whole project, please comment if you have enjoyed it or found it useful).

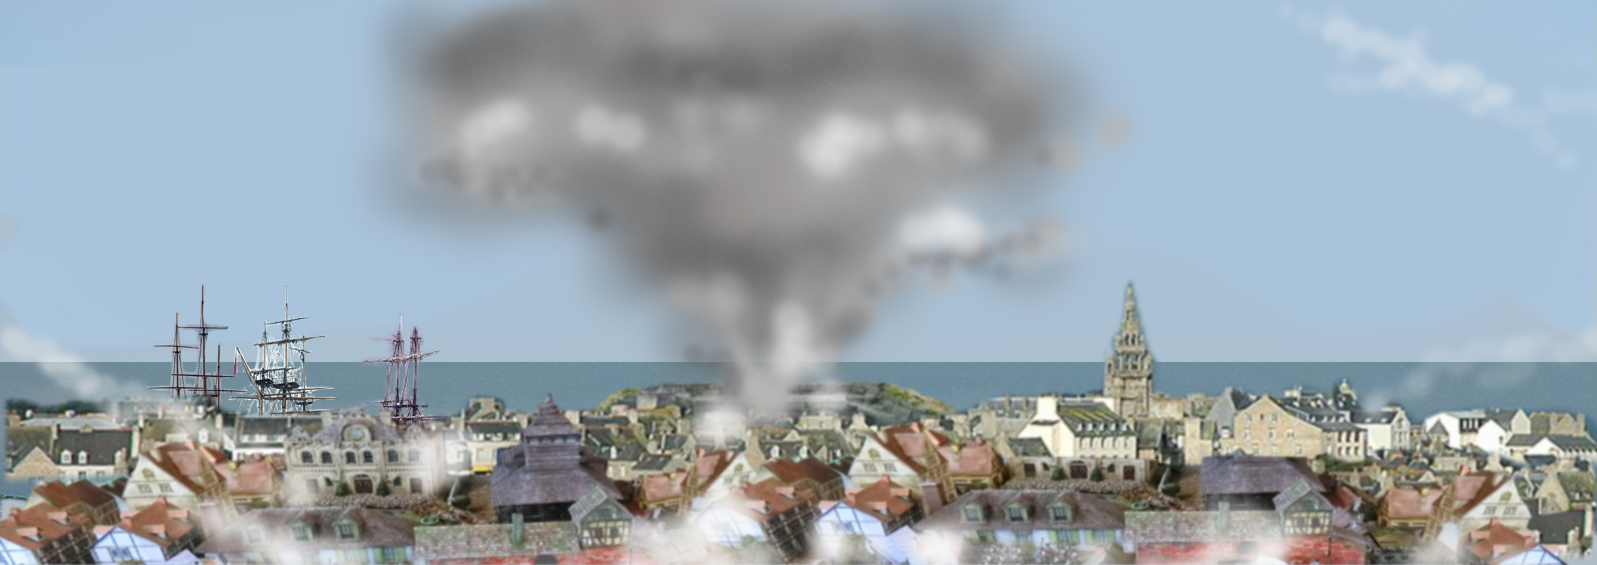
Abrantes City and harbour as seen from the Cime d'Abrantes about 0800 on 11th August 1756

The Duke of Marlborough's situation
Ken as the Allied C-in-C

By 0820 on Sunday 11th August The Duke of Marlborough had been watching a large pall of smoke rising over the stone bastion on Abrantes harbour and wondering about the consequences. Was it too much to hope that his plan for Cochrane's sailors was working? ADCs looking through telescopes reported heavy musket fire around the city gate of the bastion and inside its retaining walls. Also puffs of musket smoke around the Hotel de Ville and then The flag of Vestisle which had been flying above the building was slowly replaced by a red ensign. Was that a faint British cheer emanating from the city centre?


Marlborough had originally hoped that the Royal Naval elements would blow some holes in the walls on the island side of Abrantes and that his troops would be near enough to exploit it. He surmised that timing and events had caused Cochrane to attack the harbour bastion and Town Hall first, and so he scanned the horizon along the whole battle line to figure out what to do. Far to his right his flank had collapsed  and the Jacobite hIghlanders were rampaging over Bellune Hill, looting corpses and trying to assemble in and near the woods to outflank the Hanoverians. But the elated Highlanders were slow to assemble and von Brunck had plenty of time to order his entire force to face right to put on a formidable front of cavalry and infantry since they no longer had any French to their own front. However it meant there would be no assault from there on Abrantes city.


So Marlborough's gaze then alighted on his own centre where a single regiment of French cavalry was causing havoc to the line which was already crumbling. The only bright spot was that the French line brigade opposite, at the farm, was clearly the worse for wear and would not be counter attacking but just trying to protect that approach to Abrantes.


As he looked along the ridge to his front and in the valley at his left things looked a bit better. The French Guards and elite infantry had been taking a battering and Granby's reserve of 4 Grenadier battalions was fresh and nearby. Although the German musketeer brigade was falling back in the valley the Allied left flank on the Cime de Cassatte looked strong and healthy. Also he had 5 Battalions of Hessians still in reserve - plenty of strength just not in the right places at the right time. That was because ahead of this wing there appeared to be no weaknesses in the French line to test.


Nowhere did he feel strong enough to risk an attack on the city, at least not till some news was received from  Cochrane's sailors.


Marlborough had the orders from Horse Guards still ringing in his ears "My Lord, remember this is a raid not an invasion. You need to inflict a bloody revenge on the Frogs for Minorca and try to ensure the threat from the Jacobites is blunted, but don't risk losing our Army in another fiasco!" So he ordered his generals to rally as many troops as possible and fall back till things clarified.


Around 0845 his aides brought forward an exhausted messenger, a midshipman whose youth and knowledge of French language had enabled him to blag his way through the battle lines with a scribbled message from Captain Cochrane:


"Your Lordship

Young Pretender captured but lost to accident in transfer to ship. Unable to recover his body. Bastion gate blown but my troops overwhelmed. French VIPs including Duc de Vestisle prisoners. Making escape with about 200 men and prisoners by sea to North to rejoin fleet.

respectfully

Cochrane (Captain RN)"


So that made up Ken's mind. An honourable retreat would save the army and Charlie's death would disrupt the Jacobite cause better than he could have dared hope. Job Done!


So what had happened to Charlie and his followers?


The prisoners were taken via the now unguarded North gate to the Abrantes beach. The French navy and transports had mostly set sail for Brest on the dawn tide and the few which remained only had skeleton crews and cannon not run out for action.  So all that greeted the escaping sailors was a desultory fire from swivel guns mounted on the gunwhales with hardly any effect.  But there were enough fishing boats and cutters at the beach and harbour to be commandeered and be able to take everyone off. 


According to Guy:

French High Command lost no sleep to hear that Bonny Prince Charlie ‘slipped’ trying to embark from the jolly boat to transfer to a ship into the deep after a British sailor had surreptitious lifted his wallet and replaced it with some lead weights. The men, women and animals of the island are now safe from his dubious tastes. His retainers being tied up, were unable to rescue him and they were bundled below (not a chance of a ransom or promise of good behaviour, France already has too many aristos seeking gainful employment). Jamie Fraser had been wounded trying to defend Charlie in the scuffle at the Hotel de Ville but, back in England, would be hanged for treason (Sorry Clare, away on your jaunt in America, you'll never meet him again!). Charles has died and without any French blame. The best of all worlds. We get rid of a problem and our agents can spread the news around Scotland that the Brits actually did him in. That will keep the fires of revolt smouldering. The official court obituary will remember a noble Prince, with perfect Christian morals, who thought only of his people.

 The search for Charlie's body was unsuccessful...... 

According to Ken's "alternative facts":

In news from London, Lieutenant Bond from His Majesty's ship Audacious has been promoted to the rank of commander and reassigned to the Foreign Office to carry out liaison activities. I understand his last duty included commanding the side party of the Audacious when Prince Charles was brought aboard. 

The lieutenant's actions in attempting to rescue the prince from the water have obviously been recognised and it's good to note that no blame is being attached to him following the  unfortunate and unexpected failure of the side rope. 


But there is a lot more to say. In the spirit of those drama documentaries based on real life they go on to tell you the fate of the protagonists.


What happened to the French gold secured in the bastion casemate?                                                                                                                                                                                                                                  

The gold was well hidden so Richelieu could stand to be financially far better off. All the aristocratic witnesses as to the gold’s whereabouts are captured so he will plant fake news saying the British took the gold and the French are to disbelieve any denials from perfidious albion. The servants who knew will be given a one way ticket to Guadeloupe. Trouble is only the Duc de Vestisle and Chevalier Dumonnaie had the two keys to the casemate under the bastion where the gold was stored. The Sergeant of the guard at the bastion had been taken into DuMonnaie's confidence and he was wounded when the sailors exploded a gunpowder keg among the surface-stored ammo. The company of British sailors at the bastion was finally forced to surrender by the whole battalion of Citizen's Militia which Guy so generously sent there and so the Sergeant will recover from his wound and demand a significant pension and sinecure as Deputy Governor of Vestisle from Richelieu  and De Muy in return for keeping quiet while they break down the door and distribute the ill gotten gains as they see fit.

(No doubt having originally trained as an avocat at the Sorbonne, De Muy will advise how to draw up a contract making sure the Sergeant gets as little as possible (sounding a bit like Les Miserables!)


What happened to the sailors and the Abrantes Militia at the Chateau du Roi?


It had always been the intention of Captain Cochrane and Lieutenant Bond to ensure a message was got back to 2nd Lieutenant Dumbleton who had been left in charge at the Chateau du Roi and of the 250 or so prisoners from the ambush of the Abrantes Militia battalion. (As stated in the original British brief no one was equipped to cope with prisoners apart from the VIPs) The prisoners had been locked in the (emptied) wine cellars below the Chateau since about 1100 on the Saturday and had been nearly 24 hours with little air and no food and water. Many were wounded, with no medical care. Dumbleton's scouts up the trees in Chateau Woods reported on the battle, the explosion in the harbour bastion, and eventually ships moving out of harbour and the Allied infantry forming up and moving Southwards back to Beach 4. Cochrane failed to remember them as he was so concerned to get his valuable charges off the island quickly. Dumbleton waited and waited but soon became aware that the whole of the Legion de la Morliere was heading his way to sweep up his mere 75 sailors. So he ordered all the cellar doors locked and barricaded as he scuttled off back to the boats at the Quai du Chateau to catch up with the British Fleet.


Morliere's men had fought three battles in the last 24 hours and lost their commander and were pretty jaded so they only gave a cursory look around thinking the men of Abrantes had been taken away to England. By about 2pm, however, someone heard faint banging from the cellars and investigated, the doors were battered open but by that time it was found that around 100 men had died from wounds, dehydration and suffocation.  Thus the story of "Le Trou Noir de Vestisle" became almost as famous in French history as the Black Hole of Calcutta is in English. Some unkind souls have pointed out that Dumbleton's younger brother, a mere ensign, had been a victim in Calcutta and the news had only recently reached Portsmouth just before the Vestisle expedition was launched.  The subsequent enquiry into Dumbleton's conduct completely exonerated him and he was promoted to 1st Lieutenant ostensibly for his part in the woods ambush and capturing so many prisoners !


The consequences on Vestisle were grave, however, since over 300 men from the western half of Vestisle had perished thanks to the Duc's original order to investigate the goings on at the Chateau.  These were not professional soldiers but mainly farm workers, fishermen, carpenters, blacksmiths, shopkeepers and cloth workers, so the French Government felt obliged to invest in Vestisle (pardon the pun) and provide money to persuade some of the Jacobites to stay on, and for men from Eastern Vestisle to diversify their work interests across the island in order to help the bereaved families.


That's why to this day there are so many red headed Vestislians with names like DeCamerone, deFrasier, d'Ogilvie and M'Donalde........


https://en.wikipedia.org/wiki/Black_Hole_of_Calcutta


Other Jacobites and Sundry French Commanders?


Earl Marischal Keith will be looking for a reward for the excellent Jacobite performance.

 Lt General Barbier also for masterminding the major part of the battle of Bellune Hill and leading the Guard Cavalry in those glorious charges for an hour and half of frantic excitement finalised by personally leading the Royal Dragoons in a flank attack on British artillery and infantry (I reckon it was those ADCs supplied by Willz wot gave him inspiration!)


The left flank Legion de Lauzun did do exceptionally well but all the units were dispersed and the Comte de Lauzun (who thwarted about 6 or 7 attempts by Dillon to kill or capture him) went back to Abrantes a bit sulkily and will need cheering up by some ladies of the night till his command gets back together.


For the Highlanders Guy promised - 

The Jacobite infantry performed extremely well and now there are masses of potential recruits for the Wild Geese regiments. Their commanders will be offered commissions in the French army


Lord Sackville and the future of history?

Lord Sackville’s untimely death means the outcome of the battle of Minden will be affected. The British cavalry will actually do something so the French cavalry will veer off to face that threat and they will not attack the British brigade. Further though, under Granby's inspirational leadership the Allied cavalry sweeps the cream of French chivalry into the river and the British and Hanoverian infantry march on the French centre using their expert musketry to see the French infantry packing. Minden is occupied, taking an important French supply base, and the French army does a sauve qui peu fleeing back to the French border provinces.  Taken with French losses elsewhere in the world in 1759 King Louis sues for peace under rather desperate terms, and the Seven Years War will be renamed the "Four Years War" subtitled "Liberation of the Low Countries". And Guy helpfully added:
Also Sackville would not become Secretary of State in the American Department in 1775. Fortunately the government minister at the time was a tea drinker, so there was no tea import tax and he supported the concept of the American colonists having representatives as he was an enlightened chap. Therefore the Boston tea party didn’t happen nor the Revolutionary War.

Who would have thought we could so comprehensively rewrite History in a weekend's wargaming eh?


Mini-Campaign Conclusion

On the day, and after the brief discussion, I declared the mini-campaign a marginal win for the British. Just how marginal is shown when I totted up the units destroyed using my Army Points system dictated by quality and size of units (eg. 1 for Small Inferior units, up to 5 for Large Superior ones)


French - 16 units lost represented by 57 points out of a total of 201 = 28.5%

Allies - 16 units lost represented by 53 points out of a total of 209 = 25.5%


So these figures show that the campaign was well balanced and so was the skill and luck of the players. I could not be happier. The players were very complimentary about the campaign and the weekend games themselves, they seemed to have been challenged and enjoyed it. 


For my part it is hard to describe how grateful I was for the weekend's activities. Regular readers will be aware that I've had many Napoleonic weekends in Oakridge since 2015 but they have not really been my "baby" nor a project I felt any long term commitment to. Some of us had a weekend of Imagi-nations SYW in May 2018 which was great but did not use the figures we had to best advantage (too many and too cramped). This alternative history mini-campaign, however, used mostly historic units in a plausible context and felt real to me throughout. That was aided considerably by Ken and Guy playing in character, making sensible decisions and deploying in an 18th century military manner so by the weekend itself we had a fine battle set up for everyone to take part in.  Then Dillon and Graham applied themselves with a will in the same vein to assist and help drive things forward. For me it worked like a dream. They were all so great when it mattered and good at organising themselves - wrapping up Saturday's game and planning the overnight moves to give us a huge game on the Sunday which I found constantly exciting.

Even clearing up was done just as efficiently - thank you to all concerned.


Any lessons to take from this?

I've had many enjoyable campaigns in my rich wargaming life, and many have been pretty realistic, but often complex and time consuming. This one probably worked better than any other I've had so maybe some bullet point thoughts might help others:

  • I shamelessly used the stimulation of Charles Grant's original mini campaign but adapted it hugely in scale and purpose for the needs of our big and diverse armies - so - use a trusted source!
  • Set a finite time to run it - in our case we started in Spring 2019 with the aim of finishing with a weekend of big games in "Summer". The time between was taken with lots of fun emailing and map moves but, with a little bit of licence from me, as Games Master, we got there.
  • Keep the campaign rules simple - just basic map moves by squares cross country and road and not too many map units to keep track of. I printed my map large and used magnets to pin it to a metal notice board. Then took regular photos of the numbered magnetic counters to send to the players as progress sitreps.
  • Don't use more troops for the map work than you can field on the table. I learned the hard way over the years that megolomania has to be curbed to avoid the risk and embarrassment of doubling up on certain required units!
  • Use a small cadre of reliable players. Deliberately I set Ken and Guy as commanders of the forces which would be engaged initially, as they were the main figure contributors. Later I invited participants whom I guessed might be interested in the historical context and/or 18th century classic style games to come for however much of it they wished. It would be up to fate who the subset of players would be and in the end 2.5 days of player time almost worked perfectly. This was 3 guys out of maybe 15 given invitations; I'd hoped for maybe a couple more to turn up during the day games but in fact it worked out pretty good. The only down side was the two Grahams having to leave early so I had to actually play - not my preferred role in my own game!
  • Subset players are also reliable - both Dillon and Graham C were willing to be involved in limited emailing and giving some orders a few weeks before we were due to meet. Though not strictly necessary it did help the "fog of war" and I hope helped them feel more involved than just turning up for the tabletop games.
  • Set the duration of the wargame time to be finite and with measurable and achievable objectives so you can tell who has won. I much prefer historic-style strategic objectives but, as a fall back, I was prepared to use the unit points losses to determine victory. The fact it had such alternate devastation,  yet practically equal losses at the end, is tribute to how well-matched my opponents were in both skill and luck!
  • Having a team of great people to work with who were all experienced wargamers and enthusiasts of the period proved to be a bonus in helping all my planning efforts pay off - so once again very grateful thanks to them


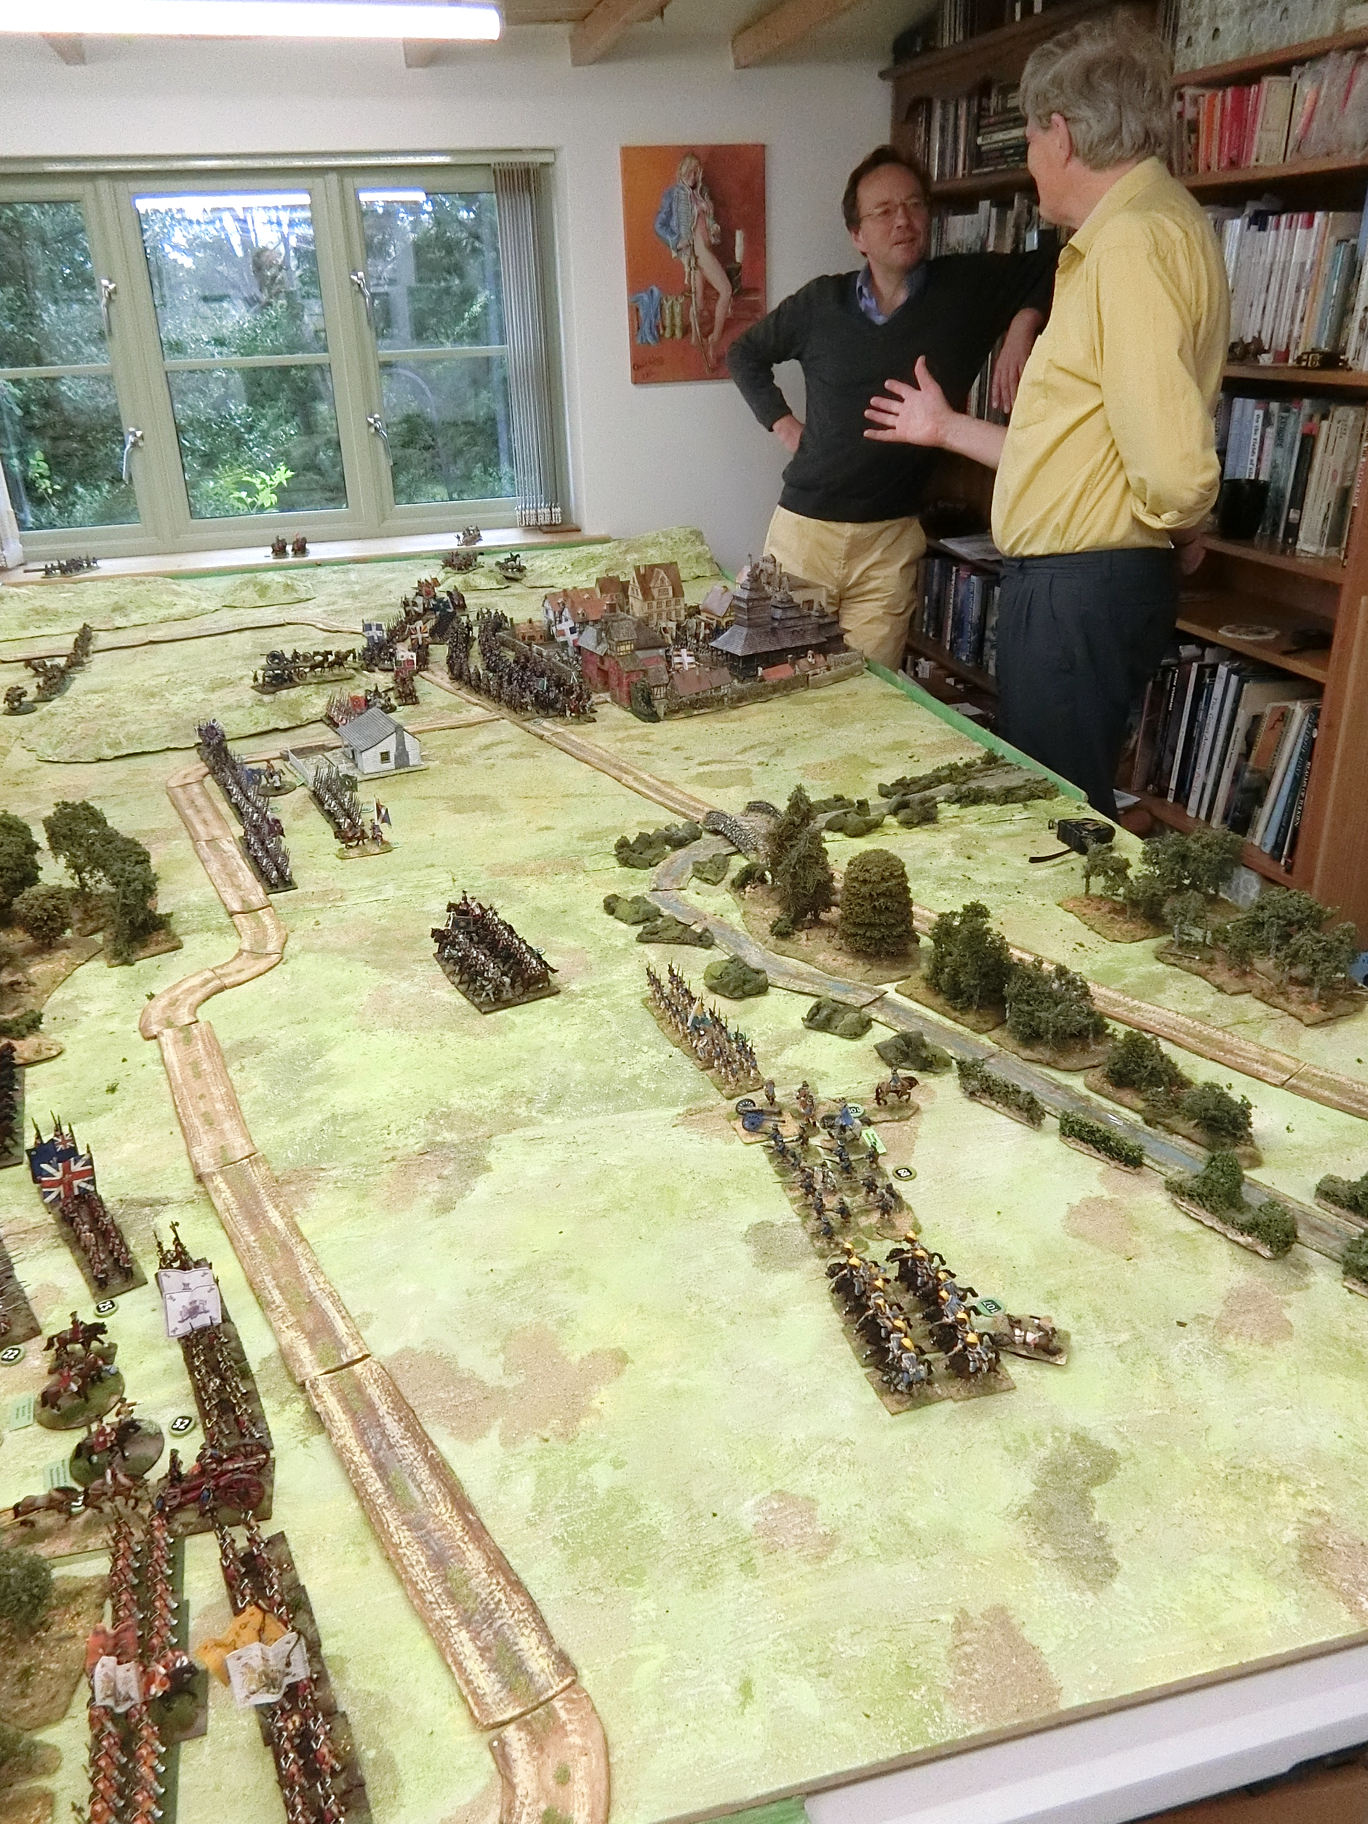
A rare pic with me in (left) taken by Ken Marshall

CREDITS
Original idea - Charles S Grant article in Practical Wargamer Magazine - The Raid on Vesta
Idea expansion, game design, campaign rules and map, terrain and tea making, photos and reporting - Chris Gregg 
28mm Figures from the collections of Ken Marshall, Guy Barlow, Chris Gregg and Graham Cummings.
Around 2,500 Figures mostly by Crann Tara and Minden designed by the late Richard Ansell and commissioned through the foresight of Graham Cummings, Frank Hammond and Jim Purky.
Terrain - mostly scratch built by CG.  Most buildings are foam core or art board faced with downloadable and printed paper/card architecture from various internet sources. Abrantes Tavern - resin by Grand Manner. Hotel de Ville is a converted Christmas decoration mansion. Farm is a Perry plastic ACW farmhouse. Trees mostly by Supertrees of USA. Flexible rubber road pieces from Total Systems Scenic.
Casualty Marker dials by Warbases.

RESOURCES
For my Player Briefings, Orbats, Campaign Rules etc see the downloadable files in the right side bar under 18th Century Historical or via this link