Summarising the three-day game
This is the final part of my account of our attempt in the West Country to refight the action round La Haye Sainte at 1:3 scale which took place last July. Here is a link to Part Four
This one will summarise how we thought it went and call on some personal views. It also gives me an opportunity to use some of Kevin's superb close up photos of small parts of the action. (Too many of the latter to include all, so keep watching for more).
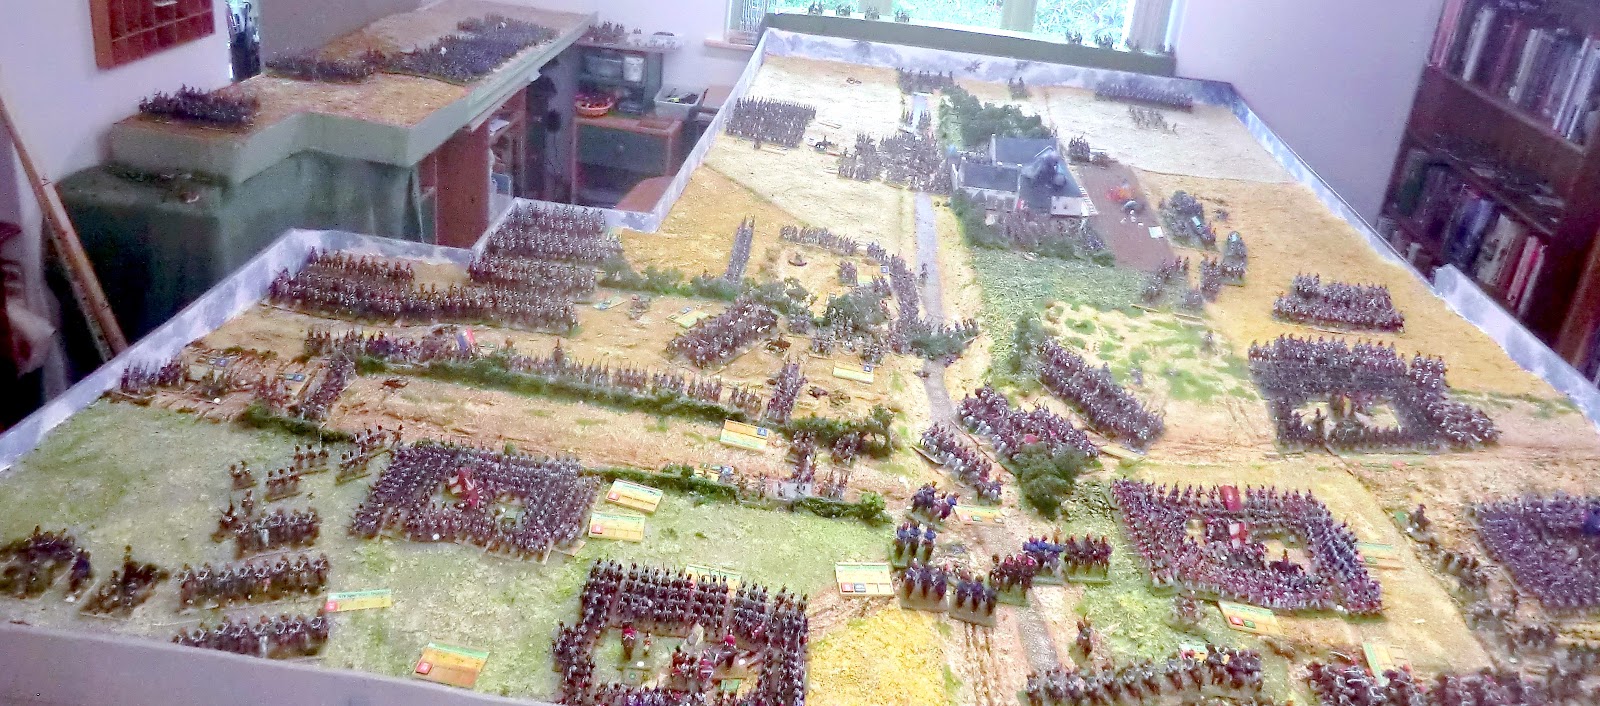
First some photos of the battlefield at the end of our playing time
 |
I appear to be pontificating about the end result and Richard and Mike politely listening impassively, presumably exhausted by 3 days wargaming :-). The blue dotted line indicates the extent of the French advance by 5pm historic time.
Photo - Dillon Browne
|
 |
Above and below: two photos necessary to show the full width as I can't get the camera up sufficiently high for a wide enough angle! Between them they show that the Allies still have four solid squares of redcoats and a shaky one of green jackets, backed up by three squadrons of KGL Hussars. The French have a Cuirassier regiment closely engaged on the right with another approaching at the baseline; Horse Artillery are two moves away from a prime central firing position; a practically untouched Dragoon regiment is on the left, backed up by the mass of three battalions of the fresh 13th Legere infantry regiment. La Haye Sainte farm is surrounded.
|
How to decide who had won the refight?
Instead of the 14 Moves we managed I had hoped to get at least one more move done each day to reach 17 or 18 moves - 6pm Waterloo time, roughly when LHS finally fell historically. I think the initiative token system conspired against us on that one. But in the event I had little choice but to see who had fulfilled the objective best as written in the briefs.
Bearing in mind Napoleon's historic orders Ney's job was not just to take LHS but to take the "elm tree crossroads" and the Mont St Jean crest and then forge ahead to Mont St Jean Farm and village (off the North edge of our table). So to win the French had to be dominating the ridge crest along the line of the sunken road and have seen off most opposition by close of play (about 6pm real time) on our third day's play. Bringing up artillery would have been a conclusive bonus. There were 4-5 Allied battalions still intact and 3-4 more squadrons of KGL Hussars just arrived, in addition the Allies still had a British Light Dragoon squadron and a small Rocket Troop section to come later. So the French were not in that position and it was with some regret that despite their hard efforts I declared it was an Allied victory.
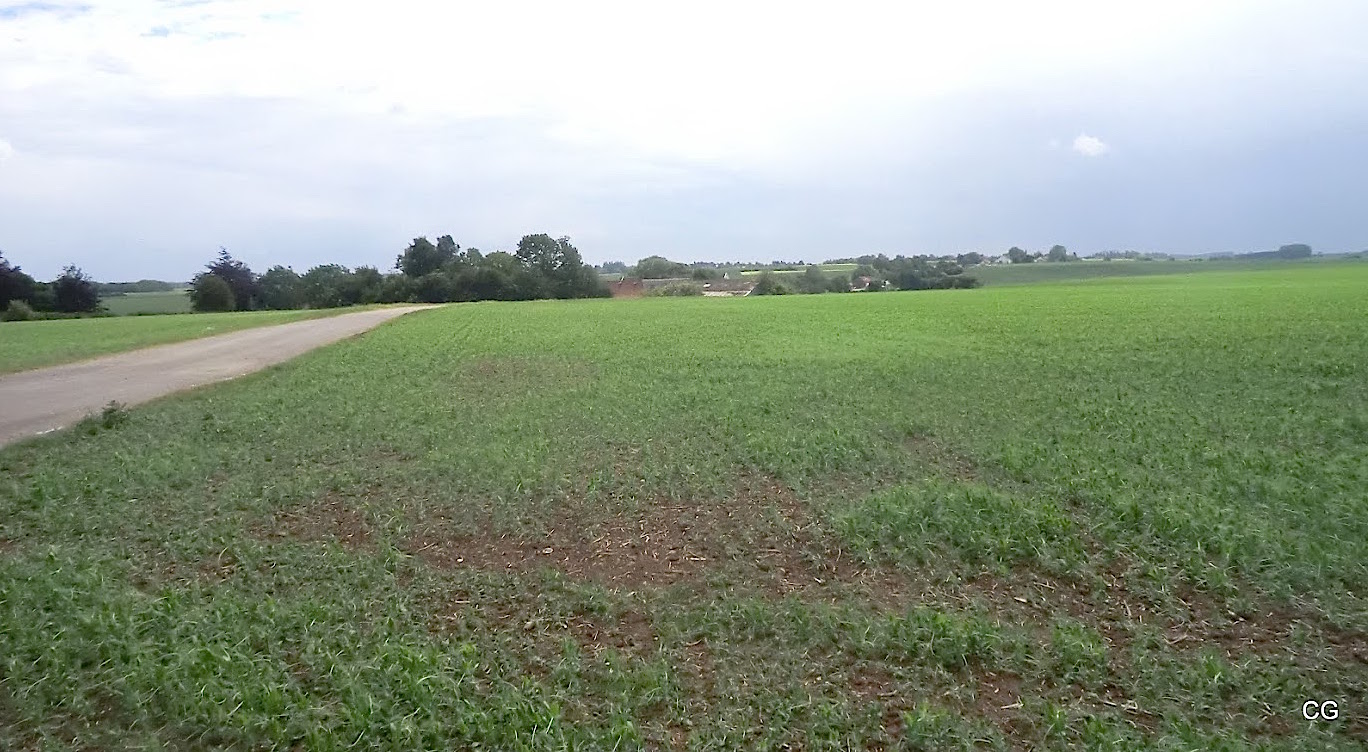 |
| View looking over LHS from near the Elm tree crossroads - position of part of Ross' battery |
Even so Richard's French were well on the way to a victory eventually with large parts of the strong cavalry force well placed on each wing and three fresh high quality battalions just arriving. The HA battery too was within two moves of setting up near Wellington's elm to dominate the crossroads. More infantry and cavalry reserves were in the order-of-battle had there been time. Also in the French favour James declared to them that the LHS "Out of ammo " rule had been invoked due to being surrounded and there were only about two moves left before rifle ammunition ran out. This would have resulted in minuses to rifle-armed fire, melee and morale. By that time all other riflemen were either destroyed or fleeing.
 |
| The main gate of LHS farm - site of the barricade across the chausee; now a very busy road. The Grand Battery ridge is in the distance. |
 |
| View from the Hanoverian monument, built on what was the sand pit. The sides of the road were much steeper in 1815 |
So if we had managed those 3 or 4 more moves the fatal combination in close proximity of cavalry, infantry and guns would have made life on MSJ very unpleasant for the Allied squares.
 |
| Voltigeurs of 13th Legere advance up MSJ |
I think the key elements to the way it went were:
- Allies throwing forward, often to "Very Close range" - 6 inches, the whole Rifle battalion and whole 1st Bn KGL light (about 300 elite figures) which slowed up and killed a lot of French. This proved rather suicidal in the game and was not "historically" how the rifle-armed troops should have been used; but James declared this to the umpires as his plan from the outset and Mike "played a blinder" putting it into effect over the 3 day's play.
- French insisting on committing a lot of force into subduing LHS not just masking it and passing on to get up MSJ faster and surround the farm.
- Failure, for whatever good reasons, to commit the 1st Cuirassiers earlier to the full blooded charge they deserved, given that all their casualties were recyclable into a new regiment!
- Some failures on my part with game design and movement distances as discussed below.
What may not be apparent from all the info provided in Part One, and the narrative of Parts Two to Four, was that to recreate the iconic atmosphere of the La Haye Sainte I had to set orders of battle that included as many as possible of the units that operated in those few hundred square metres from 1.30 - 6pm. In reality both sides committed more units in response to success or failure over the hours, but I deemed it too difficult to make reinforcements conditional on failure. Also to keep the game going I had to anticipate reinforcements ahead of time or they would have been too late to have any impact. As Dillon says below, this had a disproportionate advantage for the Allies in defence. So I might have been too hard on the French but to have called it a draw felt like those unsatisfying cricket test matches deemed a draw because "rain stopped play"!
What worked well and what didn't?
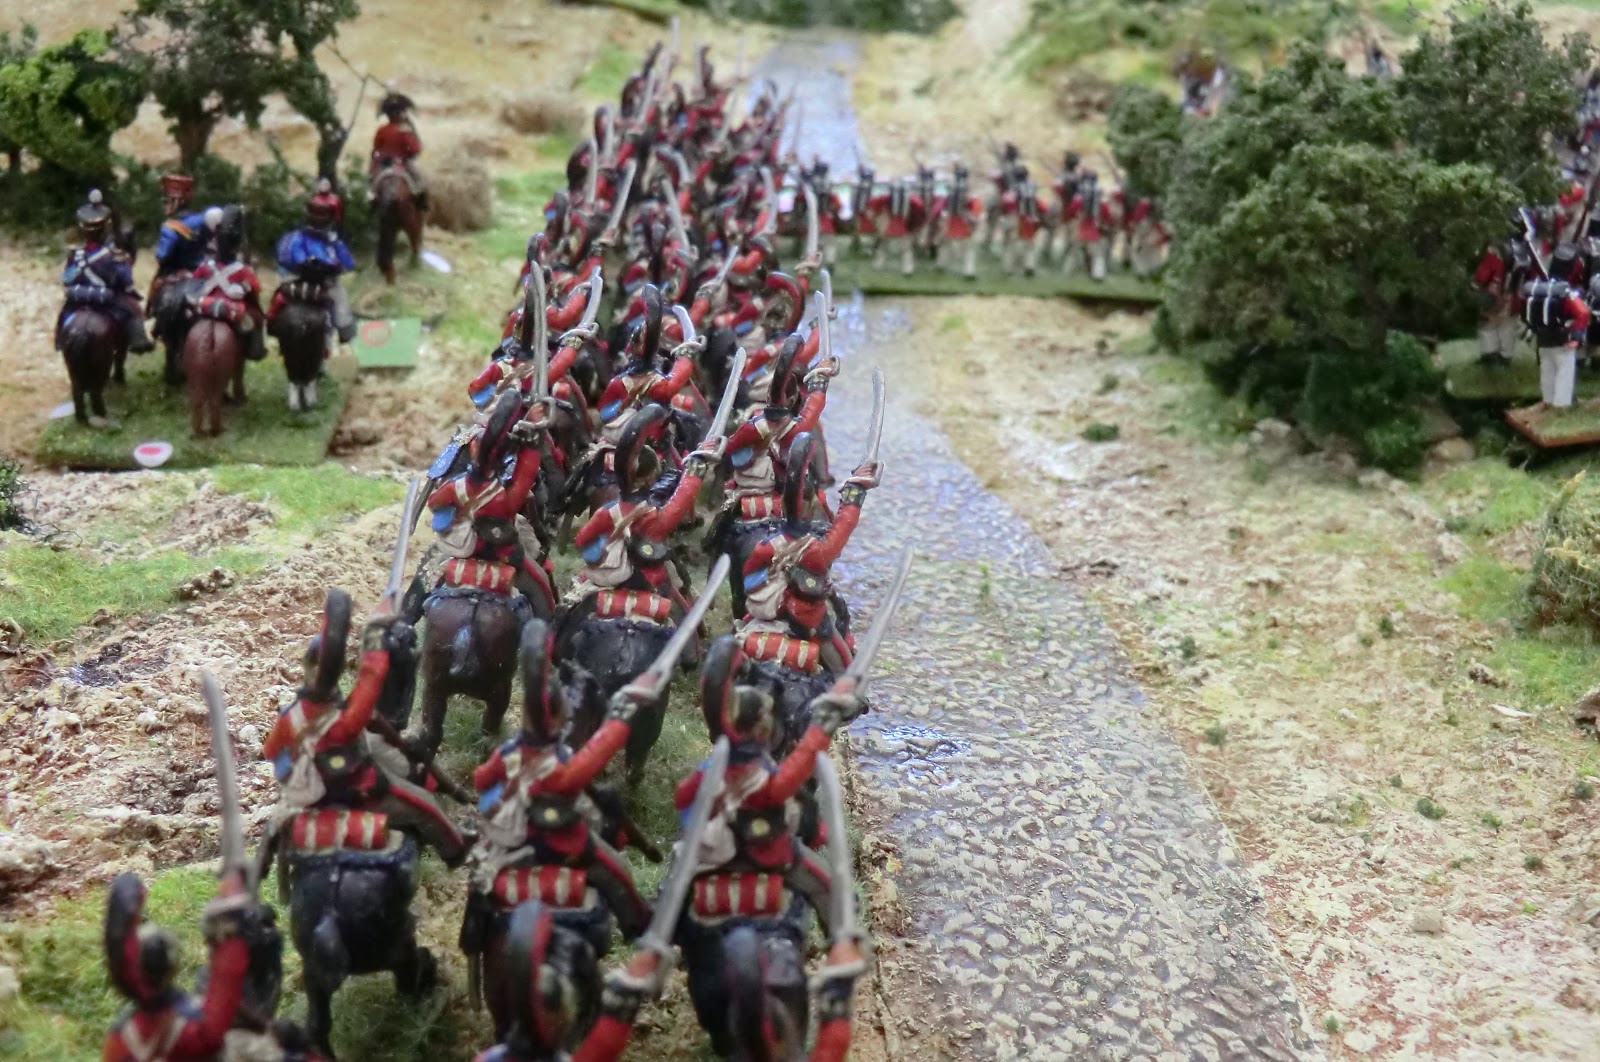
Strangely I think the bit that worked best was the peripheral action of the Scots Greys and lancers. The former managed eventually to recover on the reverse slope sufficiently to counter attack down to the Elm tree crossroads and at the end were holding off a Cuirassier squadron.
My rules for the Greys' retreat and recovery of morale took what felt like a realistic amount of time (about 2 hours) and in Mike there was a resolute and experienced commander who wasn't going to let an opportunity slip to use even their small numbers to crucial advantage at the end.
I was very pleased with the concept of the the Command/Events chart (see Part One) and the way the advantages worked out over the 14 moves to give highs and lows of excitement, a few potentially game changing activities, but mostly well balance distribution of Initiative tokens. There was a maximum of 12 tokens for each side and this posed the kind of command decisions I wanted; even the Allies didn't find it sufficient to make their defence as flexible as they would have liked. The French never had enough and more would probably have made a more satisfying game for the French players.
Artillery fire was fun to play. The very long ranges and "off field" guns gave a dimension to fire support not usually experienced in horse and musket period games. I gave an individual figure-based casualty infliction that felt quite personal when several model guns picked on a particular unit. The attrition rate was sufficiently heavy to feel the pain but not so bad that units crumbled quickly. The feeling of relief among the Allied players was palpable on those moves when the French advance up MSJ masked their own artillery - just like that reported in first hand accounts of the battle.
Surprisingly we lost very few senior commanders as casualties, despite multiple ways this could have happened. Maybe I didn't make it easy enough given the high density battlefield.
 |
| The Scots Greys clash with the Cuirassiers |
I was very pleased with the concept of the the Command/Events chart (see Part One) and the way the advantages worked out over the 14 moves to give highs and lows of excitement, a few potentially game changing activities, but mostly well balance distribution of Initiative tokens. There was a maximum of 12 tokens for each side and this posed the kind of command decisions I wanted; even the Allies didn't find it sufficient to make their defence as flexible as they would have liked. The French never had enough and more would probably have made a more satisfying game for the French players.
Artillery fire was fun to play. The very long ranges and "off field" guns gave a dimension to fire support not usually experienced in horse and musket period games. I gave an individual figure-based casualty infliction that felt quite personal when several model guns picked on a particular unit. The attrition rate was sufficiently heavy to feel the pain but not so bad that units crumbled quickly. The feeling of relief among the Allied players was palpable on those moves when the French advance up MSJ masked their own artillery - just like that reported in first hand accounts of the battle.
Surprisingly we lost very few senior commanders as casualties, despite multiple ways this could have happened. Maybe I didn't make it easy enough given the high density battlefield.
We decided on some improvements immediately after the game:
All movement needed to be increased so 15" close order and 18" skirmish for infantry would give more fluidity. Cavalry needed an extra 3" to walk, trot and canter moves. Troops fighting in built up areas where they can't retreat due to high walls or no doors/windows (especially when pushed) ought to be destroyed more easily. This would be a significant factor in the Hougoumont game yet to come.
A Participant's view
Dillon, who commanded the French Cuirassiers and Horse Artillery on Day 2 and 3, has given me some thoughts on his part in the game:
" ....... I thought I would have another look at the game back in July. I couldn't help but notice your comments on my cautious advance with the cuirassiers. I cannot deny this but thought I would explain how this came about. The first problem I had - and it may be that this is due to something that had been overlooked at the time - was that my commander was quite stretched to control his forces. I had the colonel of the 1st Cuirassiers, but looking at the documentation before me I'm wondering where Baron Dubois (Brigade commander) got to? When the force was handed over to me on the Saturday morning I don't recall being given a leader with two figures and I can't see him in any photos. Should he have been on the table?
 |
| The Elite squadron leads the 1st Cuirassiers advance, followed by 2nd squadron |
Anyway, my first move was to start advancing up the hill as required. But then it was pointed out that I still had two more squadrons to bring onto the table ('What? More!'). Due to the command radius and only one 'leader' I had the option of advancing with the first two squadrons and leaving the others behind immobile on the baseline, or wait to gather my forces before a more co-ordinated advance. Assuming that the French were going to capture LHS eventually, for most of the Saturday the right flank always looked like it was going to have a better chance of giving the Allies a hard time (than Dillon' s left ). In front of the Cuirassiers there were two or three quite steady looking regiments. Knowing the likely outcome of cavalry against square I wasn't too eager to destroy my regiment.
 |
| 2nd and 3rd squadrons on the attack |
But the other factors to account for were having to limber the artillery and getting them up the hill - stretching my leader more - and having to advance at such a speed that I could keep the whole force moving together without leaving anybody behind.
In hindsight perhaps if I'd spent more time trying to understand the leadership chain and initiative I might have queried where the Cuirassiers generals were. Also it may have been more interesting, although I don't think it would have succeeded any better, if my one leader attacked with one squadron at a time.
 |
| A look inside the Luneburg square assailed by Cuirassiers. Casualty figures were not literal replacements, but one figure roughly represented the removal of a 6 figure base. Luneburg had suffered badly from long arrange artillery fire before the cavalry blocked line of sight. |
In general one of the biggest problems the French have is that the Allies are playing at home. When they receive any reinforcements they are available immediately to throw into the fray. The French forces have to slog up the hill. Even for cavalry I suspect it would take about four moves to get up to the sunken road without any "faffing about". As I was there for about 9 moves I think and the problems associated with waiting two moves for the rest of the regiment to appear on the table, I think I probably was 'slow' by only a couple of moves. The other problem was the time taken up by the fighting in LHS. My advance ran to the clock ticking in the farmhouse and the melee probably lost the French a couple of moves I should think from the whole battle.
Anyway, whatever should or shouldn't have been done on that sunny weekend in July, I really enjoyed the whole affair. You and fellow organisers pulled off what I think is one of the true momentous wargame events. Yes, I've played Borodino over a weekend and just about every major Napoleonic battle, but in 6mm and nothing one tenth as grand as your version of LHS."
 |
| The North face of the sunken road on MSJ just West of Ross' position in 2014. Given that the Lion Mound construction reduced the height of the ridge the sunken road must have been a formidable obstacle in 1815 as this bank is still high now. |
 |
| The 5th Line KGL fire down on Cuirassiers from the height of the North side of the sunken road |
My reply:
"Good question about all that command stuff and Baron Dubois in particular. Hindsight shows that if I hadn't messed up and you both had checked the orbat, numbered generals and your chances of getting them, we may have recovered from it. It was only right that you were trusting me to have it right and not try to "interfere". So my answers:
1. Baron Dubois had a numbered figure on the "Command figures" tray and was in the Orbat scheduled to be with his units so did not need to be in the Command/Events" chart. "Someone unknown" evidently forgot to place him on the table ! doooooooh! General Piquet for the Dragoons was in the chart as he wasn't listed by me as automatically present, and his number came up.
 |
| 2nd Dragoons with Lancers behind |
2. Watier, your Divisional commander, was in the chart but his dice score never came up.
3. Milhaud your Corps commander was in the chart and did come up at a useful time and was used. He had two Command tokens - did you use them? Maybe Richard didn't allow you 2 as he had a maximum of 12 for the whole force.
4. But the big issue as far as I was concerned was that I had deliberately allowed the whole 1st Cuirassiers Regt to be expendable. The Orbat shows that 4th Cuirassiers could only arrive (from Move 8) if there were enough casualty figures from 1st to make up the numbers. So in my GM's pre-game mind I had envisaged some ferocious "charges" by 1st Regt Squadrons earylish in the game regardless of loss. (Thus simulating the historical bravery and tenacity of this Cuirassier brigade all the afternoon of 18th June). I'm sure that the outcome would have been a destroyed Cuirassier regiment eventually but some major messing up of the Allies on MSJ, and wargame excitement too. 4th Cuirassiers Regt could have then come on earlier to exploit and threaten. If you and Richard hadn't thought of this between you I'm not sure why not?
5. I should have made the cavalry move distances longer. This was realised quickly after the game, but see Nr 6.
6. As for waiting, the order system is intended that a senior commander could use his 12" mounted command range to order a charge without accompanying, so giving at least an extra minimum 24" extra charge distance from him. And if you had been prepared to launch a squadron charge with one order for 3 moves from a walk, by agreement privately with an umpire, you could have had (12" + 15"[walk] + 18"[trot] + 24"[canter] = 69"" from the initial ordering position. Sorry if that was not appreciated. In short the "orders" were not meant to be move-by-move but issued in a realistic way to subordinates who would be left to carry them out however long that took while the senior commander went elsewhere if desired"
 |
| Colonel of 1st Cuirassiers |
Excerpt from Dillon's response:
"The option to throw the 1st Cuirassiers into the fray quickly was recognised, but then as a gamer I fairly quickly realised the logistics problem of getting enough cavalry killed to bring on another squadron or two and then the time taken to get them forward to have any influence on the game. So, despite the intent, I had subconciously figured out the cuirassiers were probably a one-shot weapon. This is the problem of the French having to 'play away' that I've already discussed."
Thanks Dillon for all this entirely logical explanation, and your enjoyment of the game despite the problems.
Thanks Dillon for all this entirely logical explanation, and your enjoyment of the game despite the problems.
What did I learn about Waterloo from the whole exercise?
In my time I've organised and played in many skirmish level games, but usually not more than about 100-200 figures in play at once. About 25 years ago I devised a Napoleonic Peninsular system which had battalions of about 100 figures, but that was in 15mm and seemed quite manageable. This attempt to recreate one of the most crowded battlefields of the era at 1:3 figure:man scale was going to combine some elements of skirmish detail with wargame "armies" of as many tactical units as a decent sized conventional scale wargame. Therefore my research required an understanding of:
- what was happening right at grass roots level,
- how the entirety of units in the chosen area had inter-acted dynamically on the day,
- and also what outside influences had made the battle fluctuate how it did.
 |
| Some of the King's German Legion Hussars |
 |
| Colonel of the KGL Hussars, painted by CG |
 |
| Men of the 5th Line KGL by Kevin |
Why did Wellington have so many expert skirmishers in this area but use most of them in close order?
Open order troops take up more space than we usually allow in conventional wargames and there just wasn't room on this frontage. Initially 1 LB KGL had a company of skirmishers out on the right of LHS and 1/95th had companies forward in the sandpit and its supporting hedge/treeline, but half the battalion followed doctrine by providing a solid line further back. Historically the bulk of 1 LB KGL stayed back on MSJ and they spent most of the day in square. The difference in our game was that our Wellington chose a forward strategy of close range delaying tactics with his light troops, firing and retiring, not distant sniping, and that also created the space to deploy about 2 and half battalions of green jackets, about 400 figures, as skirmishers. They lost terrible casualties through a combination of Paul's close range volleys and Richard's long range artillery but it paid off tactically in the end result.
 |
| Part of the 1/95th main body in the sunken road on Mont St Jean |
Could the Luneburg battalion have been destroyed in our game as in the real battle?
I set the deployment up to ensure Luneburg was near enough to LHS at the start to reinforce it but had sufficient open ground to cover to given the hidden French cavalry a chance. The scenario built in that any units beyond the table were hidden by a combination of smoke/mist from the excess moisture that day, and dead ground. Richard had a fairly free hand to deploy the Cuirassiers near the table edge, and given more determination, different use of Initiative tokens, and preparedness to gamble one squadron, Luneburg could have been reached and pinned early on. Subsequent squadrons would have surrounded it and led to destruction. If I'd made the cavalry move distances a bit longer that would have helped. Even if they had formed square down by LHS they would have been very distant from the supports available at that time. Discussion in the narrative and in Dillon's account above explains why it didn't happen.
 |
| A company of the Luneburg Battalion main body climbs out of the sunken road |
By early afternoon on 18th June Wellington deemed his right centre was more vulnerable than his centre round the chausee. So he shifted some troops and artillery out of the area we were representing, Ross' battery being one of them. Visiting the actual battlefield and then building MSJ and the Elm tree crossroads position in scale you can understand that, while Ross was well placed to fire on any approach to LHS farm and orchard, once the French were fighting round the buildings and creating smoke most targets were in dead ground or hardly visible.
 |
| Overview of Ross' position near the crossroads and above LHS |
 |
| The view from behind the battery gives some idea of the amount of dead ground - add your own ideas of poor visibility and battle smoke |
 |
| Roos' reassignment in progress |

 |
| Historically even Rogers' Royal Foot Artillery battery was redeployed during the afternoon |
I believe this had a lot to do with how to fit the whole army into the narrow but strong frontage Wellington wanted to present to Napoleon matched to the width of Mont St Jean ridge. Our section of the frontage was sufficient to give an insight into the logic. We tried hard to get the areas covered by the units to match their historic counterparts, and although I used a bit of licence (one could argue that the 79th Highlanders and the 28th North Glos regiments should have been included) the whole thing felt right and there just was not enough room to deploy a whole battalion in two ranks. The Allied professional officers calling on their Peninsular experiences must have been well aware of this constraint - and at 1:3 scale so were we!
 |
| 8th Line KGL look appropropriate 4 ranks deep |
As GM I chose to use the historical deployment of three companies of 2 LB KGL in the orchard, two in the farm and one in the garden, but the difference was in our game James chose to defend the orchard until wiped out and driven out.
 |
| First fight in the orchard |
 |
| A section of 2LB KGL mans the barricade outside the LHS main gate |
 |
| French view through the stable archway: KGL Riflemen about to be pressured from two sides |
 |
| The axe-armed sappers turned up early for our game |
Final words on LHS go to Kevin
"I have to say, as an umpire and assistant, over the three days I thoroughly enjoyed my time even though, after all this effort, I was not playing. ( I had sneaked a few games in during the testing!) The actual outcome to me was not of importance strangely enough – surely an umpire’s imperative. It was the gaming and comradeship that I was there for as well as the sheer spectacle and to pay homage to the brave combatants of those 200 years ago. After all the contributors hard collecting and painting labours - “Let everyone enjoy” was the message..........but naturally everyone wants to win (don’t they?!) Wargaming at this scale brought a different perspective on troop formations, movements and activities.
I remember having a particular discussion about how the French horse artillery guns should be picked up by their respective limbers. One wargamer asked me why I had moved the limbers in front of the guns facing the enemy. It was Richard who had seen the RHA at a show who discussed the method he saw whereby in real life they ride past the guns and the guns are then turned 180 degrees and attached to the limber and then the gun goes haring off towards the enemy. (In this case the limbers could only get to the guns location in this movement). Detailed military drill practice knowledge came in useful in a number of cases.
 |
| A few of the hundreds of French infantry in Kevin's collection (Photo and digital effects KE) |
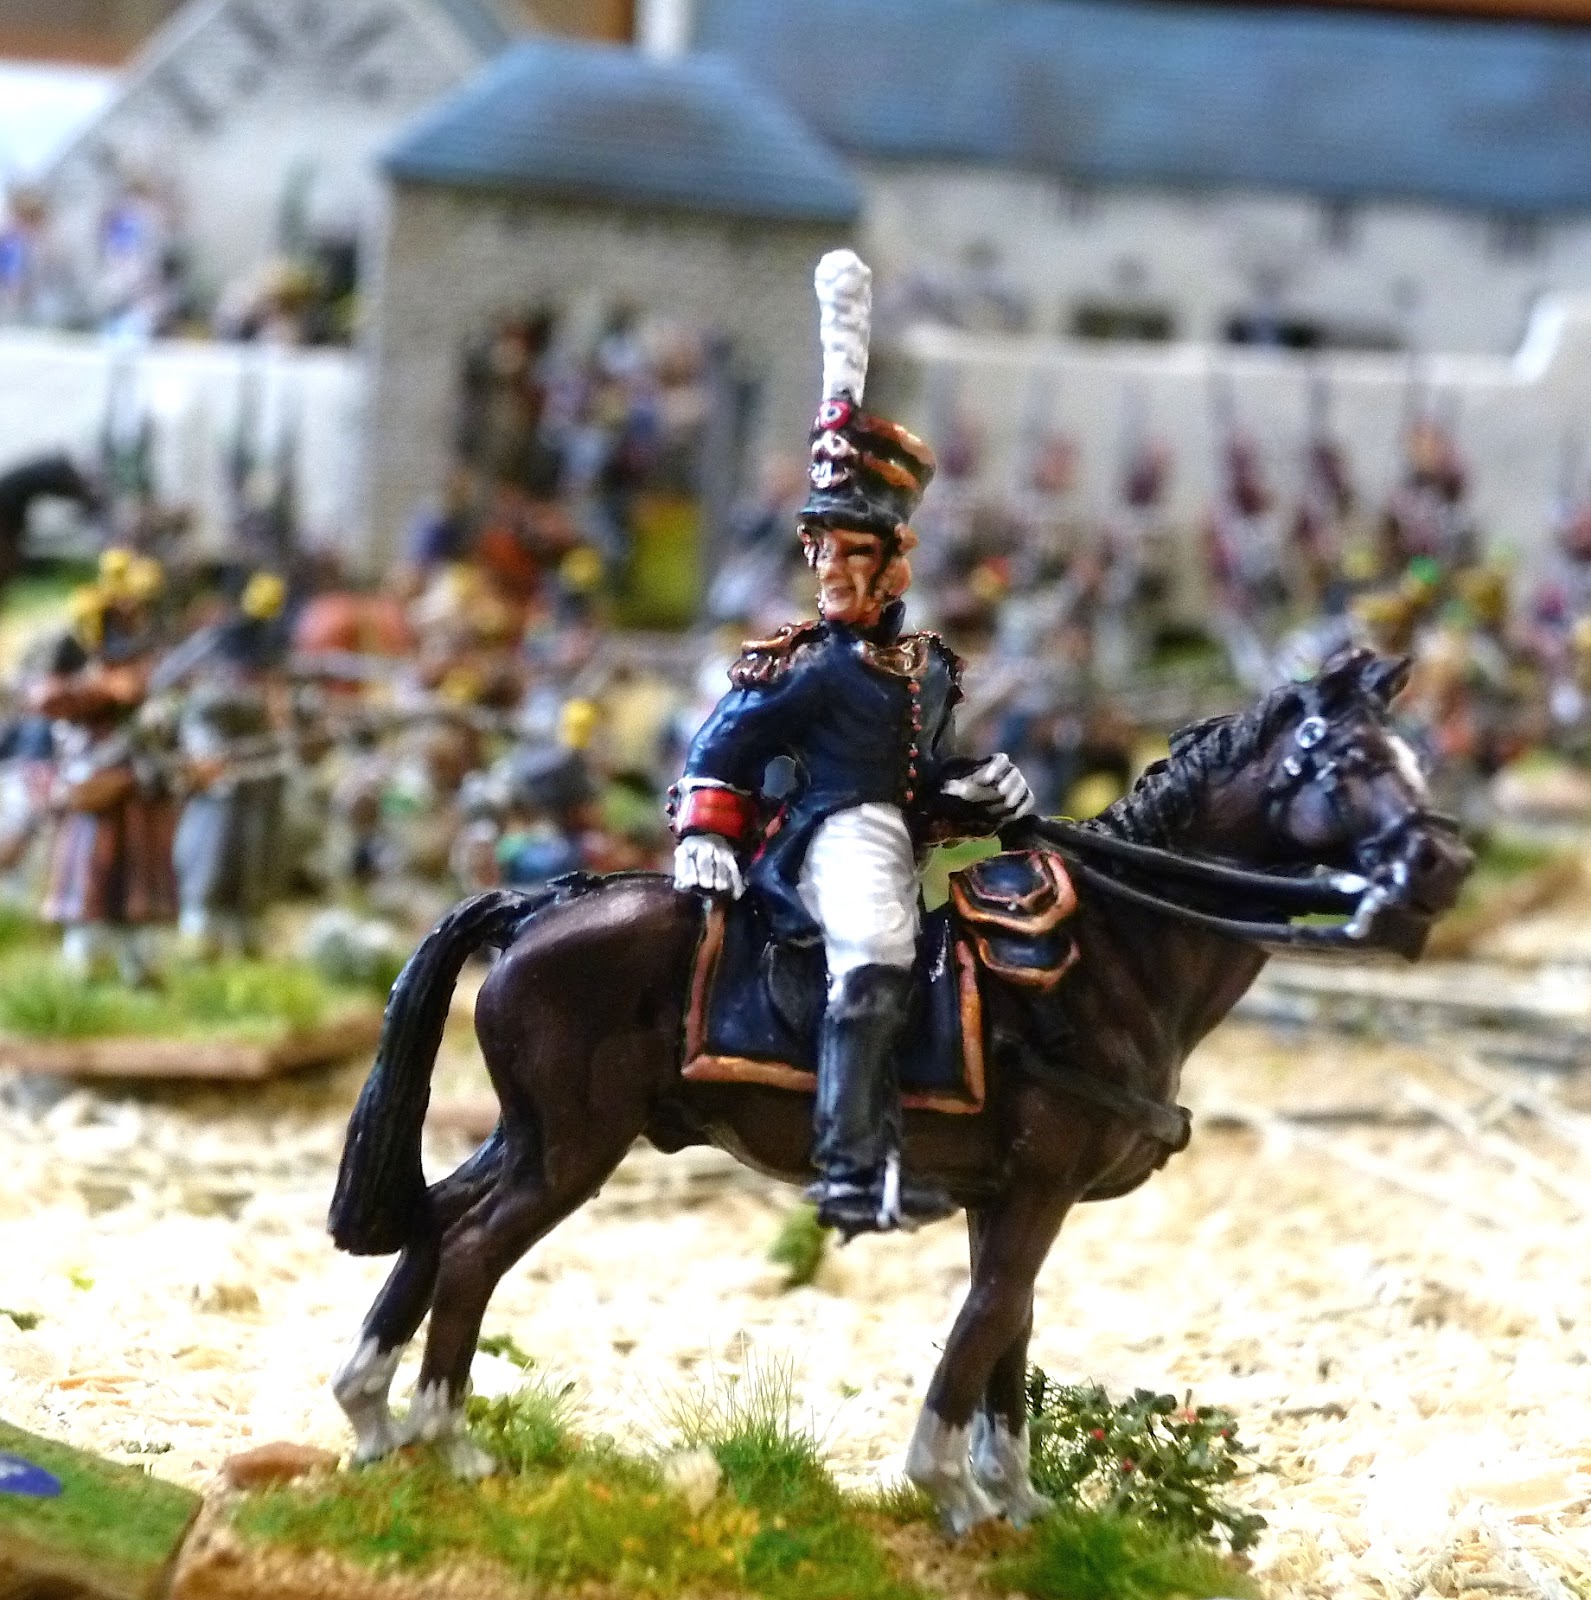 |
| French Infantry battalion commander outside LHS farm |
The three days did not pass without difficulty particularly concerning the above mentioned issues, and also figures getting mixed into other units. I am sure the latter happened in real life though. :-)
I felt it all brought us a lot closer to the real action of the day. For the first time we saw the real scale of the activities (albeit with 1:3 rose tinted spectacles!) None of the wargamers were wounded – except their pride in the result! All in all it was a great long weekend that would have benefitted from one more day wargaming activity. But, alas, people have homes to go to and we were to leave the hospitality at Chris’s house, which was exceptional, and as gamers we actually got to know each other a bit during the “downtime” at the pub and when having breakfasts.
 |
| Beautiful animation in the French artillery train, by Kevin |
A truly enjoyable time. A truly memorable occasion. But it was not over............Next to come was the battle for Hougoumont. (Yes at 1:3!)"
 |
| Kevin's Hovels Hougoumont model painted and ready to be put in a landscape |
 |
| Here it is modelled by CG, and the game in full flow (in September 2015) |
Here are links to the earlier parts of the LHS wargame refight so that you may access the full story easily;
Background, Rules, maps and initial positions - Part One
Wargame Day 1 - Part Two
Wargame Day 2 - Part Three
Wargame Day 3 - Part Four
CREDITS
Original crazy concept, game design and rules, umpiring, note and photo taking, tea making -
Chris Gregg (CG), aided and abetted by Kevin East (KE).
LHS Farm model - Hovels 25mm resin building (painter unknown), adaptions such as cut-out doorways and opening gates by KE
Trees, hedges, fields and all landscaping - CG scratch built
28mm figures mostly Perry metal and plastic, but also Warlord and Victrix plastic, and more metal from (at least) Foundry, Essex, Trent, Front Rank; from the collections of Kevin East, Paul D, Paul H, Chris Gregg, James Fergusson, Richard Newcombe, and with subsidies or donations from Mike Tovey and Ian Allen
Casualty marker bases in MDF - hand crafted by Kevin and from Warbases.
Artillery, wagons etc
Learning about our project on the A Military Gentleman Forum, Niels of Westfalia Miniatures had donated some British artillery equipment for Kevin to paint and use. A couple of Westfalia pieces are in this scenario but we do have more that couldn't easily be used in the front line - I will feature them on another blog posting. Thanks Niels. Well worth looking at the company website for a lot more than Napoleonics.
Status Bases and Markers
If you want to get yourselves, at a special price, some Wargamer ADC plastic status bases and markers like Martin had provided to us for these games, please visit this blog post first waterloo-project-record-keeping for the link.