Showing posts with label Army Painter Quickshade. Show all posts

Monday, 25 December 2017

West Country Quatre Bras: 4th Hanoverian Brigade

It might seem a bit "sad" to be posting on Christmas Day but I was going to email the Quatre Bras project team and send some reassuring photos when I thought it would be just as simple to blog it to them. So Happy Christmas Kevin, James, Tony and Richard :-)

Here's a reminder of the closing stages of our Quatre Bras refight Part 1

The thin red line in the foreground is three Landwehr battalions, Verden, Osterode and Munden, of 4th Hanoverian Brigade. Only three? Well I have to confess that I ran out of time back in September and could only give Kevin three finished battalions for the game. He took it well, like the gentleman he is, and we claimed the fourth battalion, Luneburg Landwehr, had got pushed off the road to QB by a British Guards Battalion taking precedence!

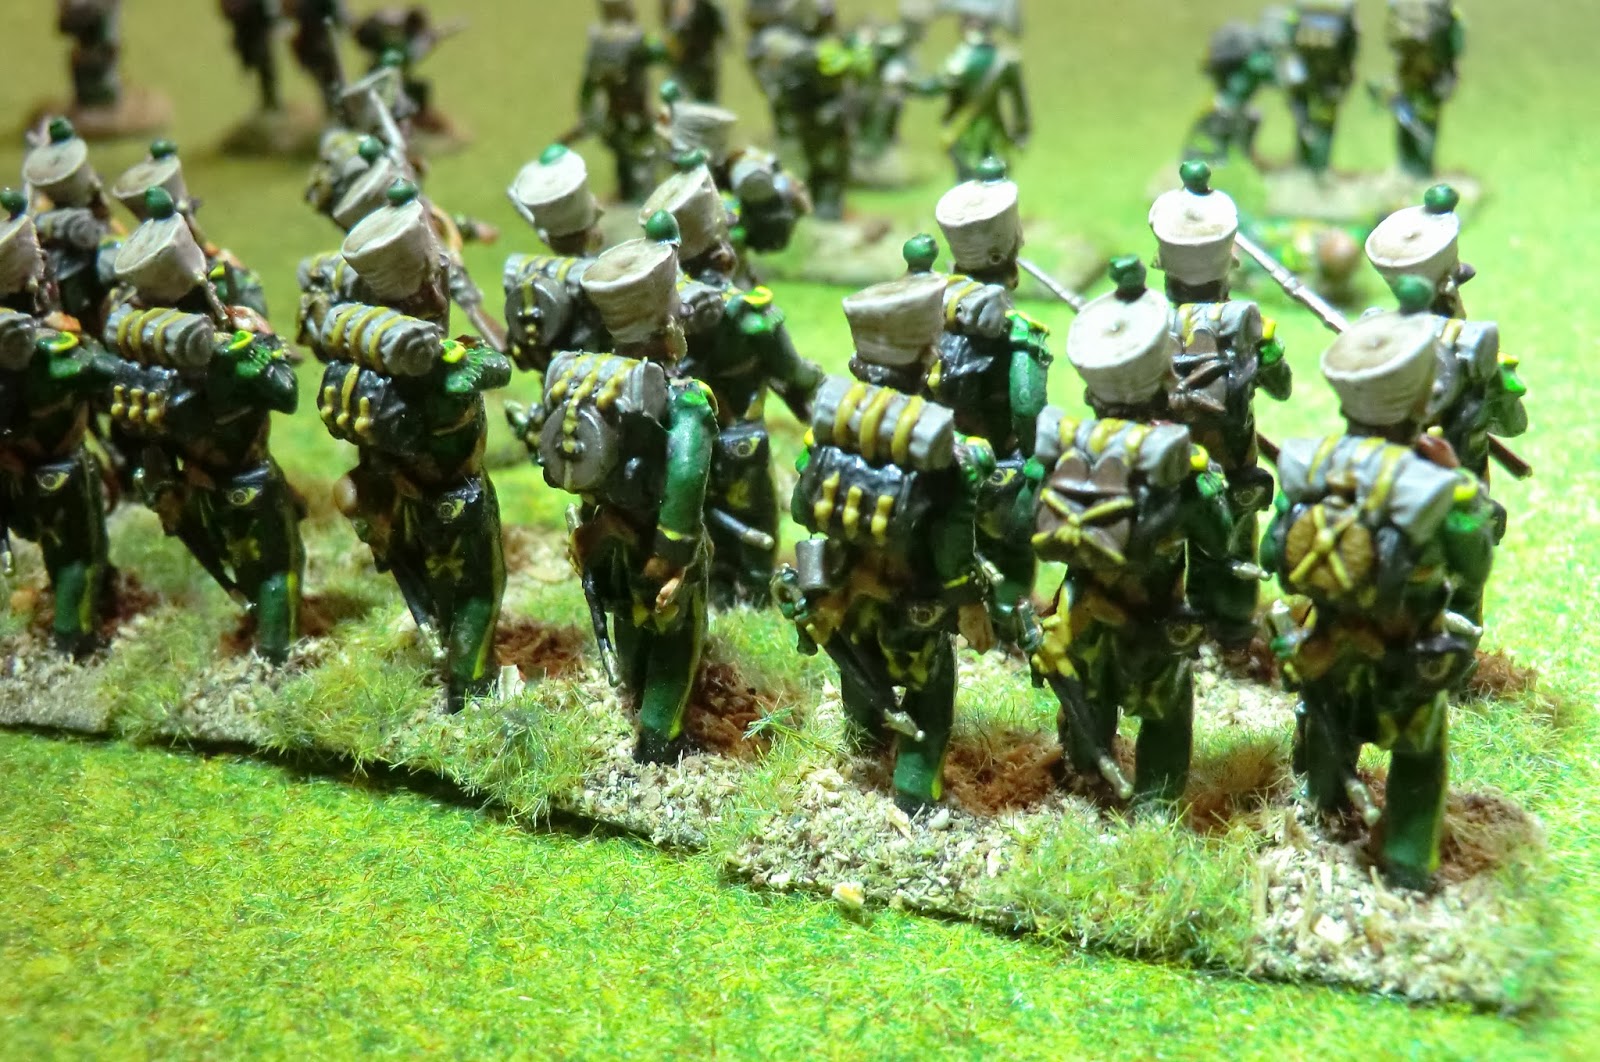
So this post is mainly to reassure Kevin and James that Luneburg Landwehr are now complete and will be ready and drilled for QB Part Two. They have that "lived-in" look I like given by Army Painter Quickshade and have just the matt varnish to do.  Here are the pictures to prove it.


For those who care about such things the brigade started as a job lot of Warlord Games plastic when they had a massive sale of surplus sprues.  These were for the basic infantry, and I converted  a variety of figures I had in stock for all the officers, NCOs and musicians. These were a mixture of Victrix Peninsular British, and Perry metal Hanoverians, some repainted from my 1:3 scale La Haye Sainte Hanoverian battalions.  Just for fun here are some photos I took when I was busy on the assembly line - raw casting parts stuck together and then all four battalions having just received their Army Painter red spray undercoat.  


As I did for the 1:3 massive battalions I painted as many as possible "in one go" but  in this case I ran out of time on the last 36. They won't win any prizes but I'm still very pleased with the overall effect,  I think it is a smart and business-like uniform even if they count as Raw in the game.......

Project team - see you at Quatre Bras Part Two.  Punters - many of you have your invitations now so I hope you will be able to come. Meanwhile have a Joyous New Year.

Thursday, 14 May 2015

Waterloo Project: Leading the herd?

Apologies for the lack of blogging. I'm facing the wargamer-blogger's dilemma: do I spend time on blogging or painting figures? With the Waterloo game deadlines looming I have been very busy with the latter, and I still owe the world posts on the last Waterloo 1:3 rules test game and lots on my creation of the terrain for our 1:100 Waterloo games scheduled for two weekends in June which has taken me most of March and April.

But for now, the humorous nature of this mass production figure painting at 1:3 scale struck me as worthy of some fun photos.
A squadron the French 2nd regiment of Dragoons I'm currently working on in readiness for a saunter up Mont Saint Jean. These are four boxes of Perry plastic cavalry stuck together en masse. However, for some reason, I think because the horses and saddlecloths are different to the troopers', I stuck the officers to the horses but left all the rank and file nags without riders for undercoating.  To make them easier to handle I stuck all the horses to the final bases before painting.

I used a couple of different colour spray paints to do the undercoat and then, no fancy oils but a variety of Citadel washes and thinned paints at random. Then similar treatment with a variety of colours for drybrushing. The aim being to produce a look of natural randomness within the chestnut/bay range for the whole lot.. Finally white blazes, stockings, etc, and hooves where necessary. I keep Henry Hyde's wonderfully succinct guide to horse painting next to my desk (see page 245 of  "The Wargaming Compendium") as it is an extremely useful reference. One officer and two trumpeters horses are greys.
I've done a number of spare horses and rides as casualties.

It wasn't till I'd finished them (excepting the Army Painter Quickshade when the whole figure is together ) that I realised I had produced an effect unknown to me in 40 plus years of figure painting - that the officers look as if they are leading a herd of riderless horses.  It's 52 horse figures and I'd never painted so many in one batch before.  The riders are well on the way to completion now so another squadron will soon take its place on the shelf.

And I never followed up my post on KGL Hussars with photos of my second squadron.  So here are two shots from our test game in March. In all we will have three squadrons like this on the day.
These are also Perry plastic made from several boxes kindly discounted to the project by James Fergusson
napoleonicwargamesblog  and painted by me. Status markers by  wargamer-aide-de-camp

And now to encourage me to finish them here's a view of a companion squadron of  Dragoons following up the Cuirassiers in our March test game.  With promised collaboration from other members of our Waterloo project syndicate I'm expecting to field about 160 Dragoons for our La Haye Sainte endeavour.

Now the expert is still frantically at work, coincidentally on a similar task. Kevin East has just sent me two photos of his latest work in progress.  48 Perry metal French Cuirassiers for a squadron of the 1st Regiment.


As for me, back to the brushes.....

Tuesday, 3 June 2014

Waterloo Project: 191 from Luneburg on the painting table

Kevin puts me to shame with his prolific output, (french-brigade-510) super detail and top quality figures, and so to try to keep my end up I'm just showing what is in store for me next. Unlike Kev's gourmet approach to his models, I tend to love doing my wargaming on a shoestring, so I have been accumulating the Hanoverian Luneburg Battalion slowly for about the last 8 months or so, bit by bit. In fact every time an opportunity came up  to buy some "British Infantry in stovepipe shakos" at a good price on Ebay, or cadge them cheaply elsewhere.

I've got all the figures I need now for our 1:3 scale representation and have mounted them and undercoated them in Army Painter "Army Green" spray ready for painting. Before I say any more here is an overall shot.


They are an eclectic bunch, but all judged by my eye to fit together on the tabletop. They started off when my art patron, Ian, offered his unwanted boxes of Victrix French and British to the 1:3 project. Shortly after that I bought a batch of Front Rank British Light Infantry from James Fergusson of Fergscalemodels. That eventually led to James joining our project and supplying lots of boxes of plastic figures to me and other members of the team at a good price. Some of those ex Ian and James Victrix Peninsular Infantry have found their way into the Luneburg ranks here. In addition there are batches of Foundry and Essex, and I've included a few Perry Hanoverian buglers and command figures. There was also an Ebay batch that looked a bit like old Hinchliffe style but bigger, so not sure what they are.

From my research it seems Luneburg was one of two Hanoverian "light" battalions but on the day was being used as a field (line) battalion so I've based the majority in 6s to ease that function.  Apparently it was composed of four large companies. But info also suggests that 1 in 3 men were armed with rifles not muskets, I assume that means within each company. At Waterloo 50 men were detached to join the Nassau troops defending Hougoumont, I'm guessing they were all rifle armed skirmish types. Followimg this logic my Luneburg battalion would still need a large quantity of skirmishers so I've based this first company in 3s using kneeling, firing and at the ready poses so they will adopt  "open order" more easily in our game.


The models don't have rifles as such but I've removed most bayonets and from a distance who will notice?

I've put the other companies together just in a pragmatic way that makes each one a bit different but hopefully looking as if they belong together - the full paint job will help that. More formal poses have been used, but even different manufacturers in the same company.


The unit is completed by a command stand of officers, musicians and colour bearers, and there is also a mounted Lieutenant Colonel, and four casualty markers. Our rules will allow for very varied sized units so I anticipate, on the day, this will be one  rifle-armed company of 44 figures, and a main battalion unit of 147 all ranks.

Now I've put these on the blog it's meant to spur me on to get them painted .....191 in one go is exciting yet scary. I've set myself a 3 month target for completion. Meanwhile if anyone has any reliable information on what the Luneburg colours looked like on 18th June 1815 please let me know, my colour bearers are waiting expectantly with bare poles ........(ummm, perhaps I should rephrase that!!)

Not sure when I will be brave enough to show these again but next time I will try to say a little more about their role in our La Haye Sainte scenario and why I think they are worth all this effort.

If you haven't found it already James Fergusson's blog is worth a visit Napoleonic Wargames blog.


Thursday, 6 February 2014

Waterloo Project: Nassau Light Company

Now here's what I call a pretty cool uniform (and it's not light blue!!). Whoever invented this smart rig of green with black facings and lots of yellow lace supported by buff equipment straps, ought to have won the Stella McCartney prize for fashion design, or whatever its Napoleonic equivalent was.
Trumpeter and Sergeant of Nassau Voltigeur company

I'm not being too fussy as I get a bit confused with the battalions of Nassau troops at Waterloo. They fought, at least, at Hougoumont, La Haye Sainte (LHS), behind the central ridge, and on the Allied left flank. Their uniform was still in their old French style even though now opposed to the Emperor. I only need one large light company for the LHS scenarios I'm organising, but Kevin needs the best part of a battalion for Hougoumont - the 1st battalion of the 2nd Nassau Regiment, I believe.  Mine is 54 figures, representing about 162 men - Nassau battalions were very strong at Waterloo, around 950 men in 6 companies. The "Waterloo Companion" gives 800 at Hougoumont and Kevin's spreadsheet shows he has opted for approximately 650 to allow for some losses - about 215 figures. Apart from my 50 we will be making them up from the contributions of 3 other wargamers, so maybe we won't see the full battalion till the day in Summer 2015. I will just be concentrating on my Voltigeur Company for this post.

Being generally a wargaming cheapskate I've opted for a lot of plastic in this project and I've got about 4 boxes of Victrix French infantry to dip into. So I raided them all to get the bits I needed to assemble 54 Voltigeurs. For those not familiar with these, here is a look at them in the raw state.
The big down-side is there are lots of fiddly pieces to identify, snip off the sprue, trim then glue. It took me about a week of spare time to make up this company, I used bits from various boxes, some moulded in different shades of grey (only two, not 50!)
Unless I had quite a few more boxes it would be very difficult to get the entire unit in the same position, but that didn't matter as, for a light company, I expect them to spend a lot of the game in open order, manning defences, or doing other non-linear escapades. More on the posing detail later but for now its 48 privates on 3- figure bases, 4 x NCOs  individually, and a command stand of the bugler and officer. Oh, and a casualty figure in case he's needed! By the way, sometimes I cut up old plastic credit cards and membership cards to make bases when I can't be bothered to shell out for commercial plastic or MDF ones; unfortunately, occasionally some of them warp a bit when the texturing is applied, so be warned - spend the money and be safe!
I find a very good product for the base coat is Army Painter spray paint.  Not only is it a good quality finish and doesn't clog up the nozzle, but it's well named "army" painter. I have used one can of "Army Green" so far on this project for about 40 x 95th Rifles, 134 x 2nd KGL light, 54 Nassau Light, and just added about 120 towards the Luneburg battalion, and it's still not finished after approx 350 28mm figures.  Once dry, for this unit I gave them all a quick thinned coat, with a big brush, of Citadel Snot Green followed by Caliban Green. That gives a variation in tone for shading. Then, to boost my morale, their distinctive green and yellow Voltigeur epaulettes, plus the faces and hands, so they looked human.
Here you can see that I had applied a coat of acrylic structure gel over the figure bases and the card bases to help blend them in. The green colour is just the "Army Green" spray base coat, not any attempt at grass. 

I won't bore you with all the painting procedure but now show the finished result before applying the Army Painter "marmite" - Quickshade.

The bugler close-up is an example of what I had to do for all the figures except the officer - paint on the Hungarian knot-like decoration on the breeches freehand.  My hand isn't steady enough to describe the circles in yellow so I first painted a yellow cross with slightly rounded edges. 106 yellow crosses later and I went back using a very fine brush and dotted green spots in each trefoil and a separator line going up to the waist. It wasn't as difficult as it sounds and I think the result is worth it as that's one of the distinctive features of this uniform.
Now to texture the bases with sawdust and sand mixture followed by Javis static grass, a good spray with matt varnish and they were ready for me to experiment with in formations! The initial assembly was done just before Christmas and I set myself to finish them by "the end of January" - that happened on January 31st.
The company deployed in skirmish order with one half forward and the other
half acting as formed reserve

Given the choice of Voltigeur figures in the Victrix box, I opted to make twelve
kneeling - firing or at the ready, intermixed with 12 standing looking as if they
 might be advancing or ready to fire. To my mind these are the best to represent skirmishers.

Then I chose parts to fit to two standing/walking torsos to make loading poses of different kinds.
The front rank being nearly "ready" and the second rank pouring powder and ball down the barrel
of the musket. I ignored the possibility of some of this company having rifles
as I already have enough rifle-armed troops for LHS, and need the variety.
Here is a close up of the back view . I wanted the brass bugle horn badges on the cartridge boxes to look good and didn't expect to be able to do that in paint, so I added a couple of hundred to my sheet of self -made transfers. A bit fiddly cutting them all up and sliding them on, but I think it was worth it. (Note the slight base-warping of the left hand stand)
To finish off my experiment I wanted to see how much space they occupy in  two, three and  four-rank line formations. The two rank line is approximately 50 metres at our 1:3 ground scale, so for shoulder to shoulder close order for 150 men that feels exactly right to me.


To conclude I'd just like to say that the only other time I've used Victrix was their Austrian Grenadiers box 
grenadiers anyone? and they proved simpler to assemble. I think these French must be an early design and if you are the type who likes minimal preparation before painting they are not for you, but if you are a diorama builder then the possibilities for variety of poses is very good indeed.


Friday, 3 May 2013

A variation on "Quickshade" paint jobs

I've occasionally been asked about how I use Army Painter Quickshade and also how I do figure bases. There is no easy answer since, to me, all forms of art can be an adventure in which you might know where you'd like to go but not necessarily how the route will work out to get there.

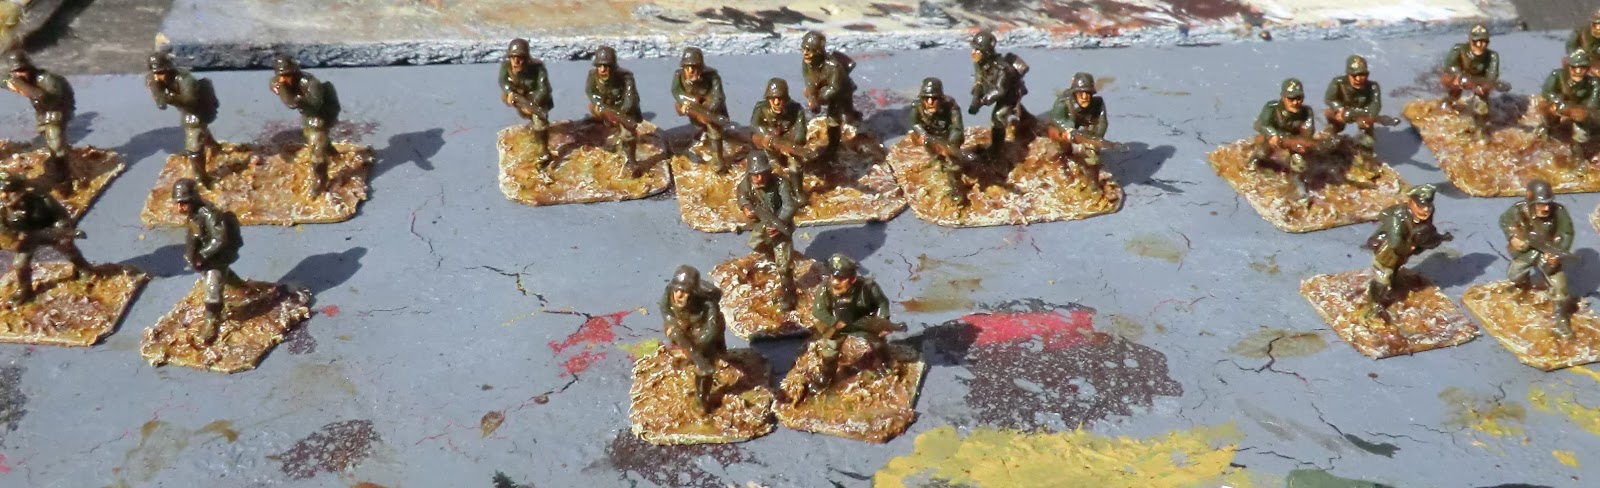
But recently I acquired a nice batch of  30 Perry designed Foundry Miniatures 20mm World War Two Germans and, as these figures are so good I thought painting them slightly differently to usual could be a good relaxation and diversion from my two-dimensional art. Also I think the German uniform of the early war period was pretty cool even if the motives of the soldiers inside them might have been questionable. Just as a taster here is a photo of the finished result with a squad of Landsers advancing across my back garden on a sunny day.

I prefer low profile bases so the family is now well used to me asking for out of date credit cards, plastic store cards or membership cards and the like and I find them strong and easy to cut but don't interfere with the aesthetic value of the figures as they are so thin. I clean up the figures, not that there was much "flash" on these, and then glue them to the bases I had cut ready. This makes them easy to handle and it was a short step to spray the whole lot in one thorough coat of a basic grey. This acts as undercoat and  basic uniform colour but will be mostly covered. I used "Carplan" Grey primer from a local motor parts store.

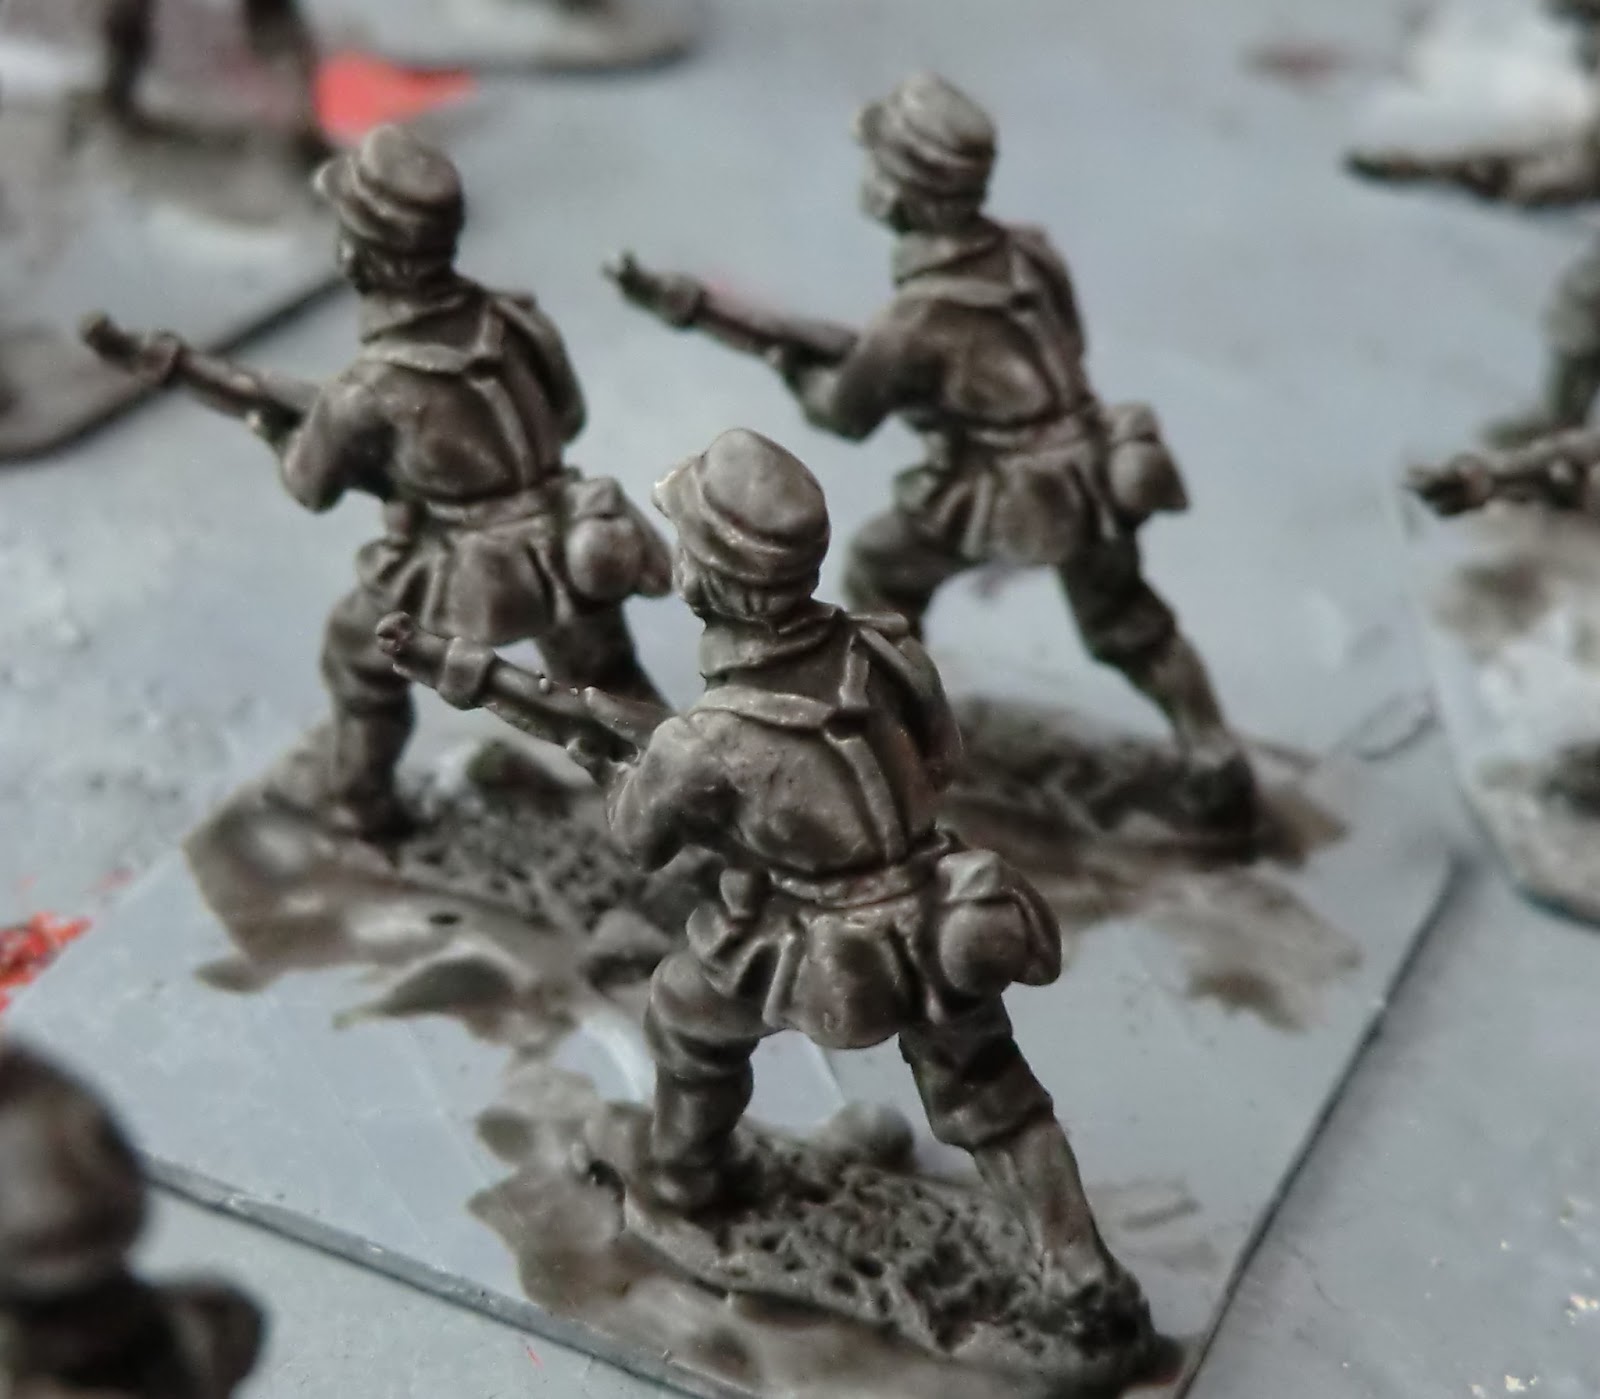
Now here is where I used my Army Painter Quickshade, dark tone, not at the end of the process but the beginning. Happily I was near the very end of a tin and, I guess for some technical reason, the Quickshade dried matt instead of the glossy you may be used to. I put it on with an old brush, not the dipping and shaking method the manufacturers recommend. As I hoped, when dry, it picked out all the lovely sculpted detail a treat, and would also act like black undercoat for outlining but without concealing the detail from me while I painted.
Here are some of them at this stage

The actual painting technique would involve a few careful strokes of colour, mostly on the highlight folds and leaving as much of the dark folds as appropriate. This was done on the trousers with Games Workshop (GW) Fortress Grey........


 ..........and on the jackets with GW Knarloc Green.

You may well be thinking that this makes the main clothing seem too light but, never fear, that will be rectified later in the process. For the same reason I did not use black for helmet, boots and gun barrels but GW Charadon Granite which is a very dark grey. Similarly though it was only on main highlight areas.  The next photos also show flesh and brown and black for rifles, straps, bread bags etc.

I did the flesh my usual way which is a coat of GW Elf Flesh washed when dry with a diluted solution of  GW Flesh Wash (now called Ogryn Flesh wash).

Once the figures were entirely painted, including fine detail like collar patches and shield motifs on helmets, it was time to landscape the bases. Where I want a particularly good effect I use Winsor and Newton Acrylic Structure Gel as this can be applied with a brush and fills up the spaces between the metal figure bases. It can also be manipulated and textured to some extent and then dries hard to give ruts and puddles etc. I mixed GW Ivanden Dark Sun  (a kind of yellow ochre) and a small amount of fine sawdust with it so that saves another step. Again it's a bit bright but that can be dealt with.


Now comes the really interesting bit. It was my artistic friend Terry Preen (see his guest page in right side bar) who introduced me to the radical idea that you don't need to buy Army Painter Quickshade at £18 a pot or whatever it costs now, but you can use various wood stain varnishes available at your local DIY store. Although I do like the effect of Army Painter products, especially for Horse and Musket period uniforms, for a good overall "drab" effect ideal for WW2, I found B&Q Antique Pine Satin Quick Dry Varnish. It is water based and dries within an hour leaving brown in the folds and a very slight brown film over the rest of the figure. If you don't want the latter then quickly wipe it off the highlights with a tissue or a  clean brush while it's wet. On these figures the effect was to darken the uniform and create interesting puddles of dark shadow in the texture of the base colour/texture.

This is "muddy" when you put it on but does dry clear with a highly glossy finish that actually makes them feel  satisfyingly protected from whatever the wargame battlefield can throw at them "Take cover! incoming dice!!!"


I next decided that I needed to give the bases a highlight with GW Bleached Bone.

Obviously this is now getting into the territory of personal taste and, for WW2, leaving the bases like this would probably have wider deployment possibilities but I think it looks a bit depressing so prefer to cheer them up with some touches of green. I just use small patches of PVA glue and dip into a pot of Spring or Summer effect imitation grass and then the odd dab of a rubberised fine clumping to look like weeds.

Finally it was time to give them a good coat of Matt Spray varnish as this obviously reduces the glossy shine to a  more realistic look but also ensures the grass effects get a durable bonding on the bases. (Remember to shake the can really, really well to get the matt finish)

If you'd like to see several images of the final effects please see these items for sale on Ebay.

And if you've found this interesting or instructive please leave your comments. thanks