Showing posts with label Saxons. Show all posts

Tuesday, 23 May 2023

On Bloody Ground - Cover art for a new rules series


I've been a bit excited the last couple of weeks as, for the first time, I have one of my paintings as the cover of a glossy book.


Some may be aware that I painted this oil commission of "King Harold at Hastings, 1066" a few years ago for an esteemed senior wargamer who lives not far from me, and it was spotted on my website about 5 months ago by the authors of these rules.  David and Dan Toone are a father and son team from Essex who have big plans to make an impression on the world of Ancient and Medieval wargaming with something a bit different. In these days of fashionable small scale skirmish games with sword, spear  and armour warbands they are offering a "big battle" game. Still designed for a basic 6 foot x 4 foot table and armies manageable by most gamers' resources, they can be ranged up as big as you like.

At this stage it is important to me to point out that the "The Norman Conquest" is merely the first of many in the pipeline and I will say more towards the end of this post - please read on.

In the words of the authors 
"OBG - The Norman Conquest is a 64 page, perfect bound rulebook, with common sense core rules, including brutal combat and a system of orders that makes the game dynamic, exciting, fun and challenging.
The rules are designed for use with individually based 28mm miniatures, but can easily be adapted for use with any scale or basing.
This first book in the series covers the Dark Ages in Britain between the 8th and the 11th centuries and includes army lists for Saxons, Vikings, Normans, Irish, Scottish and Welsh.
If you have any questions regarding the game and it's mechanics, or more specifics on how the game plays, don't hesitate to contact us.
We will be creating more videos on the mechanics of the game, as well as battle reports and information of our newest releases.
On Bloody Ground can be found and bought on our website here:
Also check out or new Facebook group dedicated to WiP Games and Miniatures and everything to do with On Bloody Ground:
That says it all really.
My readers know me as a keen "horse and musket" wargamer with a strong bent towards World War Two as well. Although I've played a lot of Ancient, and a fair bit of Medieval in my time, in no way do I pretend to be any expert in the history and mechanics of the warfare of those eras. So I can't give an opinion on how "good" the rules are, but I can say that if I was not already up to my eyes in a big project (see some forthcoming posts on my Napoleonic 1809 campaign progress) I would be highly stimulated by this book to get some boxes of plastic Saxons  and say, Vikings, and have a go.  Suffice for now for me to present you with photographs of some pages from the book which I hope will be enough to help you to decide to buy a copy at the very reasonable price of £15.  It is A4 size, easy to read text with lots of diagrams, and feels like a durable volume that is good to handle. As you see above it is backed up by lots of information and free downloads elsewhere on the internet. There is also a blog On Bloody Ground


A very comprehensive and useful contents list, and there is also an index
at the back


Your existing base sizes are not a problem, evidently as long as you
can fit figures into a unit footprint base, which remains constant
throughout the game. Not a bad idea to represent the fluid
formations of the period thinning out with losses and exhaustion.
Skirmishers operate as individual figures though.

There are 8 pages of really useful photos of actual units and game-specific vignettes - not just eye candy but a real aid in understanding how to form armies, plus useful stimulation on "uniforms" for beginners


The six nationalities represented in this volume each have three pages
 packed with useful examples of unit types

I'm proud of another little contribution of mine -There are a number of black and
white vignettes of details of the cover painting which have been used as chapter
 endings etc. Hopefully they give a little added stimulation to get on with the wargaming


The Future
David and Dan are being naturally pragmatic in these difficult economic times and future volumes depend to some extent on sales of Part One. But each period has its own devotees so, personally, I am optimistic that they will be successful in more than just "The Norman Conquest" era. They have plans for releases in the following order:
The Reconquista
Rome's Gallic Wars
The Persian Wars
Alexander the Great  (a favourite of mine which I am looking forward to)
They are already working on a series of 28mm white metal figures but the only info I have on those is that it will b Greeks and Achaemenid Persians first
And in answer to my basic question David said:
<<Each book we produce will have the same core rules, with variations in special rules, arms and armour as necessary for the period. So players can buy one book and play to their hearts content with no need for anything else.>>
To finish here is sneak peek of the Cover for Book Two which I have completed, and the expectation is there will be more paintings to come for the following titles.  If you are not already aware of my art work please take a look at my website Chris Gregg Art. If you are already one of my art patrons then I think you might like to start collecting this series as a little sideline to your investment in my art - Thank you. 
The Soldiers of Islam gather to make Holy War c. 1082 
(original acrylic painting by Chris Gregg - COPYRIGHT)


Thursday, 16 December 2021

Battle of Langensalza Part 4: Conclusion and Wrap-up

Recap

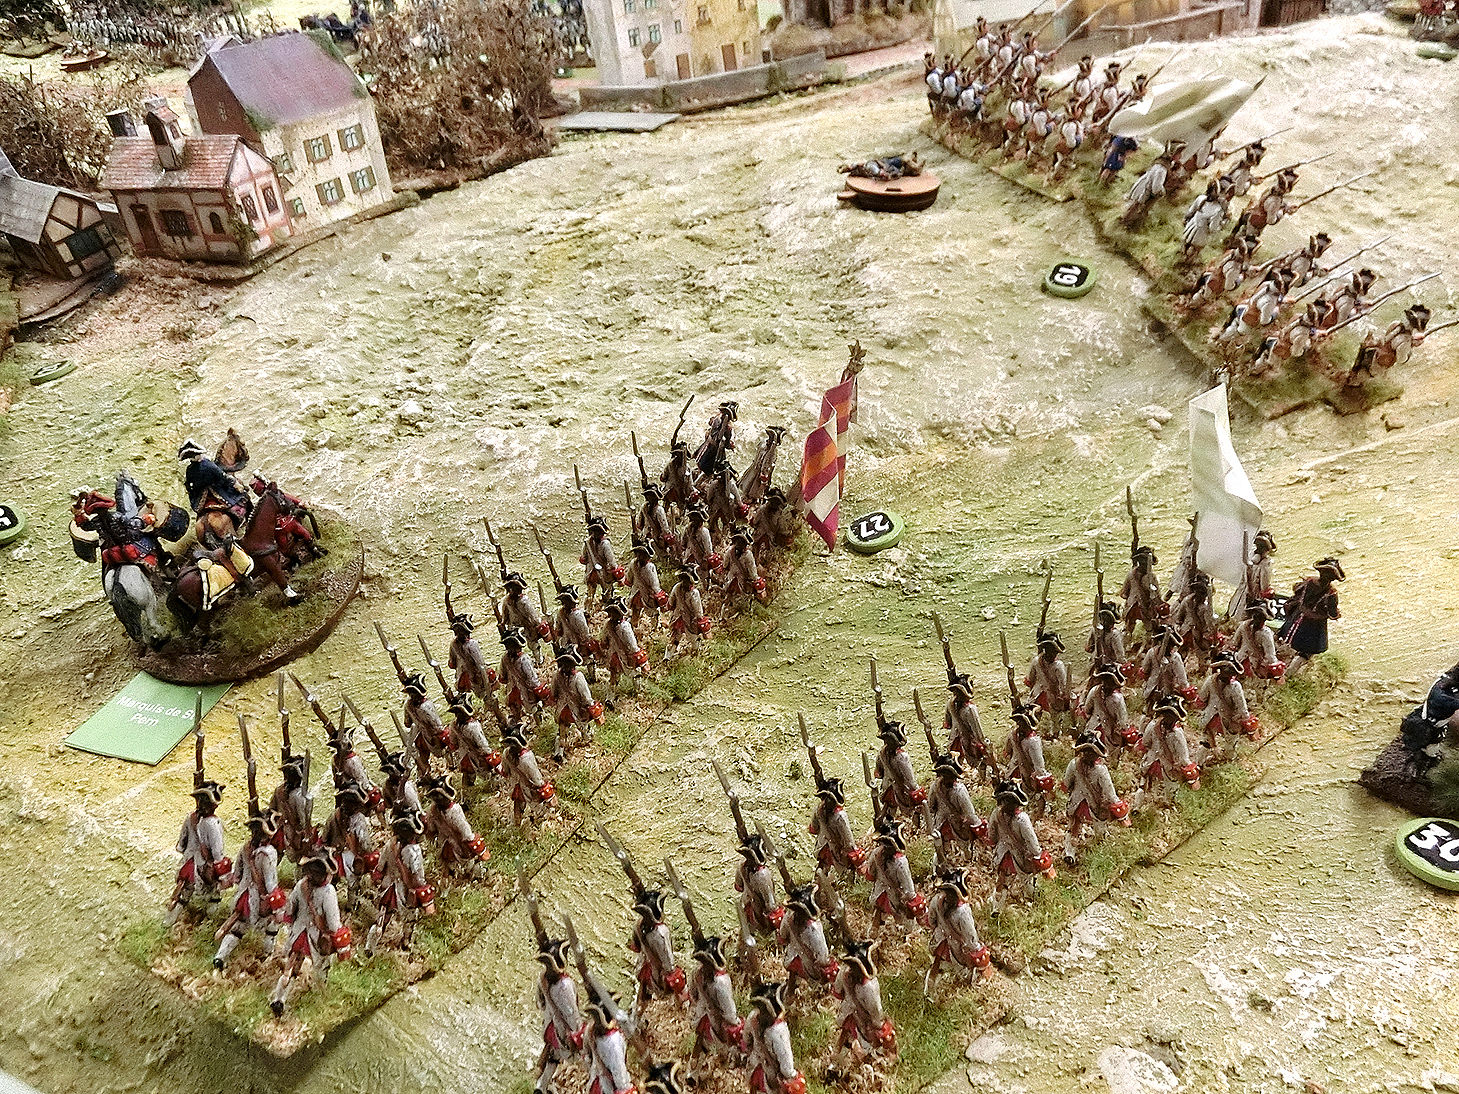
I rather naughtily last time left my readers hanging just before the last moves of our refight which took place in mid-August 2021. That was because after nearly a full day's play and 3 hours of game time (9 moves) the Saxons had held on without collapsing and were being reinforced by the arrival of the C-in-C, the Marquis de St Pern. He brought up a brigade of French Grenadiers and a brigade of line infantry so we needed a bit of time to dwell on the consequences, I thought my readers might like that too.

CG in rare "listening" mode
(Photo courtesy of Richard Newcombe)

Move 10-11 Summary (10.00 - 10.40 am)

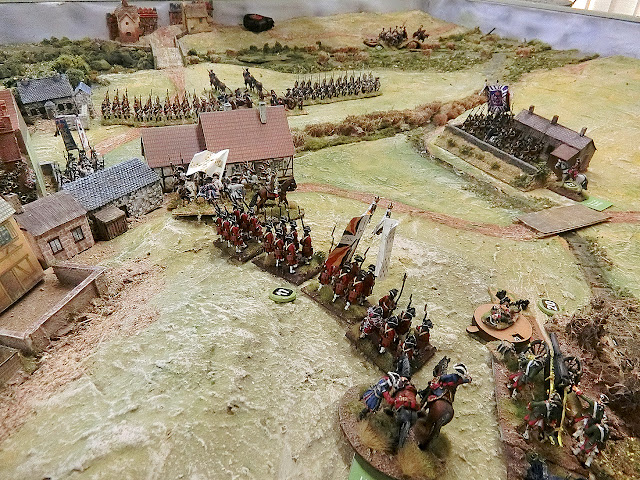
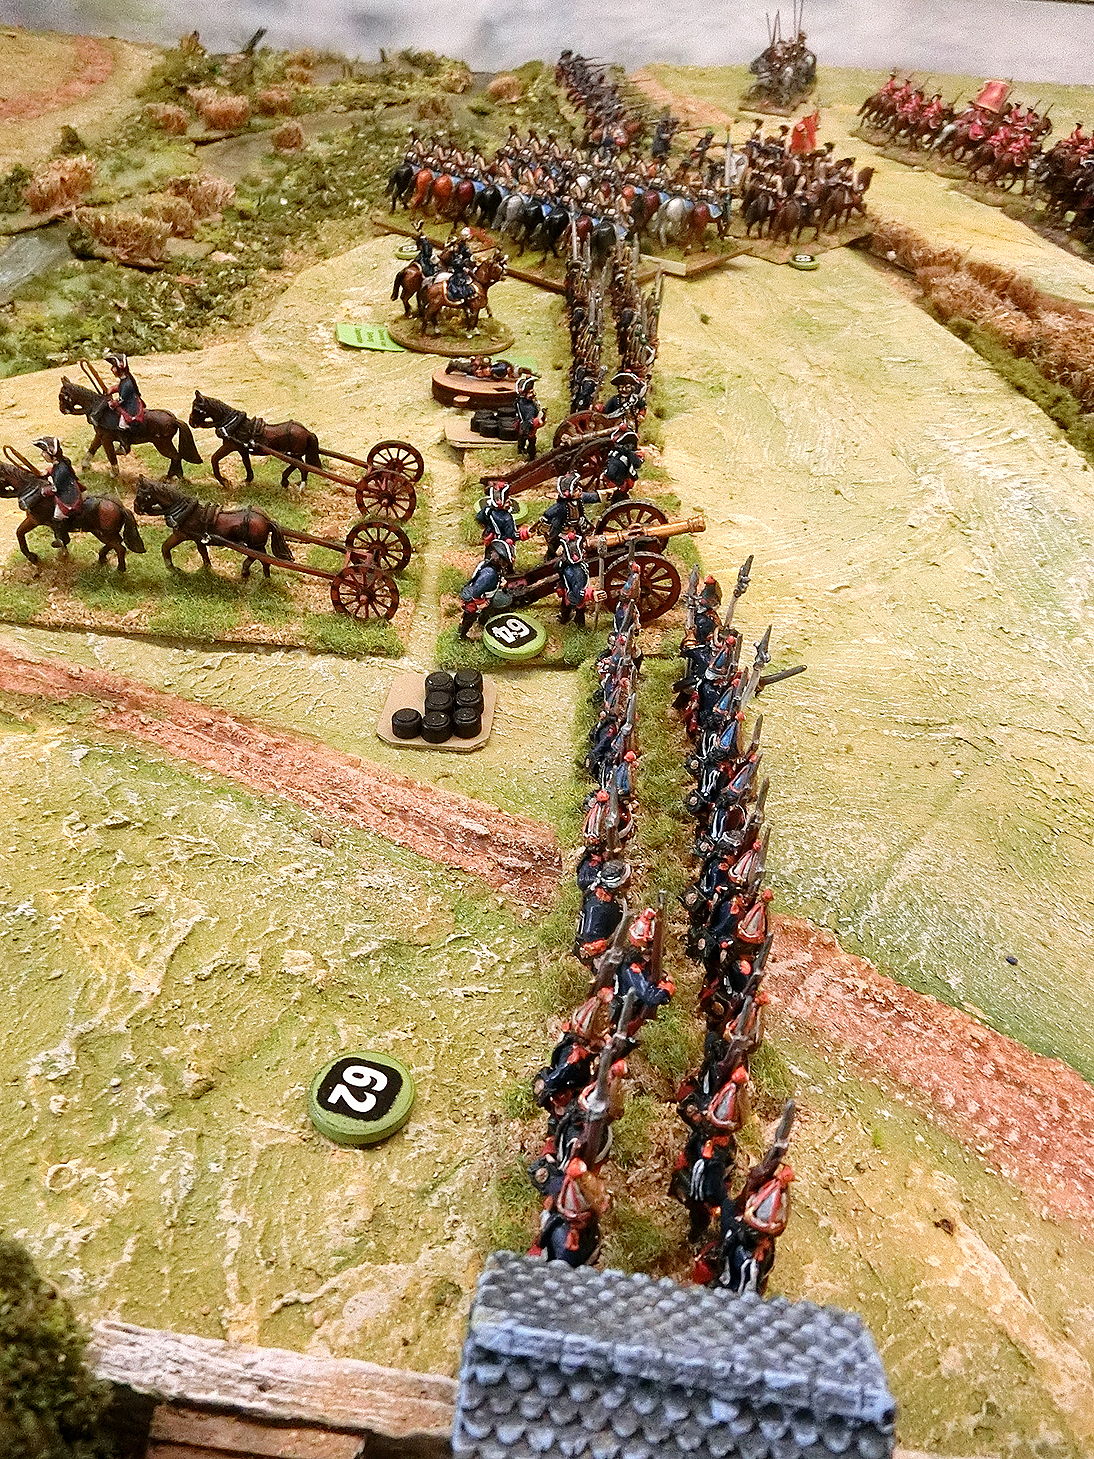
The first photo is a different, longshot, view of where I left the last post. In the distance the French reinforcing Grenadiers can be seen emerging from the wooded Ufhofen ravine. The left flank Saxons have formed a box-like defence from Langensalza town round to one of the line-of-communication routes back towards Eisenach but have been pushed back from the Sumbach stream.  General Wangenheim is down there looking as if he is forlornly trying  to summon another attack by the mass of Hanoverian cavalry, which has been initially repulsed and now is reforming to try again. Towards Langensalza  the Allied infantry is reforming on the high ground, but in the Allied right centre Colonel von Donop's Hessians are at last on the move, although they have to negotiate dense woods held by French skirmishers on their way across the Sumbach


The view below, over Langensalza, shows the Zieten Hussars by Rahsenmuhle farm then the Prussian Grenadiers still forming a solid line in much the same position as they had occupied for about an hour and a half. Cannon fire has repelled Saxons from the nearest buildings but de Stainville's men still make a resolute defence across the Judenberg high ground behind the town.  And beyond the peak St Pern's Picardie Regiment is marching to assist.   But the French right flank cavalry have completely collapsed and dispersed except for the Schomberg Volunteer cavalry..............


.............They had been forced to retreat with 4 Hits and the fast follow up by Prussian Cuirassiers is ensuring they don't have enough distance to rally and reform. In fact in Move 11 they were chased from the field.


Hessian Grenadiers form the front line on the right-centre high ground and Hanoverians the second line, but all have casualties from their previous efforts. The Hessian Musketeers appear at the extreme right.

By about 1030 some Allied cavalry reformed enough to make a tentative return across the Sumbach and
von Luckner's Jagers have come up from Schonstedt to join the attack.


(Above) In the Allied rear the Royal Nassau Hussars had caused considerable concern and disruption, and destroyed one Hanoverian battery, but at last Luckner had caught up with them, leading his Hussars in a frontal charge. The two small Hussar units effectively neutralised each other but at least that left the Allied infantry unhindered in their advance. At the extreme right the Volunteers of Austrasie skirmishers have emerged from the wood to fire into the flank of von Scheele's Hanoverian infantry.

Below Comte de Solms' Saxon brigade is still viable. The Saxon Guards and converged Grenadiers have proved too hard a nut to crack and have now fallen back after three separate Allied infantry attacks over the previous two hours. Undaunted, the Hessian Grenadiers have moved downhill to keep pressing them.


East of the Judenberg Picardie is beginning to form a battle a line to extend the French right flank and show those Cuirassiers they are open for business!

With the infantry of the Royal Legion still holding the Judenberg Hof and the rest of the Saxons firmly in Langensalza town there was little prospect of the Prussians being successful if they tried to attack here.


So there was something of a natural break all along the battle lines and the time had rolled around for our table booked for ale and victuals at the local 18th Century village hostelry. "The Butchers Arms" would prove a very welcome place to debate how things had gone so far and decide what we did next.......

In response to a special request, here are some "close-ups"; or rather me cropping some interesting detail from standard game photos! I hope they are acceptable.


Conclusion 

As you will have gathered from Parts One and Two of this mini-series we had put a lot of effort and planning into this refight so I was not leaving anything to chance. With the forces we had available I could imagine that we would not finish in the 11 Moves we had done and by the evening of the main play-day. So I had got agreement from C-in-Cs Guy and Paul to come the next day, 20th Aug, to continue and finish it off. We invited others to join us for whatever of the two days they wanted. So Martin and Richard could only make the first day and we had lined up Ken and Kevin to come the next day and see what was needed. So we were not committed to a fruitless day's gaming I had prepared a quick and dirty DIY scenario for Ken and Kevin to lead on the next day if needed (more on that later).

So  unconstrained by any artificial time-outs, the conversation over dinner ranged across the historical setting as well as the vagaries of initiative dice!!  The main points from the conversation were:
  • Only one Allied brigade was effectively unbloodied but that was led by a Dithering commander and most of the  others were only just reformed or reforming. Allied commanders knew they had done their best but it was not as good as they hoped given the apparent initial advantages.  Dice had evened out across the game so far except for poor Paul's Hessian Infantry brigade. Their failure to make progress was truly significant in giving the Saxons a stable infantry line at 10.00 am
  • The Saxons/French were very pleased with their achievements so far. The left flank and centre-left  had held on better than the tactical situation suggested it might. The town and high ground were still in their possession and though the right flank was vulnerable the reinforcements had arrived in the nick of time.  Most importantly in the centre the arrival of the Grenadiers meant the French could go on the offensive there.
  • Historically, Paul and Martin conceded that Allied Commander, von Sporcken, had not achieved anything like a decisive blow to the Saxons and to press on now would most likely result in the whole Corps not being a viable strategic unit at this outset to a new Spring campaign. To retreat with some honour intact seemed the most realistic outcome, perhaps holding the high ground and bridgeheads until the rest of the Allied Army manoeuvred a way forward for them.
  • Also from a historical perspective the French accepted a limited victory in that we had put some artificial "fighting spirit" into the French /Saxon army and that to save the Saxons from a disastrous and costly withdrawal was a significant achievement. To inflict a major defeat on the Allied attackers was never an expected outcome.
  • Most significantly Both Paul and Guy felt they had had plenty of satisfaction and a good return for their painting and organisational effort, as did I too.
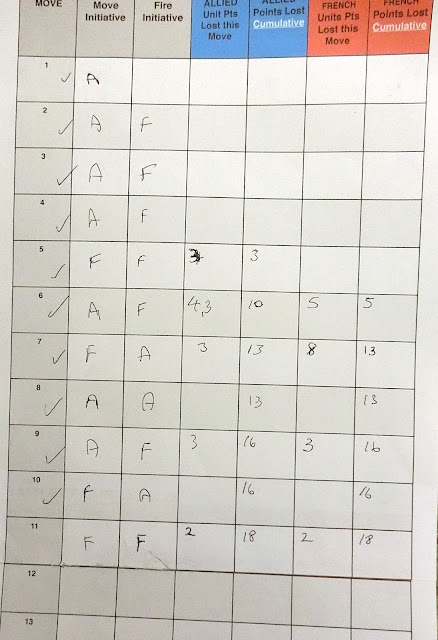
So we declared the game at an end with a French/Saxon victory and went back to look at the "scorecard" I had been keeping, just out of interest.
It records Army Points (in my system) lost only from units "Done For" and not losses among units still on the field. The Allies started with 100 Army Points and the French/Saxons with 84. The chart shows both sides had suffered 18 Army Points lost by the time we stopped. Testament to how closer it had been in purely attritional terms, and credit to the skill of all the players that the toll was not higher.


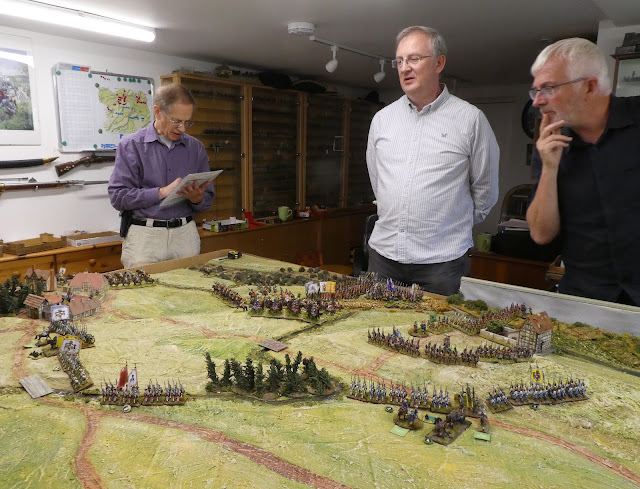
CG in "checking the rules" mode (with Paul B and Martin)

Wrap-up

This had proved to be yet another mini-project which we had managed to bring together by combining collections and ideas - Guy's, Paul B's and my own and I'm incredibly grateful to them for going along willingly under my direction and for the time and effort they put into packing and organising their armies and bringing them to Oakridge for our entertainment. But the greatest satisfaction for me was that it was the first Seven Years War battle I had analysed and researched (a bit) and devised the terrain, orbats and scenario for completely from scratch. It was uninfluenced by any other wargamer's take on the real thing, maybe because the real battle was so one sided it was not worth their attention. I hope I've shown that you can make a very acceptable "what if" version by looking at the wider strategic situation and the forces in close proximity to the battle area. As a reminder to anyone who wants more detail here is a link to my resources for the game Battle of Langensalza.

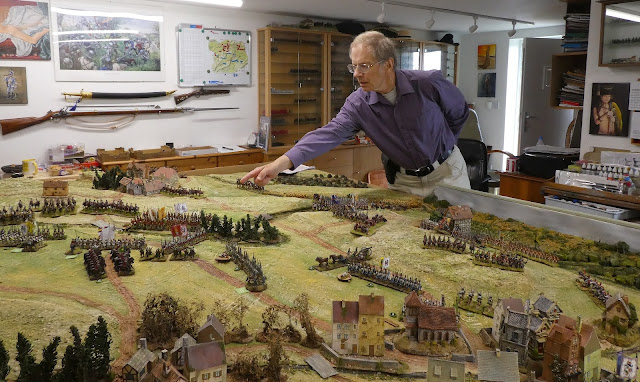
CG in "director mode"
 (photos courtesy of Richard Newcombe)

I did not notice till we were well into the game but our version bore  a remarkable tactical resemblance to Waterloo.  The Saxons are Wellesley's "infamous" army - an infantry-strong force of units of mixed ability containing some stalwarts and some ne'er do wells, but mostly average. They have to hold a fairly wide area  which has outlying strongpoints and high ground but not enough resources to  put up  a good show everywhere. The Prussians are represented by the French main force arriving when their opponents are stressed and weary and enabling the offensive to be taken.  The Allies are strong in cavalry and artillery; just like Napoleon's army they have a significant boggy area to cross which holds up the deployment of the guns for an hour or more. They have the tactical opportunity and space to outflank, but only if they are quick and resolute. A subordinate commander has access to a lot of good cavalry and if reckless he could lose them to the musket fire and bayonets of resolute infantry (happily Paul was sensible!). Both sides have a good corps of Grenadiers/Guards which are destined to meet in the centre of the field........

However, for us, the reinforcements merely brought the defenders to parity, not giving them an overwhelming superiority. 

I hope you have enjoyed reading about it and seeing the pictures as much as we did organising and playing.  Any thoughts, comments or questions very welcome and thanks for staying the course.

And those who worry about my custom sculpted terrain being a "one trick pony" I have had 7 more games on it since in various guises and in three different historical periods - more on them later.


Tuesday, 30 November 2021

Battle of Langensalza Part 3: The main event

 Life has been hectic but I must finish this one as I have kept my faithful readers hanging on long enough. Thank you all for the very supportive comments received on Parts One and Two.

I will launch straight into Move Three of the refight and we are now around 8am.

Above and below: The situation develops around Langensalza town. Martin begins to deploy the Prussians of General von Syburg's wing across the Merxleben bridge and marsh.......

......while Richard gets a double move to advance over the Judenberg and begin to occupy the BUA itself with the Comte de Stainville's Division

A closer view of von Syburg's left wing Cuirassiers and Freikorps infantry

In the centre Paul now deployed von Mansberg's brigade of Hessian Grenadiers to face the Saxon elite units. Von Bock's Hanoverians are hastening  up the hill to reinforce them  but will they be in time to bring enough strength to bear?

On the Allied right Lt General von Wangenheim presided over the two Hanoverian cavalry brigades and Luckner's small corps of light troops to build up a massive outflanking movement round Schonstedt village.....

....and all of a sudden Guy's sensible decision to gain ground towards that village with de Borck's Saxons looked vulnerable!

As befits a good 18th Century battle at this stage both sides were manoeuvring for position and not much blood had been spilled. The Saxons had few batteries, and all the Allied ones, previously out of effective range on the heights North of the River, were silent while being brought across the River Unstrut via both  bridges.

After most of the movement around 0820 I happened take these two photos. Martin and Guy across the table from each other both looking suitably thoughtful about the way things  are shaping up. We shall take a closer look ourselves.......

Guy has good cause to look worried. Von Borck has ordered the small Royal Nassau Hussars unit to hold Schonstedt dismounted while he retreats his infantry back downhill and over the stream to try to hold it against the masses of Hanoverian Cavalry heading his way. In the foreground von Reden's brigade and beyond Schonstedt is von Hodenberg's.

In the vicinity of Das Pumphaus, even with his General's help von Bock only manages a standard move to begin forming line on the hill crest. Beyond the Kielmannsegg Infantry the Hessian Grenadiers are braving the close range fire of Saxon Grenadiers and Guards with a frontal assault.

Back across the Orlbach and Sumbach streams Lt General von Kielmannsegg can be seen trying to urge the "Dithering" Colonel von Donop to bring up his Hessian infantry brigade (a great shot of some of Paul B's Minden Miniatures Prussians, pretending today to be Hessian)

Over on the extreme Allied left an audacious display of parade ground confidence was taking place. Martin has pulled back his small unit of Zieten Hussars to make room for the line troops and artillery to form up. Eschewing the "cover" which might be afforded by the butch looking Cuirassiers von Syburg has ordered his Grenadiers to march across the enemy front in column. Using the relative safety of the marsh to their right they suffered minimal casualties from the Saxon light artillery battery near the Judenberg Hof.

Around 0830 potentially decisive developments began to happen to give the Saxons courage that they might hold on until the hoped-for reinforcements arrived.

Von Mansberg's three small Hessian Grenadier battalions had suffered badly at the hands of the Saxon Foot Guards and converged Grenadiers (with close artillery support too) and their retreat spread out the brigade over the hill to avoid Von Bock's Hanoverians

This useful aerial shot shows that in the centre the Hessian Grenadiers had in fact inflicted enough to push back their adversaries a little. This made Guy's whole battle line look more organised than he probably felt as Paul began to surge Hanoverian Cavalry round to the extreme end of Guy's flank. But there was no Saxon second line to fall back on.

Luckner's Hussars dismounted to join their Jager comrades trying to prise the Royal Nassau Hussars out of Schonstedt

Both Hanoverian Cavalry brigades formed line, probably hoping to intimidate the Saxon infantry rather than attack head on over the stream 

View from the Saxon side of the Sumbach. These are only "small" units for our game as the Grenadier companies had been converged in the centre of the field. Paul's cavalry were mostly standard size.
Now the action began to hot up on the Allied left flank. Martin and Richard's cavalry had come close, facing each other across the Riedsgraben stream...it was only a matter of time. A mutual charge by the Leibregiment zu Pferde against the French Royal Legion Dragoons was a close encounter but decided by the dice.........

Above: Cavalry engagement on the left; in the foreground Zieten Hussars are ducking back round Rasenmuhle farm.
Below: the opposite view, from the Judenberg, shows Comte de Stainville's infantry taking firm possession of Langensalza town.

Above: ............this photo lures you into thinking the French have won outright as the Leibregiment is fleeing back into the marshes.......

.....but it was not all one-sided as the Royal Legion cavalry were forced to withdraw by their by 4 Hits 

As the time ticked on towards 0900 the battle began to hot up on all fronts.

Now here was a surprise. Guy got a double move with the Nassau Hussars, saddled up, rode round his immediate aggressors and headed off to create mayhem in the Allied rear! Note all those columns of Hanoverian and Hessian infantry reserves and beyond them their artillery have arrived down from the off-field heights.  Luckner's troops thumb their noses at the Hussars and nip round Schonstedt village to join the flank attack. In the distance battle is joined once again on the central hill.

At this point von Hodenberg led his cavalry brigade in a charge across the Sumbach and chose to focus on the Saxon light field battery on the other side of the bridge as the weakest link in de Borck's line. But what is that? A second line now behind the Saxon infantry.......That is Colonel Carlsbourg and the Champagne Infantry Regiment just arriving in the nick of time at the right place!

The battery was easily seen off but the cavalry had suffered casualties going in, not least poor "Dashing" Hodenburg was made hors de combat and replaced by a "Dependable" substitute. Not surprisingly their charge took the Veltheim regiment into the flank of the Prinz Maximilian  Infantry..........

.......and routed them along the line of least resistance - back towards Langensalza. But Veltheim suffered too many casualties in that attack and withdrew to reform. The hoped-for hole in the Saxon line was not to be filled by Hanoverians yet.

In the centre von Bock's Hanoverian infantry had moved forward to engage the Saxon line close up but as can be seen the Kielmannsegg infantry has been broken on the musket fire and bayonets of the converged Grenadier unit.

Above and below: Over in Langensalza town the Saxons have a firm grip in the BUA but that is no surprise to Martin whose main tactic is to draw what he can off to the flank to be defeated in the open. To that end his artillery have now arrived and the Grenadier battle line is accommodating the batteries. 
The Saxons and French do have superiority in infantry numbers though and these Swiss are superior quality too.   On the extreme right there is more close action........

A brave attempt to stand firm along the stream but the inferior, and small, Von Wunsch Frei infantry do not stand much chance against the large regiment of elite Du Roy Dragoons.....

Not surprisingly the Freikorps line troops are broken. But Martin still has plenty of heavy cavalry in hand

The Royal Legion Dragoons watch the ongoing action while they attempt to reform back on the escarpment

Around this point in the battle the Allied commanders look contented enough.

The Allied attack in the centre was not to let up as long as the constant supply of troops was there. This looks horrific with Hanoverians taking canister on their flank quarter and Saxon Guard fire from the front....

......but in fact the Guards were now weak and Hanoverian fire was enough to push them back. At least at the moment the Allies were now in charge of the central high ground; the Hessian Grenadiers had reformed and were returning, a battery of artillery has come up.....if only Lt Genereal Kielmannsegg could encourage the Dithering Colonel von Donop to roll something higher than 1 for Initiative they could steam roller through

On the French right flank one could not blame Richard for wanting to press the attack of the Du Roy Dragoons across the Riedsgraben even though they had some losses. The small unit of Seydlitz Cuirassiers counter attacked but had more supporting units to help even though the Royal Legion Dragoons had reformed and got a double move to canter down to join in.

Much to everyone's surprise they won and ended up routing the Du Roy Dragoons.
Sorry they are in the distance but I'm always a sucker for
a lovely photograph of a line of Prussian Grenadiers!

In the follow-up charge the Seydlitz Cuirassiers hit the weakened Du Roy Dragoons and routed them too!
Martin's fairly cautious, but well orchestrated, plan appeared to be paying off

Back on the other flank Paul was keen to press on with his cavalry. Von Hodenberg's went in but von Reden could not seem to get initiative this Move for his brigade

Carlsbourg had managed to move first and plug the gap with his French infantry to bar the Grothaus cavalry

And it did not go well for the cavalry who routed back towards the reforming Veltheim regiment

Slight developments show in this overhead shot about 0920-0930 game time. At the Sumbach stream the Hessian Leib Dragoons have retreated rather than remain isolated to face French musket fire. Opposite them, behind Carlsbourg, the French have more reinforcements in the shape of the La Ferronaye Dragoons. In the foreground Luckner's Hussars have mounted up to face a potential threat from the Royal Nassau Hussars, now in the Hanoverian rear. His Jagers have control of Schonstedt village. On the central hill the Saxons are once again contesting the territory. 

History was well and truly on its head now we are giving the Saxon/French the will to fight! By this time in the real battle the Saxon Guards were fighting for their lives in the steep wooded gorge just South of Ufhofen village, barely still on our table.

Paul's making a bit of progress now and it's always a good sign when the attacker moves round to the other side of the table to shift his troops! At this point the worried look on Guy's face is well founded as his neat line is temporarily disrupted. In the nicest possible way we take our 18th Century wargaming seriously in the Cotswolds!

Above and below: On the high ground North-west of Langensalza a plucky small Saxon regiment has counter-attacked out of the town to try to relieve the pressure on his elite comrades. Hanoverian Dreves infantry and some Hessian Grenadiers are trying to present a coherent attacking front all along. They have close artillery help now.

But Kielmansegg still cannot get Donop's Hessians to move up in support

Above and below: It all ends in tears for both sides really. The Dreves regiment is pushed back, as is one battalion of Hessian Grenadiers. The Saxon Prinz Friedrich August infantry are sent reeling back towards the town and the weary Saxon Converged Grenadiers have also had enough for now.

The Zieten Hussars are looking pretty cool, but fairly ineffectual at the moment, though they do serve as a nice foreground to show that nothing very significant is happening on the Allied left this turn.

A long shot puts it all in context about 0940: Sadly without the help of von Donop's solid bunch of infantry battalions  in the centre Paul's attack is looking a bit meagre. He has created a nice solid-looking line on his right but the Sumbach stream will give Guy space and time to re-consolidate his line with the reserve elements recently arrived. Hessians command the central high ground now, but only just. On the Allied left Martin is faced with some hard decisions about how to make an impact with his small but superior quality force against a lot of enemy with a town and hill to defend.

After biding their time the Royal Nassau Hussars found a target. I had allowed a special order for this game so that the Allied artillery, restricted to crossing the river only by bridges, could follow on and seek out their brigades which had gone on ahead across the marshes. At this stage of the game some of the batteries in transit were vulnerable. The Hussars found a Hanoverian Medium field battery and sent the gunners off in a hurry........

.....then they pressed on towards von Donop's infantry (which had now managed to move forward at last!) but fell short due to the steep slopes and the stream. By now the Luckner Hussars had saddled up and were preparing to deal with the French threat to the Allied rear area.

Paul had turned his rear battalion to face the threat and Guy, fearing that Royal Nassau would become a horsemeat sandwich, pulled them out of the way and faced Luckner.

While that had been going on Paul had some luck at last with von Reden's cavalry brigade on his extreme right with a double move. The Alt Bremer cavalry pressed across the stream to pin one of the Champagne battalions, while the large Reden Dragoons were able to manoeuvre to take them in the flank. The Champagne troops wee broken and Guy's line was forced to contract. Alt Bremer suffered badly too though.

On the Allied left flank only one French unit remained - the small but good quality Schomberg Volunteer cavalry which had been peppered a bit by long range fire from the Angeleli Frei infantry. The Seydlitz Cuirassiers attacked them and forced a retreat but were also themselves weakened to retreat status. That did not matter as Martin still had the Prussian Leib Carabiniers in good strength nearby to follow up.

This wider angle shows that the Royal Legion infantry holding the Judenberg Hof farm had become the viable end of the French/Saxon line. The Saxon infantry next to them had received a battering from the Prussian guns and retreated up the Judenberg so the situation was opening out considerably now. The Prussian Grenadier line was intact and the guns still had a fair bit of ammunition

The Comte de Solms was doing a good job of retaining a defensive line as in the centre both sides seemed content to pull back and consolidate after 2.5 hours of continuous combat. The following picture pans back to reveal why this contracted Saxon formation actually looked quite promising.

At the top of the picture Guy had worked the light Volontaires d'Austrasie into the small woods and used it as a hinge at the right angle separating de Solms' troops from those of de Borck and Carlsbourg. This created a large area which could be filled by his major reinforcements - it was 10.00 am and the Marquis de St Pern had arrived with his Division. That consisted of a large amount of Grenadiers de France and Grenadiers Royaux and the large Picardie Infantry Regiment (seen below reinforcing the Judenberg flank)


So we had reached a major point in the game with the long awaited arrival of the powerful reinforcing body and the French Commander-in-Chief.  It seems like a good place to wrap up this "Main Event" part of the report and next time I will give the concluding moves and wrap up the whole project.