Background
Dedicated readers will recall that JP, a Cotswold "neighbour" of wargaming YouTube fame, has been working with me and Kevin East to stage another Waterloo version (see our 1:3 refights in 2015 here). I set the scene briefly back in March Games for 2022. JP started off with the basic General d'Armee scenario for D'Erlon's Assault and we decided to expand it from there to allow for the full scope of my 12 feet x 6 feet customised battlefield . This can give a good part of the centre of the Waterloo field from just West of La Haye Sainte (LHS) to just East of Papelotte and La Haye at roughly 1:20 scale. JP has gone for nearer 1:15 overall in figure numbers and balanced out bases for battalion and regimental sizes. As I write the guys are setting out ready ad we seem to be getting away with it.
This blog sets out how I made the terrain. As usual the basic system is much the same as earlier tabletops but there are always variations to adapt to the scale of game and figures so I hope you will find it of interest.
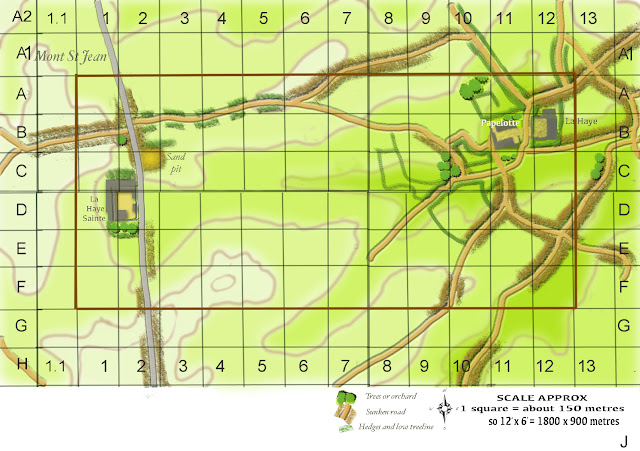 |
| This is the Photoshopped map I devised from contours in Adkin's "Waterloo Companion" which also allows for a bit off of-table manouevring. It was used to model the battlefield and for all the planning. |
 |
| Just to whet your appetites here are JP and Kevin setting up the "on table" French. Allies to follow later |
Terrain basics
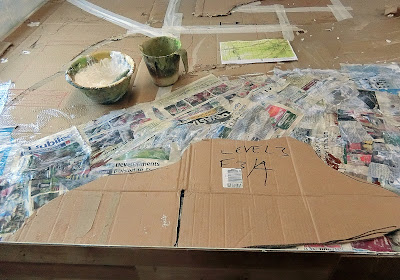
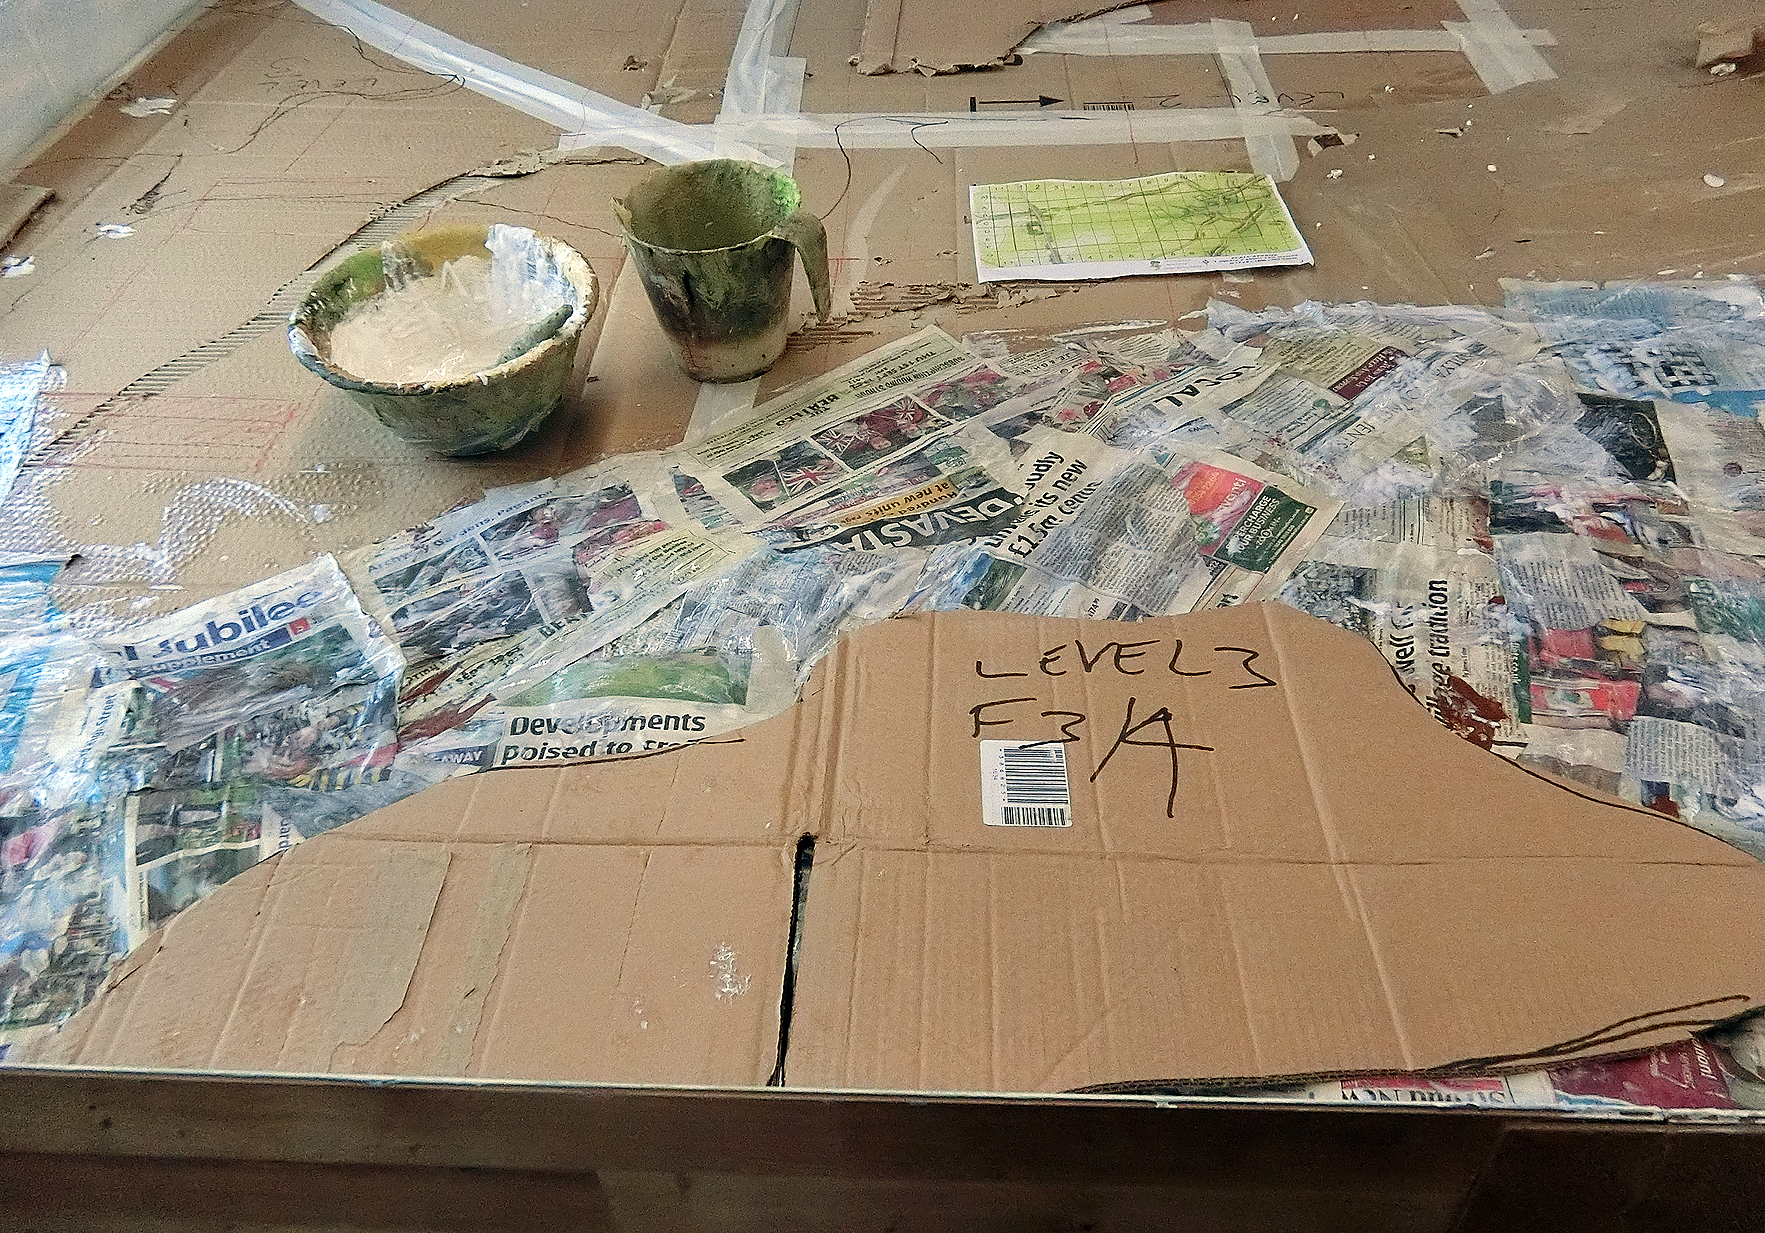
I dismantled the old table top which was for the Battle of Madling in April and recovered most of it for reuse. As I contemplated the large swathes of rolling crop fields for Waterloo I realised it would be easier to make the contours from scratch and add on the textures from my earlier Waterloos and Quatre Bras refights. So I kept the flat 8 x 6 basic cardboard base and had to extend it to 12 x 6 with more 18mm MDF boards, and then cover the whole lot with big cardboard sheets (I retain, flattened, any big packing boxes that come to the house) to make a "canvas" for the contour building.
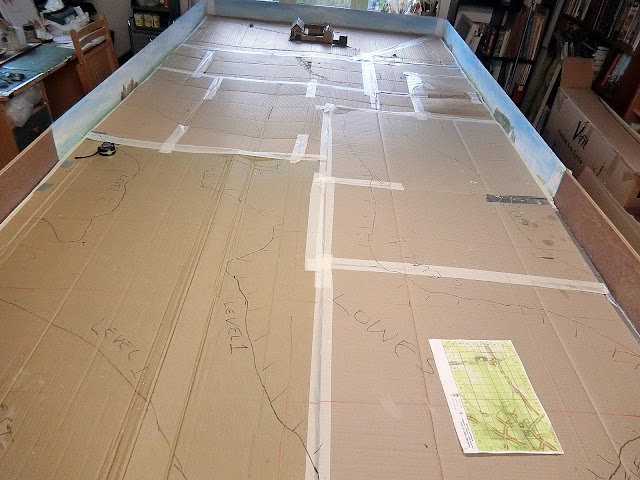 |
| Setting up the background boards (a pack of cheap laminated floor panels from B and Q) at this stage helped me have a firm base to build up to. I'd roughed out a scratch-built LHS (more on that later) to help keep my eye in on the map scale and locations . You can see I've sketched in the basic contour levels on the cardboard |
 |
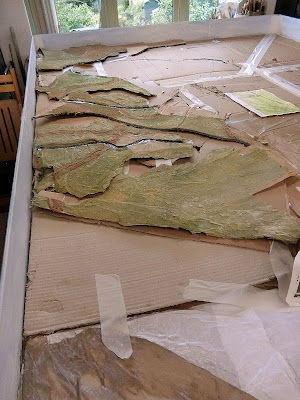
The contour sketches were used to make templates for higher ground
and more cardboard and polystyrene to build up as necessary |
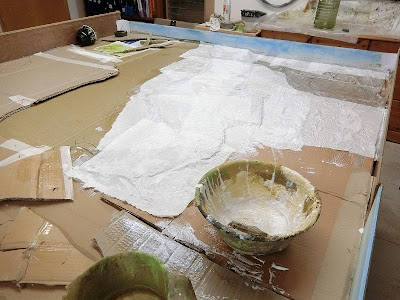 |
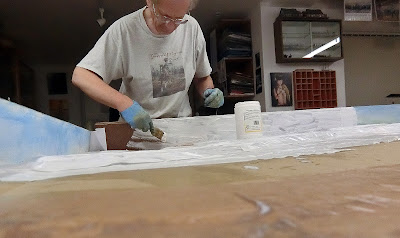
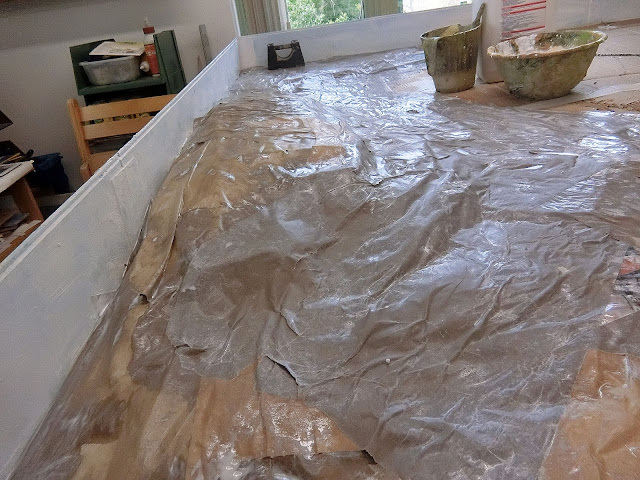
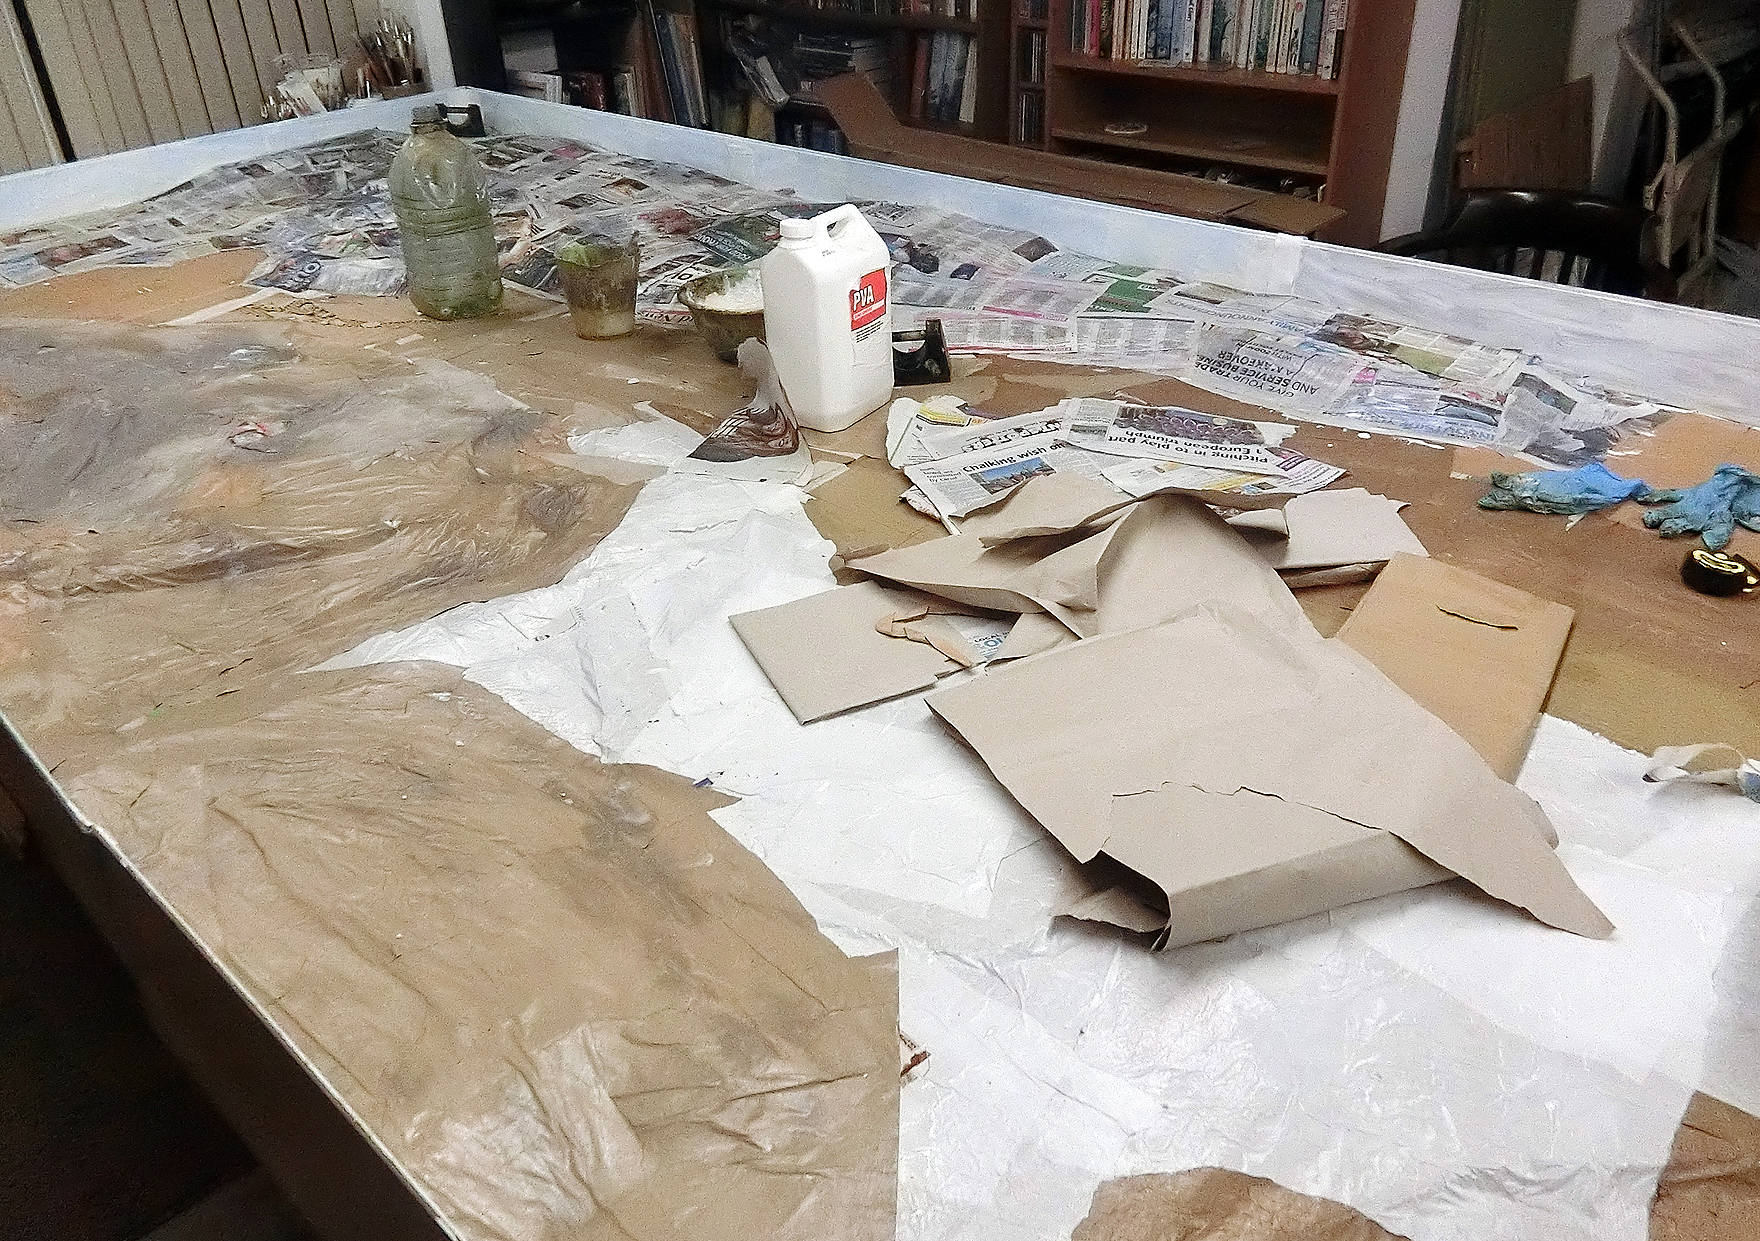
Paper sheets were covered in thinned PVA glue to build up
layers as papier mâché (pm) |
 |
At this point I thought it made sense to paint
the backboards a rough white primer of acrylic gesso |
 |
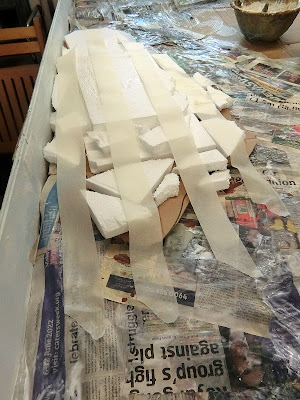
Wide masking tape secures the polystyrene or other pieces
long enough to cover with paper and PVA |
 |
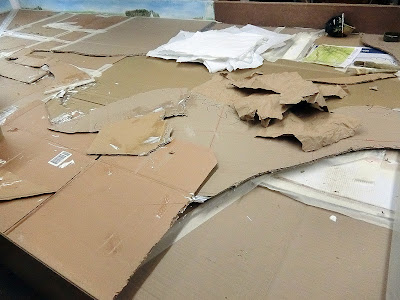
I reused a lot of textured card and poly pieces from
earlier battlefields.Very little is sent to the tip
from one game to the next but I have a very full garage! |
 |
| CG at work in full flow with dilute PVA and paper pieces |
 |
A cardboard template provides the basis to build a higher contour
layer....... |
 |
| .....by piling on waste polystyrene pieces (I never buy any) |
 |
| ....then finishing with papier mâché to blend it all in |
 |
| I did that over the entire surface |
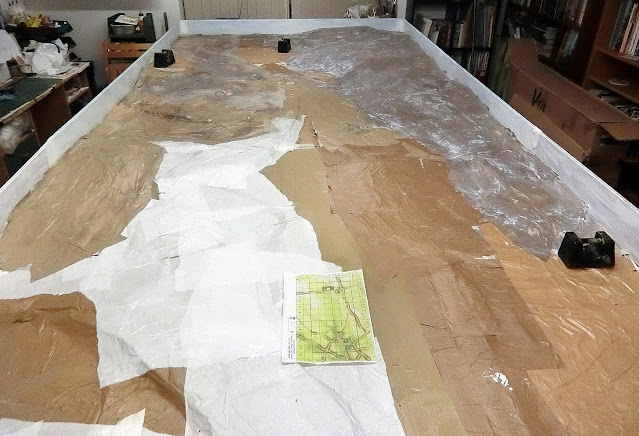 |
| Eventually ending up with a fully contoured battlefield which was left for a day or two to dry thoroughly as a hard shell. As usual I used old metal weights to minimise the chance of warping on drying out |
Roads
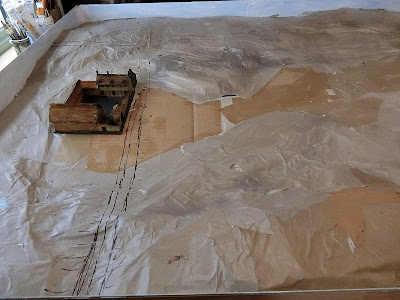 |
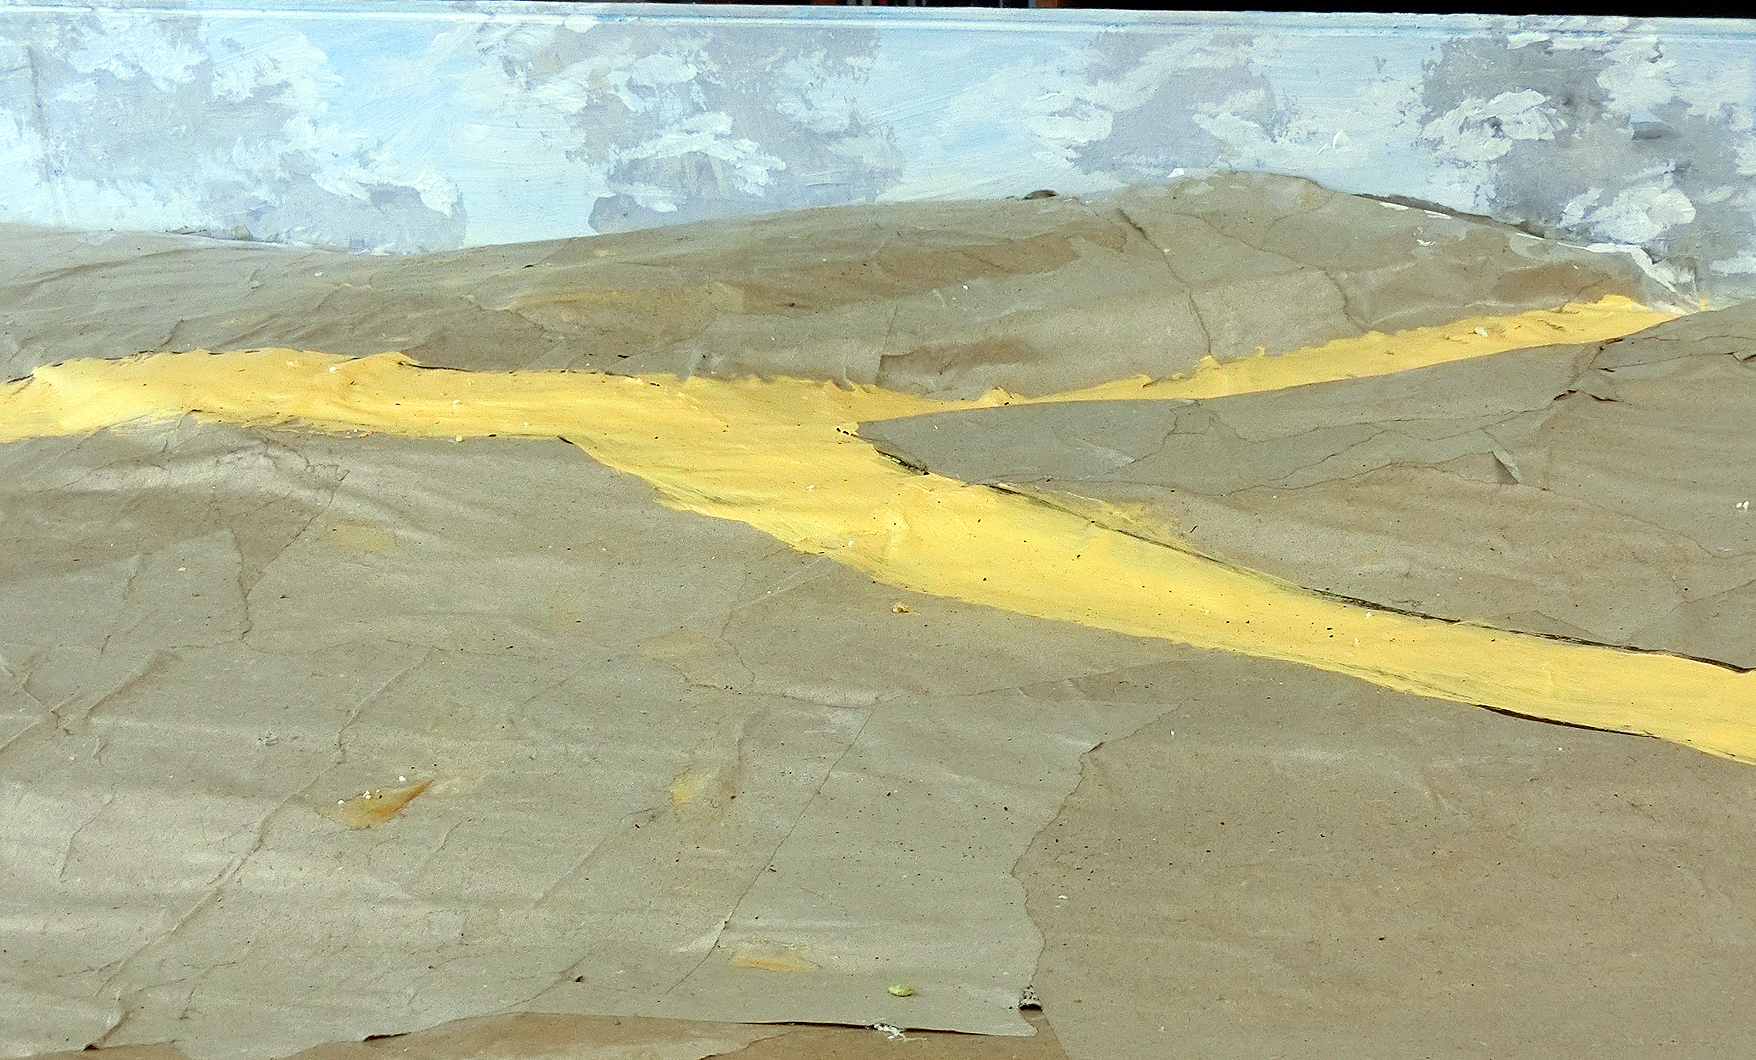
On this hard shell I could draw in the road areas from the
map reference |
 |
| Then painted it in roughly with acrylic to help keep me focused |
 |
I identified with hatch marks the areas that needed special
attention for sunken bits. The depth of cardboard allowed me to
cut them out as necessary...... |
 |
| ....then fill in with pm to fill gaps and smooth out edges |
 |
The main chaussee from Charleroi to Brussels was cobbled.
I restored the same road pieces recovered from Waterloo 2015 |
 |
| Roads now sunken, I repainted for continuity but I would texture them at a later stage |
 |
At this point I took the opportunity to paint all the back boards as an
amorphous swirling mass of smoke and low lying
mist sodden clouds as on 18th June 1815 |
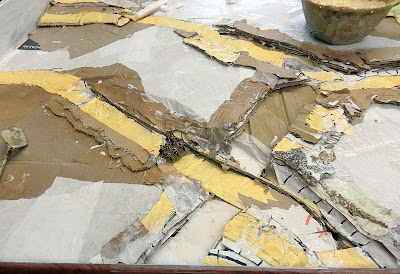
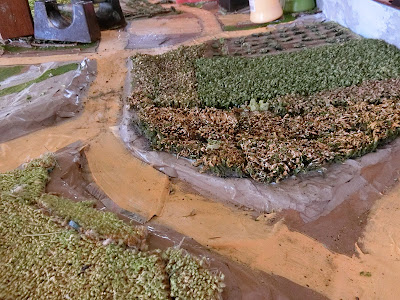
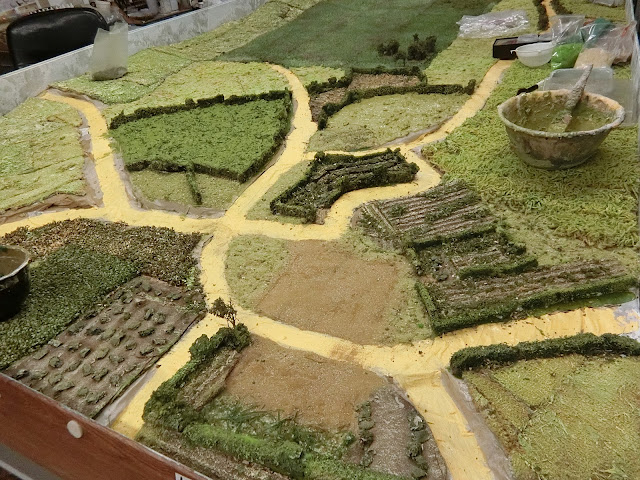
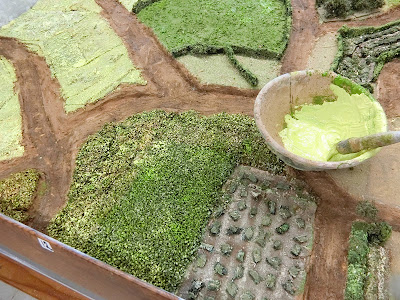
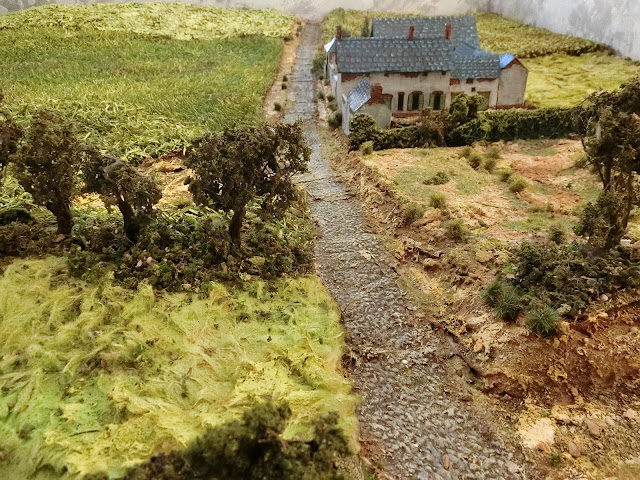
Texturing fields and roadsThis was the most labour intensive part of the whole process but I think the results justified it. Mostly I reused the 2015-2017 Waterloo and Quatre Bras field textures and repainted when necessary. It was like putting together a jigsaw; in some places I left the joins and in others filled them with paint or mixture (see later). I used some commercially bought imitation grass strips (about £3-4 each from "Home Bargains" discount home store gardening section) which needed a lot of painting. The effect of waving ripening crops is good, and soft enough to put figure bases on. For smaller areas I mixed my good old fashioned "gloop" . This is varying proportions of sand, sawdust, plaster filler powder, PVA glue, acrylic or emulsion paint and water, applied mostly with old brushes or occasionally a small trowel.
Probably I can let all my pictures do the talking
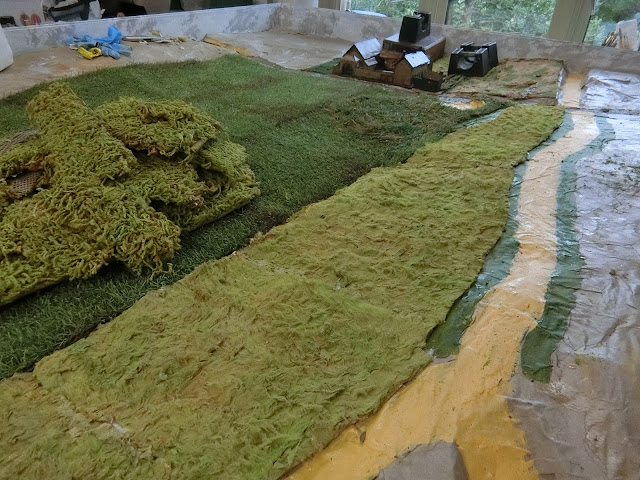 |
| The dark piece is the commercial grass. I wanted a big uniform area for the main scene of the historical D'Erlon's attack. I had already painted it a bit before laying, but it would need a lot more painting to look good for this purpose. That old shag-pile rug emerged again in pieces....... |
 |
| .....but was reunited |
 |
| Some may remember this teddy bear fur from 2015 |
 |
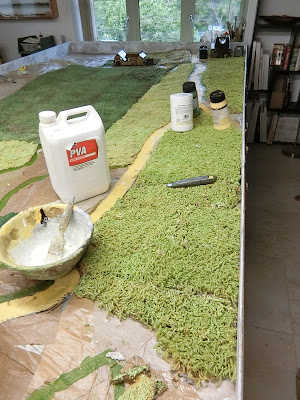
| Paint pots, PVA container and weights used to help secure some of the "jig-saw" pieces while the glue dried |
 |
| These bits started life as plastic astroturf mats |
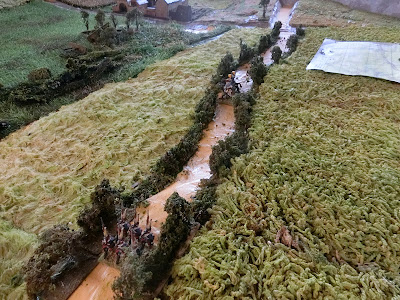 |
I put hedges in place and ensured the roads would be wide enough
to march JPs figure bases down, although I used some
of my 18th century infantry and cavalry as testers |
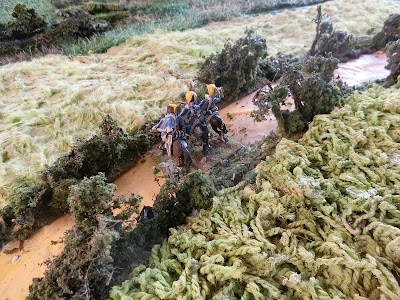 |
Wellington ordered gaps to be made in hedges.
Mine are wide enough for a 3-figure base |
 |
| More astroturf |
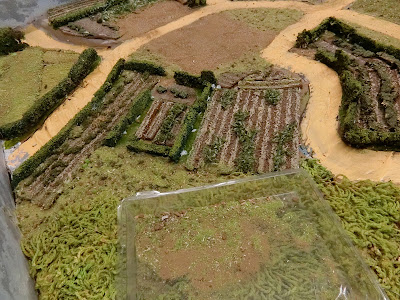 |
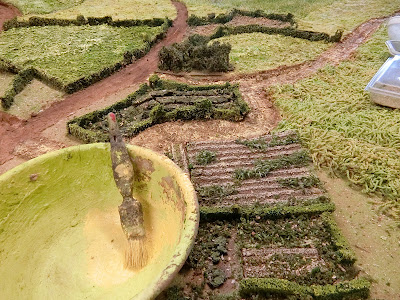
| and now I'm reusing the original 2015 vegetable plots from Hougoumont |
 |
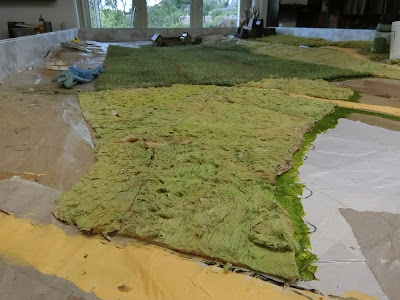
Above and below: nice green gloop was used for the fields I did
not have suitable old pieces for |
 |
| sawdust and sand mix for the Papelotte and La Haye building footprints |
 |
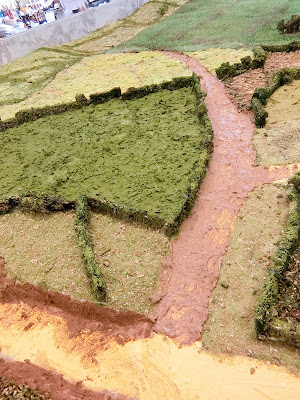
Some of the joins needed green gloop to blend them in;
they will be dry brushed later |
 |
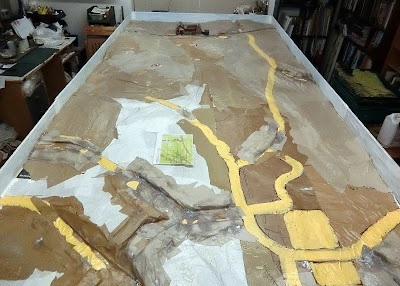
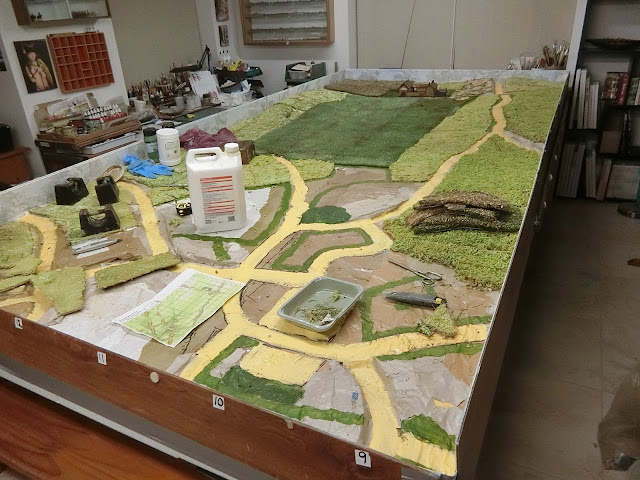
| Finished the texture except for dry brushing and the roads |
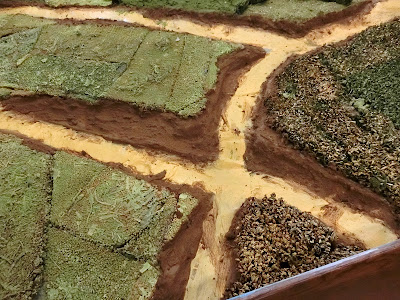 |
| A darker earth colour gloop for the sunken road banks |
 |
| then a medium brown for the base of the roads |
 |
When fully dry all the glooped surfaces were skimmed with my
surformtool to get rid of obvious nibs and highpoints..... |
 |
| ......which left lots of dusty rubble to collect up |
 |
| Above and below: all drying off nicely for dry brushing |
 |
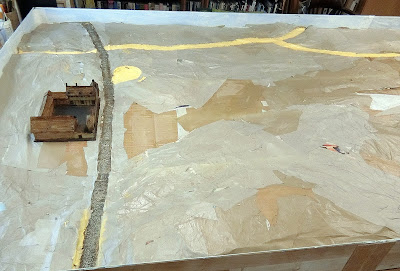
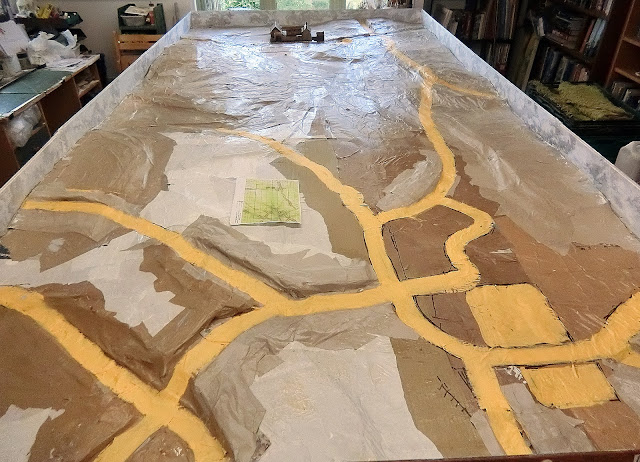
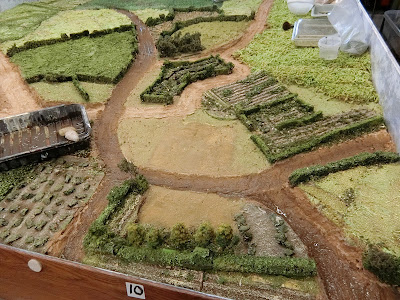
I used various shades of lighter greens all over until
I was satisfied the whole "painting" had a unified look |
 |
| The roads were dry brushed with shades of lighter browns to cream |
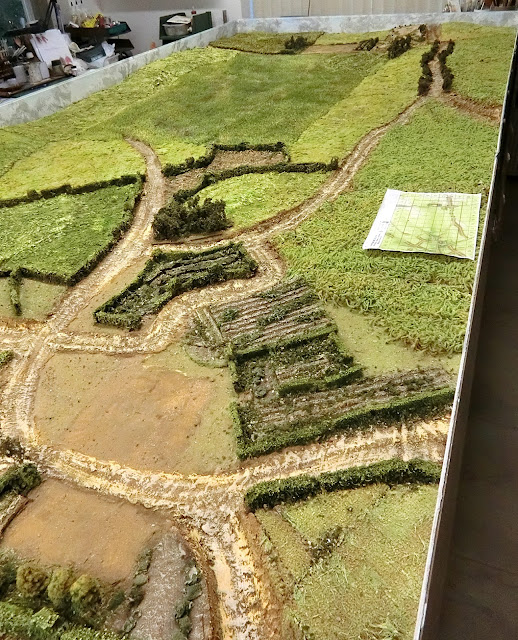 |
| Pretty well content with this now |
 |
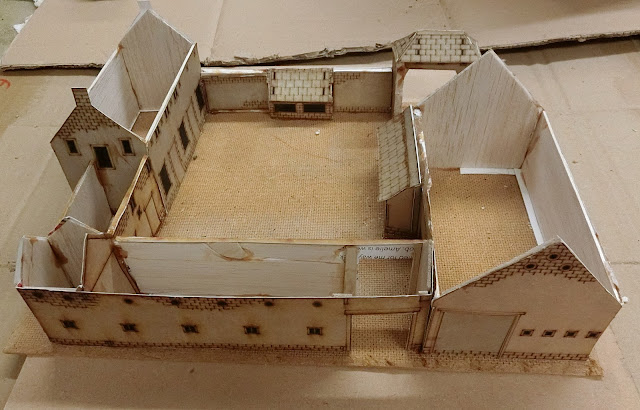
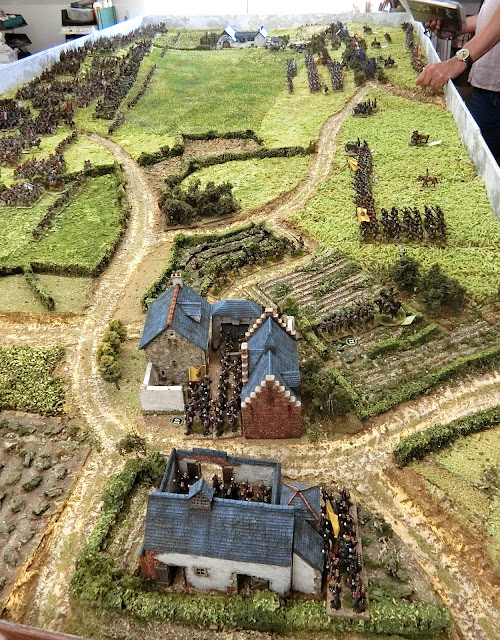
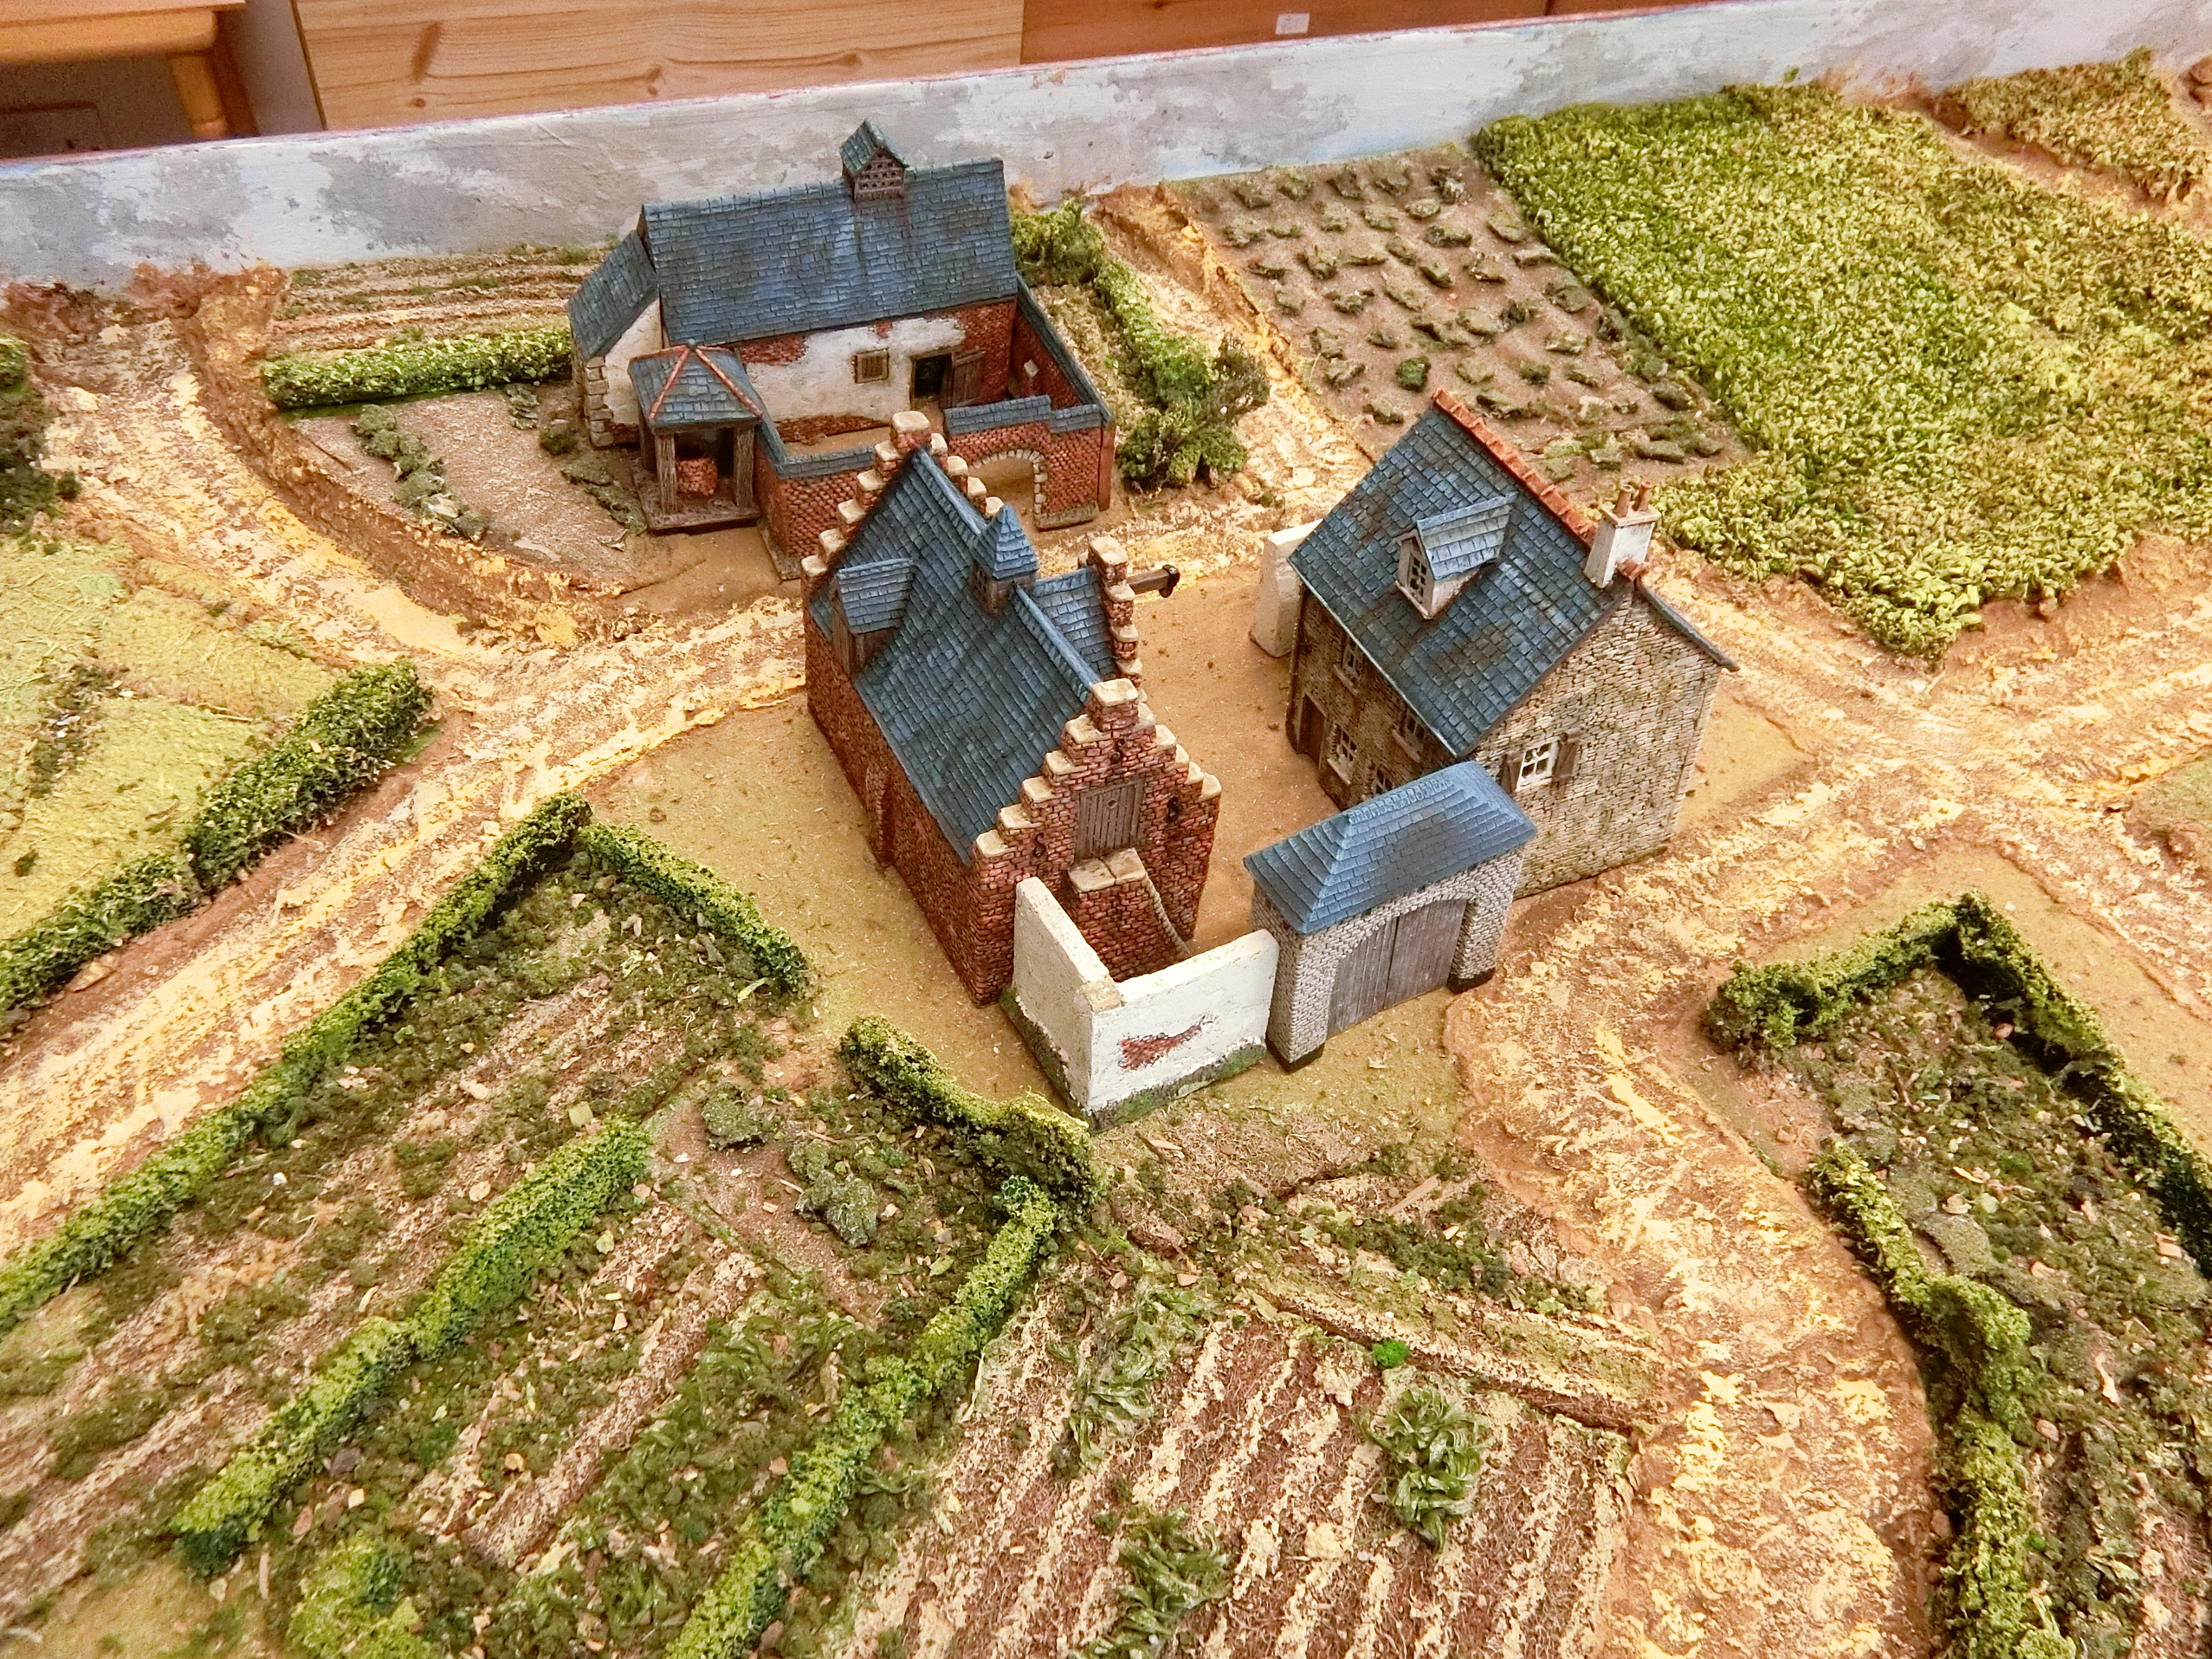
Above and below: Kevin brought his box of lovely 25mm Hovels
and other buildings for me to play around with to create
a semblance of these two farms on the required footprint size |
 |
They will be blended into the terrain later with trees ,
bushes and more sawdust |
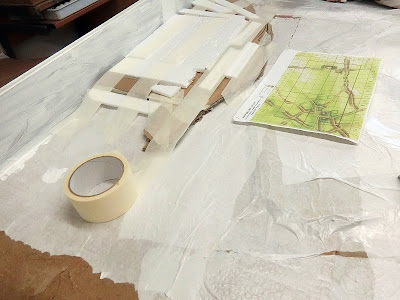
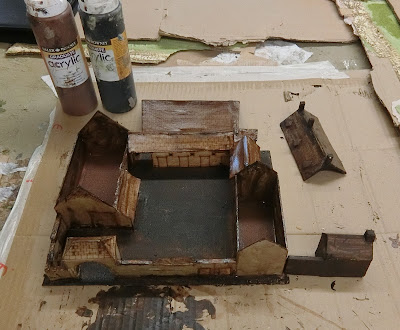
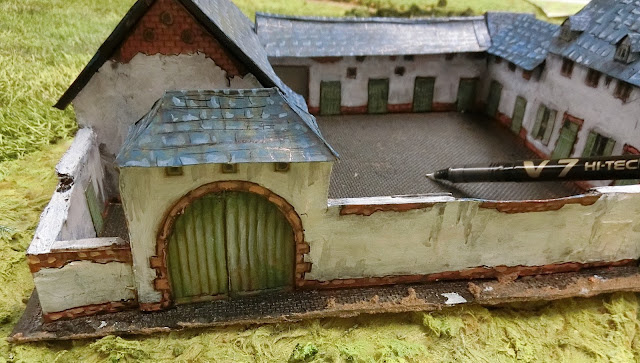
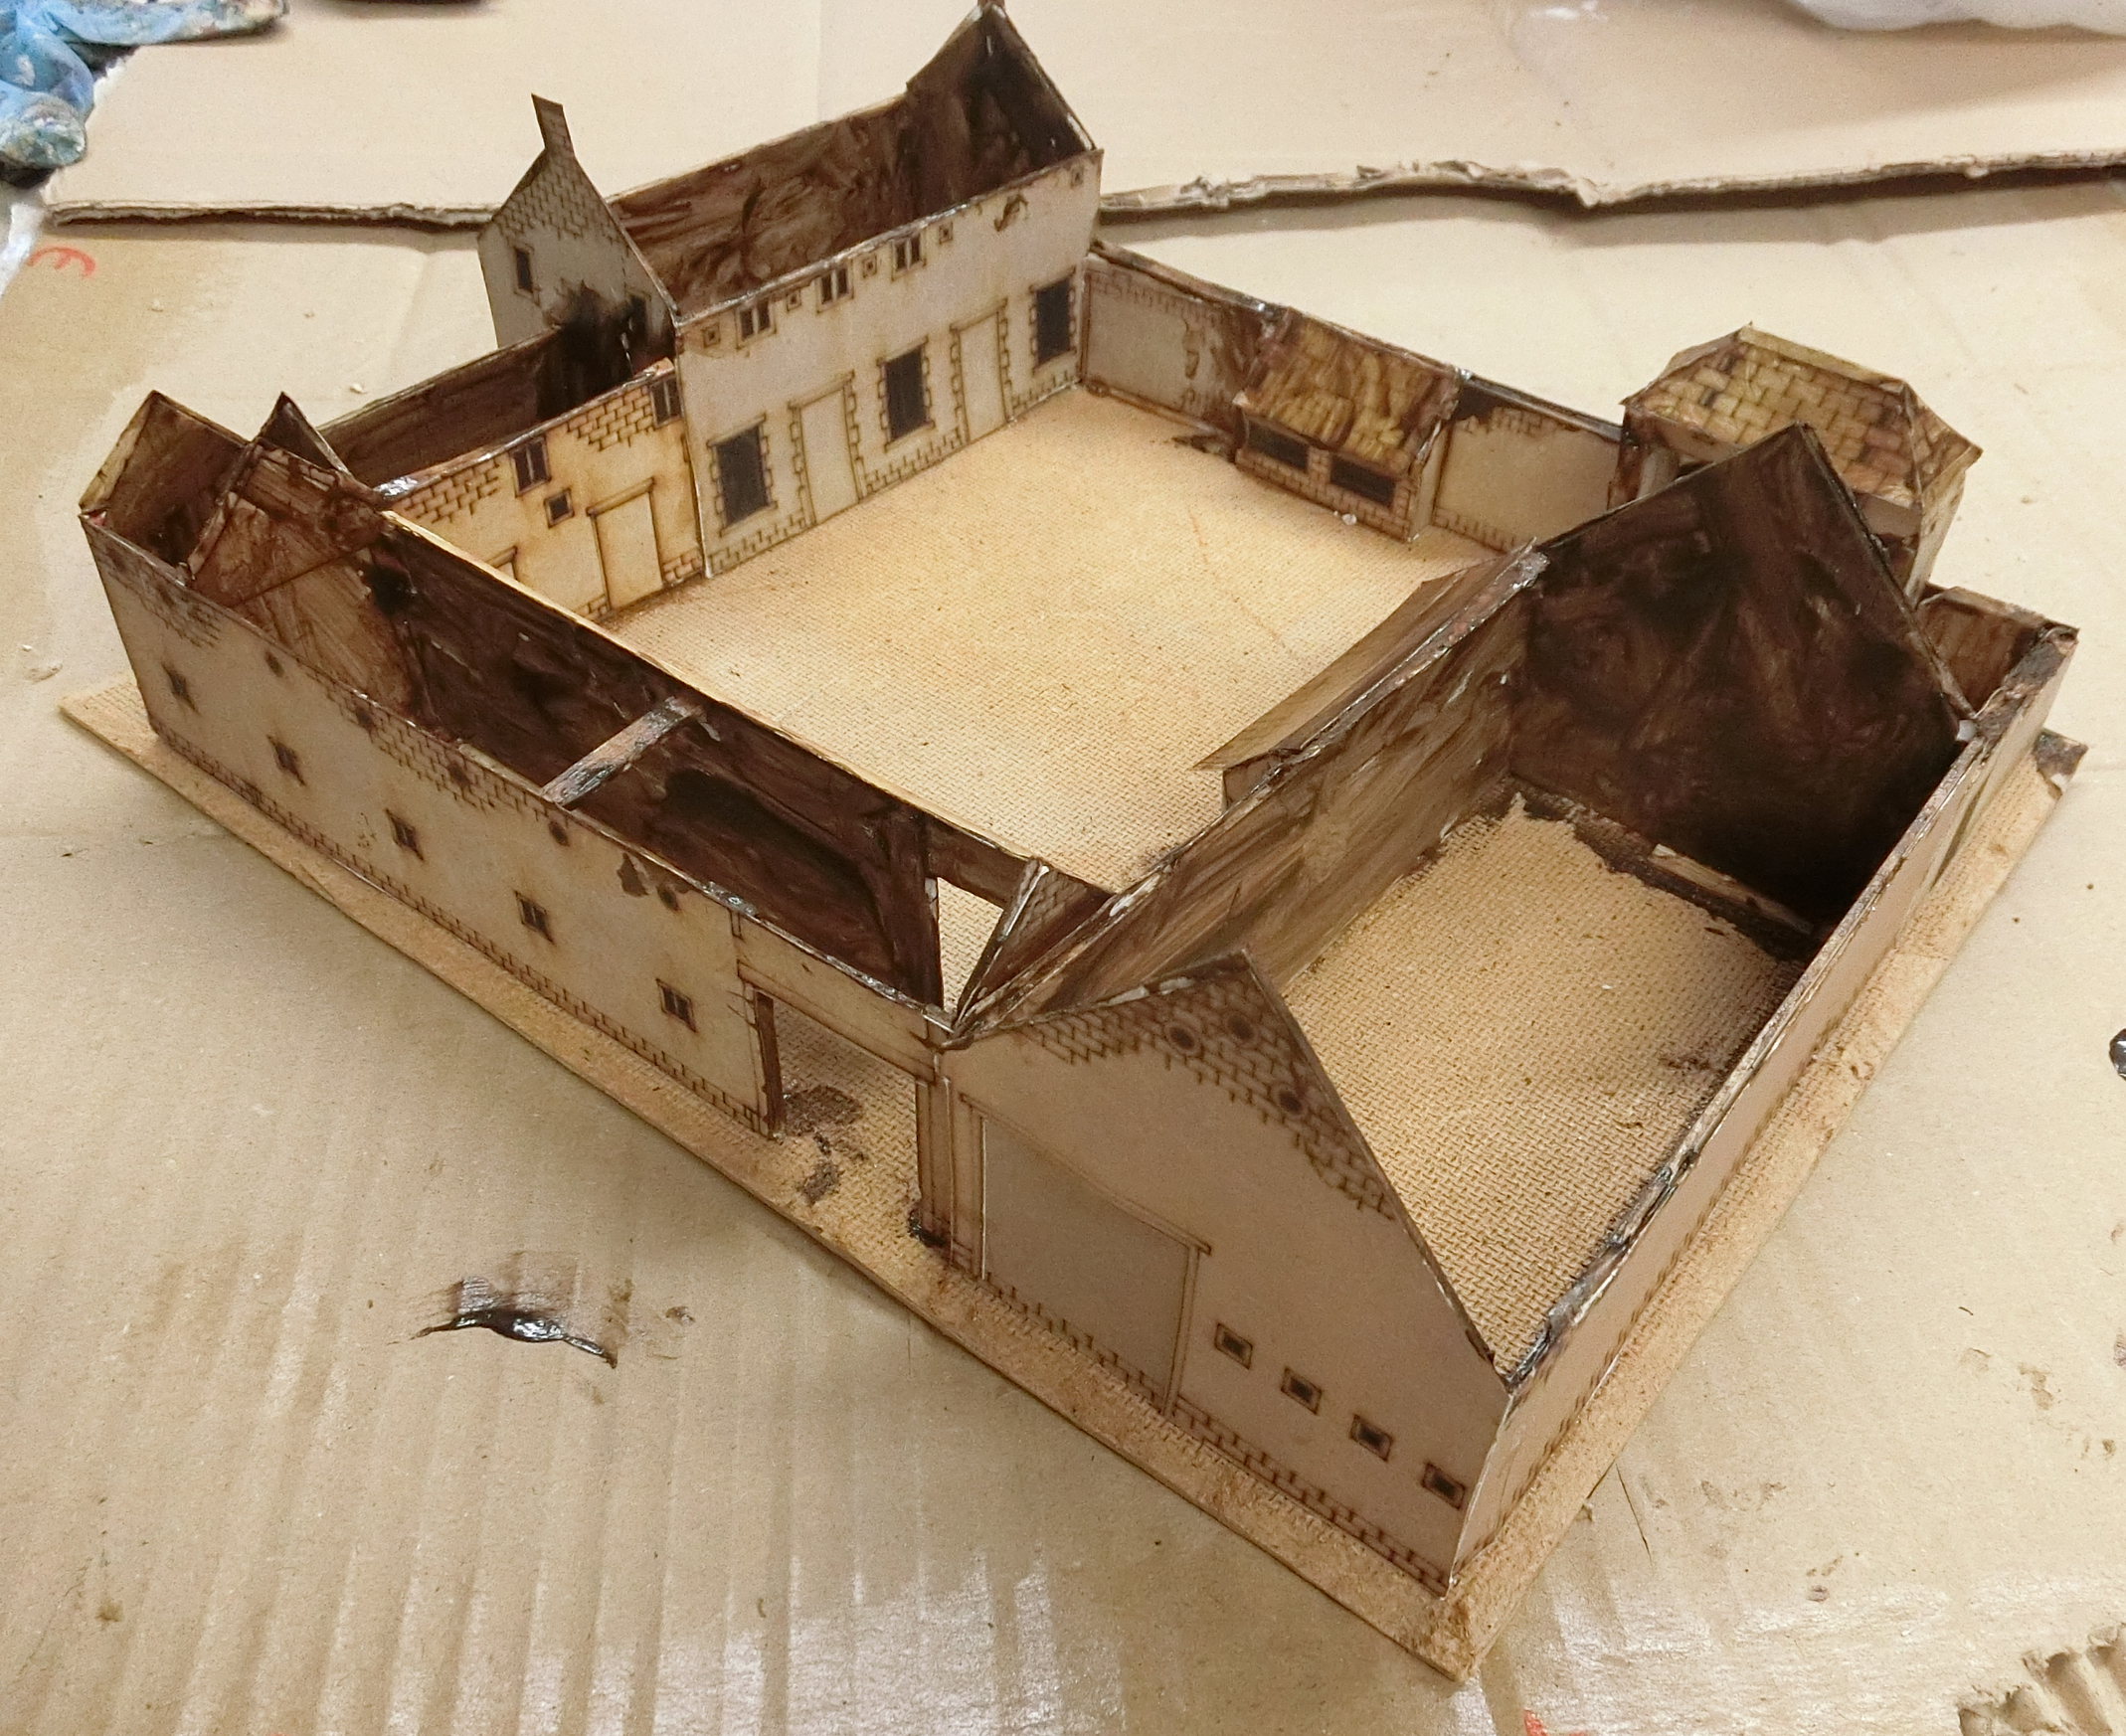
Making La Haye SainteMuch discussion went into how to render this famous object of our Waterloo battlefield. At this scale the footprint, if you reduce the orchard and garden, is big enough to give some idea of the reality. But not at 28mm or even the 25mm of the Hovels model we used in 2015. I decided we could do it in modified 20mm (1/76 scale if you like), but being the cheapskate I am I was not keen to buy a scale model only to discard about a quarter of it. So on the internet I found a commercial version in MDF at roughly this scale in which they had kindly published the templates of the MDF pieces, as well as photos of the model finished in different colour schemes. There were no instructions of course but I saved the files and printed them off to give me about a dozen sheets of "authentic" LHS from which to make my version about 2 inches narrower
 |
| Paper prints of MDF templates and the colour photos of complete kit |
 |
| I made it up and modified it and then strengthened the whole thing with balsa wood sheet and strips. |
 |
| Painted a rough dark brown on the inside faces |
 |
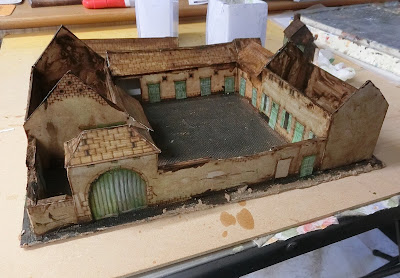
I put a thin coat of brown paint and PVA over the whole thing to harden
it off but leave a fair amount of the detail to aid my painting later.
Basically the same technique as I use for painting figures in
my two dimensional art work |
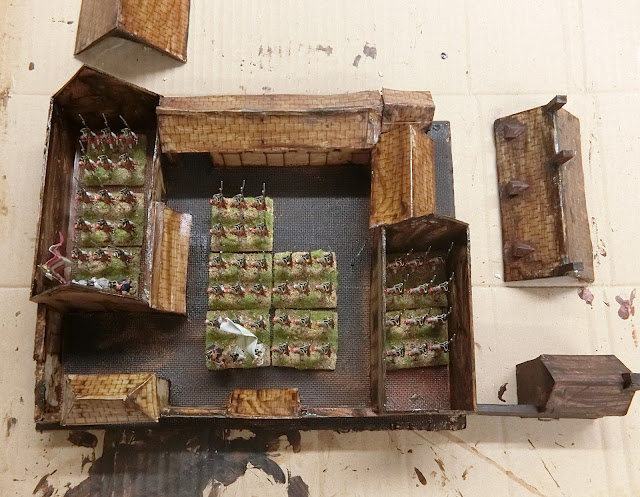 |
I checked with my SYW figures on the same base sizes as JPs that it could hold about two
battalions worth in our scale. That would allow 2 Light Battalion KGL to be reinforced and/or the French to attack inside too |
At this point I was satisfied it would work and so used it, as you see above, as a constant reference point for the model terrain building. But it was not till Kevin brought his models round that I started painting as I wanted to ensure compatibility with his superb building paint jobs. First there was the pretty tedious job of cutting out and fixing lots of detailed bits like the doors and window shutters.
 |
| Thin coats of green for the woodwork |
 |
| The basic grey and white after thinned "burnt sienna " for the exposed brickwork |
 |
| Tedious but satisfying detailing of roof tiles |
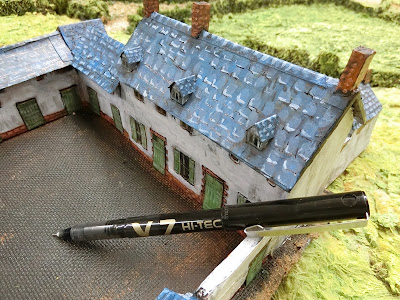 |
| outlined here and there with fine liner pen |
 |
| I also highlighted a lot of the brickwork with orange and outlined that too, and added weathering stains to the white |
 |
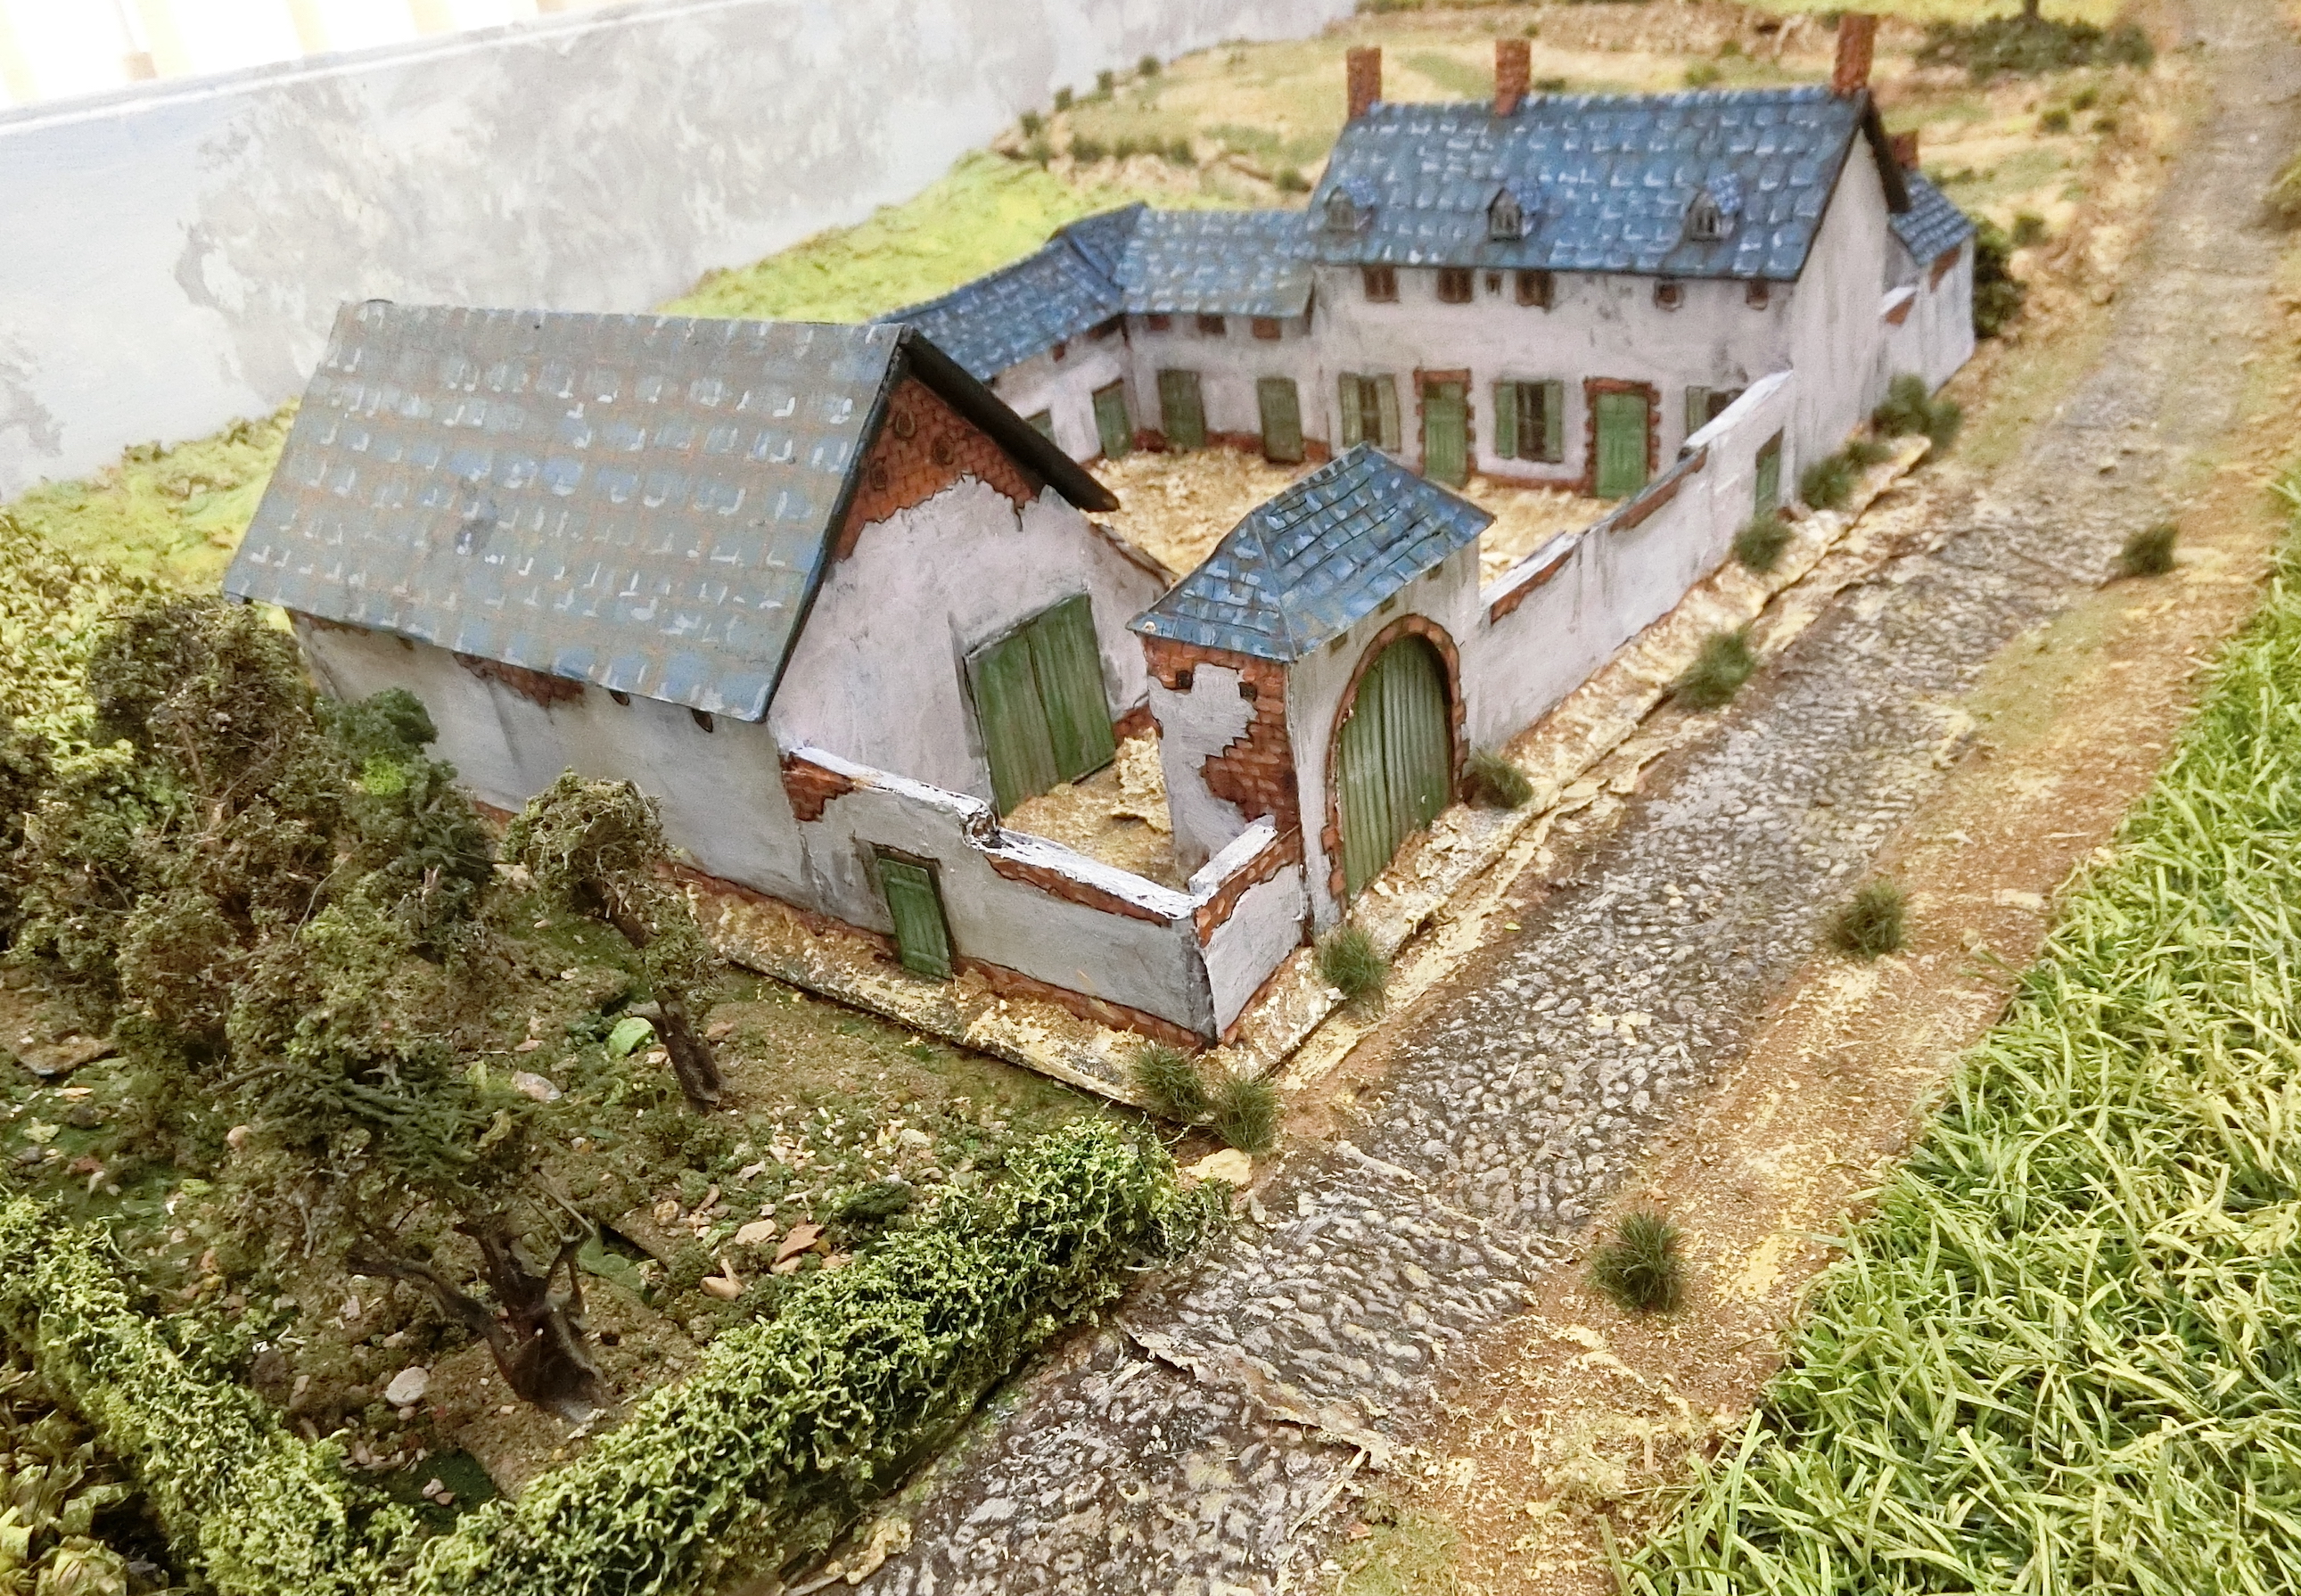
| The finished LHS in situ after sawdust gloop base and dry brushing |
 |
| Classic view from Wellington's Elm |
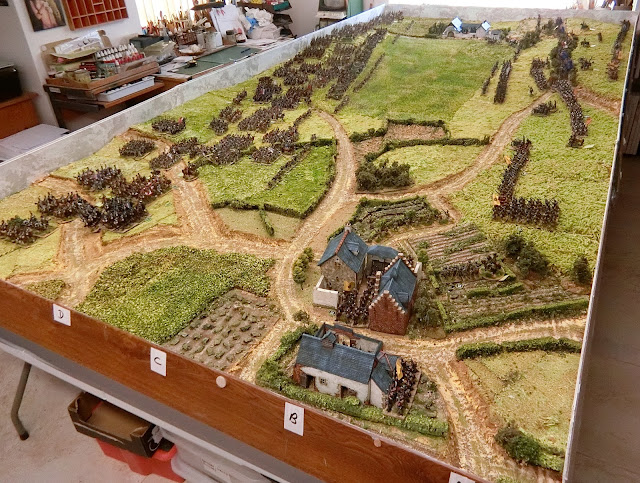
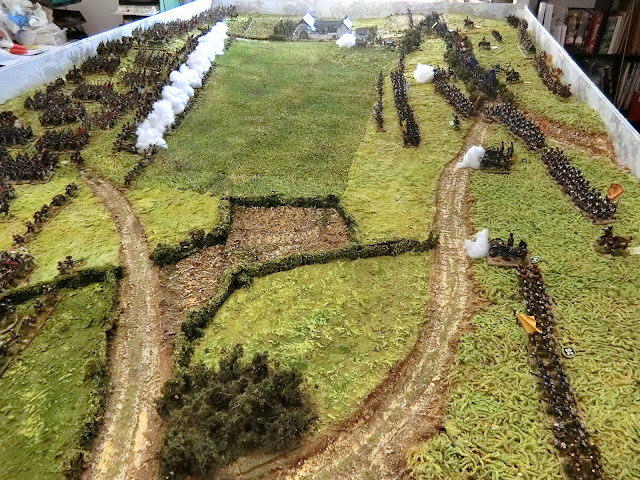
A Tour round the finished TableI hope the following series of photos will speak for themselves
Setting out the armies
Now JP told me today that he has some taster YouTube videos on this project for the benefit of his many hundreds of followers, released on 13th August, here is a link
For the benefit of my many hundreds of visitors here is my taster of pictures taken during and after the set up (in a sweltering 33 degrees C).
 |
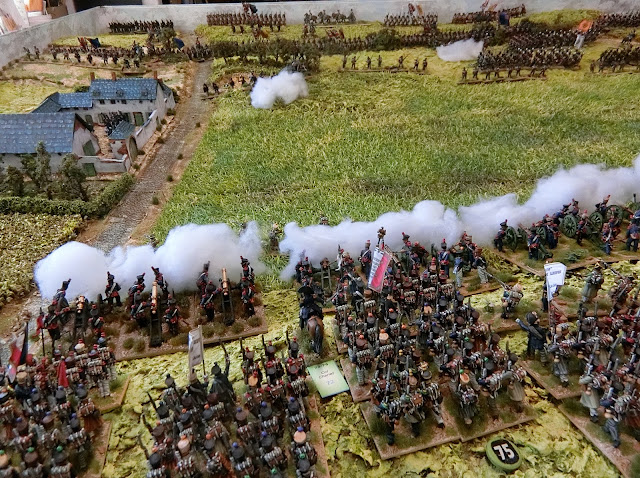
| As the Grand battery assembles the exposed Bijlandt's Dutch-Belgian brigade is ordered to form columns and march westwards ASAP |
 |
| Here they are spreading out on the march |
 |
| The view from behind the Allied first lines, more are off the table |
 |
| The Grand Battery opens up.....and the feeble artillery response from the few Allied batteries deployed at this stage |
 |
| Two views along the length of the Grand Battery |
What will be the outcome of the initial bombardment? And how will our Cotswold/West Country D'Erlon's Assault develop?....both sides still have significant reserves off table - about 3000 figures to play with in all........see Part Two next week.


Je suis plusieurs sites de wargame dont le votre. Je suis impressionné par le sérieux de la préparation de vos reconstitutions. Toutefois, je m'interroge concernant la représentation des régiments de cavalerie dont les effectifs comparables aux bataillons d'infanterie sont représentés par moitié moins de figurines.
ReplyDeleteJ'y vois plusieurs inconvénients
L'empreinte sur le terrain des régiments de cavalerie ne correspond pas à ce qu'elle était réellement.
Les régiments de cavalerie sont engagés au complet alors que dans la réalité, ils étaient engagé par escadron comme les bataillons des régiments d'infanterie. Cet engagement pouvait être soit en ligne, soit en colonne, le plus souvent ils se présentaient par échelons successifs et décalés dans l'espace pour permettre au premier de se retirer avant que l'escadron suivant arrive au contact.
Lorsqu'un régiment de cavalerie s'engageait, il gardait en réserve un escadron pour permettre le repli du régiment en cas de contre charge et de poursuite de l'ennemi.
Tout chose qui n'apparaît pas dans de nombreux wargames.
Concernant l'artillerie, les français combattent « attelé » et les britanniques « dételé ».
Cela signifie que les caissons de munitions français sont immédiatement derrière les pièces pour permettre le réapprovisionnement. Les britanniques au contraire installent leurs caissons plus en arrière et se servent de leurs avant-train pour amener les munitions aux canons durant la bataille.
En pratique et pour tenir compte de l'échelle, il faut neutraliser la longueur d'un caisson en arrière des canons français pour représenter les deux ou trois lignes de caissons (selon le calibre) et la ligne de chariots divers qui accompagne chaque batterie. Les bataillon d'infanterie peuvent dépasser ce dispositif en circulant dans les intervalles.
I follow several wargame sites including yours. I am impressed by the seriousness of the preparation of your reconstructions. However, I wonder about the representation of cavalry regiments whose numbers comparable to infantry battalions are represented by half as many miniatures.
I see several drawbacks.
1/ The footprint of the cavalry regiments on the ground does not correspond to what it really was.
2/ The cavalry regiments are engaged in full whereas in reality, they were engaged by squadron like the battalions of the infantry regiments. This engagement could be either in line, or in column, generally they presented themselves by successive levels and shifted in space to allow the first to withdraw before the following squadron arrives in contact.
3/ When a cavalry regiment engaged, it kept a squadron in reserve to allow the regiment to withdraw in the event of a counter charge and pursuit by the enemy. Anything that doesn't appear in many wargames.
Regarding artillery, the French fight "limbered" and the British "unlimbered". This means that the French ammunition wagons are immediately behind the guns to allow for resupply. The British, on the contrary, installed their caissons further back and used their limbers to bring ammunition to the guns during the battle. In practice and to take the scale into account, the length of a caisson behind the French guns must be neutralized to represent the two or three lines of caissons (depending on the caliber) and the line of various wagons which accompanies each battery (afuts de spare parts, field-forges, waggon for tools , wagon for luggage...) . The infantry battalions can overcome this device by circulating in the intervals without restriction.
Thank you very much French follower glad you enjoy my blog. Personally I accept all your points. In this game I am only responsible for the terrain. I will offer a few points of defence for my mates however. JP has decreed that the Grand battery , once formed, cannot move, therefore in practice we do not need the limbers. As wargamers we are limited to space, particularly depth, so we need the area behind the battery to bring up D'Erlon's infantry. Historically they did this moving through about three echelons of supply caissons and limbers. They would just clutter up the gaming area and slow everything down. As for cavalry I believe Gd'A rules do allow for the effects of different cavalry formations but the column of squadrons will be seen in our battle as in one regiment but even at 1:15 scale you still need it to be be just representative , not actual , to keep the game momentum up. If you want to see us wargaming accurately a big battle in insane detail , like nowhere else please sees all my many blog posts in 2015 and earlier on LHS and Hougoumont at 1:3 scale.
DeleteIt was interesting to see how you made the table, which looks very nice by the way. How long did it take you to complete it?
ReplyDeleteThanks very much for the question. I allowed myself about 3 -4 weeks including clearing off the previous table. I worked a few hours on average nearly every day and finished with 3 or 4 days to spare. You could do it in less time with more hard work but some of the processes do need a day, or even more, to dry properly before you can move on.
DeleteWow! Superb piece of work. So inspirational (who am I kidding). Did I say "WOW!"?
ReplyDeleteThanks a lot , we do our best to please!!!
DeleteChris has created many excellent tables but this one was truly excellent and a privelige to play on.
ReplyDeleteThanks a lot Anonymous. It was a privilege to have you here to play.
DeleteSteve Johnson (professional model maker) has sent me the following: "I tried posting a comment on your Blog but it wouldn't publish, yet I get updates on the post re: how you put the Waterloo table together. Bizarre and one of those things that is affecting some Bloggers and not others. In short a great post and I loved to see how you went about putting it all together."
ReplyDeleteThanks a lot Steve
DeleteLovely stuff. That's a real labour of love
ReplyDeleteThanks Anonymous. Any chance of giving me your name?
DeleteBrilliant as always Chris. JP has quite a knack for good games and beautiful figures so the end result here should be spectacular. Very much looking forward to following all updates.
ReplyDeleteThanks a lot Carlo. Yes it was great game and I'm hoping to publish the next part today if I can.
DeleteReally useful terrain building advice , as usual you have done a terrific job with everyday materials that anyone could get hold of. Thank you for sharing. Martin Gane
ReplyDeleteWhy am I so late in catching up with your posts Chris? - this is just brilliant again and shows how industrious and talented you are!
ReplyDeleteBetter late than never Kerry, thanks so much for your comment. I hope you have seen Part Two and I must find time for the final act too.
DeleteExemplary terrain building once again Chris. Sets the standard for the wargaming community to aspire to. Really disappointed I was unable to attend.
ReplyDeleteThanks a lot James, I hope I can inspire a few that terrain matters. Yes I missed you - long time no see.
Delete