Background
In the previous post I outlined three weekend games we have planned here at my humble Cotswold retreat. The first one was to be Wiltshire's Ken Marshall organising the next episode of his Imagi-nations campaign between the mid-German forces of "The Electorate" (a bit like Prussians and Hessians) against the equally formidable "Ducal" armies (white coated Austrian types with Hanoverian style allies), and we had now advanced to October 1753. I decided we would use the standard 8 foot x 6 foot table and my contribution would be custom sculpting whatever terrain Ken wanted. The date for the game was set for 23-24th April and we ended up with 3 other players and me, with Ken as umpire, on the Saturday to play out a fight for territory between the two substantial Advance Guards. The Sunday brought two new players and the main armies to try to decide the issue.
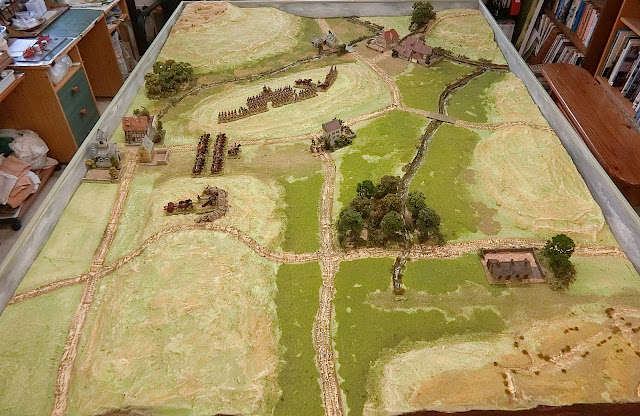
I was amazed how Ken's collection of Minden/Crann Tara/Fife and Drum 28mm figures had grown - to about 1600-1800 figures I think. In addition we called on a few hundred of mine and about 400 - 500 from Paul B of Cheltenham. I was worried this would be too many for the table but Ken felt confident a lot would be overcome by attrition on the first day, nevertheless he had to ensure some substantial forces for the newcomers to command on Day Two. As those two were "Honours of War" creator Keith Flint and his play tester Steve Johnson, we wanted to put on a good display. So you will have to forgive the toy soldier megalomania which made manoeuvring room at a premium but wargames eye candy at the maximum. I hope you agree - here is a glimpse of what is to come:
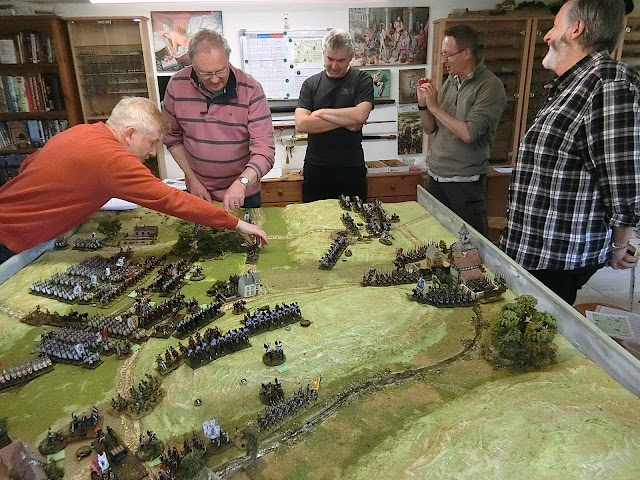 |
| Paul and Keith are having a serious advance with the Ducal army while Steve J tries to distract us all with his good natured banter |
 |
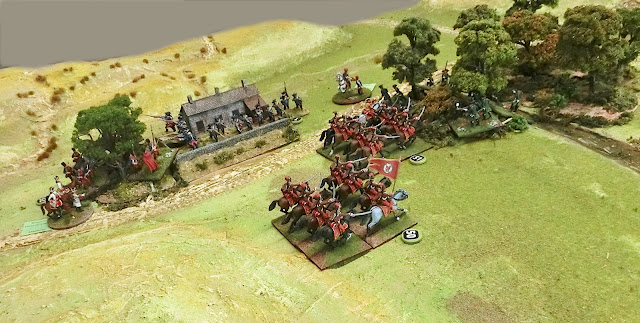
| Yes it got a bit crowded but "Honours of War" can stand that. Retreating or fleeing through masses like this can take its toll. |
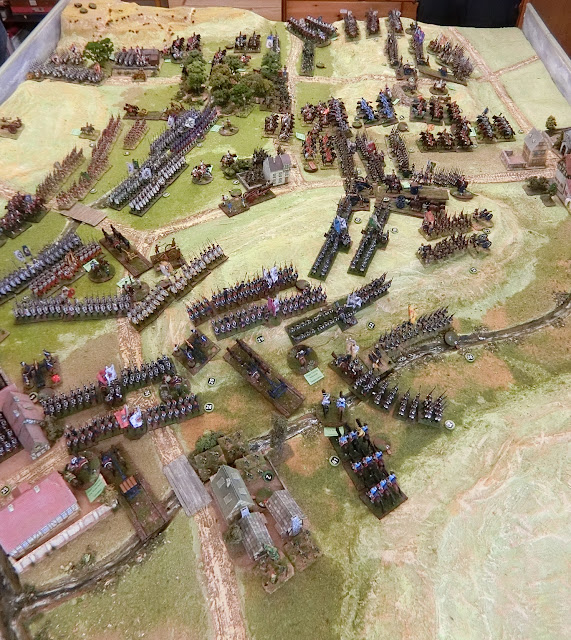 |
| No shortage of cavalry action in the centre and far flank |
Anyway, much more of that later, this post is mainly about making the battlefield and a basic intro to the game.
Dismantling the previous sculptured table top
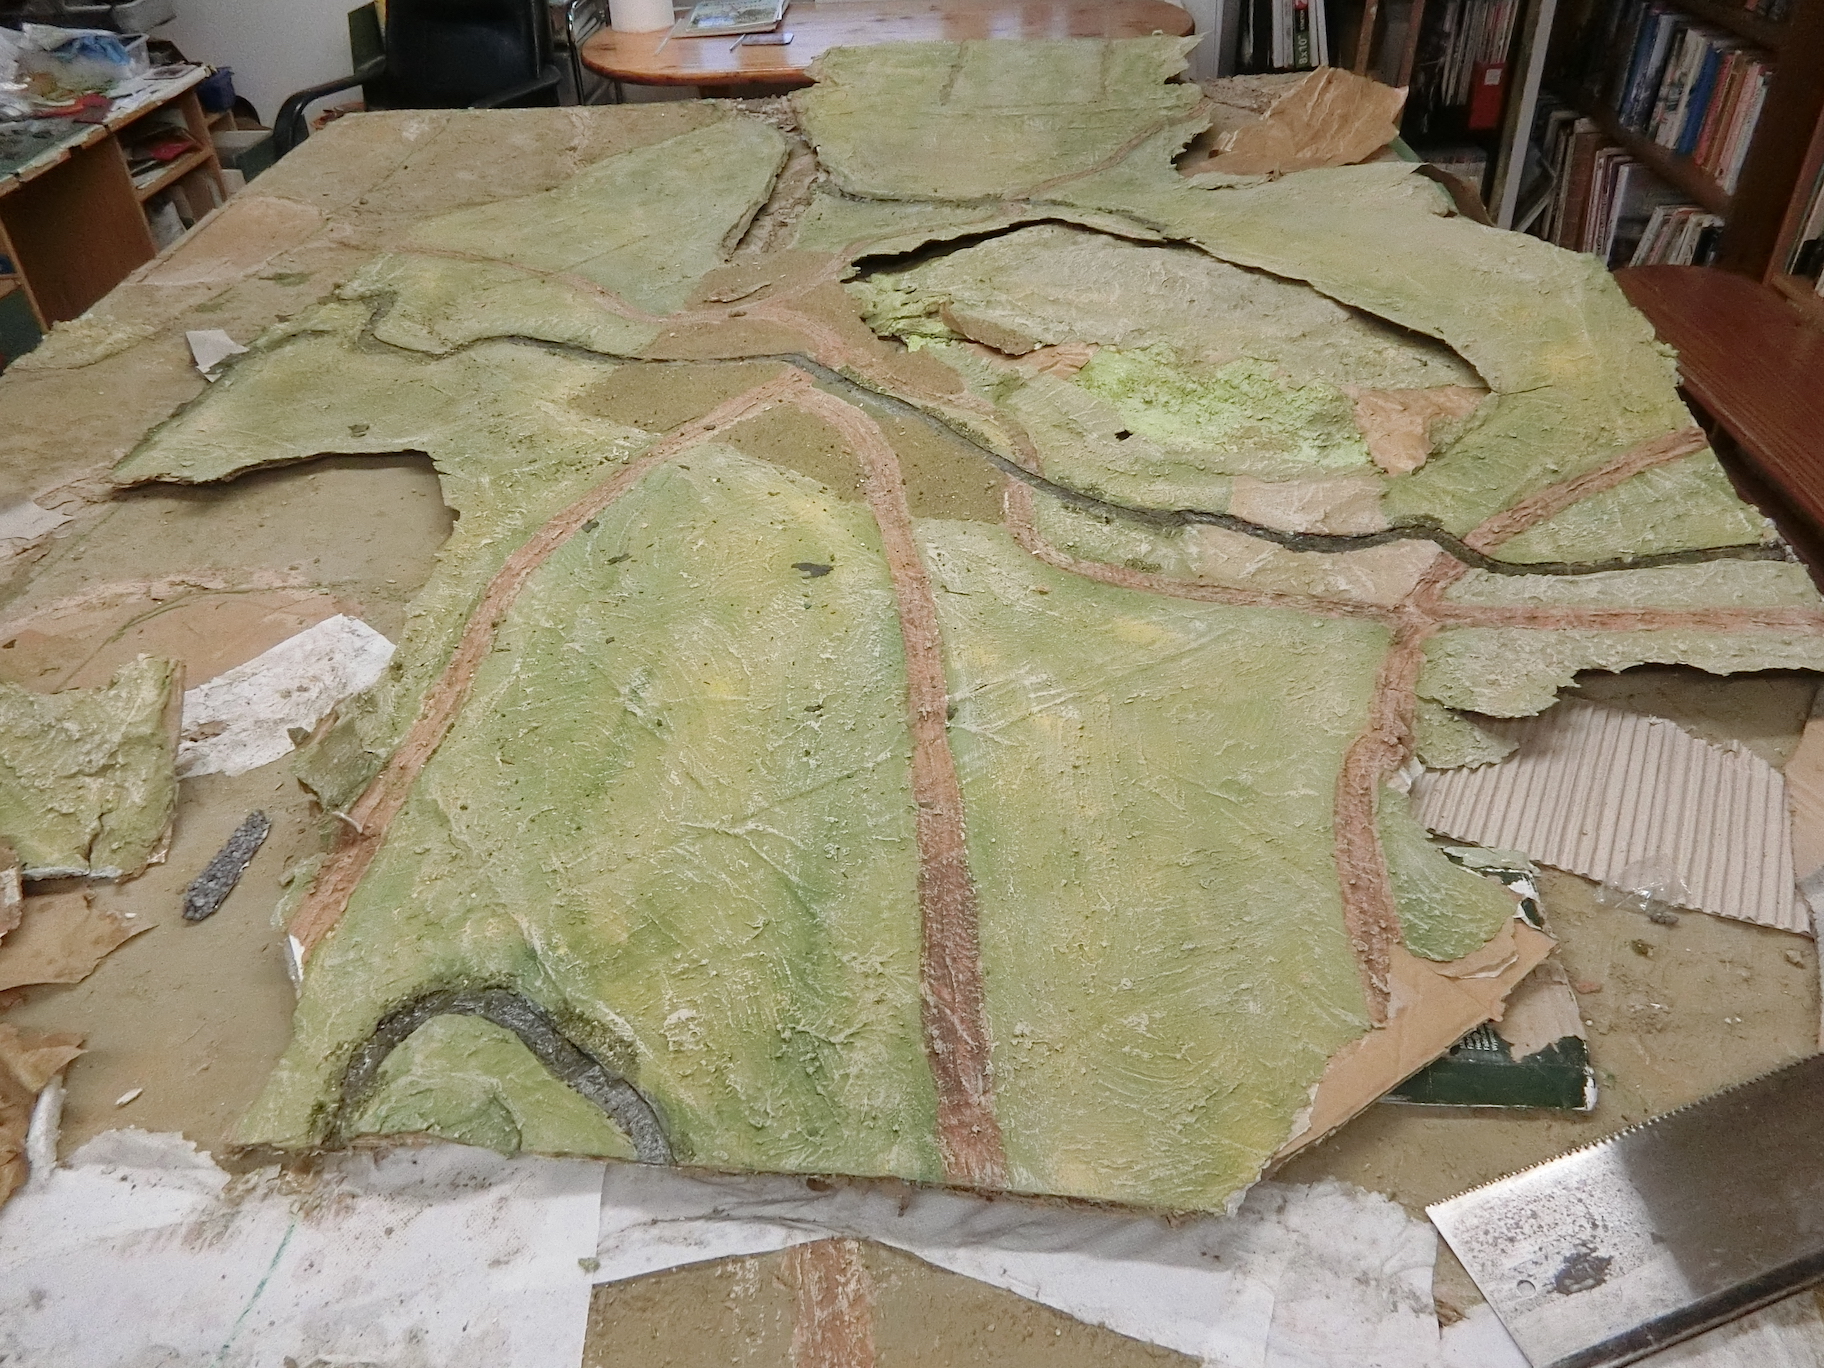
For those who have lamented the demise of my previous "art installation" terrains, don't worry, not much goes to the local tip, most of it is recovered and reused in different guises. I will start off with some photos of dismantling the previous Langensalza terrain in January.
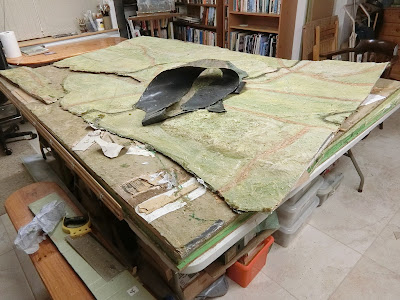 |
Releasing the cardboard base from its bed on top of the
old Brampton board |
 |
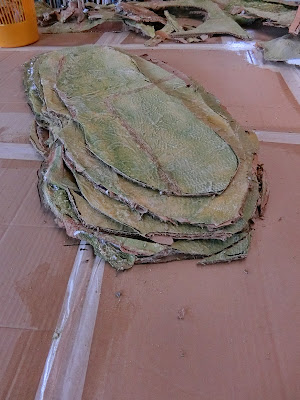
Recovering hills and useful textured surfaces for storage and
future re-use or adaptation |
Creating the battlefield for the Battle of Madling
Here is a look at Ken's sketch map which he sent me as a starting point, together with a description of the kind of terrain he envisaged
And this is the version I made of it in Adobe Photoshop to use as my scale guide for the build. (I don't have the full pro version but I find Photoshop Elements 2020 is adequate for my needs and affordable to buy).
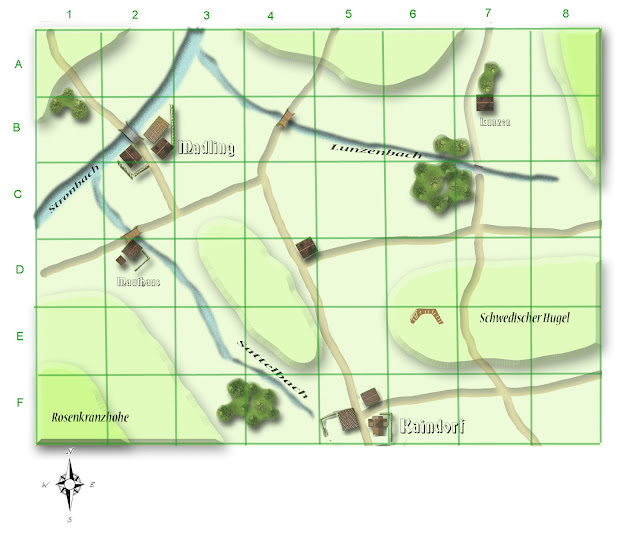 |
| It looks like I must have decided unilaterally that the corner high ground in A-B8 was to be steep! |
I will describe the stages in making the table from start to finish by photo captions. Most of the methods will be familiar to my regular readers and apologies if I bore you. However, towards the final stages I did things a bit differently.
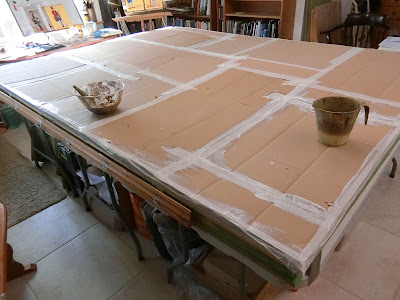 |
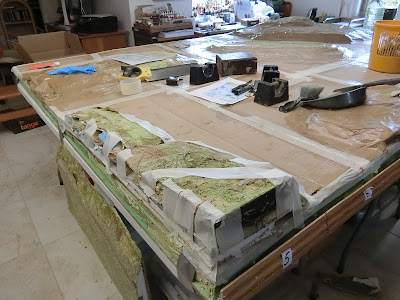
I used large surplus cardboard packaging to give a fairly flat surface.
Joins were sealed with masking tape covered with PVA |
 |
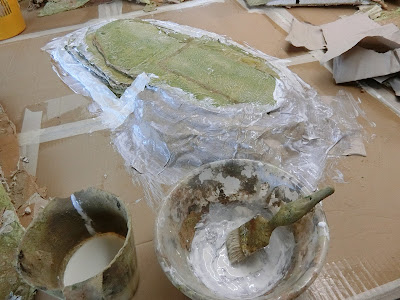
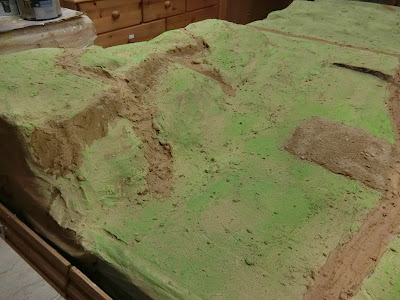
Reclaimed hills were used where they were the right size.
Elsewhere flat pieces of textured surface were stacked to make a
roughly stepped hill or two which will be smoothed out a bit later. |
 |
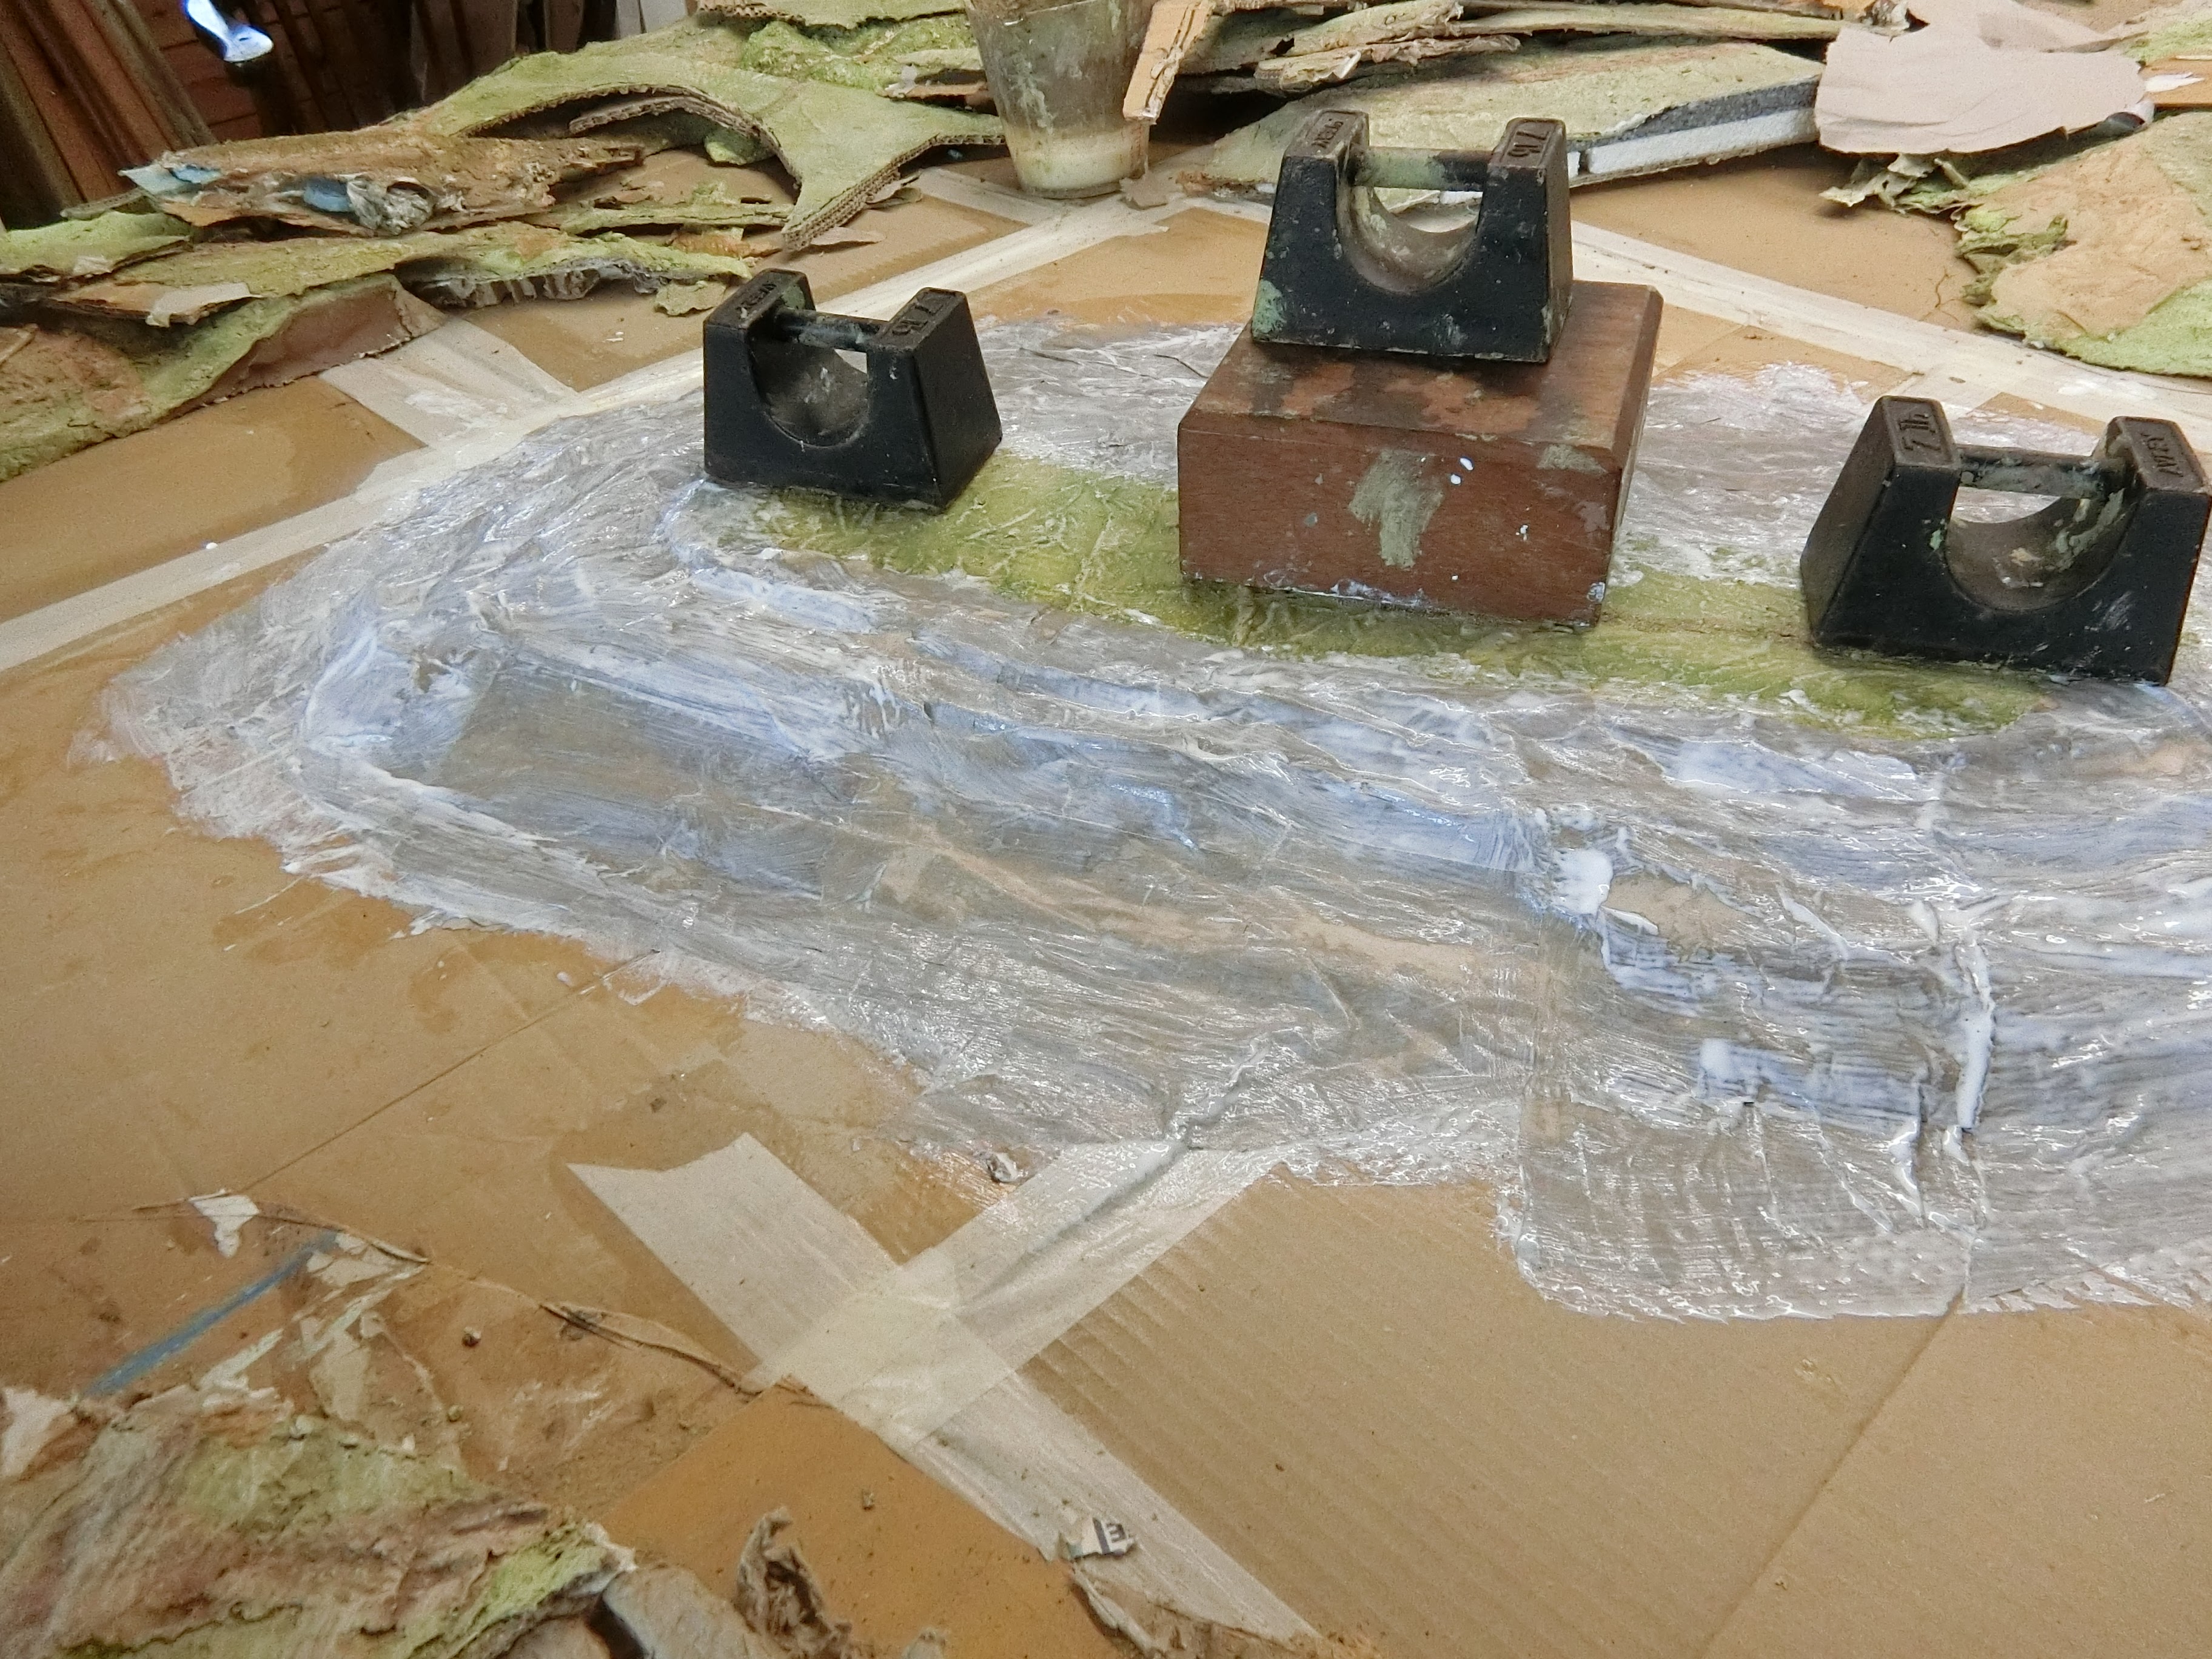
| Smoothing out first stage with papier mâché and PVA |
 |
| Weighted down to prevent warping while it dries out |
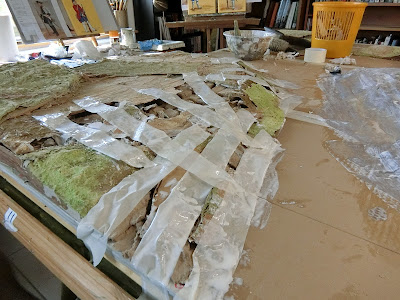 |
More hills cobbled together from pre-loved pieces and masking tape
before the papier mâché coating (below) |
 |
| Here is the high double contour corner piece in process |
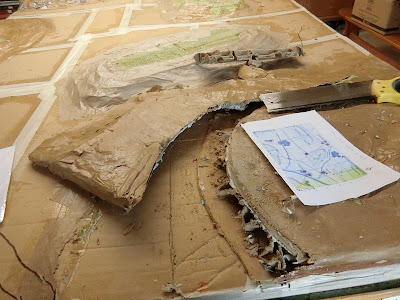 |
Checking my construction map I realised i had made the Rosenkranzhohe
too big!! I had to get the saw and make a drastic change. |
 |
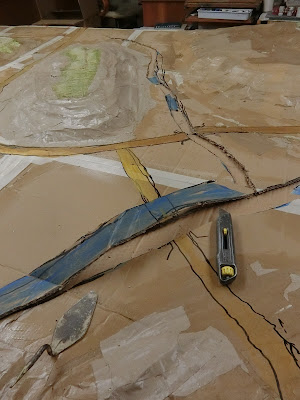
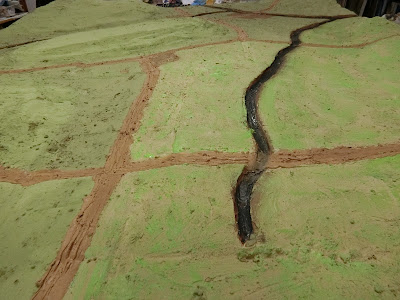
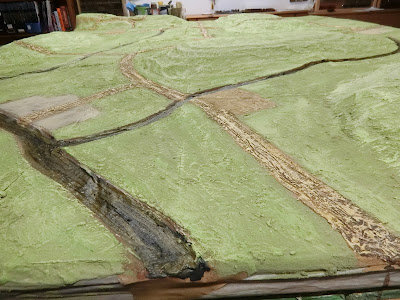
| Now the hills were in place I sketched in the roads and rivers with marker pen and thin acrylic wash |
 |
| If it is thick enough (about 3-4 sheets of paper) the papier mâché and PVA dries to a satisfying hard surface |
 |
Time to use a heavy, sharp knife to cut out the streams and river
to make use of the natural recess depth of the cardboard packaging |
 |
| Then blend in the stream banks with more papier mâché |
 |
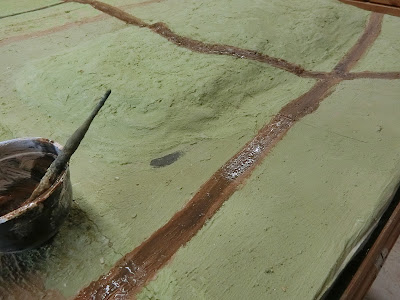
| Treatments begin to get more optional now. This time I have used a thin mixture of builders plaster to coat the stream and river beds as an undercoat for colour |
 |
| While that is drying I can get on with a big job... |
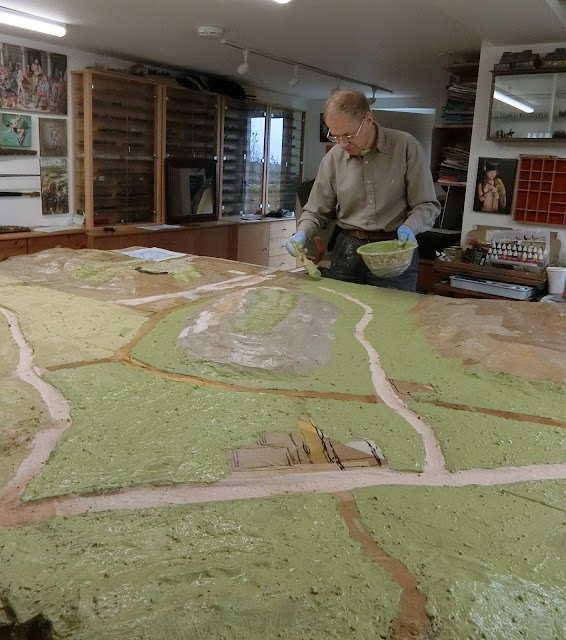 |
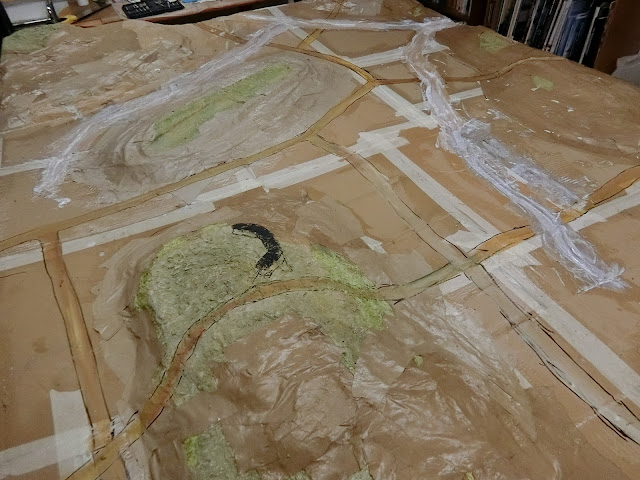
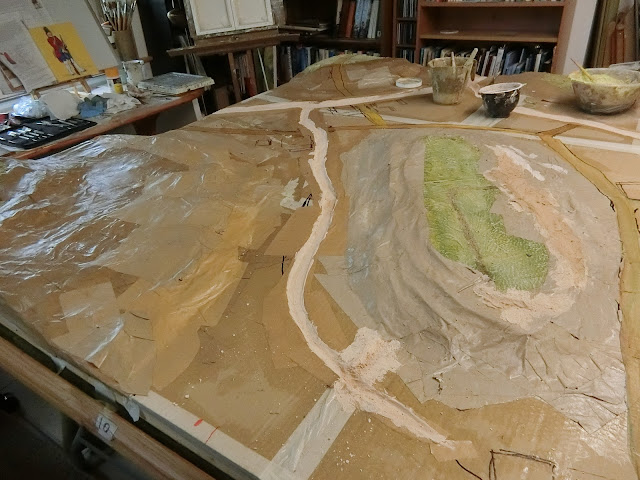
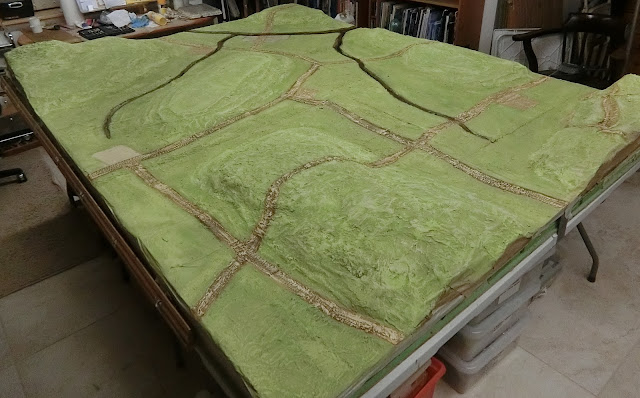
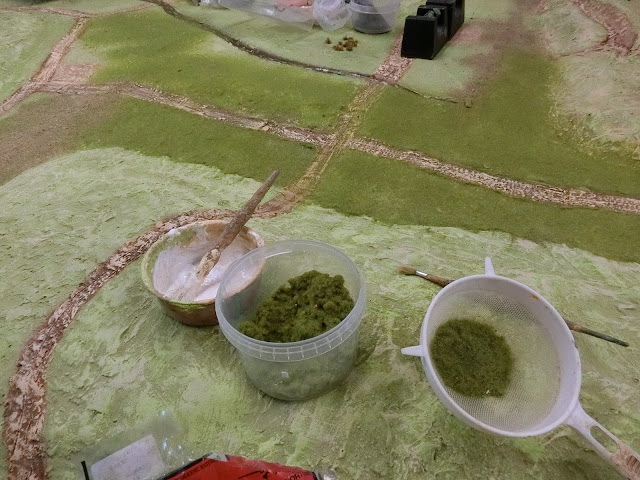
.....coating everything except roads, rivers and BUA areas with various green textured gunge.
This time I just used builders plaster, sand, acrylic or commercial matt emulsion paint, and water.
No sawdust, small stones or PVA glue. Omitting the latter was a mistake. |
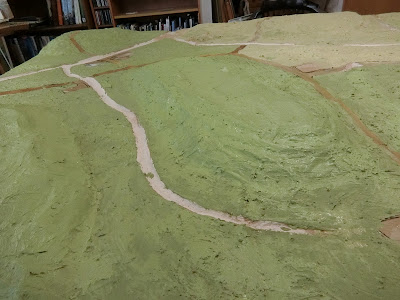 |
| It looks quite nice though, and does help to blend in those stepped slopes |
 |
| Not really deliberate but the greens turned out differently due to different mixtures and running out of some shades part way through. As an artist I tend to play it by ear and use what I have, adapting as I go along.....let's see how it dries out |
 |
| Applying a dark mixture of paint and PVA to the stream beds |
 |
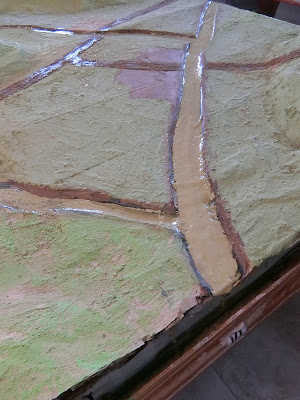
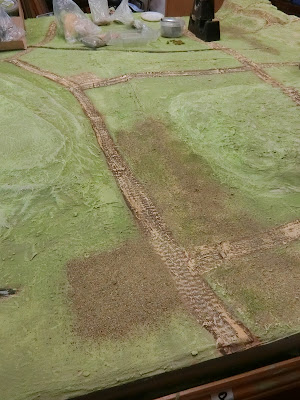
Brown plaster and sand mix helps define a cliff line and paths on the very steep hill.
A similar mix is used for a base coat for all the roads |
 |
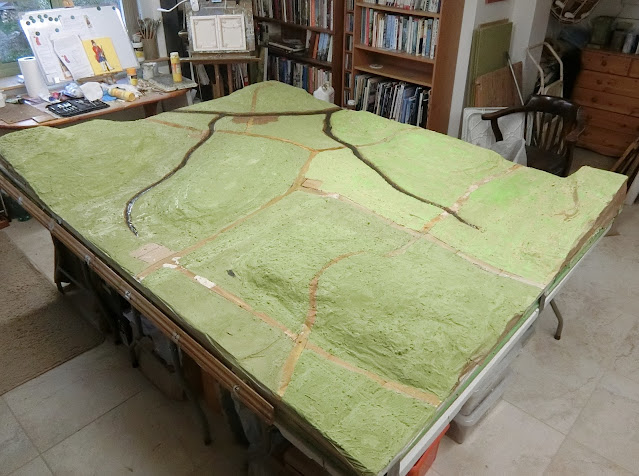
| River beds and roads all blocked in now with base coat mixture - textured for the roads, smooth for the water. A simple brown and/or sand/PVA coating for the built up areas (BUAs) |
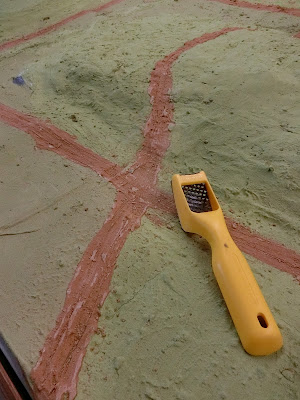 |
When it was all dry and hard I went over the entire surface
with my surform tool and ground away at the little nibs of hard sand or plaster.
The idea is to keep texture but not so much that it is ugly or difficult to put troops on. |
 |
| The residue can be swept up and stored to be used for something else |
 |
| A thin wash of dark brown acrylic paint fills the ruts made in the plaster roads |
 |
I used a dull brown runny mixture of paint and PVA
on top of the dark river beds. There are no right or wrong ways here BUT,
rivers are only blue when you are so low down on the bank as to see the reflection of sky.
If you are flying low in a plane, helicopter or air balloon have a good look down on the rivers |
 |
While it was still wet I introduced more dark paint nearer
the centre to represent a deeper depth of water |
 |
| I like to work across the whole area with different effects to keep it in all in mind like a landscape painting. So now I have done some lighter dry brushing to bring out the high ground better |
 |
| But then I extended that treatment to the low areas too, and to the casual eye it all looks similar. Some might be happy to leave it there. |
 |
| Keeping at the dry brushing with slightly different combinations of colours. Over the days I noticed that these greens take on quite a different hue if photographed in daylight or under the strip lights we normally use during a game. |
 |
I used a nice warm cream as a dry brush for the road network.
You can also discern the slightly varied dirty water colours |
 |
No PVA in the gunge....the plaster drying out had caused
some cracks where my cardboard joins were.
I used sawdust and artificial grass mixtures to try to disguise it |
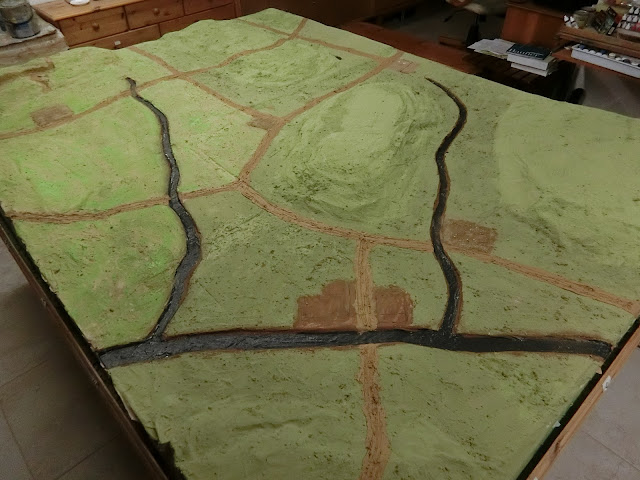
 |
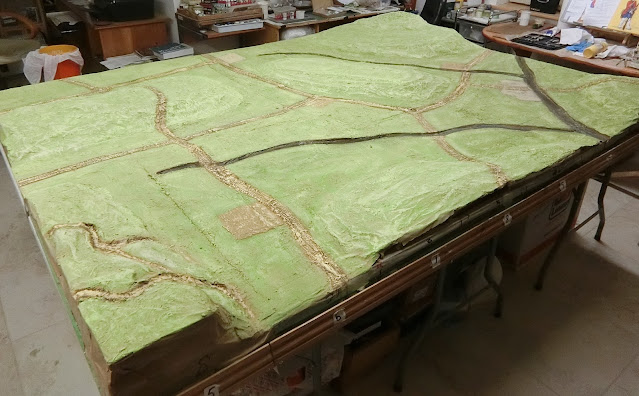
| That led me on to something I've not done before - the wholesale spreading of static grass and sawdust combinations over all the low ground areas. My idea was to make it look like well watered productive pasture land, and leaving the high ground bare to look a bit more like moorland heath. |
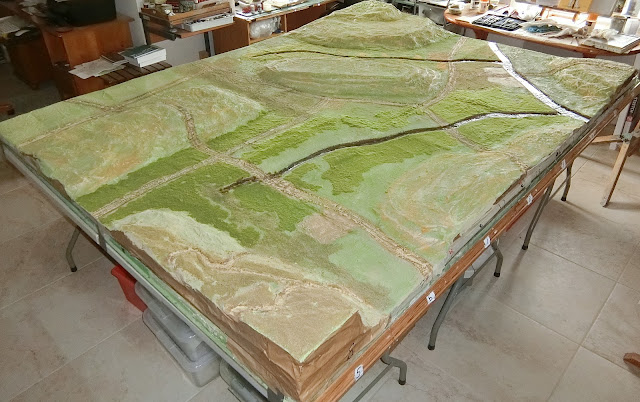 |
| Quite pleased with this result. These two views of the same with different lighting |
 |
| I used dried or burnt grass flock for the very highest contours in each corner. Lots of areas of the world have brown grass where the soil is thin and well drained such as rocky moorland or plateaux. |
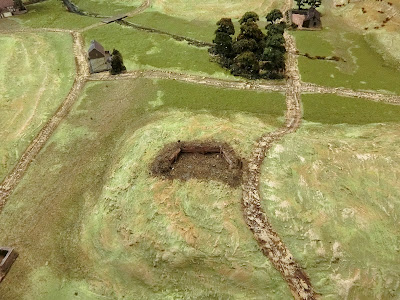 |
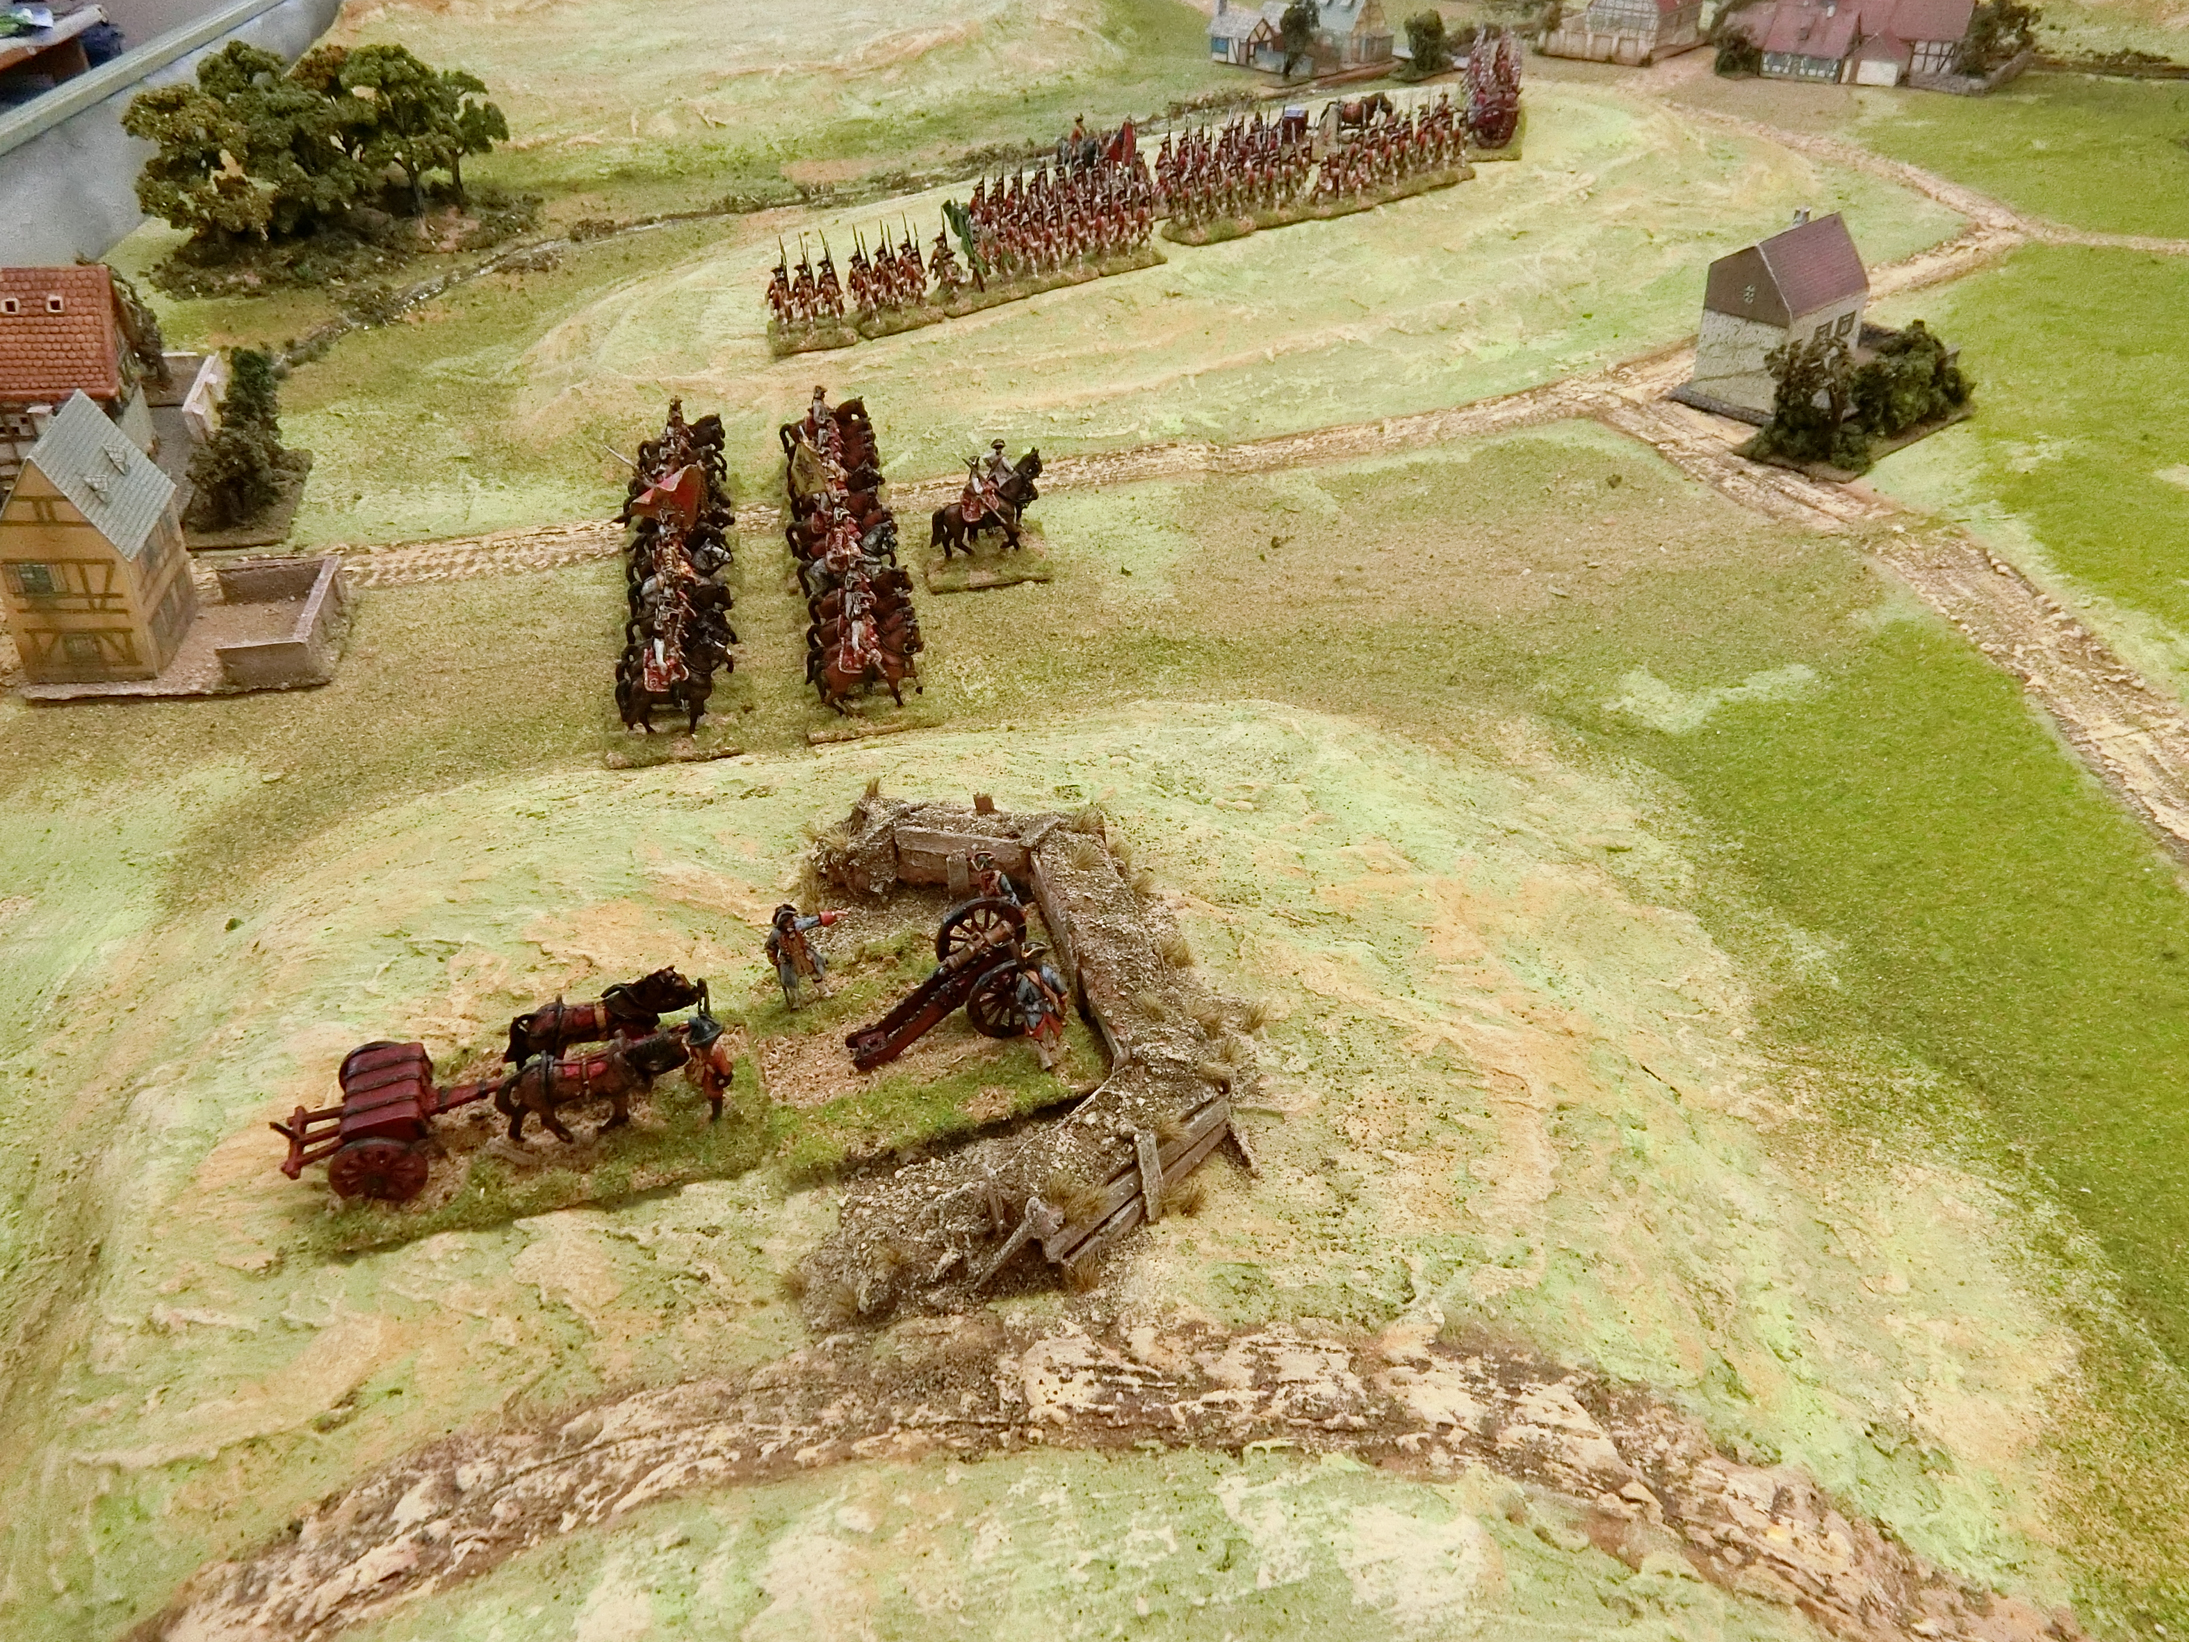
The roads have yet another lighter drybrush and I'm putting some terrain features on now.
The redoubt has to be very old (Thirty Years War) falling apart and overgrown by weeds. |
 |
I pre-made the bulk from air hardening clay and stuck some coffee stirrer bits in it.
I stuck that in place on the hill then more wooden stakes and a mix of sand and flock effects. |
Looking round the finished battlefield
The above sequence is effectively the end of the "how-to" part as I seem to have got carried away with finishing the detail and adding the woods and buildings and have not taken any specific build photos. So what follows is a look at certain parts that might be of interest and then the overall effect.
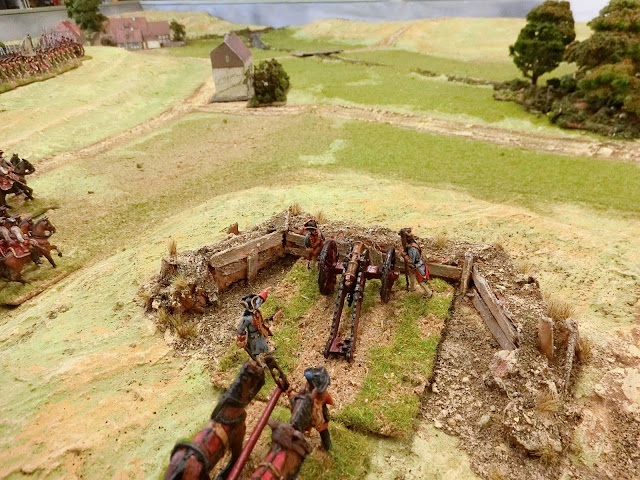 |
| First the finished redoubt. All the loose stuff was brushed off then dry brushed with cream acrylic. Adding tufts for weeds completes the tumble down look |
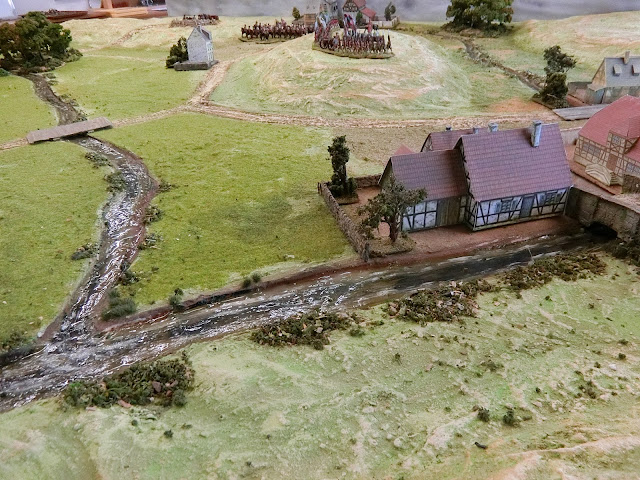 |
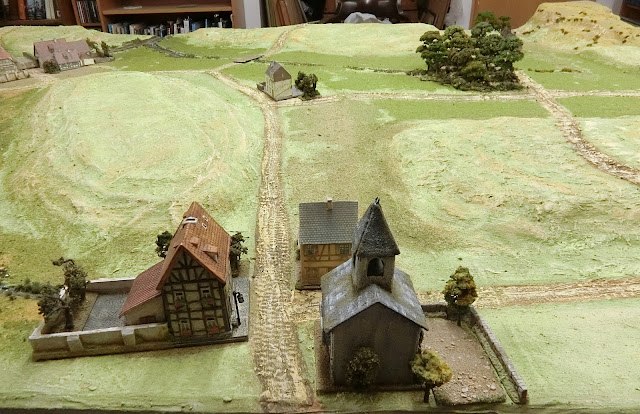
| Two views of the Village of Madling. All the card buildings are reinforced with balsa wood and are removable for putting troops in the BUA, but hopefully have a lived-in sort of look. I did not get round to weathering the card models before our game but I have since! |
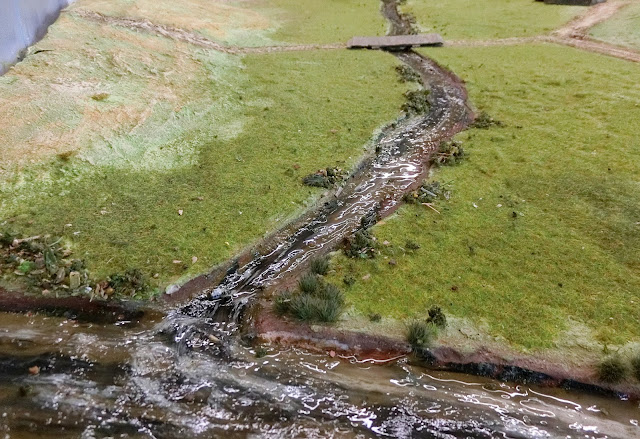 |
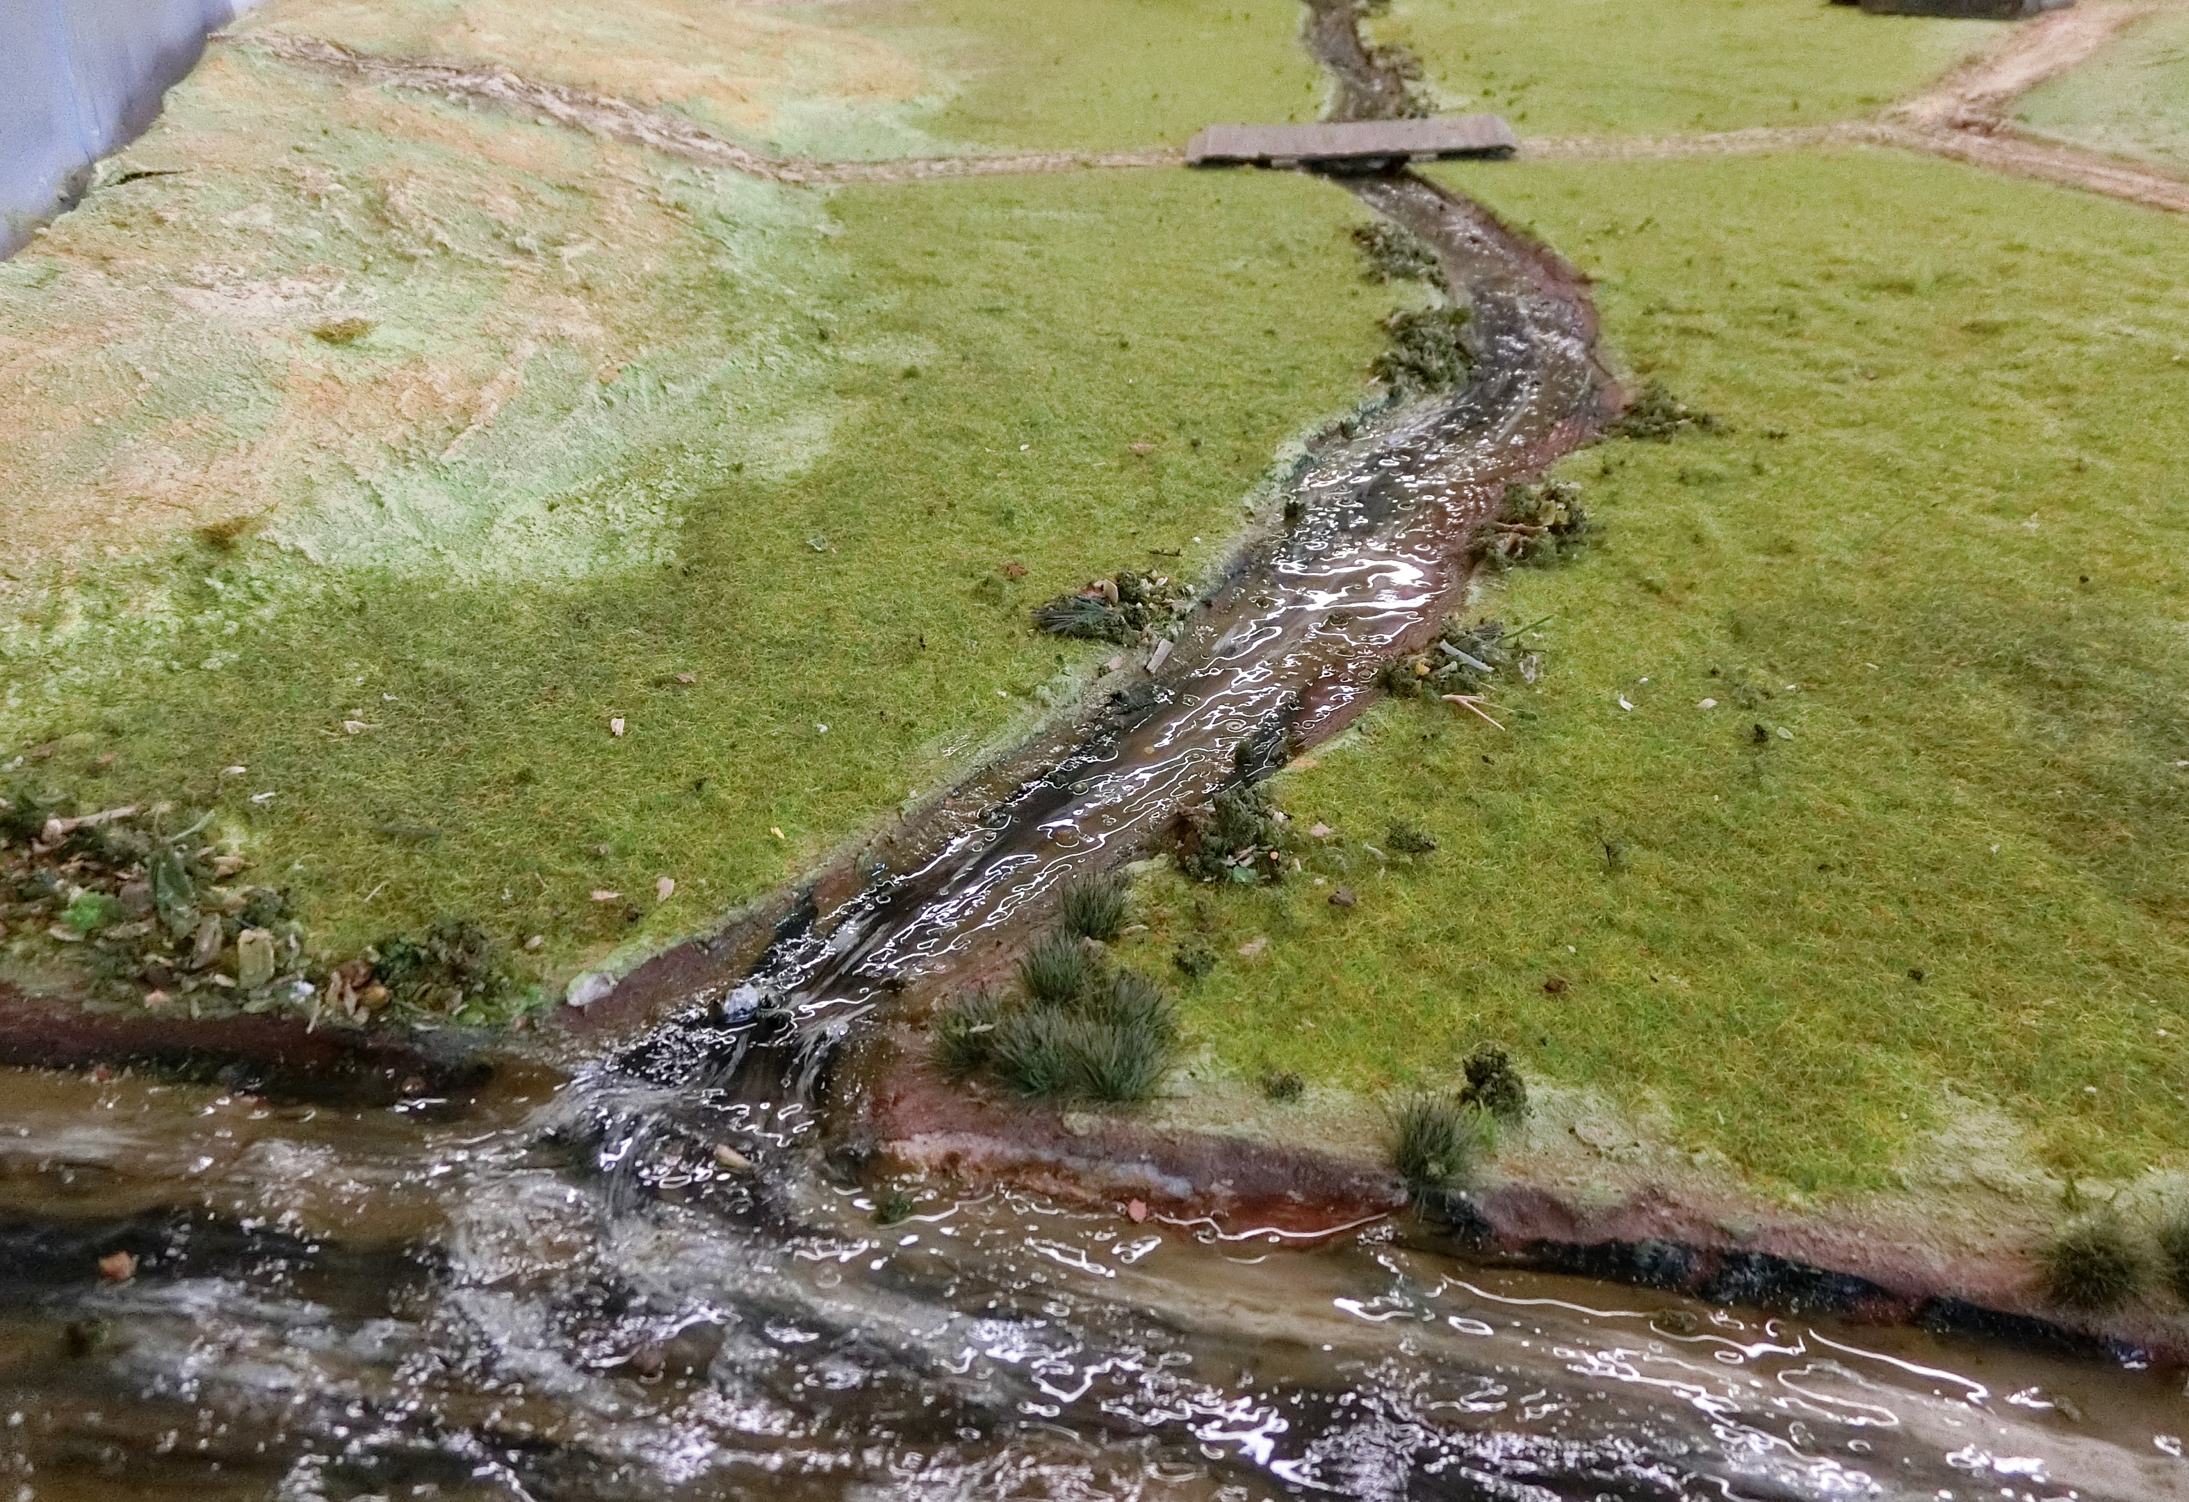
| Close up of the Stronbach river and Lunzenbach stream. The previous paint was finished off with light dry brush of white and when dry was coated with up to 5 layers of acrylic gloss varnish. |
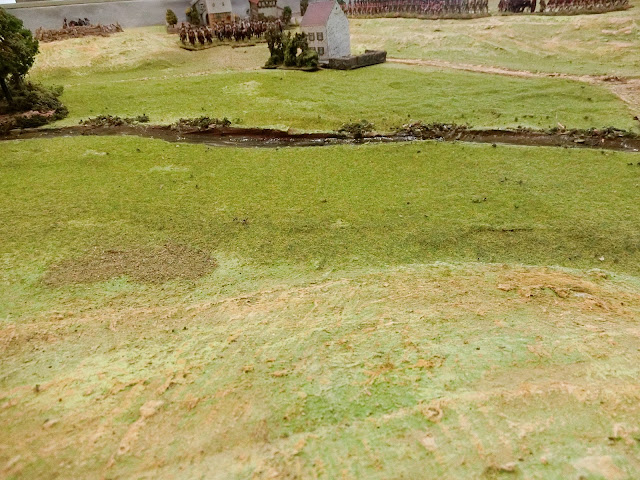 |
| View showing the transitions of surface textures from the basic painted terrain through static grass/sawdust finishes, and all the streams were judiciously edged with my general mixture of green foam scatter and commercially bought tufts. They help offset the stark look of the cut-out cardboard river banks |
 |
| Kaindorf in the foreground |
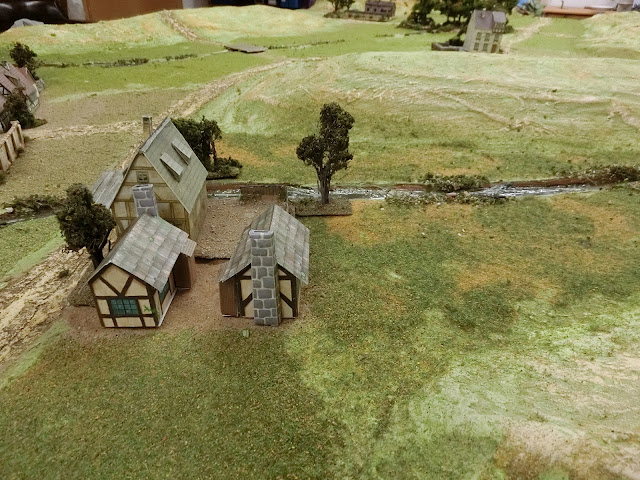 |
| The hamlet of Mauthaus |
 |
Looking down on Lunzen from the high corner moorland with cliff edge and paths. Covered with dry grass in two or three colour combinations and "winter tufts" to mark the paths.
|
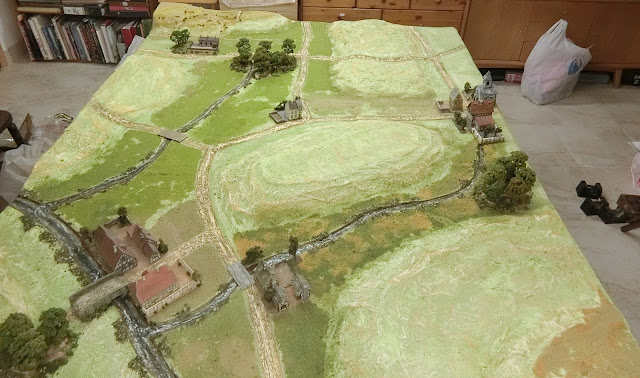 |
| Finished effect before the soldiers arrive |
Battlefield as parade groundI wanted to give the players an idea of how big the units are before the day to help their planning. So the following is a further look round in the company of my small, but growing, Hanoverian army.
 |
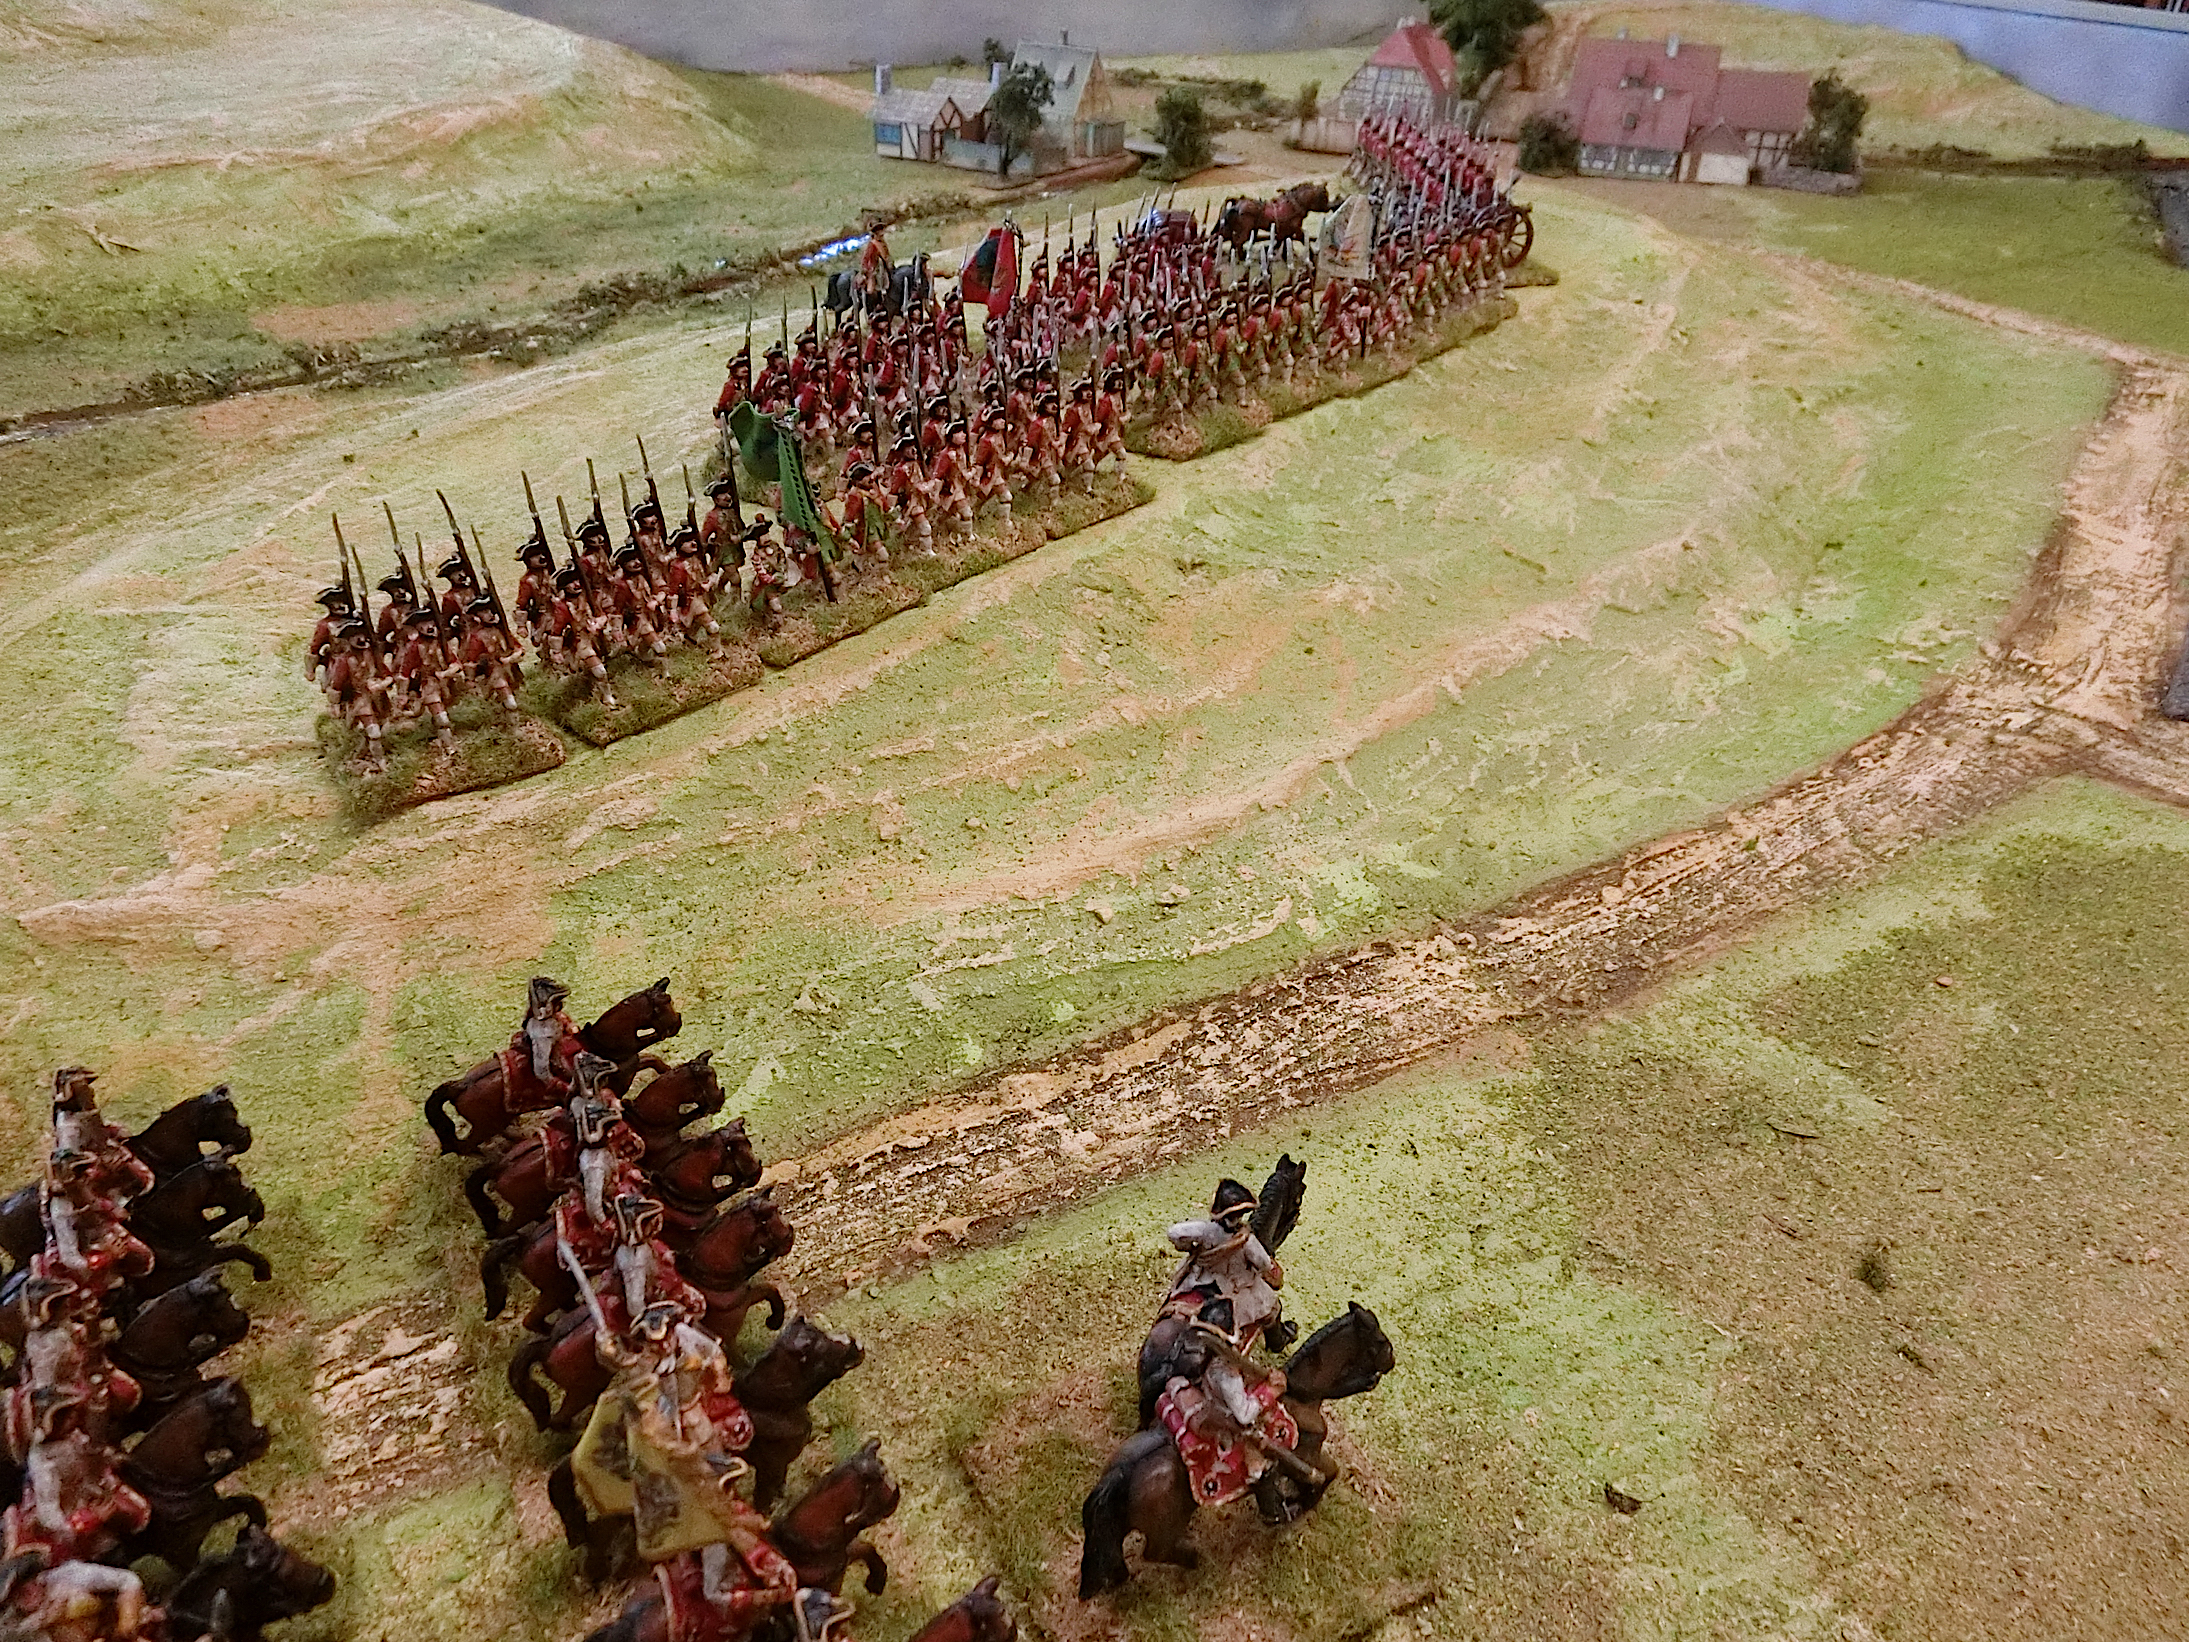
| The overall look with an "Honours of War" brigade of infantry and one of cavalry, and an independent battalion of Jägers garrisons a forward hamlet. By now I have refurbished the grey cloud/smoke backdrop which sets off the terrain nicely and is multi-use. The how-to on Making trees I did a year ago. |
I will finish off by giving you a taste of Ken's Imagi-nation campaign. We pick up after the battle of Stadl an der Mur
The Mur Valley Campaign – Madling, October 1753.
Electoral Outline
"1753 – The Elector has tired of the long period of peace between the electorate and the Grand
Duchy. Whilst it has been useful in allowing him time to rebuild and train his army, the time has
come to further his territorial ambitions by seizing the Mur valley from the Duke.
The annexation wasn’t as easy as the Elector expected. The Ducal army reacted swiftly to the
invasion and successfully halted the electoral advance before Tamsweg. The campaign has
degenerated into a war of outposts as the two armies struggle to gain an advantage and the fear of
failure overcomes any martial ambition or initiative by the two commanding generals.
An attempt last month to outflank the Ducal forces at Stadl failed and the appearance of
unidentified foreign regiments at that battle confirmed intelligence that the Duke was being
supported by a coalition of neighbouring states who have also suffered from the Elector’s military
ambitions. Although coalition forces have not been committed to the fight anywhere else, it can only
be a matter of time and the army is likely to find itself heavily outnumbered.
The Elector’s generals now await the arrival of winter and an end to the campaigning season that
will allow them to consolidate on their gains in preparation for a resumption of the campaign next
year.
The message from the Elector is clear. There can be no more failure after the Stadl debacle. The
army will not give ground and lose the territorial gains made. Several of the generals whose
performance particularly displeased him at Stadl are now residing in the Electoral prison at
Oldenburg and he has made it known that there is plenty of room for more to join them. "
In outline - The Electoral Commander, von Stuttenheim is defending everything to the East of the Stronbach. He only has two brigades of mixed light troops at the start and the Ducal Advance Guard is expected to arrive from the Northern baseline...............
Steve and Kevin conceal most of their defending troops ......not much to see
......until Paul's Ducal Hussars and Grenzers hit Lunzen farm like lightning and the defenders are revealed.
A lot more next time.......
(PS Please feel free to comment but my replies might be delayed due to a pressing commitment away from the computer)


.jpeg)


Fantastic modelling and terrain making Chris, thank you for sharing and inspiring. I need a games room like this to complete all the projects in my head.
ReplyDeleteSee you in June.
Willz.
Thank you Willz . When you come here in June we will be playing a game on a variation of this table top.
DeleteWonderful post Chris and as always, your artistic table making process is fascinating and inspirational. Great looking game and looking forward to more updates.
ReplyDeleteInteresting preparation...gorgeous terrain!
ReplyDeleteThanks Carlo and Phil for your appreciation and constant support for my creations
ReplyDeleteVery inspirational, the terrain is top notch, quite superb. Looking forward to the next post!
ReplyDeleteThanks a lot Donnie. Yes, me too, hopefully within the next couple of weeks
DeleteFascinating for me to see how you went about making the table Chris. I must say very impressive work and has certainly given me some ideas for how to make stuff for my games going forward. I'm certainly looking forward to the first part of the battle's AAR. Keep up the good work!
ReplyDeleteSteve, I'm glad you found it interesting to "look under the covers" so to speak of what you were wargaming over. Thanks so much for coming along and giving us the benefit of your good humour as well as for your great blog write-up.
DeleteAn excellent article. Really impressed with how much work you put in to help other players realise their plans. Terrific.
ReplyDeleteThanks so much Paul. I suspect you and I are similar in that putting in effort to share our wonderful hobby for the benefit of others is what gives the buzz. I feel so lucky I like to spread it around when I can.
DeleteVery impressive terrain work, as always. Don't think many of us would have the inclination to work so hard at it but the results certainly justify the effort! :-)
ReplyDeleteLook forward to the AAR too. It's certainly a packed battlefield - not much room to manouevre at all. There's going to be some crunchy fighting going on there... ;-) As you say, with Honours of War the amount of disruption as units are forced to retreat or rout as well - absolute mayhem!
Cheers,
David.
David, as you will find out when we have a chance to meet I am mad when it comes to hobby input, but certified as no mental health disorders! Yes, too many troops for my liking but Ken loves to stretch the capabilities of his players and it certainly got a few lines busting as you will see later, hopefully soon.
Delete:-) I suspect that, in the eyes of the world, as wargamers we are all regarded as pretty crazy! But it's a "good (and very creative) crazy" from our point of view... ;-)
DeleteReally looking forward to the AAR. (No pressure ;-))
Cheers,
David.
At last I can finally comment again ! Wonderful looking game and a sensational tutorial on how you build your terrain. For all those working on a tight budget this is a masterclass in what can be achieved , very inspirational.
ReplyDeleteMartin good to hear from you and thanks so much for your praise. Yes the main expenditure is on PVA glue and paint (but I buy big cans reduced at such DIY stores as Wickes or B and Q) and also the commercial scatter and tufts. Very reluctant to pay the prices for commercial "add-ons"but I do treat myself occasionally if an offer comes along. Hope the result does not look too homespun.
DeleteAmazing terrain and troops! Great stuff.
ReplyDeleteKind Regards,
Stokes
Thanks Stokes, please take a look at Part Two, and I'm currently working on part three
Delete