I hope you have enjoyed my Part One post giving an introduction and how-I-made-the-terrain. In that I gave photos of the setup and explained that Bijlandt's Dutch-Belgian Brigade had started off in the historical position on the forward slope but that Richard, as Wellington, had quickly ordered him to move before the Grand Battery opened up. This was in fact a little white lie to disguise a "cock-up" in the original Allied brief which Richard reasonably interpreted to mean he did not have to start Bijlandt there!
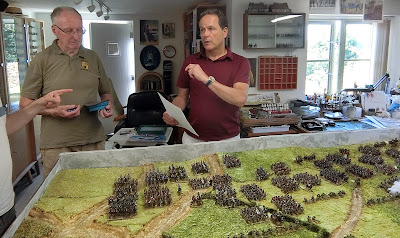
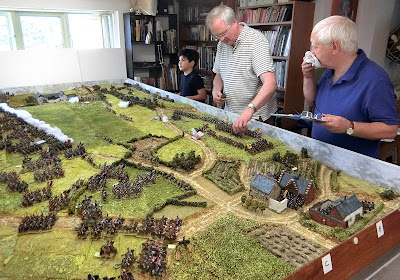
We three organisers/umpires had to make a compromise, so Bijlandt was put in columns of march and headed towards the new position along the Mont St Jean road to the East. Here is a photo near the start with the Allied commanders deep in discussion.
 |
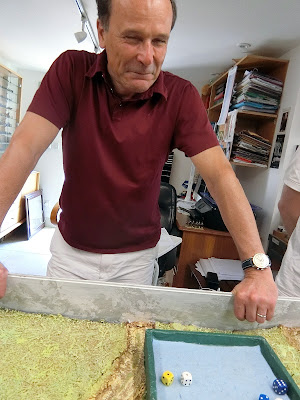
| Charlie, Richard Newcombe, and Paul B discuss possibilities now the respective artillery barrages have commenced about 1 pm game time (1030 a.m. real time). We allowed two "free" rounds of artillery fire before the game proper started to give some effect before troops moved. |
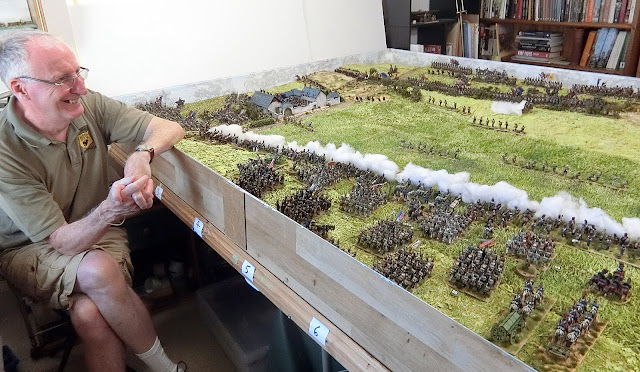
Having set the scene I will backtrack a bit. JP had the original idea for this (based on a General d'Armee scenario expanded) and was driving the game and supplying about 90 per cent of the figures. As JP is a very busy man Kevin East had taken on all the documentation, adapting my maps for deployment choices, and writing the briefs as well as simplifying the orders-of-battle for game purposes. Apart from making the terrain my role was to act as "map-umpire" and generally give everyone the benefit of my (impartial) opinions, as is my wont. Rather strangely, due to not enough players being able to attend on the day, both Kevin and JP were playing - both as French! (hence the need for my impartiality)All the resources you might need to understand our game fully, including briefs and orbats, are available as downloads from the right hand sidebar under Napoleonic here
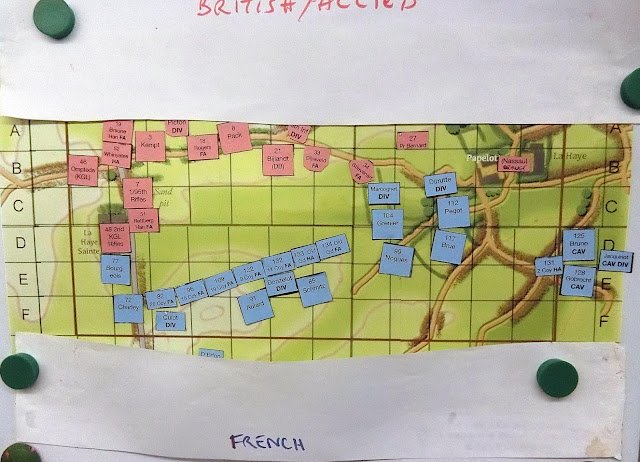
Some maps:
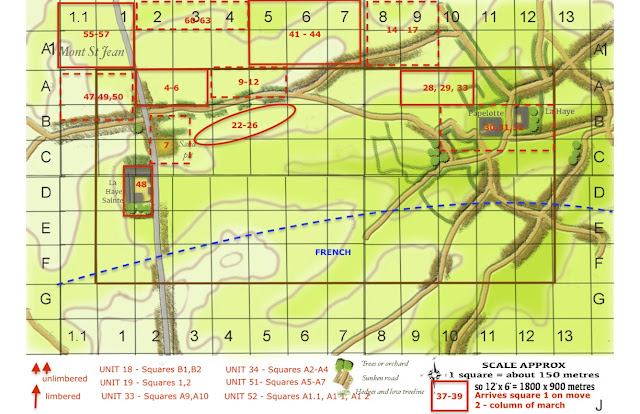 |
| Above and below: Maps for Allied and French commanders giving areas within which to deploy Divisions and Batteries, and an idea where the enemy will be |
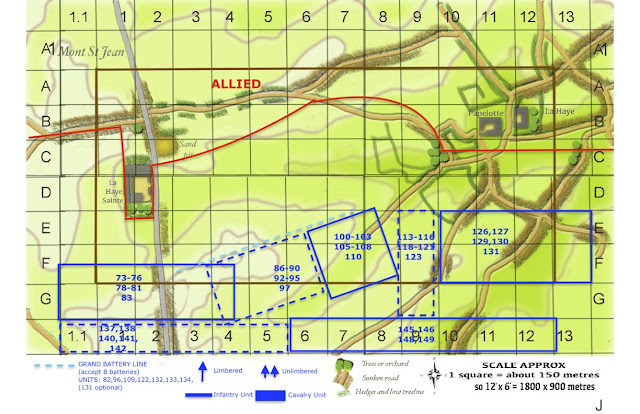 |
| The map allowed both sides to deploy and move off-table reserves |
I have a metal whiteboard and can attach documents with magnets. I made enough markers on magnetic paper to represent each brigade and battery, plus Divisional and Army commanders to help identify the space taken up. I devised a simple set of combat rules for off table should they be needed (available
here ).
Each unit was allowed to move one square off table if an ADC was allocated and successful. More ADCs gave the potential to move faster.
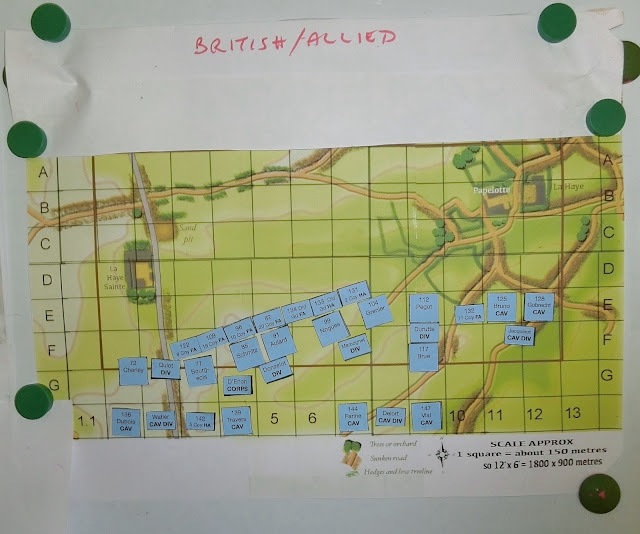
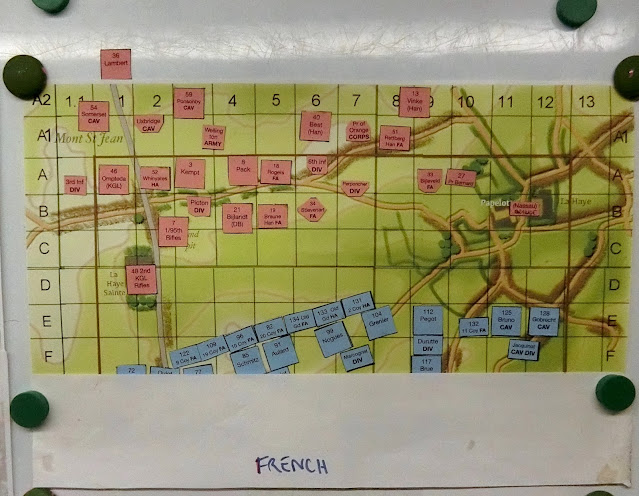 |
| Complete Allied deployment, and French - on-table units visible (Batteries 131/132 were reversed) |
 |
| The complete French deployment before I placed the Allied army. I think the reserve Cuirassiers Divisions eventually got reversed . The thick brown lines denote the 12 x 6 feet playing area |
The Plans
As will be evident from the maps the two commanders (Richard as Wellington and Tony Dillon as D'Erlon) were expected to deploy in approximately historical areas but could then develop the battle as they saw fit. Historicity was skewed somewhat by the practical wargaming necessity to enjoy increased armies by the bigger battlefield, but this was still only a third of the whole Waterloo field so reserves had to be limited to what was available in the immediate area. So there were no French Guards or Dragoon brigades and for the Allies no KGL Hussars or British Light Dragoons, and very limited artillery.
French
I was only party to a brief "order" in writing from Tony to attack Mont St Jean (MSJ) with a right hook, and that all battalions were to be formed in attack columns "chequer board" style. In fact much more was said in the pre-game council of war each side was allowed. Tony, JP and Kevin, devised a plan to take the right hand Cavalry Division (Jacquinot) off the table and outflank La Haye. At least this might distract reserves from the centre and at best allow a combined attack on vulnerable infantry. Simultaneously, Durutte and Marcognet's Divisions were to develop a strong attack on the Allied lines between Papelotte and the centre. Quiot's Division on the left flank would attack La Haye Sainte (LHS) and keep the British and KGL pinned down along the chaussee to Brussels. Donzelot's Division would remain in reserve behind the Grand Battery. The two Cuirassiers Divisions were kept well back off the table at first but the intention was to try to bring them on at some point, either to exploit infantry success or to entice a counter-attack by Allied cavalry and disrupt the defensive lines. In his brief Kevin had imposed a limit (to give some realistic historical restraint) on Watier's cavalry in the centre not to be able to attack further forward than the mid way line C-D on the map.....but the Allies were not to know this....
British/Allied
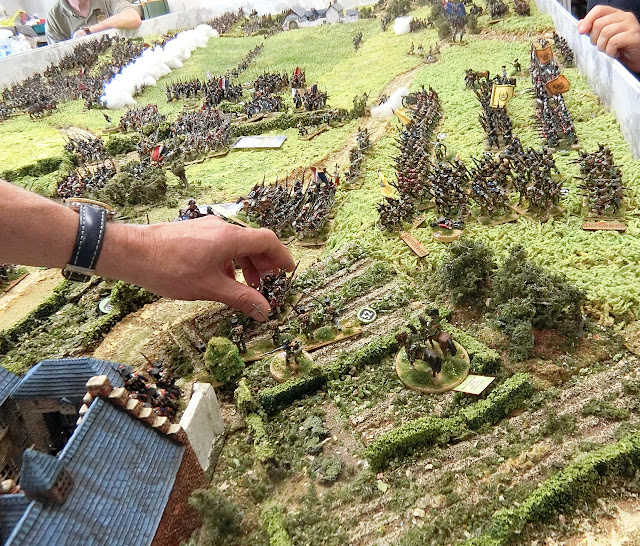
On the face of it the Allied job looked easier. Good quality troops in a strong position on their right flank with Charlie playing Picton and KGL commanders, and bringing the superstar quality of his YouTube"rolling 6s" fame, what could go wrong? Paul had the more difficult job of moving Bijlandt's brigade under fire to a new position and then "digging in" to defend the eastern slope of MSJ and the farms of Papelotte and La Haye with rather sub standard quality Dutch Belgian and Nassau troops. He had Vincke's Hanoverians off the table as backup. Richard masterminded the allocation of ADC's and had direct control of both heavy cavalry brigades plus Lambert's reserve infantry.
The Opening Stages
From here on I will try to keep the narrative simple as JP has encapsulated each move in a short narrative on his YouTube channel (links at bottom of this post).
 |
| JP, Tony and Kevin discuss the French tactics |
 |
Charlie starts as he means to go on -
a double six as the very first roll in the game! |
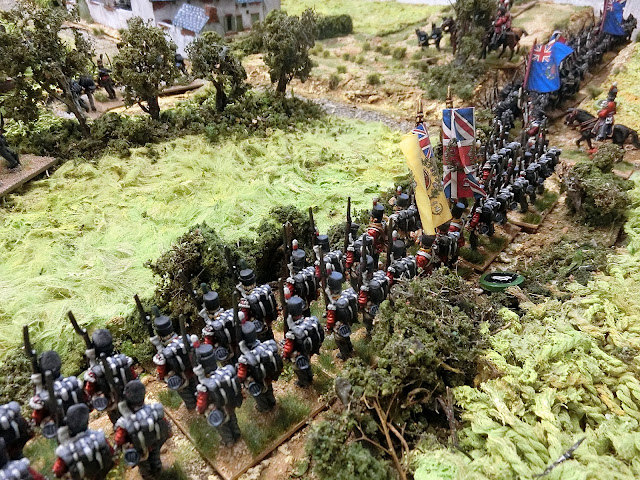
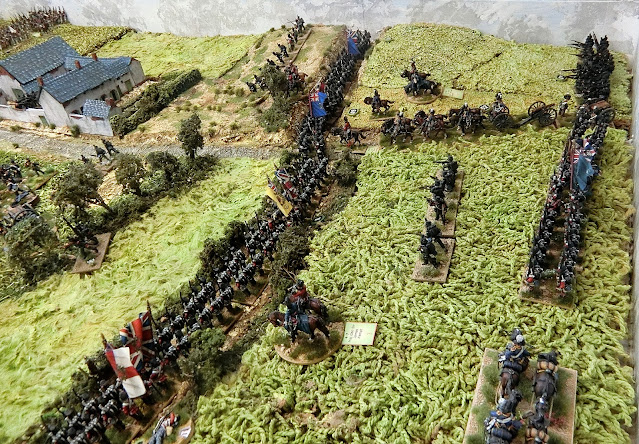 |
| Picton's line above LHS |
 |
| Durutte's Division commences the "right hook"... |
 |
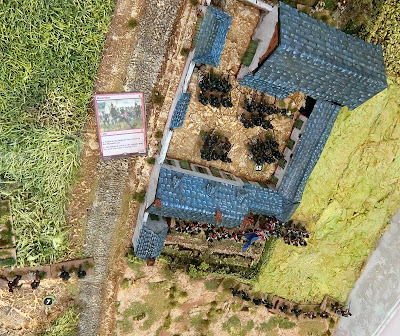
| ........against Nassau infantry |
 |
| Dutch Belgian battery |
 |
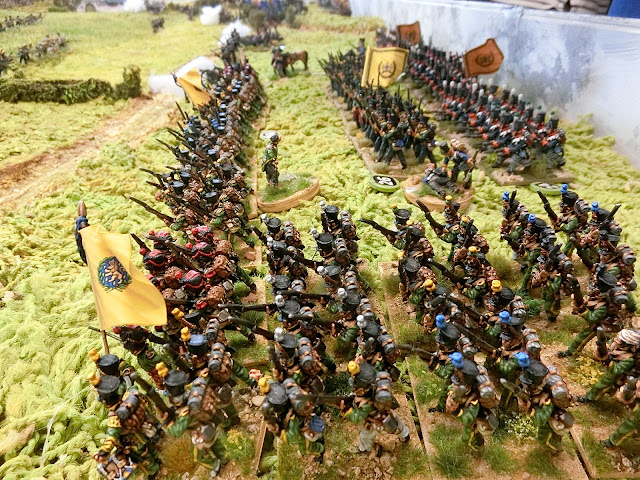
| Bijlandt's moving off at speed |
 |
| Paul begins to reorganise the Allied left centre |
 |
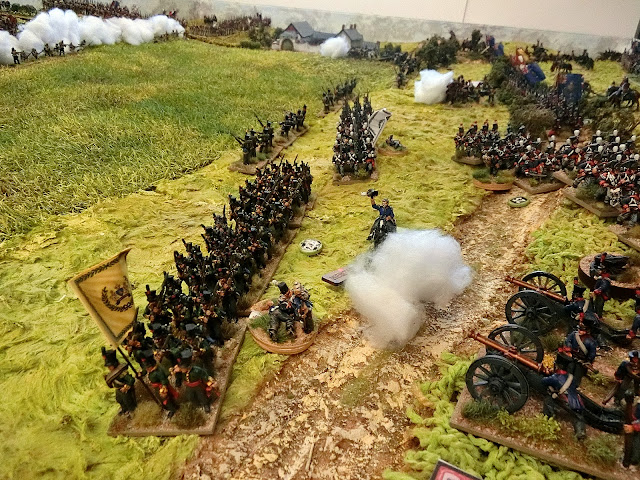
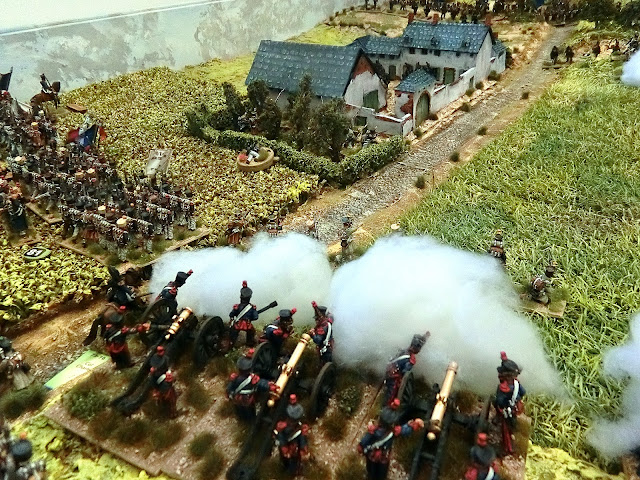
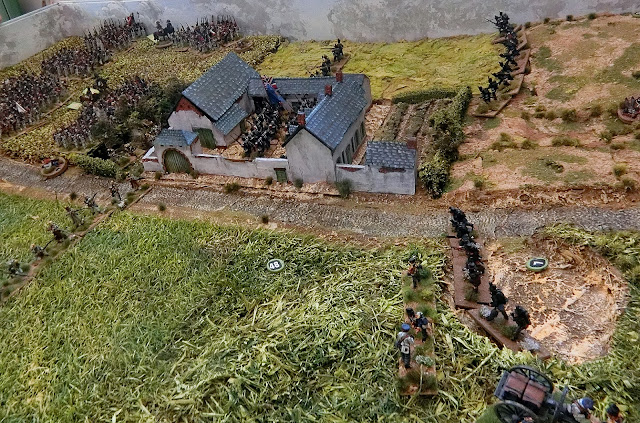
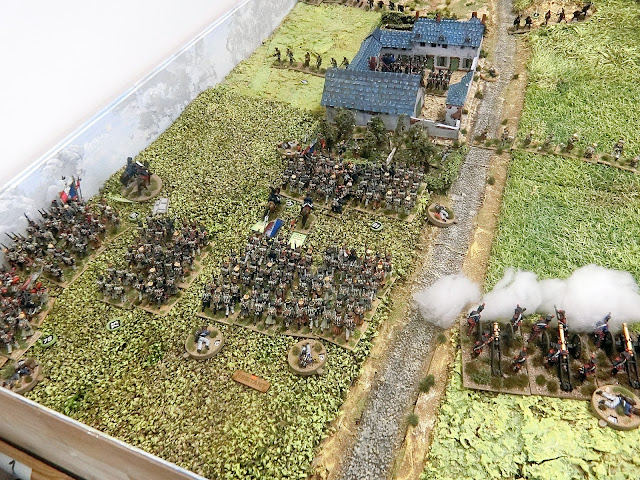
| Charlie stands firm overlooking a tentative advance by Quiot's leading brigade on LHS |
 |
| The British battalions get some cover from the hedge lined summit road and reduced casualties in the "bounce through" area behind |
 |
| The 28th Foot (Gloucestershire Regiment - Yay!!!) were to keep a good record throughout our battle |
 |
| Bijlandt's had kept sustaining casualties from the Grand Battery fire..... |
 |
| ...and a couple of battalions scarpered to the rear slope of MSJ to reform |
 |
| Durutte's skirmishers open a dual with Nassau light troops |
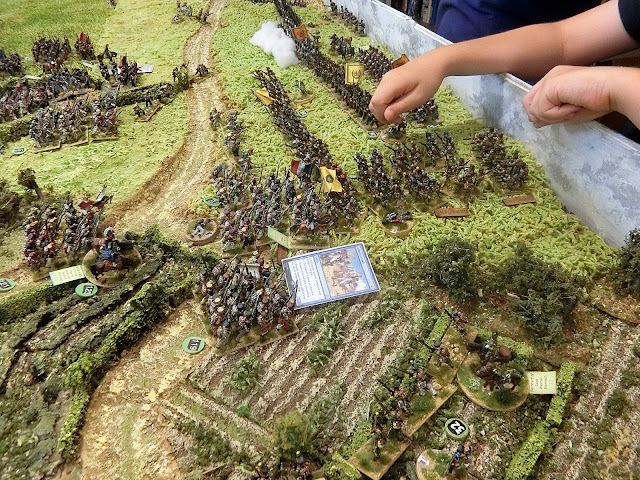
The French Attack Develops
 |
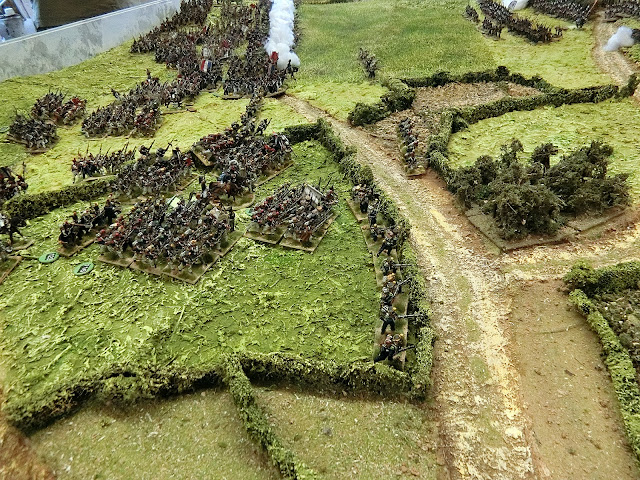
| Nassau line battalions and Dutch-Belgians have been deployed back for fear of the Grand Battery fire |
 |
| Marcognet's Division moves round to the right of the Grand Battery to join Durutte in the "right hook" |
 |
| At this point Kevin took Jacquinot's Cavalry Division off table to the right. I had the job of tracking their map movement; more on that later |
 |
| The 2nd KGL Light Battalion was under constant artillery bombardment and skirmisher fire in LHS |
 |
| The French were playing a patient game to allow the Grand Battery to maintain fire as long as possible |
 |
Charlie and Richard attempt to fill a gap which had developed
in their centre |
 |
| Prince Bernard of Saxe Weimar's and Bijlandt's infantry try to maintain a fierce looking frontage to the oncoming French veterans |
 |
| Picton deploys skirmishers forward to take some of the battle, at least, to the French |
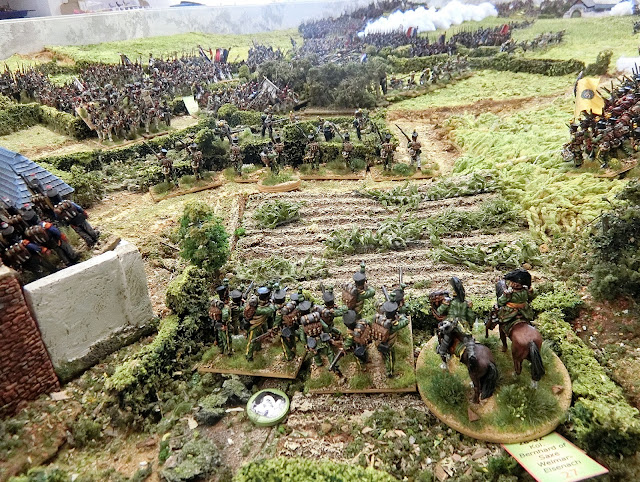 |
| Nassau Light troops in close skirmishing with Durutte's voltigeurs near Papelotte |
 |
| Just my luck - as Tony puts his first serious attack in on LHS he has displaced the barn roof - so much for my modelling skills! |
 |
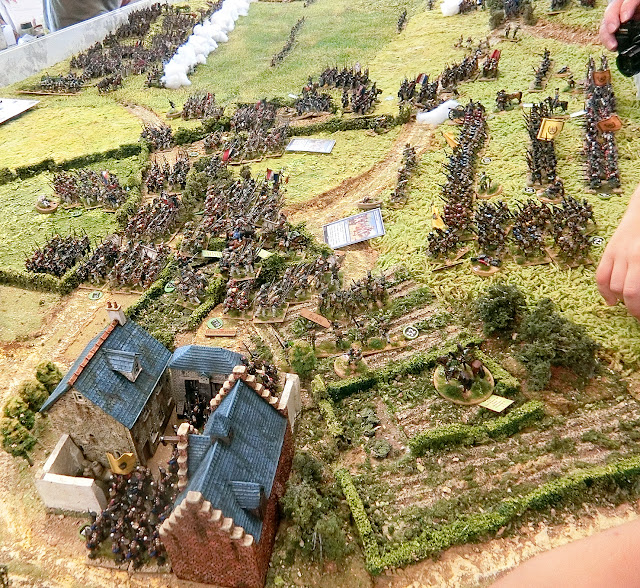
| The magnetic map helped give some overall picture of how the battle was going (players had a habit of messing me about a bit, unintentionally so it's not 100% accurate throughout!) You can see Jacquinot's cavalry now off the table are at the right, "hidden" in sunken lanes and high hedged fields |
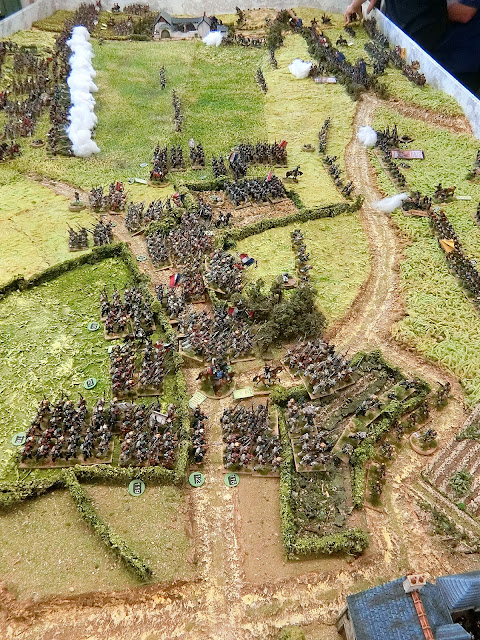 |
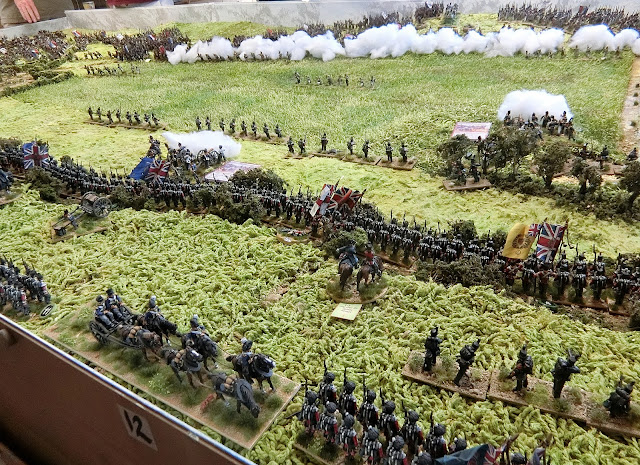
Durutte's and Marcognet's Divisions now in parallel.
Half the French infantry available is in this attack |
 |
Jacquinot's Horse Artillery was left behind - sub-contracted to Durutte to aid his attack
|
The Allied initial resistance
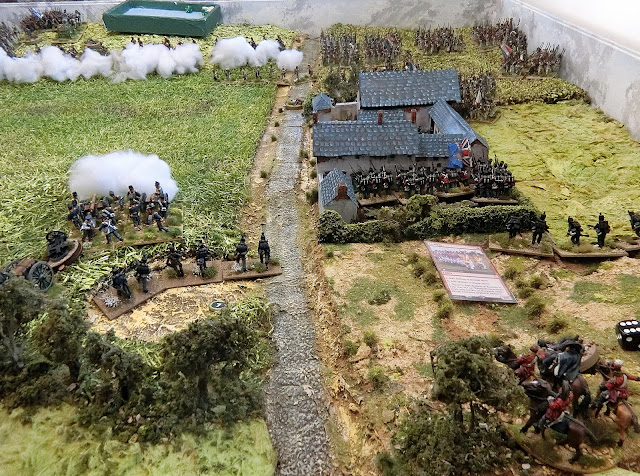 |
| Ompteda puts forward a KGL line battalion to reinforce LHS |
 |
| Artillery and skirmish fire causes some disruption among the Nassauers |
 |
The Grand Battery and skirmishers are causing pain to Bijleveld's Foot artillery battery which
now has 8 hits |
 |
| Although I'm impartial I was pleased to see those terrain disrupting French got pushed back by a now-weakened 2nd KGL light. Another column is attacking through the orchard |
 |
Shortly afterwards Charlie decided to form 2LB KGL into
skirmish order and follow them to make room for the 5th KGL Line |
 |
| Kevin presses Durutte's columns up the slope |
 |
| Where they were promptly hit by Nassau light troops lurking behind Papelotte farm |
 |
| The dice did not go well for Kevin!....... |
 |
| ....probably due to Charlie's "evil eye" |
 |
| Effective volley firing from Nassau line battalions saw off Durutte's leading columns |
 |
| Marcognet's first attack goes in at more or less the same time.... |
 |
| ..............but with similar results |
 |
| The first French infantry attack has been surprisingly thwarted....... |
 |
| ......this time the double 6s were being rolled by the big man - Paul B |
 |
with typical Dutch coolness he toasted his achievement in water
(in 33 degrees C !) |
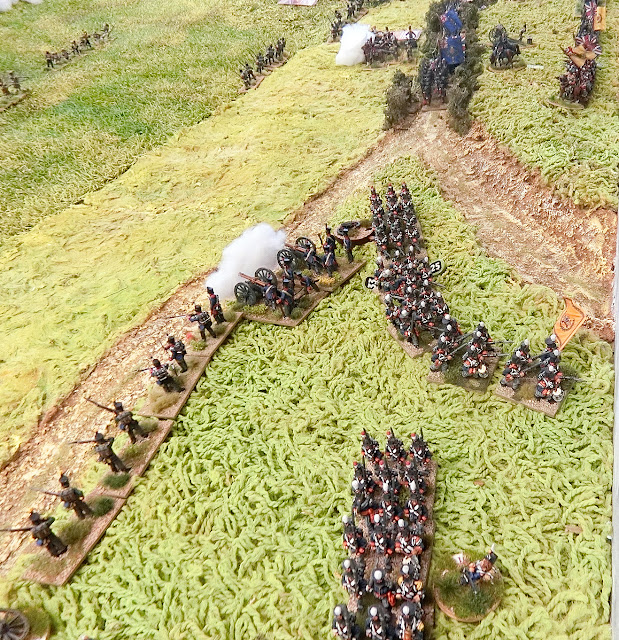
French second wave attacks
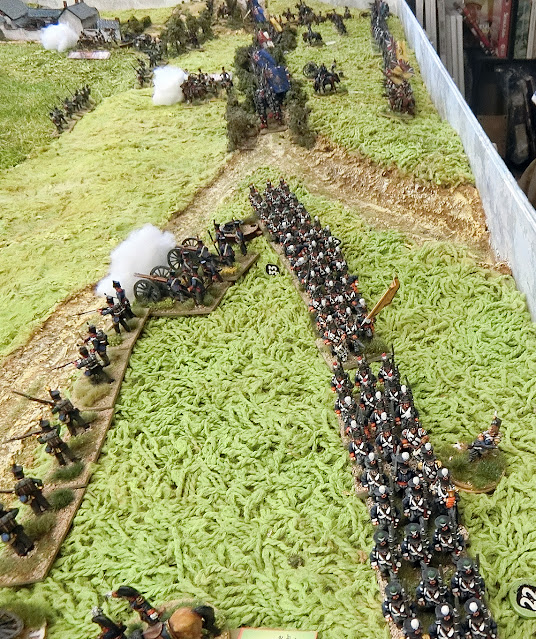
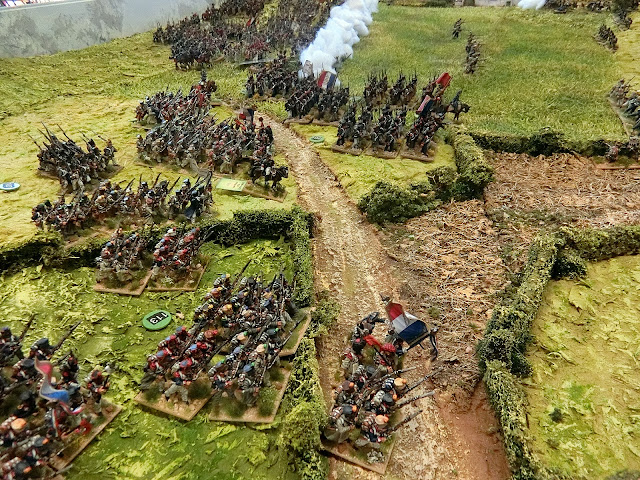
 |
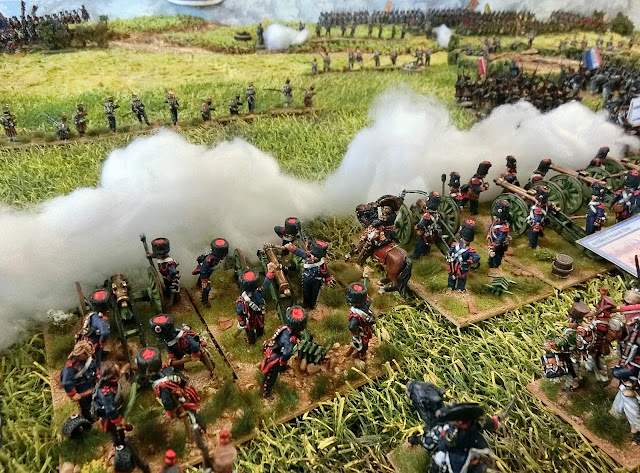
| A second attack on the LHS barn entrance; skirmishers at front and right, and the constant artillery fire |
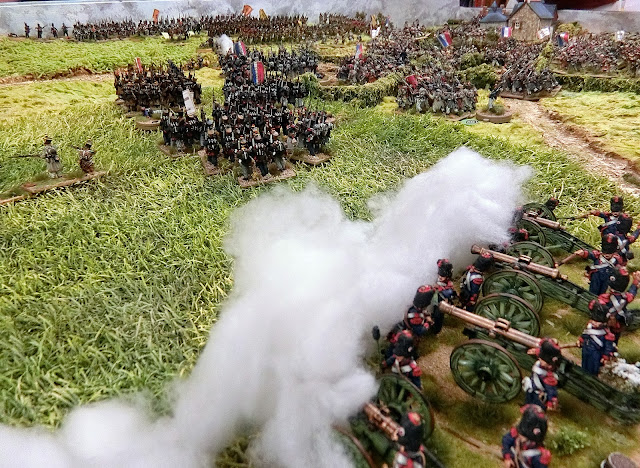 |
| Napoleon's "daughters", Guard 12 pdrs in the Grand Battery, pound the allied lines before the next attack |
 |
| The annoying Nassau skirmishers are being pressed back |
 |
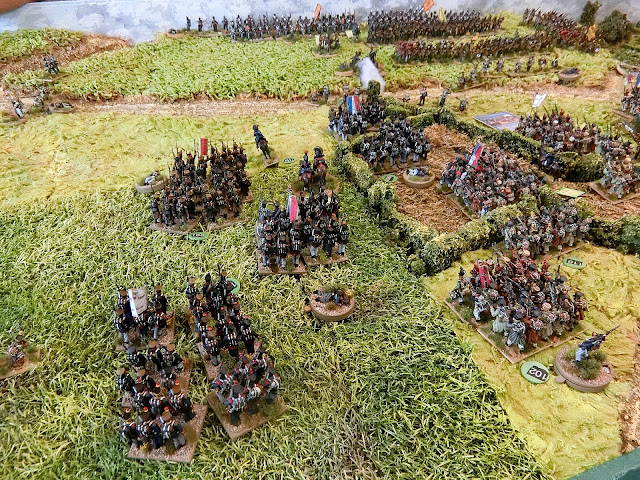
| D'Erlon looks on pleased to see a resurgence of French forward movement; and he still has a division of infantry and two of cuirassiers uncommitted |
 |
| Durutte presses forward with the next brigade |
 |
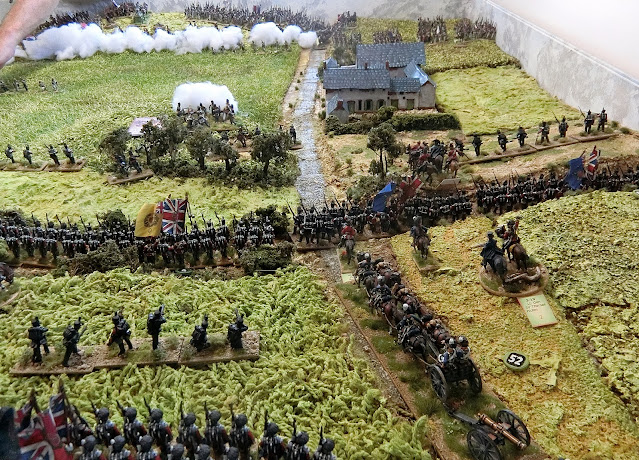
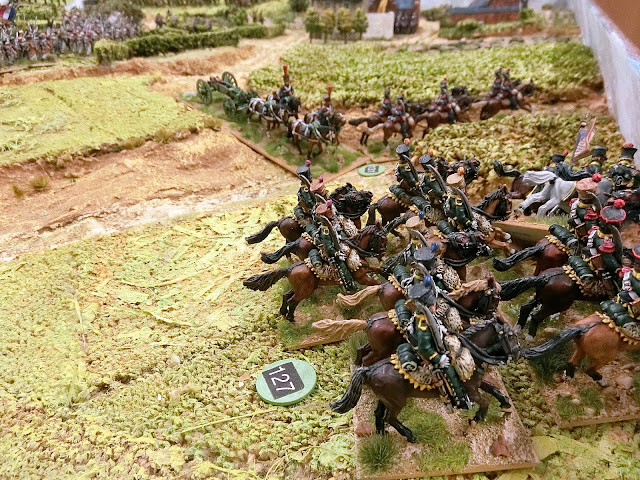
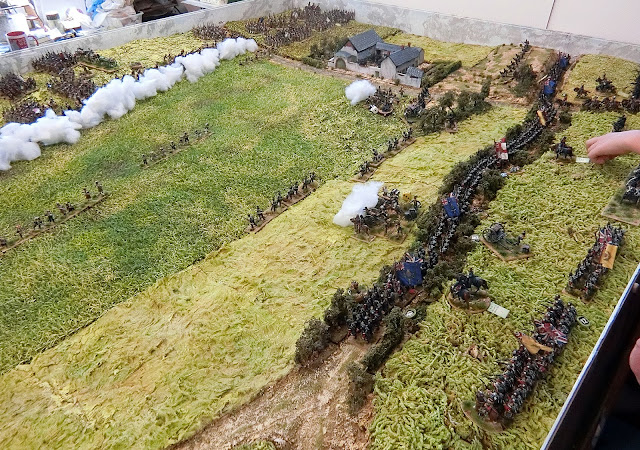
| This panoramic view shows that Jacquinot's Horse Battery has taken up a semi-permanent support to the infantry while the Hussars and Lancers are still off to the right. Tony is just bringing on his first brigade of Cuirassiers at right centre. Richard has Lambert's brigade reinforcing the main Mont Saint Jean position |
 |
That was necessary as the Grand Battery was taking a steady toll.
That gap on the road has just been made by a Highland battalion
scuttling to the rear to reform |
 |
| the Allied "reformers" shelf! |
 |
| Just to add to the collective sense of Allied dread here is a Cuirassier's eye view of the thinning line on MSJ |
 |
| The Nassauers and Dutch-Belgians are still hanging on but with mounting hits. If they win, that Infantry Assault card will take victorious Frenchmen over the enemy "backline" under the terms of their orders to clear MSJ! |
 |
I've never yet seen Charlie upset however the game is going.
He was a ray of sunshine even on this hottest of days |
 |
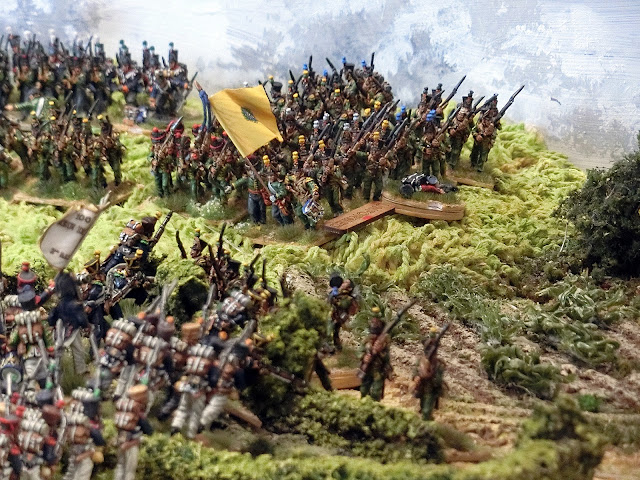
| Nassau battalions begin to break under pressure.... |
 |
| ...but on the other flank the French have once again been repulsed from an attack on LHS. However 2LB KGL (the skirmishers outside the LHS stable block) have suffered badly over the nearly two hours of fighting |
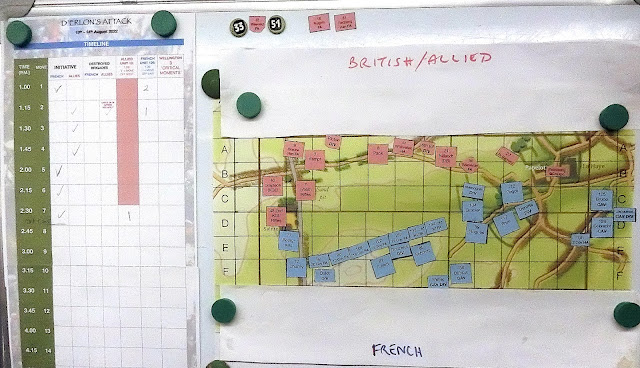 |
| Game Turn record and magnetic map after 7 Moves |
It was around 5pm real time and some players had to go. We'd done 7 Turns and got to 2.45 in game time at the end of the first day's play. The map shows the French Light Cavalry Division in the same position! Unknown to the Allies, the sad truth was that poor Kevin had been rolling 1s and 2s, even with rerolls, to activate his ADCs and get the flank march underway. Leaving them in sight on the map had a slightly unnerving effect on the Allies, who in reality were having a narrow escape from a serious threat....how would it develop? Unseen, more French Cuirassiers were moving up to the left of the Grand Battery and, likewise, Wellington was bringing his two heavy cavalry brigades into a more central reserve position.So far I was full of admiration for the smooth way JP had conducted things and the good spirits displayed by everyone in such heat.
JP has published some great videos on this at time of writing.
This one is Terrain tour and set-up day
And this is JP's report on Day One - The infantry assault
Hope you will watch them and also comment on this blog if so moved, thank you.
Interlude
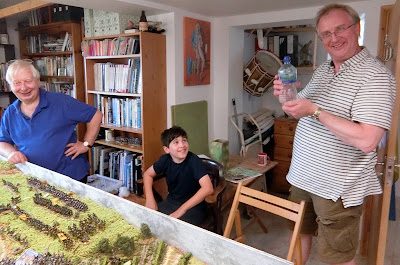
I was lucky to be able to entertain Richard and Tony for that night. After we'd satiated our appetite on pizza at the pub and started on the beer, and refreshed our palettes with Jane's famed apple crumble and ice cream, the chaps were willing to humour their host with a crazy idea. Hot Summer night and plenty of beer let's have a game outdoors!
I got them to set up a simple terrain while I concocted two orders of battle for "Honours of War" and allowed them to fill it with chosen units from my cabinets. With a crowded table and two gung-ho opponents it did not last long....but the sun was going down fast. Eventually I broke out the rechargeable lights and we had a little romantic evening just me, Tony, Richard and the dice.......I can't remember who won.....who cares!?
So, there will be even more Napoleonic drama in the next part. That won't be till early September I'm afraid, due to other commitments.


Truly very well done. I've enjoyed JPs videos on this game and there are many aspects to your write-up which I admire. Perhaps needless to say, a gorgeous result with superb terrain. Inspirational stuff.
ReplyDeleteSorry about your name! But thanks so much for visiting my blog and for your compliments. I think both JP and I share a love for inspiring other wargamers.
DeleteWonderful! Very inspiring; a visual treat. I usually find Waterloo a bit hackneyed and overfamiliar but this certainly makes it seem exciting again... :-)
ReplyDeleteCheers,
David.
Thanks for your comment David. I agree with you to some extent but it was 7 years since we'd done Waterloo and I knew this would be special.
DeleteTremendous report as always Chris and the photos and troops are unsurpassed. Great to see so many happy and smiling faces around the table. Wonderful post.
ReplyDeleteThanks a lot Carlo....more to come in the final Part soon
DeleteWonderful stuff Chris and wished I could have been there for Day Two, especially after getting stuck in traffic in London on the way home! The board looks brilliant and the AAR really does help pne follow the action, ditto the magnetic board. The off table movement is a nice idea too.
ReplyDeleteYes Steve, I wish you had too ...but you will get your chance to play on this tabletop. Thanks for the supportive comments
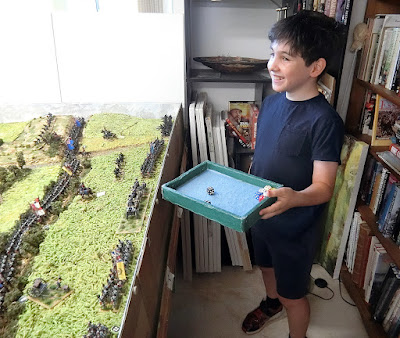
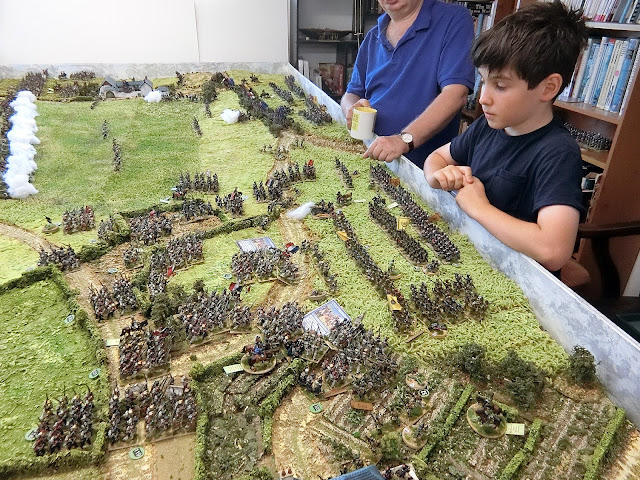
DeleteYour young player looked to be having a grand day out.
ReplyDeleteGreat stuff!
Charlie always seems to and so did the rest of us. Despite his long face Kevin perked up straight away once his bayonets and sabres were levelled again
DeleteAbsolutely inspiring - thank you!
ReplyDeleteAnd to you Sir for your appreciation
DeleteSuperb. I’m not surprised Charlie is smiling. Can imagine what I would have been like at that age with all those wonderful models. Crikey, I’d be like it now.
ReplyDeleteChris/Nundanket
Haha, Me too!! Charlie is used to his Dad's prolific toys but still says he enjoys coming for my terrains
DeleteYet another wonderful looking game , truly tremendous and the write up brings it to life.
ReplyDeleteTerrific terrain and great looking figures , what more could you ask. Waterloo like David said can be a bit stale but this game shows it can still be great fun.
Not sure why I am anonymous, perhaps because I am abroad: Martin Gane
ReplyDeleteWell Martin, thank you so much for visiting us incognito and commenting enthusiastically as usual . Hope you get back safely to UK
DeleteFantastic display of Napoleonic eye candy and superb terrain.
ReplyDeleteThat looked like an enjoyable game Chris.
Willz.
Yes it was Willz, and I wasn't even playing so enjoyed watching it all unfold!
DeleteExcellent as ever Chris. I noted you made the ground around and to the west of Papelotte broken with hedges etc., inhibiting cavalry and slowing infantry. This was of course correct, and something I missed in my own recent Waterloo game. You live and learn I guess!
ReplyDeleteLooking forward to the next post.
Thanks Keith. The terrain features are taken from "The Waterloo Companion" which i find excellent for the maps. Added to which Kevin and I were taken along many deep and tree-lined lanes around here in 2014, and although foliage has grown a lot in 200 years the character of this area felt right to be dense
DeleteAnother great report Chris - this is a great game to play- you know you'll have to do the Hougoument side next now don't you! Best wishes and thanks
ReplyDeleteThanks a lot Kerry. I hope you are joking, I think we did Hougoumont to death in 2015 - see the Popular Posts sidebar at right - that one has had over 4,300 views to date.
DeleteWonderful as always!
ReplyDelete