First of all though I forgot to say that if you see the previous photos I painted the back drop all round at a fairly early stage. This was done by first using a broad brush to give a coat of white gesso all over. Gesso is what we artists use to prime our canvases and it gives a very good ground for acrylic or oil paints and does not dry too quickly, also you can stain it with acrylic paint which is what I did then. In theory the blue sky should fade to much lighter nearer the horizon but with only 5 or 6 inches height to play with there was not much scope for getting that right. If you do it will give a much better feeling of distance. That dried in an hour or so and I was able to use acrylic white, Paynes Grey, and various tints to get the fluffy clouds. If you add small tints of colour like blue, brown, yellow or even dark red to your clouds it gives much more character and mood than just a grey made from black and white. When nearly dry I used a smaller brush to highlight the tops in white where they would be hit by the sun. Yes I know it was rainy and then overcast for most of 18th June 1815 but that would be a bit boring - evidently the sun did come out in the evening! Instead of clouds paint smoke if you like - probably more realistic!

Next picture shows treatment with what I shall call my "gloop". For this project it was made with varying amounts of water, powder filler (like you use for filling cracks in household plaster), PVA glue, sand , acrylic paint and sawdust. The sawdust was mostly long and rough because I had tended to pick up bagfuls of the stuff while the builders were cutting joists and making cupboards in our new house, but you can buy it in large quantities at pet shops. More on the textures later.
 |
| Gloop on the right painted round the roads and stream |
 |
| I wasn't consistent with amount of acrylic paint so got varying shades of brown which was intentional as I was aiming for a variety of crop colours |
 |
| This close up shows the stone chausee using strips of textured wallpaper hardened with PVA tinted with a grey acrylic base coat. The roughness of the field texture shows well - I was trying for a look of trampled down wet crops. The roads at this stage were just painted in to show me where to leave blank |
 |
| Examples of different treatments. The foreground is not crop fields and so I used a basic plastic kitchen sieve to grade a finer quality of sawdust. In the L-shaped corner which is the base for Plancenoit buildings I used sand and grit and dried tea leaves, although I did change my mind later. At this stage I had coated the streams with a dark brown mixed with PVA to begin to build up a hard, non-absorbant surface on the MDF . That had to be done early so as to build up the banks with gloop. |
 |
| Now it's all being coated with a very thin underpainting of burnt umber acrylic. That unifies the whole art work without destroying the different shades of brown. |
 |
| Close up while still wet. I did this project in March and April when the southern UK experienced a few weeks of fine weather so each stage dried fairly quickly |
 |
| The undercoat toning is complete and now the built-up areas (BUAs)have been indicated by a grey gloop using fine sand and grit |
 |
| The stone chausee was stained to bring out the wallpaper texture and then dry brushed to highlight the "bricks". The BUAs were treated the same. |
 |
| Where the trees are to go I delineated the areas with a dark green acrylic paint. You can also see the yellow wheat/rye fields taking shape with acrylic staining and dry brushing |
 |
| There is no formula I can describe, I just went on dry brushing with different greens, yellows, browns, etc till I arrived at a satisfying patchwork of crop and grass colours. Plancenoit BUA has now been redone and coated with some left over silicone texture from rendering the outside of our house, mixed with acrylic colouring. |
 |
| Here is close up of the cutting where the chausee passes La Belle Alliance and goes down to the position for La Haye Sainte |
 |
| The extra bit to go at the side had not been forgotten |
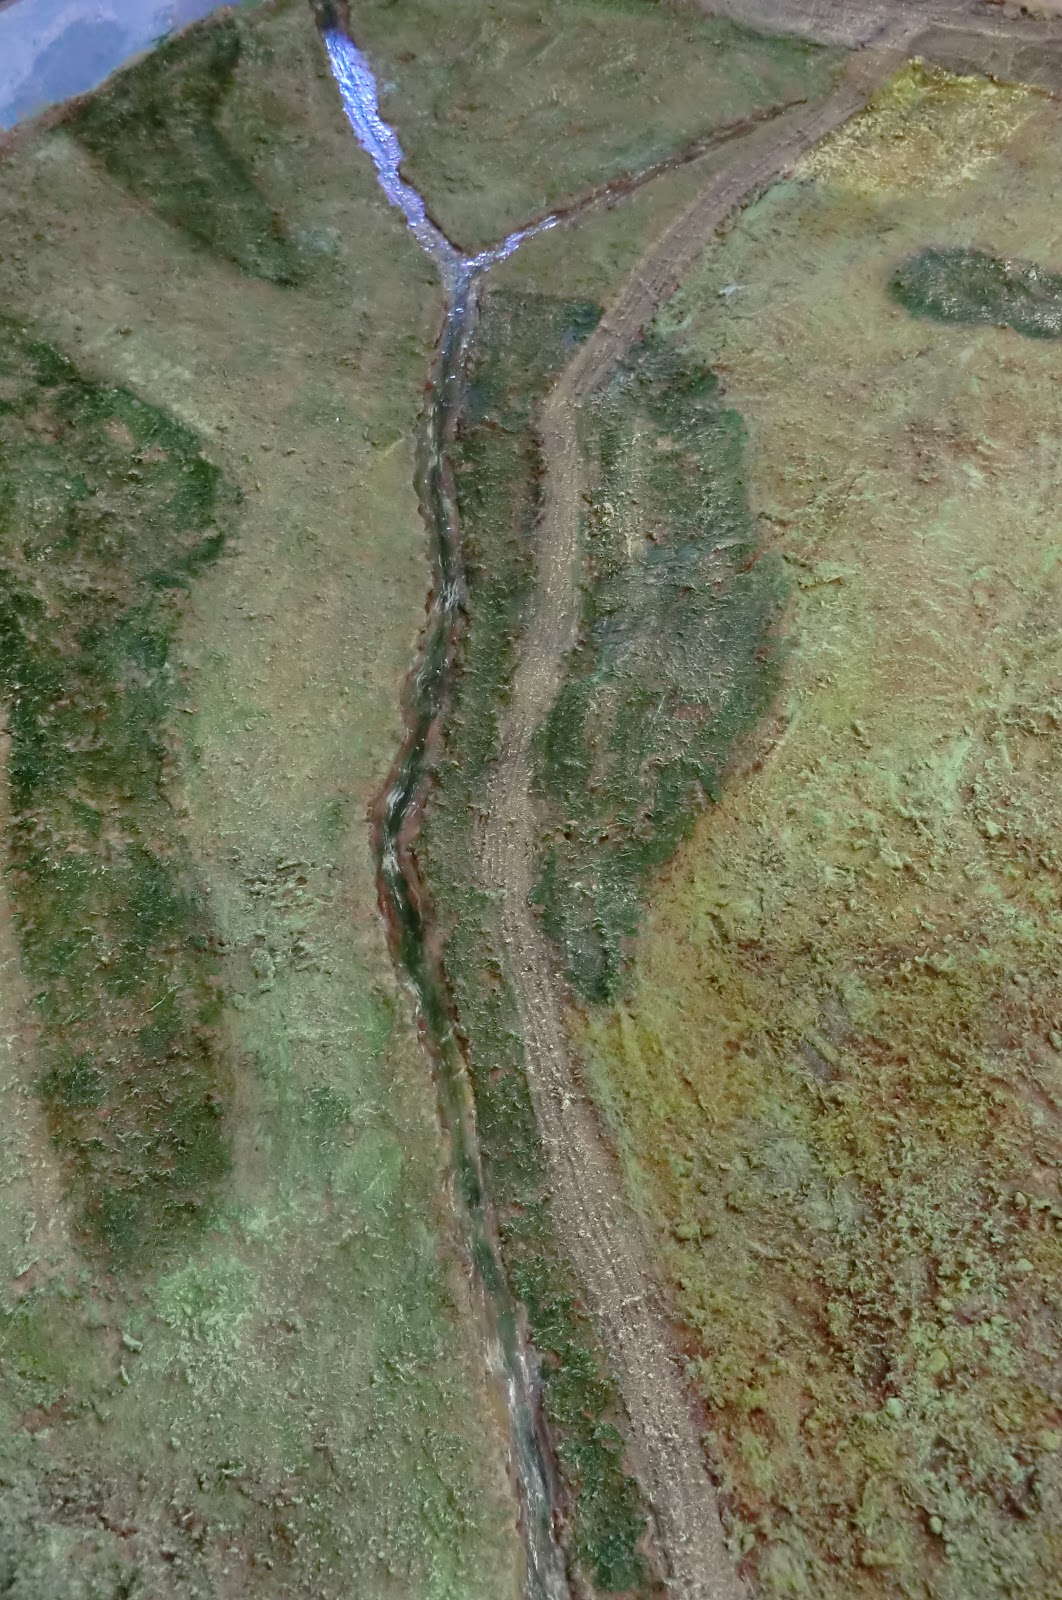 |
| The streams were beginning to take shape now. I used acrylic colours wet-in-wet, having a deep green in the middle fading to a muddy lighter brown at the edges, then occasionally flecks of white to indicate the current |
 |
| Over several days 4 coats of clear acrylic gloss varnish were added to give the reflective surface. These photos also show the completed surface of the many tracks: fine sand gloop, drybrushed when it was hard. |
So that's the story of the surface texture and colour. For me the key is using enough PVA as it gives the whole thing rigid substance when fully dry. In all I used 10-15 litres and , apart from the MDF boards it was the most expensive part of the project. I found you could pay about £10 - £12.50 for 5 litres of PVA , with B and Q being the cheapest round here.
Next time - buildings, hedges and trees.
Wow, looks amazing - your mix of different greens and browns for the fields and hills is spot on!
ReplyDeleteThis really is stunning!
ReplyDeleteYou make it sound easy but I think a lot of skill has gone into this!
ReplyDeleteLooking very, very good Chris.
ReplyDeleteThank you all for your support. I do like to think there is skill in the judgements made by the eye, even if less so in the execution, thanks.
ReplyDelete