I hope readers will by now have had plenty of time to read Part Two. Apologies for the delay caused partly by my holiday and mostly by my changing this battlefield for the one we needed for the next one (Althorp in December 1745 - much more on that later).
2.45 pm - A new French advance
 |
| Wellington, by his elm tree, casts a worried gaze along Mont St Jean (MSJ) to his left flank... |
 |
| ....where a renewed French infantry attack is under way. He has ordered the British main line back from the hedges to minimise fire from the Grand Battery |
 |
| Luckily the fire from that will diminish in the next couple of turns as Donzelot's Division is now on the move from its central reserve position |
 |
| La Haye Sainte still holds but the KGL are constantly suffering casualties from Quiot's attacks and artillery fire |
 |
| Looking across the French attacking infantry it can be seen that Nassauers and Dutch-Belgians are still holding the left hand shoulder of MSJ. Some of those rear French battalions are trying to reform |
 |
| Above and below: At the moment the Allied defence looks fairly strong but they are angled to meet a French brigade. Nassau skirmishers continue to harass Durutte's right flank |
 |
| And the result of the close action was not favourable to the Allies who have retreated off the table and onto the map |
 |
A number of French battalions were also repulsed so the front line on MSJ
is still held by Allied skirmishers |
 |
| A look at the table about 1130 real time. At this stage Richard asked Charlie if everything was OK on his flank and received an affirmative reply. |
 |
| Now the smoke has cleared round the Grand Battery it can be seen that Donzelot's nine battalions are resolutely heading for the British centre. Astute eyes will pick up Delort's Cuirassier Division has entered behind the remaining cannon smoke. |
 |
20 minutes later poor Charlie had an uncharacteristic very low
die roll for a Destiny test on Ompteda's KGL brigade, and he can
be seen removing the troops! He is up on a stool so he can reach! |
 |
| So around 3pm game time LHS is deserted along with most of that part of the Allied line |
More threats to MSJ left flank, and LHS falls to the French
 |
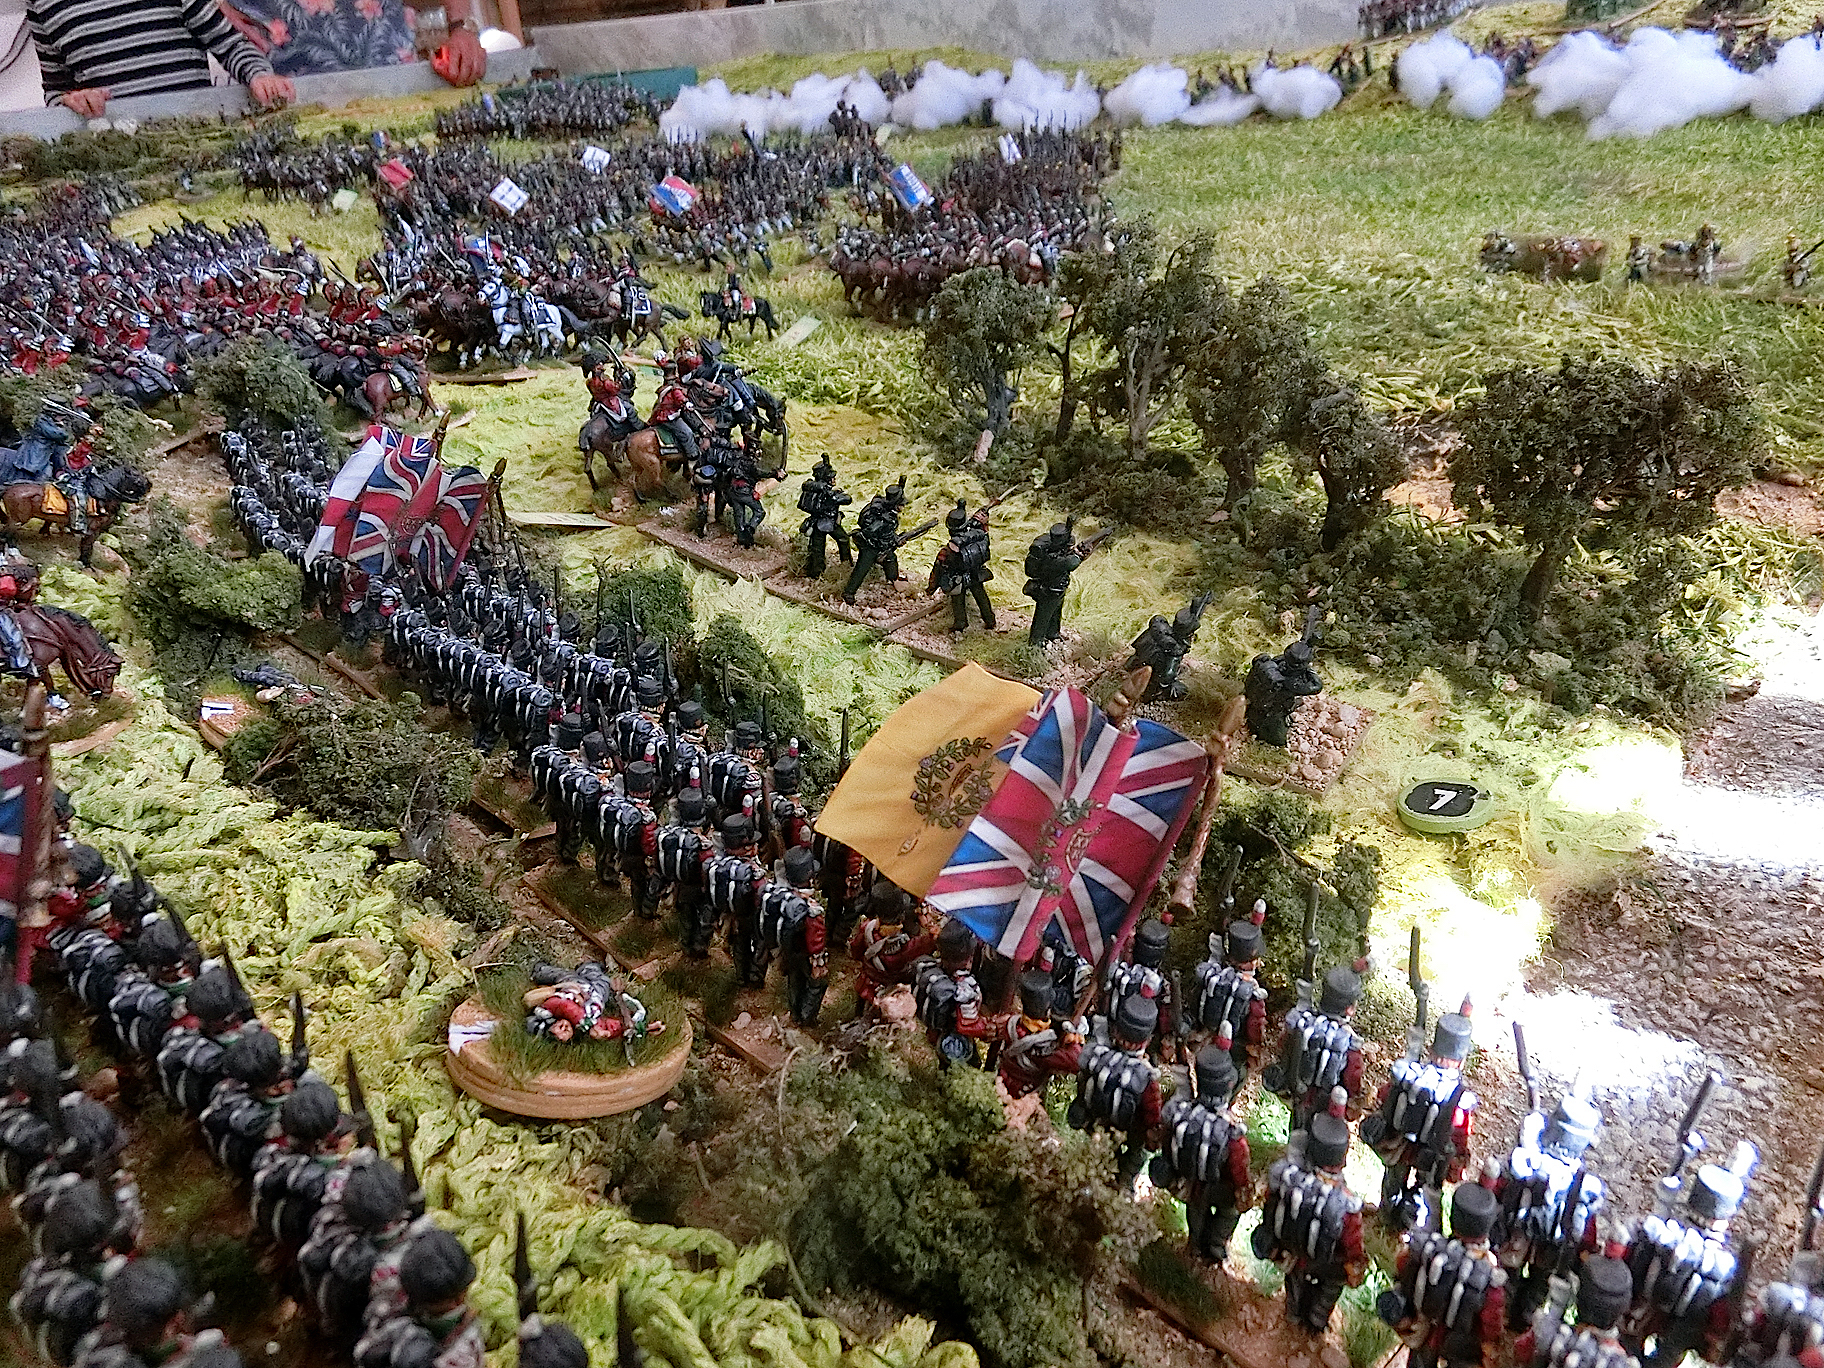
| Above and below: Time for drastic action and Wellington has ordered forward the Union Brigade through the deliberate gaps in the hedges. The speed of their advance over the crest catches a unit of French skirmishers |
 |
| But on the Allied left Paul has his hands full trying to find enough good units to keep up some kind of line. So far the Dutch-Belgian and Nassau resistance has been surprisingly effective and the French columns keep thinning out too |
 |
Behind them Watier's Cuirassiers are zoning in on the newly
arrived British cavalry. They could do with a double or triple move! |
 |
| Donzelot's view of the Union Brigade to his front |
 |
| On the extreme flank of MSJ exuberant infantry of Durutte's Division are about to chase up the retreating Dutch-Belgians |
 |
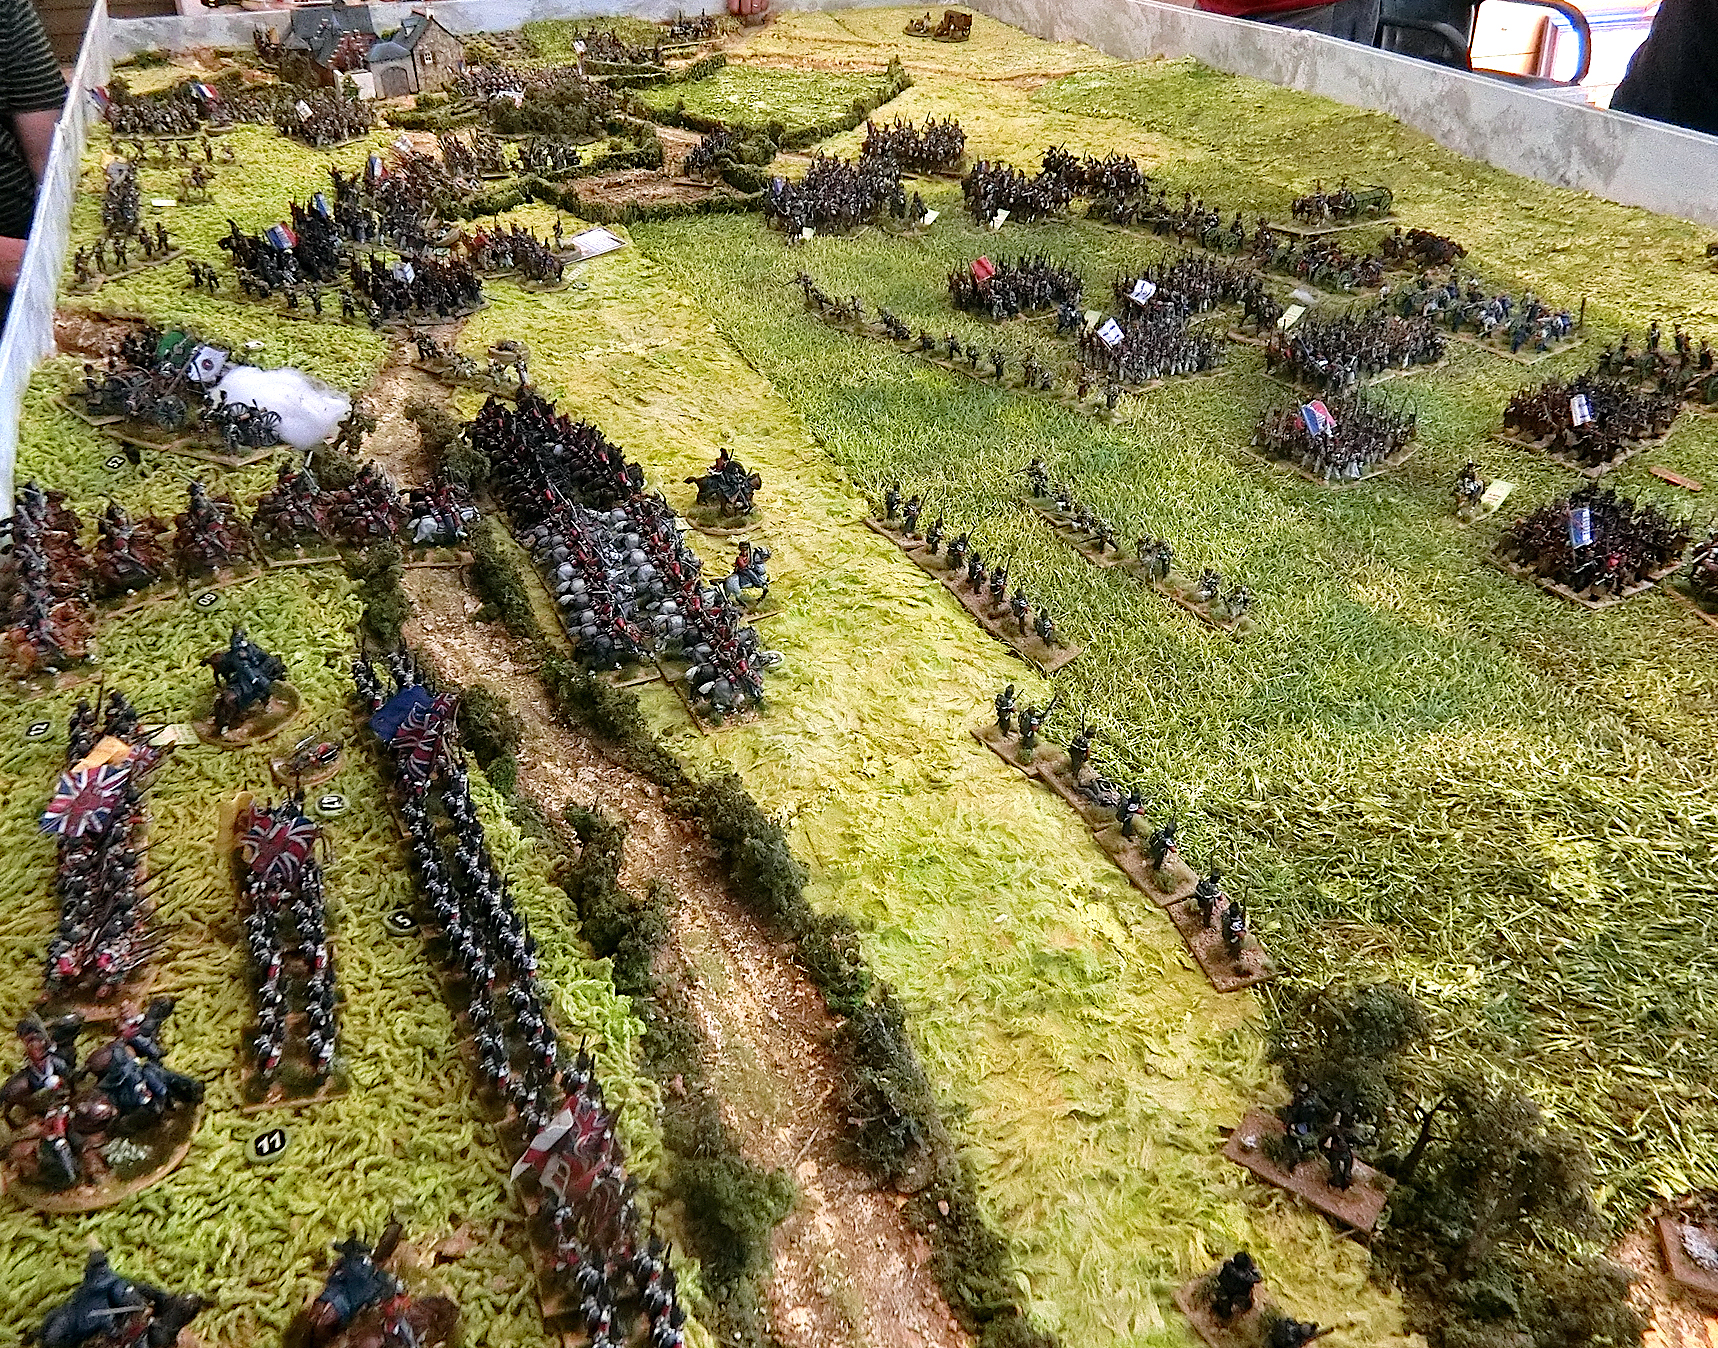
| Overall view about 3.15pm game time. In the foreground the French are masking Papelotte and La Haye, refusing to be drawn to attack them. Best's and Vincke's Hanoverians are trying to hold off Marcognet's Infantry. The Union Brigade, and Picton's and Lambert's British infantry are making the central position look strong....but Donzelot and Delort's Divisions are getting dangerously close. |
 |
JP desperately wants a good initiative roll for Watier's Cuirassiers......but he doesn't get it yet
|
 |
| Here is the view from the other direction...... |
 |
| Beyond all that Delort's Cuirassier Division continues to advance across the valley bottom |
 |
Scots Greys cross swords with the 1st Cuirassiers who are
closely supported by the 4th |
 |
| The Royal Dragoons were not going to take the eagle of the 45th this time! They were repulsed and had to fall back beyond the sunken road |
 |
| One of those Hanoverian battalions has gone and the brigade is being outflanked by a battalion of Durutte's Division |
 |
| Given the weight of numbers the Scots Greys look fated to go the same way.... |
 |
| ....and the battle noise rages round them....... |
 |
| ....as the Grand Battery has fully resumed its firing at targets on Mont Saint Jean |
 |
| Wellington anxiously awaits the result of the critical cavalry encounter........ |
 |
| .......mirrored in the look on D'Erlon's face too! |
 |
The clash ends in mutual withdrawal. Some relief to the Allies perhaps but
the Inniskillings now look vulnerable to Delort's heavy cavalry |
 |
| Here is a view of the magnetic map about this point. Just off the table on the north-east Jacquinot's cavalry are about to give Bijlandt's recovering Dutch-Belgians a hard time. My camera seems to have overlooked the remains of Pack's brigade joining the way-off-field recoverers |
 |
| The view from Watier's Horse Artillery just after the cavalry engagement |
3.45 pm - End game on Mont Saint Jean
 |
| Excitement rising - all the players have a view of how to proceed |
 |
| JP intervenes to bring up Delort's French Cuirassiers |
 |
| The Inniskillings don't stay long under a flank attack! |
 |
| Grenier's Brigade marches on towards the sunken lane under fire from Whinyates Battery, while the Scots Greys consider how to react to their fellow Dragoons' departure..... |
 |
| .....they counter-attack |
 |
| Brue's Brigade are seeing off the final Hanoverians from MSJ front slope |
 |
| Now Wellington brings forward the Household Brigade to try to get the better of Delort's Cuirassiers |
 |
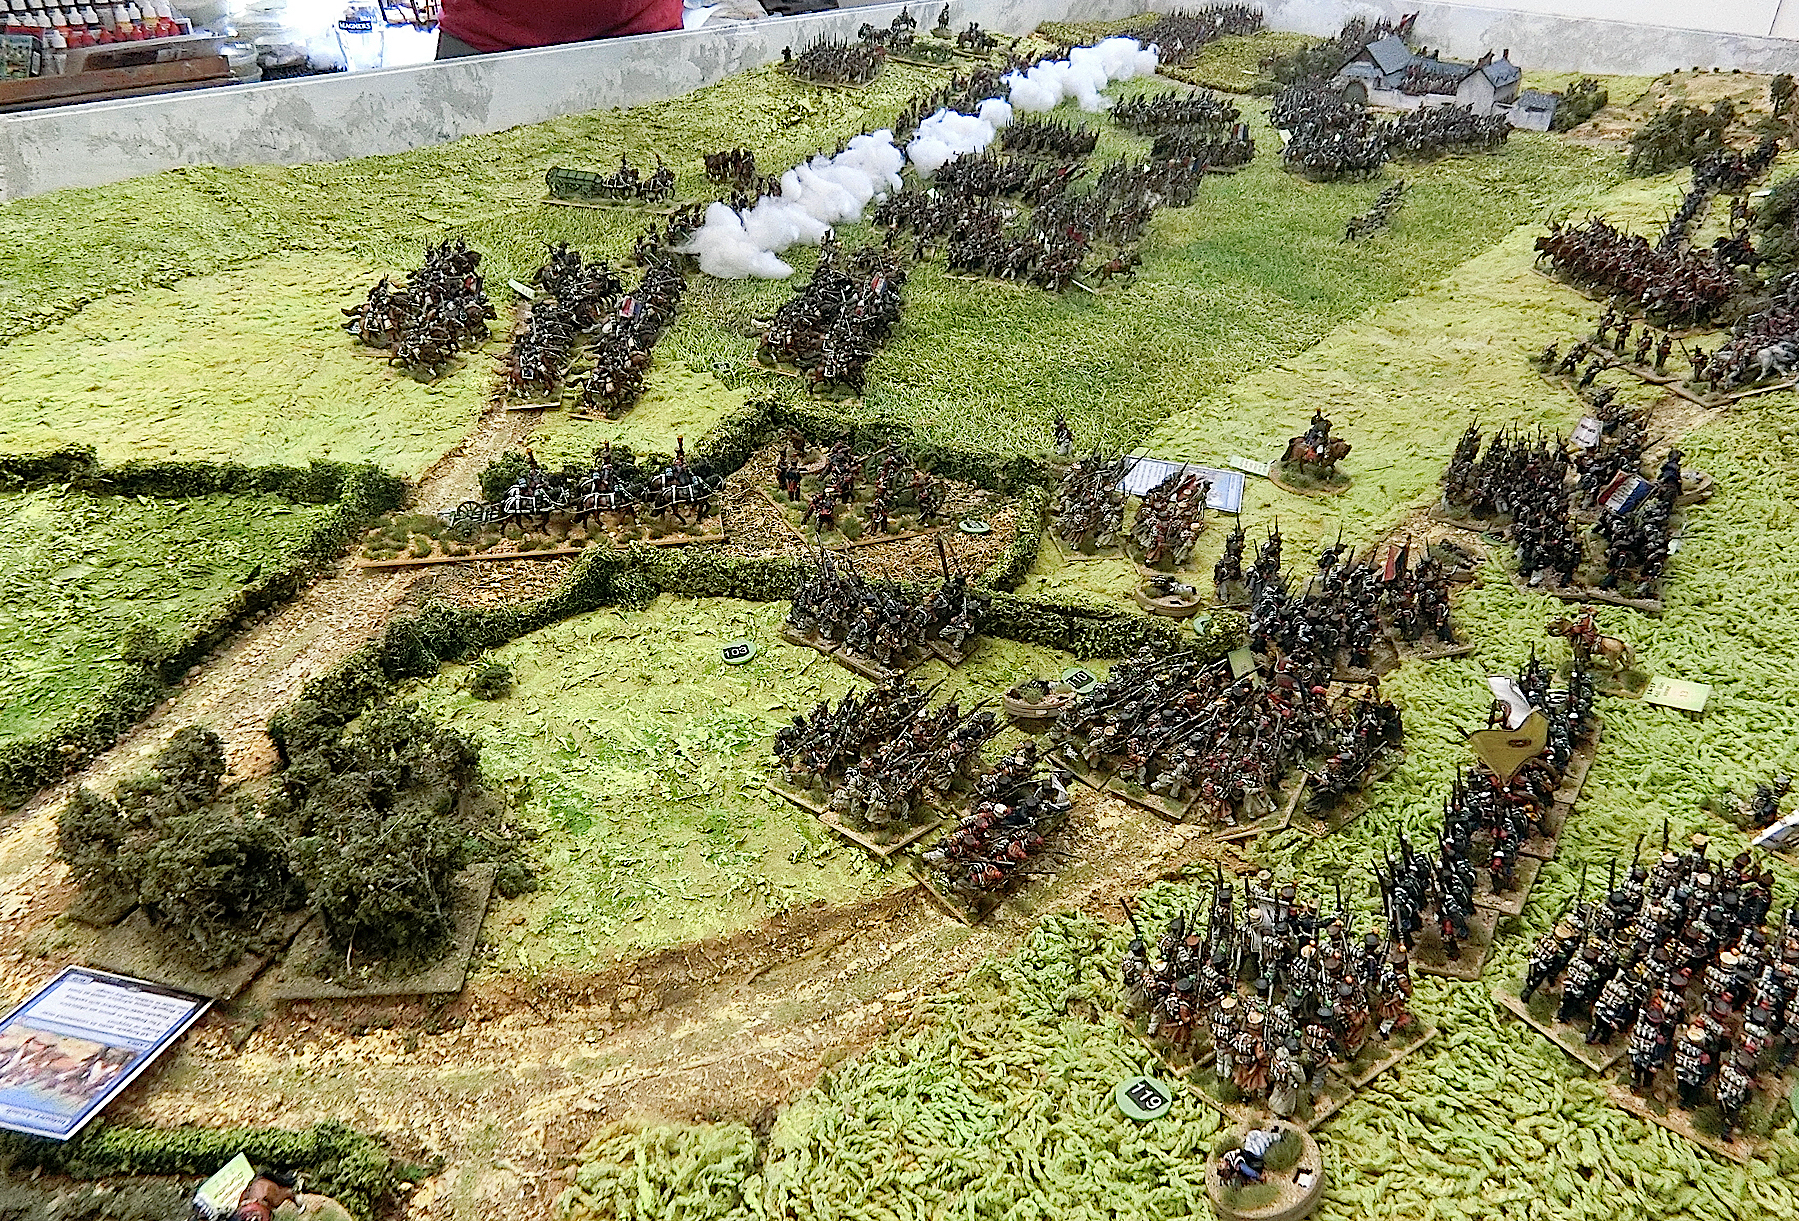
| The wider view at this time shows the French pincer movement closing in. Delort front and left, backed by Donzelot's infantry, and Watier's cavalry coming in again at the right, all supported by the Grand Battery |
 |
| Although these pictures show the Life Guards had not yet made contact, the tension was palpable |
 |
| Above and below:Two great shots along MSJ with action at its height |
 |
| To some extent destiny hinged on the already weakened Scots Greys at this stage. If they beat back the Cuirassiers then the Lifeguards might complete a rearward surge through the French ranks. If not....... |
 |
| Destroyed Greys back in their box! |
 |
| ....the way lay open for Delort to sweep in among artillery and reforming Dragoons on the rear slope of MSJ - the French had done it! |
 |
Good natured hand shakes all round
after a hard "fight" |
 |
....and Tony brought up his Napoleon's carriage - ever the optimist
(well, he is a Liverpool FC supporter!) |
Off the table I used my simple map combat rules and, hardly surprisingly, Jacquinot's cavalry destroyed the ill-fated Dutch-Belgian Brigade of Bijlandt who had started the battle under Grand Battery fire, got away, fought hard on MSJ then withdrew to lick their wounds, and later got sabred and lanced by marauding French cavalry! Sad but heroic.
Bear that in mind when you look at this final battlefield overview and the map
Despite all their valiant efforts the Allies had been comprehensively beaten this time. Yes, there was some chronic bad luck, but the French plan was thwarted by dice too on occasion. I must give credit to the French plan. The only bit I saw in writing was by Tony as D'Erlon, but I think the grand design was refined by JP and Kevin who mostly put it into action. Our scheduling a two day game gave them the luxury of letting the Grand Battery do the pounding while exploiting the relatively weaker area between MSJ and Papelotte by a less direct infantry advance (the right hook). The Light Cavalry were used as the extreme end of that hook but took a lot longer to achieve it than expected. La Haye Sainte fell far too easily and too early, allowing the heavy cavalry pincer attacks to proceed, as we have seen.
Easy with hindsight to say Richard should have sent reinforcements to his left flank earlier, but he was not familiar with the consequences of some of the General d"Armee rules and maybe did not see the collapse coming soon enough. I would have loved to have seen the Lifeguards actually engaged, but time had beaten us and no one disputed the result!
Grateful thanks to JP and Kevin for their wonderful armies and game design and much of the execution of the action. As a spectator/map movement manager I found it very exciting and wonderful to watch a Napoleonesque attack plan unfold. I hope you've enjoyed the report and pictures.
Well worth 10 minutes or so to watch JP's wrap up of the second day on his great YouTube channel
And if you haven't had enough yet JP has put together an absolutely marvelous video tour set to music through many of the photos I sent him of the game. Give yourself a treat, watch it on a desktop computer or a big TV - fantastic!
Thanks to all concerned for a really fun weekend and a satisfying wargame result.
Chris G


Simply superb Chris! Such wonderful terrain and figures and a real joy to behold. It was interesting looking at the table and seeing how you have tweaked it for the recent '45 game, as well as 'Winterising' it too.
ReplyDeleteAn interesting comment towards the end regarding Richard not being totally au fait with the rules and the subtleties contained therein. I would have been completely out of my depth, not only with the rules but also Napoleonic tactics etc.
Thanks a lot Steve. The rules being used are quite difficult to master in one or two games. JP is an expert at running games with them and Charlie knows them well, but I know from experience if you are making command decisions with Gd'A it does help if you understand the detailed significance of ADC allocation and breaking points of brigades.
DeleteOne word, OUTSTANDING!
ReplyDeleteThis is wargaming at it's peak! The whole thing is just quite superb, the table, the figures the report, just the best!
ReplyDeleteRoger and Donnie, thanks as ever for your support in following what we do. JP and Kevin are top-notch collectors and painters and I do like to put on a spectacle with the terrain.
DeleteTremendous report Chris and oh, so many superb figures on a wonderful table. I really enjoyed the YouTube video on JP’s channel and these pictures and descriptions are the most excellent compliment.
ReplyDeleteThanks a lot Carlo. I think both JP and I have gained new followers through the collaboration. His videos are very professionally presented yet with a personal , and very British, understated, style which I like.
DeleteGreat stuff again Chris. It's not readily apparent from the pics but young Charlie spent much of Sunday afternoon sitting next to me on the French side. He realised that all was lost and was hoping to curry favour with the Emperor.
ReplyDeleteI presume this Anonymous is Monsieur Antoine de Dillon, Chef du Secrétariate de Renseignements Malhonêtte at the Imperial Court? Glad you enjoyed it anyway.
DeleteIt is I..I go by many names in this instance Comte Druout D'Erlon, saviour of France and First Toady to the Emperor. He wouldnt give a lift in the coach at the end of the game saying that he had a meal ready and waiting for him in Brussels.
ReplyDeleteAh well, such is the privilege of victorious Emperors!
DeleteA great account of our days' gaming. This was a truly epic wargame - Chris's wonderful terrain, JP's and Kevin's super figures, all the planning and careful pre-game prep resulted in a fabulous wargames event played with great bonhomie. Nestled in the sunny Cotswolds with great views out and a lunchtime beer, surely no wargame could be better. Thank you Chris for your thorough action report - also for your kind hospitality throughout. Thank you for sharing.
ReplyDeleteYes indeed Paul, it was a really enjoyable time and JP and Kevin worked so hard to make sure everything was well organised....and I forgot to emphasise enough most of it was done in 30-35 degrees C heat without any cross words, despite me trying to curb JP's exuberance on some occasions!
DeleteChris, apart from the wrong side winning a great read and presentation. I’m always in awe at how you make the terrain and at some point I must have a go at making a test piece.
ReplyDeleteThe imagery is excellent and it must have been a real Wargaming gem to be part of it. Well done to you all
Ha ha - the wrong side eh? Pretty well every wargamer wants to see how the French can win Waterloo! I know I did. It was indeed a real wargaming gem. If you have a go and need any advice you know where to find me. Hope the recovery is going well.
DeleteBeautifully done and wonderfully well illustrated. A pity the Corsican brigand won this time, though. ;-)
ReplyDeleteCheers,
David.
Thanks for visiting David and for your comments . Personally I like to see the French get the better at Waterloo occasionally. From all the reading I did in 2014-15 I came away totally impressed at how brave the French soldiers were that day until it all went pear-shaped. They deserve victory on our model battlefields.
DeleteI thought the orthodoxy was that, in game replays, the French tend to win most of the time; their army was far more homogeneous and arguably better trained than the rag-bag of Allied units at Waterloo. But they did make an awful lot of mistakes on the day and, as they say, it's the army that makes fewer mistakes that wins... :-) Wargamers have the enormous advantage of hindsight and so can avoid most of the obvious mistakes when playing the French.
DeleteCheers,
David.
David, in 2015 we did the whole battle two ways. In the first, with historical deployments, the French made a good attempt but got held back , mainly by the Prussian arrival in the nick of time. The second was a "Waterloo wot-eef?"...and both sides were allowed the same forces, battlefield and rules to do what they liked within historic base lines. The French held Wellington to a standstill but with enough good troops left over (mainly Guard cavalry and artillery) to deal with the Prussians whose poorer quality in the open field let them down to the point of effective destruction. That left Wellington with no choice but to retreat back to Brussels. In other words, I think we play wargames for the intellectual challenge of trying to be a general with original ideas. If those are based on hindsight that's just because we love history and the reading etc stimulates the hobby juices in the first place. Whenever I read a military history book I'm always thinking "how can I use this in my wargaming but make it a good game too?"
DeleteThat makes sense. The first game mirrored the historical event, where the Prussians were the key to victory (and Wellington would not have stood at Waterloo without the promise of Prussian support) but the second, giving the gamers more freedom to decide and knowing what happened in reality so they could presumably avoid some of the grosser French errors e.g. don't throw away almost all the French cavalry on futile attacks on Allied squares, allowed the French to win. It supports the idea, as Wellington himself put it, that the actual battle was a "near run thing". As he also said, he had "an infamous army"; most of his veteran Peninsular army was over in North America, for instance. It still does seem an unlikely victory for the allies...
DeleteCheers,
David.