Stalingrad Project - the Excuse for tardiness!
It has taken me two years to both find the time and pluck up the courage to blog this game. That is because it was the maddest and most nerve wracking wargame I've ever organised. Not because of the players, they were all lovely. The problem was really that it was too big and I did everything on my own - acquired and modelled all the forces for a Division-level game, scratch built or converted practically all the specially sculpted terrain and buildings, read the histories and translated them to a unique scenario with special rules, and also adapted the "Rapid Fire!" rules to scale down from 20mm to 10/12mm figures and models. So I knew that blogging it might be a labour of love too far until the (brick) dust had truly settled, but now I'm preparing for the next game in my series (Barracks Hill) so thought I'd better get it done.
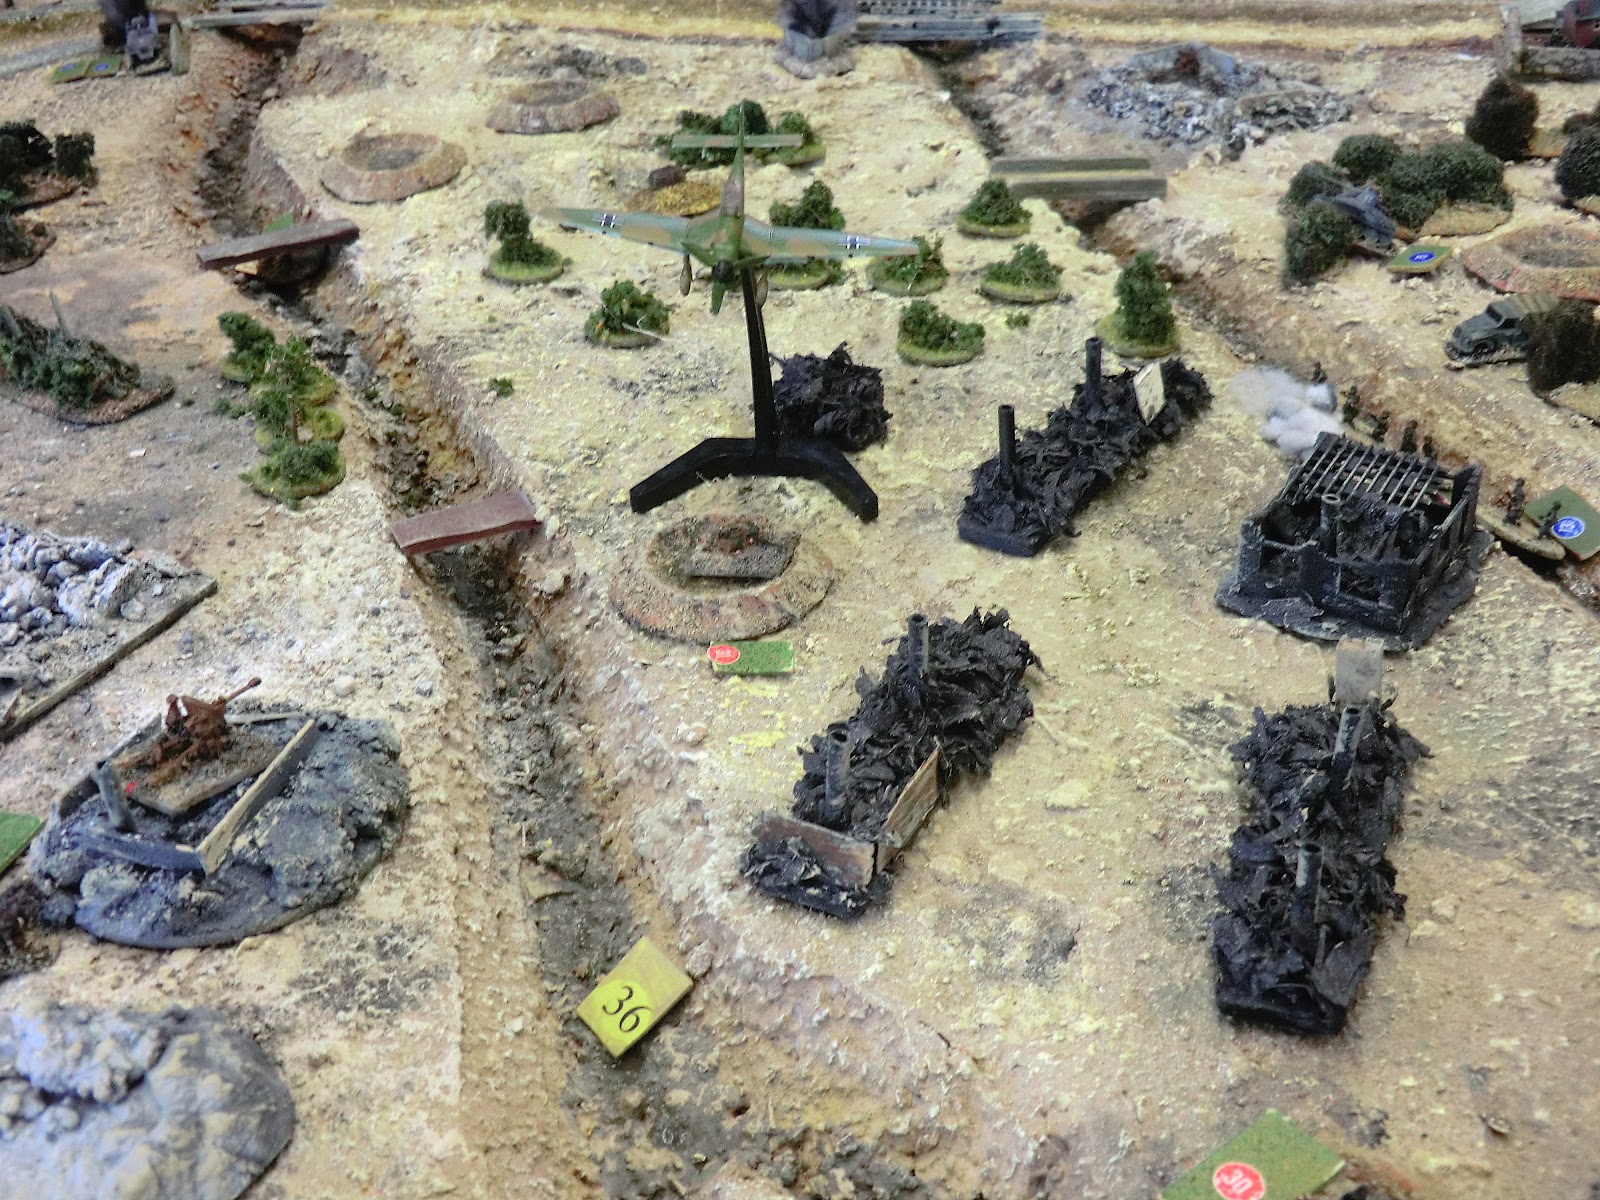
Here is a photo of the finished terrain result with some Russian unit markers (in yellow) just being deployed.
Background
Loyal followers will know that I first blogged about this in 2013. Please read the first part of
this 2013 post for background on the project and this scenario in particular. Since then I have acquired
"Death of the Leaping Horseman - The 24th Panzer Division in Stalingrad" by Jason D. Mark which, although it has some unfortunate shortcomings for the wargamer, is an incredibly detailed arrangement of official reports, first hand accounts and contemporary photos. There are sufficient potential wargame scenarios to keep me busy for a long time. In 2013 I had already formulated ideas for the rules and size of forces but Waterloo 200 and a house move intervened so it was October 2016 before I managed to get all the ducks in a row (well half tracks anyway!) to game it.
The terrain was made in various incremental stages but mostly in the month or so prior to the game, and I have a series of construction photos I can post if there is any interest in a "how-to". But now - straight into the game.........
 |
| My original idea: photoshopped map from "Armageddon in Stalingrad" to remove the historic dispositions so I could use it for terrain building the 8 feet x 6 feet table. Final tabletop shifted a bit to the East. |
24th Panzer Division advance on Stalingrad Station Number 2, 15th September 1942.
The passage of time since the game dims the memory but also makes it simpler to blog as I won't bore the reader with too much detail. All my detailed briefs, orders of battle etc can be found in the Download sidebar at right under "CG's WW2".
German perspective
Simplest for me is to quote from the first part of the brief:
<<Background
As part of the German effort to take the city of Stalingrad XXXXVIII Panzer Corps, consisting of 24th and 14th Panzer Divisions and 29th Motorised Infantry Division has approached the city from the South and West and so far overcome all Russian opposition.
Further North 71st Infantry Division has thrust upon the city centre but been thwarted by resolute resistance, and high command has decided that a fast moving flanking attack northward by 24th Panzer Division will join up with the 71st and push the Russians back to the Volga and prevent any reinforcement.
24th Panzer stands astride an obvious route into the city along the railway line (and adjacent parallel sandy roads) where it follows the steep ravine of the El’shanka river as far as the triangular junction with the main railway line coming from the South, and then northward through Stalingrad station Nr 2. Concurrently 94th Infantry Division is pushing through the Minina suburb South of the El’shanka and will take care of 24th Panzer’s right flank.
Objectives for 15th September
24th Panzer Division is to lead the drive into the city as quickly as possible to take the weak Russian defenders by surprise and will be carried out by two Kampfgruppe.
- KG Edelsheim is the main strength and will push through the Russian front line along the line of the railway and then turn North into the city. Stalingrad station and marshalling yards will be taken, and then safeguarded with the minimum forces necessary to secure your lines of communication. 94th Inf Div should take care of the enemy on your flank East of the railway in the Food Combine and towards the Volga, while KG Edelsheim presses on Northwards to link up with 71st Inf Div. Any excess units will then move westwards to help KG Hellerman mop up opposition in the Old Tsaritsyn residential and factory blocks on that side of the railway line.
- KG Hellerman is weaker and is intended to safeguard the left flank of Edelsheim by an advance into the city blocks via the workers’ suburb. It will destroy any and all Russian resistance in the built up area West of Komitetskaya Street and link up with KG Edelsheim.
The idea is that KG E wastes as little time as possible overcoming opposition and achieves its objectives quickly, relying on follow up from KG H and Divisional Assets, and 94th Inf Div to secure its rear and flanks.
In game terms to win you must get at least 7 x AFVs and 40 figures in good order off the table from any of map squares 7A, 8A, 8B while also ensuring there is not enough enemy activity or strength behind you to cut off your line of communication along the main roads and railway..............
 |
German deployment areas: KG Edelsheim is expected to thrust quickly East and then North following the railway line
towards the centre of Stalingrad. KG Hellerman is intended to take care of Edelsheim's left flank. 94th Inf Div is expected to advance North from the Minina suburb to protect the right flank. My deployments for the Germans were based on historical positions and plan. (Apologies for the careless typos on this) |
.................Intelligence
The Russian resistance has increased in a sporadic way the nearer you got to Stalingrad, but in general the Russians are demoralised and under equipped and many in retreat. They appear to be of variable quality, some giving fanatical defence and others surrendering after token resistance. However camouflage of dug-in positions is very good and you can expect all the objectives to be defended by infantry and anti-tank units but not in large numbers. Heavy indirect fire from Artillery and Stalin Organs is to be expected throughout your attack but is unlikely to be well directed if you take the enemy by surprise quickly.

The expected front line and known enemy is marked on your map in red. The Barracks is a significant obstacle on a slight hill overlooking your left flank. It is thought to be occupied and is best avoided for the moment since our strength is not great enough yet to tackle it. Aerial observation suggests that the enemy 244th Rifle Division, in a pocket to the North, is collapsing and making haste for the Volga, so should be little trouble today.
The enemy still has access to the Volga bank to the East so it is possible that reinforcements might come from that direction>>
As I said the very full orbat is available to download but in essence this front line force consisted of 3 Panzer Grenadier battalions (1 and 2/21st PzG,1/26 PzG) two with half tracks and one with trucks, a large Recce/Motorcycle battalion (KRAD 4), 3 small battalion or large company equivalents of AFV borne pioneers, Panzer Regt 24 in two small parts (there were only 20- 24 operational tanks on the day), Panzer jager SP guns and AT guns, several batteries of varying calibre artillery, including heavy, and almost continuous air support including Heinkels and Stukas.
Russian Perspective
Again quotes from their brief:
<<Background
The Germans have steadily pushed the Russians back to the very edge of Stalingrad. You can expect a strong attack, probably led by armour and with plentiful artillery and air support to be mounted against all your defensive positions. In fact the Russian units are in such disarray, with losses in numbers, materiel, ammunition, leaders and morale that there is very little proper defence. Our action sees the 24th Panzer Division poised to thrust down the main railway eastwards into southern Stalingrad. On their right the 94th Infantry Division is pressing into the Minina suburb south of the El’shanka River. On their left General Afanas’ev is leading the remains of his 244th Rifle Div towards the main street (Komitetskaya street) and Station Number 2 to reform and take up defence. 244th is using the covering fire of a formidable barracks (off table) in their retreat. There are no real orders or a plan, merely every man conscious of the senior commands' order “Not a step back!”
Objectives for the game
Your task is simple - inflict as many casualties on the Germans as possible, without counting the cost to yourself, and halt their advance, by any means possible. If you can hold onto some key areas, including the station, 62nd Army Command may be able to send reinforcements across via the Volga ferries to support you.
In game terms stop the Germans achieving their objectives for the day.
 |
| Stalingrad central city at left; Grain elevator at right; Station Nr 2 area and Old Tsaritsyn town at centre |
Deployment
I have deployed all your counters for the start of the game (everything before the red lines on the orbat). (See maps and photos). Practically everything is dug in or in hard cover in some way and all are thinly spread. In essence your defence is:
- 1 and 2 Bns 133 Tank Brigade astride the main road and rail artery, and with A/T units on the south side of the El’shanka River.
- Remains of 10th Rifle Brigade thinly covering all approaches to the workers suburb and old Tsaritsyn suburb from the West
- 244th RD remnants making a disorderly withdrawal on the northern edge of the table
- 244th RD Artillery recuperating and reorganising in the main street and station area
- Local workers battalion defending their Food Combine
- NKVD blocking battalion strung out along the North-South railway to prevent any regular units retreating.
 |
| 133 Tank Brigade and 10 Rifle Brigade were very thin on the ground, little ammo but with potentially tenacious morale. Remnants of 244 Infantry (Rifle) Division are retreating to the Volga but may turn and fight if likely to be intercepted. NKVD and Workers Battalion will hold their reserve positions. The open area along the main street and railway yards was an obvious area for artillery - as the Luftwaffe found out! Any reserves would come from the NE corner |
The remainder of the Orbat are potential reinforcing units, but we will see how they might be needed as the game progresses.
 |
| Potential reinforcements? |
Intelligence
From scouting and experience it is evident that all the Germans to your front are motorised and mobile and mostly armoured. Probably 3 or 4 infantry battalions with a tank battalion, and engineers, and a full complement of artillery batteries. Virtually continuous dive bomber attacks can be expected. The map shows the line they have reached by 6 am on 15th September. Infantry are in the ravine just in front of your front line and motorcyclist have deployed to take on your SMG company in Maksimovskii station.>>...........
At this stage in their retreat back to Stalingrad historically the Russians were in complete disarray so I had to make a few special rules - the Germans were unaware of any of these till they saw them in play and began to realise.
.............<<Special rules
Ammo limits are shown for some types - it might make sense to save most or all of it till short range before revealing your groups/guns. Please keep track of usage.
There is no accounting for small arms ammo but to represent the shortage all front line units - 133 TB, 10 RB and 244 ID may only fire inf. and MMG groups at short range. In extremis you may fire for one move only at longer range but this will make that group out of ammo (till resupplied).
The Morale of these units is uncertain:
For 133 TB and 10 RB when any serial number suffers its first casualty or is overrun by AFVs test Morale for the remainder. No other strength morale tests apply.
1 = Surrender if enemy within 12”, otherwise flee
2 = Flee 12” each move till rallied (eg by NKVD), leave heavy weapons
3 = Retreat at normal speed to cover and test again (blue sticker)
4,5 = Fight on till killed
6 = Fight on as fanatic/Elite , +1 till killed (orange sticker)
Add 1 if officer base
Deduct one if in open in relation to enemy
244 Rifle Div is a special case
I will make one move with all the serial numbers for this unit and then test for each one, marking them with a sticker accordingly which will last till they get to the rallying area in buildings next to Komitetskaya street or Station Nr 2. Once their fate is known you will take charge of each serial number and play those that fight as appropriate:
1 = Flee to the Volga - remove from table and collect until later
2 = Retreat at high speed 12” per turn to a suitable rallying point (yellow sticker)
3 = Retreat at normal speed to a suitable rallying point (blue sticker)
4,5 = Move to a defensive position somewhere and fight as desired (red sticker) until suffer casualty then as 133TB and 10RB above.
6 = Move as desired and fight as Fanatic/Elite +1 until killed (orange sticker)
Add or subtract 1 if officer base (Div CO does not need to roll)
Add or subtract 1 if with heavy weapon.
NKVD
Apart from fighting the Germans their main role is to deter other Russians from retiring or fleeing.
Any friendly troops they see within firing range first get a warning shot (this may reveal NKVD positions)
The retirers test in the moving phase:
1,2 - carry on withdrawing/fleeing
3,4, pinned down, test again next turn
5,6, turn back and resume the fight, in cover if possible.
Any who carry on fleeing get shot at full effect by NKVD in the firing phase>>.
I should add at this stage that the Russian deployment included a lot of dummy unit counters just to add to the German confusion and caution.
Stalingrad Station Nr 2 - The Wargame
My experience a year before had taught me that a big, grand tactical game with these rules at this scale with experienced players was going to develop slowly so I had scheduled a whole weekend, with overnight accommodation, for this one. Richard handled all the Russians over both days, assisted a bit by me on Day One and then Tony came along on Day Two to take over 244 Inf Div which was rallying by then, and a reinforcing tank and submachine gun "brigade". James masterminded the German 24th Panzer Div as Major General Lenski but also took part of KG Edelsheim as it was too big for Lucas to handle on his own. Kevin, in only his second WW2 game, took all of KG Hellerman, asking me for advice as needed.
Standard "Rapid Fire!" ranges had been halved in line with my ground scale (2 feet = approx 1000 metres) but move distances were left the same. I had notionally taken one move to represent one hour and opening positions were roughly as at 0600 on 15th September 1942. I wanted us to get 10 Moves done by 6pm on Sunday evening which would have been enough for the Germans to meet the objectives I set if they concentrated on the task.....
So I will let the photos help the story of our game unfold
(NB: 24 Panzer Div was formerly 1st Cavalry Div and most of its front line company sized elements are referred to as "Schwadron" in the orders of battle.
 |
| A Heinkel bombing sortie opened the game over the near part of the old city |
 |
| KG Edelsheim advances swiftly past Maksimovskii Station along the road and railway line |
 |
| To right and left of the road dismounted motorcycle squadrons of Krad 4 keep any Russian intrusion at bay |
 |
| Motorcycle squadron personnel close assault the defenders of the Station yard |
 |
| The bridge over the first ravine is guarded by a bunker. Leading elements of Panzer Regiment 24 find out too late it contains a flamethrower |
 |
An overview photo during Move 2. Russian tanks and anti-tank guns in the Minina suburb have caused casualties in KG Edelsheim but succumb to retaliation. The station garrison has diminished and will surrender as there is no safe way out.
Panzer Grenadiers of KG Hellerman are spread out making a steady advance through scrubland towards the burned out workers suburb. Grey markers are as yet unrevealed German support elements, Yellow ones are concealed Russian positions |
 |
| One of Kevin's Panzer Grenadier squadrons cautiously approaches an unrevealed dug-in marker |
 |
T-26 and BT-7 Russian tanks in Minina engaged in a spirited exchange with
KG Edelsheim for a couple of moves |
 |
| The flamethrower bunker was taken out, but I can't remember by what! At left a Russian anti-tank gun has lost its crew |
 |
| Ahead of the column Lucas engages another bunker with a stuka; initially without scoring a hit |
 |
By now Luftwaffe attacks had drawn attention from heavy AA batteries entrenched along the railway line and
Komitetskaya Street |
 |
| On the extreme left flank of the German lines a squadron of armoured cars from Krad 4 had deployed out of the Motor Tractor station (MTC) and their probing has revealed an anti-tank rifle position |
 |
| (Above and below) Infantry from KG Hellerman approach the next ravine, dealing with each entrenchment on the way |
 |
| Russian 244 Rifle Division elements are caught retreating by another Heinkel sortie. Some figures are deployed as they had been spotted by forward elements of KG Hellerman. See the brief above for the coloured maker system. |
 |
| German commanders hard at work keeping up the pace of advance |
 |
| A Pz II has taken light damage (light grey smoke) and moved on to leave the pioneers to handle the anti-tank gun in that bunker.....but watch out for Number 97! In the background an artillery observation car and a command half track are intending to take advantage of the high factory tower to get good vision down the main thoroughfare |
 |
Nr 97 turns out to be a Russian MMG but even the NKVD crew can prove no match for a platoon of Krad 4 machine gunners and the Panzer II tank. In the background the pioneer half track has been destroyed by the anti-tank gun and they have to handle the bunker on foot.
But KG Edelsheim is taking a lot of casualties now the corner has been rounded (dark smoke = heavy damage) |
 |
| Some of the casualties were being caused by a number of powerful artillery pieces along Komitetskaya Street and the railway yards, now firing over open sights. The nearest one is in this photo. |
 |
| Back on KG Hellerman's front a stuka has been called in to deal with a T34 turret solidly dug in |
 |
| Meanwhile some of the Grenadiers are advancing towards a seemingly abandoned burned out part of the workers suburb. |
 |
| Richard and James have a meeting of minds over the tactical situation each side is facing. About this time James arranged with the umpire to have a radio link discussion with his Kampfgruppe leaders as the hail of fire from the main street called for a different approach. |
 |
| Not sure if the orders were misunderstood by Lucas with 1st Abteilung of 26th Panzer Grenadier Regiment, but he has zoomed around and under the railway bridge and then begun to debus. A bit prematurely in my opinion given the relative lack of opposition. But that Russian Number 96 remains concealed in an interesting vantage point |
 |
| Better late than never some infantry and Stug IIIs are emerging from the Minina suburb to try to protect 24th Panzer's right flank. They have revealed one of the Katyusha positions which had been causing pain to Edelsheim's advance |
 |
| Number 96 turned out to be an NKVD company which sold itself dearly under severe pressure from 1/26th PGR |
 |
| James, as Major General Lenski, has ordered KG Edelsheim to advance anywhere other than straight up the main thoroughfare - those Russian guns will be taken care of by artillery and aircraft. Here we see some brave motorcycle recce troops trying to reveal dug-in counter Number 100 - which turned out to be an anti-tank rifle team. |
 |
| Looking down Komitetskaya Street from the goods yard station; manned only by a heavy artillery battery and two sections of heavy AA guns |
 |
| The forward elements of 94th Inf Div make short work of the crew of the Katyusha battery |
 |
| A similar view but this shows that the NKVD company on the bridge have been eliminated. More of KG Edelsheim pours through the underpass while Lucas marshalls 1/26 PGR and pioneers for an all out assault on the Food Combine. The area ahead is scattered with Russian troop markers, how many are real, and what is their quality? |
 |
| On the Hellerman front those burned out workers buildings turn out to have some belligerent occupants - call in the stukas! |
 |
| Above and below: Grenadiers of 2/21st PGR have now got in amongst the burned out workers buildings and some platoons of riflemen from 244 Rifle Div have the fortitude to turn to face them |

 |
| In this general view Richard appears to be trying to give an explanation to Lucas of what his men can and cannot see in the Food Combine complex |
 |
| Artillery observer's view down the main way into Stalingrad from the South. It looks like another concealed Katyusha battery is rocketing the road and railway, now vacated of Panzers. The following two photos show more clearly where they are. |
 |
| To the West of the road damaged panzers get out of line of sight of the big guns while the infantry debus anticipating a hard job getting into the ruins |
 |
| To the South and East Edelsheim's advance is well and truly off track since central Stalingrad is the target! Lightly damaged vehicles mill round while Grenadiers clear the railway triangle and Oberleutnant von Dressler directs 1/26 from a large shell crater (foreground) |
 |
| Above and below: All hell is let loose as Lucas sends in 1/26 and the supporting pioneers with flame throwers, grenades and satchel charges and the first building of the Food Combine soon blazes. The elegant street facade of Stalingrad southern Station awaits its fate in the background |

At this point as umpire I had a bit of a dilemma. I thought I'd balanced the game with thin, but interesting, Russian opposition to the all-powerful German juggernaut. I knew the elite NKVD were in such small numbers they couldn't stop much and the Food Combine only had a very weak Workers Battalion as garrison. There was virtually no infantry along Komitetskaya Street. I had given the Russian big guns an ammo limit which was nearly used up but I was beginning to regret having used them at all since they had caused James and Lucas to divert from the direct approach. The Germans could have overrun the guns with tanks and infantry easily but did not realise that, fearing a street full of machine gunners! I had quite a lot of Russian reinforcements lined up to allocate at my discretion and we still had a few hours to play. Do the Russians need them?
It was one of those pragmatic decisions all organisers can make to "have a jolly good game" instead of letting history take its course. Lucas was enjoying causing imaginary death and destruction to sparsely defended commercial buildings and deserved some proper opposition. Richard and Tony hadn't had any opportunity to be on the offensive. Kevin was happy, he seemed to be having a great time subduing sundry Russians on the Hellerman flank, even though 2/21st PGR was nearing a critical point for morale just as their Abteilung commander became a casualty from mortar fire.
So I allowed the Russians to bring on 3rd Battalion 133 Tank Brigade from the NE corner of the table. This was 2 x T60, a T70 and a T34 tank model plus two companies of SMG armed tank riders. Enough to give Lucas bit of a fright and Tony something extra to play with.
 |
| At right the Artillery battery receives attention from two stukas (see also photo below). The AA gun to its rear seems to have lost most of its crew by now. Yellow markers in the Food Combine show concealed Workers companies and dummy units. Grey markers on the rubble strewn roadway next to them show the passage of 133 Tank Brigade coming up to help. |
 |
| A motorcycle squadron of Krad 4 has penetrated the ruins of the old city and assaulted the building containing some artillery observers, who go down fighting. |
 |
| On the German left sufficient infantry of 244 RD have rallied to create a tense cat and mouse battle with the armoured cars of Krad 4 and a Marder I of Panzerjager Battalion 40. However the soldiers in this SdKfz 251 half track of Pioneer Battalion 635 go in with all guns blazing against the rifle armed Russians in the open! |
 |
Heinkels turn their attention now on the main part of Station Number 2.
The Grain elevator looms large in the background, albeit as a painted backdrop! |
 |
| The Panzer Grenadiers have almost cleared the railway triangle, only one anti-tank rifle left. In the distance Grenadiers from 1/26 have got into the non-burning Food Combine workshops from where the threat of 133 Tank Brigade becomes a reality - a T-34 tank has appeared on the table in the road. |
 |
| A senior commander from 94th Infantry Division could have got this view of 24th Panzer's attack into the city around this time |
 |
| In the middle distance a squadron of 1/26 is now battling a group of armed workers at close quarters. In the street their half tracks are keeping up close. Smoke from bombing begins to enshroud the station. |
 |
| For the moment dismounted tank riders (bottom right) protect the dug-in Katyusha by the engine shed |
 |
| On the West side of Komitetskaya Street and in the next street parallel James has organised a combined tank and infantry advance |
 |
| If they are quick they might intercept some of the retreating soldiers of 244 RD. On the right can be seen the motorcyclists who have now taken the next house up from the OP position. |
 |
| A broader view of this new German initiative. Afternoon sun breaks across the rubble strewn mess! |
 |
| Another stuka attack on the heavy artillery battery while Panzer elements have made it into the railway yard. At bottom right the yellow counters show that some squads from 244 RD have got to what they hope will be a safe place to rally |
 |
| Loss of the lead T-60 causes a morale check on 133 Tank Brigade which they fail and hurriedly retreat where they came from! |
 |
| That left the katyusha especially vulnerable and it didn't last long |
 |
| But fortunes had turned for KG Hellerman. Kevin had zealously pushed his attack and suffered steady casualties. 2/21st PGR had now reached half strength and needed to check morale. They had lost their commander and failed the test, (a 1 meaning the ignominy of fleeing!) - that gave their Russian opponents a much needed breathing space. The armoured cars could not achieve much on their own and held back for fear of outreaching the infantry support. |
Conclusion
It was now late afternoon on the Sunday of our game and 8 moves had taken us to about 1400 game time on 15th September 1942. We had to finish there and take stock. This map shows approximately where the Germans had got to.

The Germans still had plenty of troops and vehicles available and now there was not much credible opposition, but I estimated they were still at least 3 moves away from getting 7 vehicles and 40 figures off the table at the required NE map squares. It seemed to me that the fateful decision to split KG Edelsheim either side of the road instead of charging at full speed up it and the railway meant vital time was lost. It did seem that Lucas had a wonderful time bombing and machine gunning his way through the Food Combine, but it was totally unnecessary to fulfilling the mission. My fault I suppose by making the Russian artillery look too powerful. They were pretty much neutralised by continuous air attack and had the German ground troops used that air cover more closely I'm sure they would have got through relatively unscathed. Kevin did well with his first big WW2 command and I was sorry for him that his attack went pear shaped on the point of success. Thanks to Richard for putting up with my Russian deployment as he did not have much latitude for original thinking in the game. My ideas for all the Russians, including reinforcements, were just conjectural based on units in the vicinity historically, interpretation of German accounts of opposition, and making a balanced game.
Was it worth all my effort? Definitely Yes. All the players seemed to enjoy themselves immensely and there was no acrimony over any decisions all weekend. Within the bloody constraints of "Rapid Fire!" and the need for a well balanced game I think it felt fairly realistic and was the biggest and most complex WW2 game I've done in 22 years of playing this period. It definitely scratched my itch to try a Division level game with the lovely 1:144 models and what amounted to about 4 x 3 kms of battlefield to fight over. That was not something we were ever able to do with 20mm models. However. It was the third game which had been anything but "rapid" and got me thinking to how I can at the same time replicate the close fighting of Stalingrad (this ground scale is too big an area) and get a game to a successful conclusion in reasonable time. More on that later.
So how did the real battle go? Well I had made the Russians stronger than they really were. Both KGs ran into sporadic opposition, some of it fanatical, but much of it collapsing once the inevitable overwhelming took place. The Germans did not take serious casualties and the surviving Russians retreated towards the Grain Elevator and the Volga, but not very far. 94th Inf Div failed to come up in support that day but from about 2 - 3 pm KG Edelsheim raced on Northward to where a major bridge crossed the Tsaritsa River and its ravine. There they were supposed to meet 71st Infantry Division but the Russians stubbornly did not let the 71st through. So Edelsheim retreated back to Station Nr 2 for the night. KG Hellerman had done a steady job of clearing old Tsaritsyn city behind them but by nightfall all of 24th Panzer Division had become thinly spread. In a foretaste of what was to come in Stalingrad, the rallied Russians infiltrated back during the night, so on 16th September the Germans found they had to do a lot of it again!
You can find all the documents for my game, together with my amendments to "Rapid Fire!" in the Downloads side bar - CG's WW2 . Let me know if they are any use.


Chris, this is gobsmackingly stunning! A tremendous effort but very well worth it from a reader's perspective.
ReplyDeleteAwesome effort!
Excellent AAR and a fantastic selection of photo's, very atmospheric, lovely looking WW2 action and using my favourite set of WW2 rules "Rapid Fire".
ReplyDeleteThank you for sharing Chris.
Willz Harley.
That's quite an undertaking Chris.You certainly hid that as I thought you were a horse and musket man. Well done. A terrible battle in real life and most certainly a bugger to wargame.
ReplyDeleteMany years ago as a young wargamer I was introduced to a chap who had fought at Stalingrad. Well he claimed he had and he looked like it was wise not to dispute his claim. He was Ukrainian and was minus three fingers? God knows how he ended up in County Durham especially as he claimed he had fought with the Germans. I thought we had returned all their collaborators. But I digress, a brilliant set up, well done.
Thanks Jonathan, Willz and Robbie. Yes I agree Stalingrad must have been horrible and the wintry last few months do nothing for me as a wargamer. Yet I find the first couple of months of the fighting fascinating and these forces give me the wherewithal to try many different scenarios within the city, and 10mm size/N gauge gives a lot of modelling opportunities with terrain.
ReplyDeletePhenomenal project, commitment and blog post, I really enjoyed this and will come back to it again in the future.
ReplyDeleteThanks Norm. There is a lot to take in in one go so I hope you will return. Seeing your icon from the Bayeux tapestry gives me the excuse to mention I am currently painting an oil commission of William Duke of Normandy at Hastings. Hope it will be on my Instagram feed in a week or two https://www.instagram.com/chrisgregg173/
DeleteChris, if I remember correctly, the flamethrower bunker was taken out by Panzer Grenadiers
ReplyDeleteUnknown is James. No idea why.
DeleteGood memory James - glad you owned up to being "unknown"!
DeleteCracking read, enjoyed that .
ReplyDeleteThanks Dave, glad you enjoyed it. Nice to be able to pay back to you a little for all the pleasure your Sudan set up gives the world. Everyone should see this http://onemanhisbrushes.blogspot.com/2018/10/sudan-big-game-relief-of-khartoum.html
DeleteLooks absolutely fabulous, would be most interested to know where the scenery came from - all purchased? All of it, really? Or were long hours spent in scratch-building?
ReplyDeleteThanks Julian. I did not dwell too much in the blog on the terrain -it is long enough already.
DeleteYes, loads of hours and pounds spent on buying assembling , converting and scratch building. Some of the walls are from existing terrain for past 15mm and 20mm games but most is put together specially for WW2 from :
- home cast from Linka moulds
- recycled bits of plastic, metal and wood from my hoarded stores!
- Outland models from China via Ebay. These are flat packed kits of multi-storey buildings for N gauge railways and extremely versatile for converting. They now do ruined versions but I cut all these about myself
- N gauge plastic Faller buildings from Ebay - Station, railway buildings and the burned out small houses with rafters showing.
Rubble is mainly my "gloop" mixture of DIY filler, PVA, paint, sawdust, small stones etc. Then loose stones and general rubbish scattered to give a real feel for the blocked roads and mess.
Hope that helps.
Wow, what a cracking game Chris! Now I fancy doing a big BUA game but using BKCII. Something to add to the list...
ReplyDeleteSounds interesting Steve - you will have to show me a game of BKC2 one day please.
DeleteVery Impressive indeed!
ReplyDeleteThis is my take on the battle : https://notquitemechanised.wordpress.com/2023/04/20/stalingrad-with-nqmsquared/
Regards, Chris
Thanks Chris K for your praise and the link. You had taken on a big chunk of the city area in one go! I did a few games over central Stalingrad in 2020 and fully intend to blog about it eventually - quite a big task though!
Delete