Apologies for the extreme delay in blogging, it's due to a variety of circumstances beyond my control. Thank you for visiting this series and for all the terrific comments on this so far. You can catch up by reference to
la-haye-sainte-refight part two and its predecessors.
Recap of dispositions
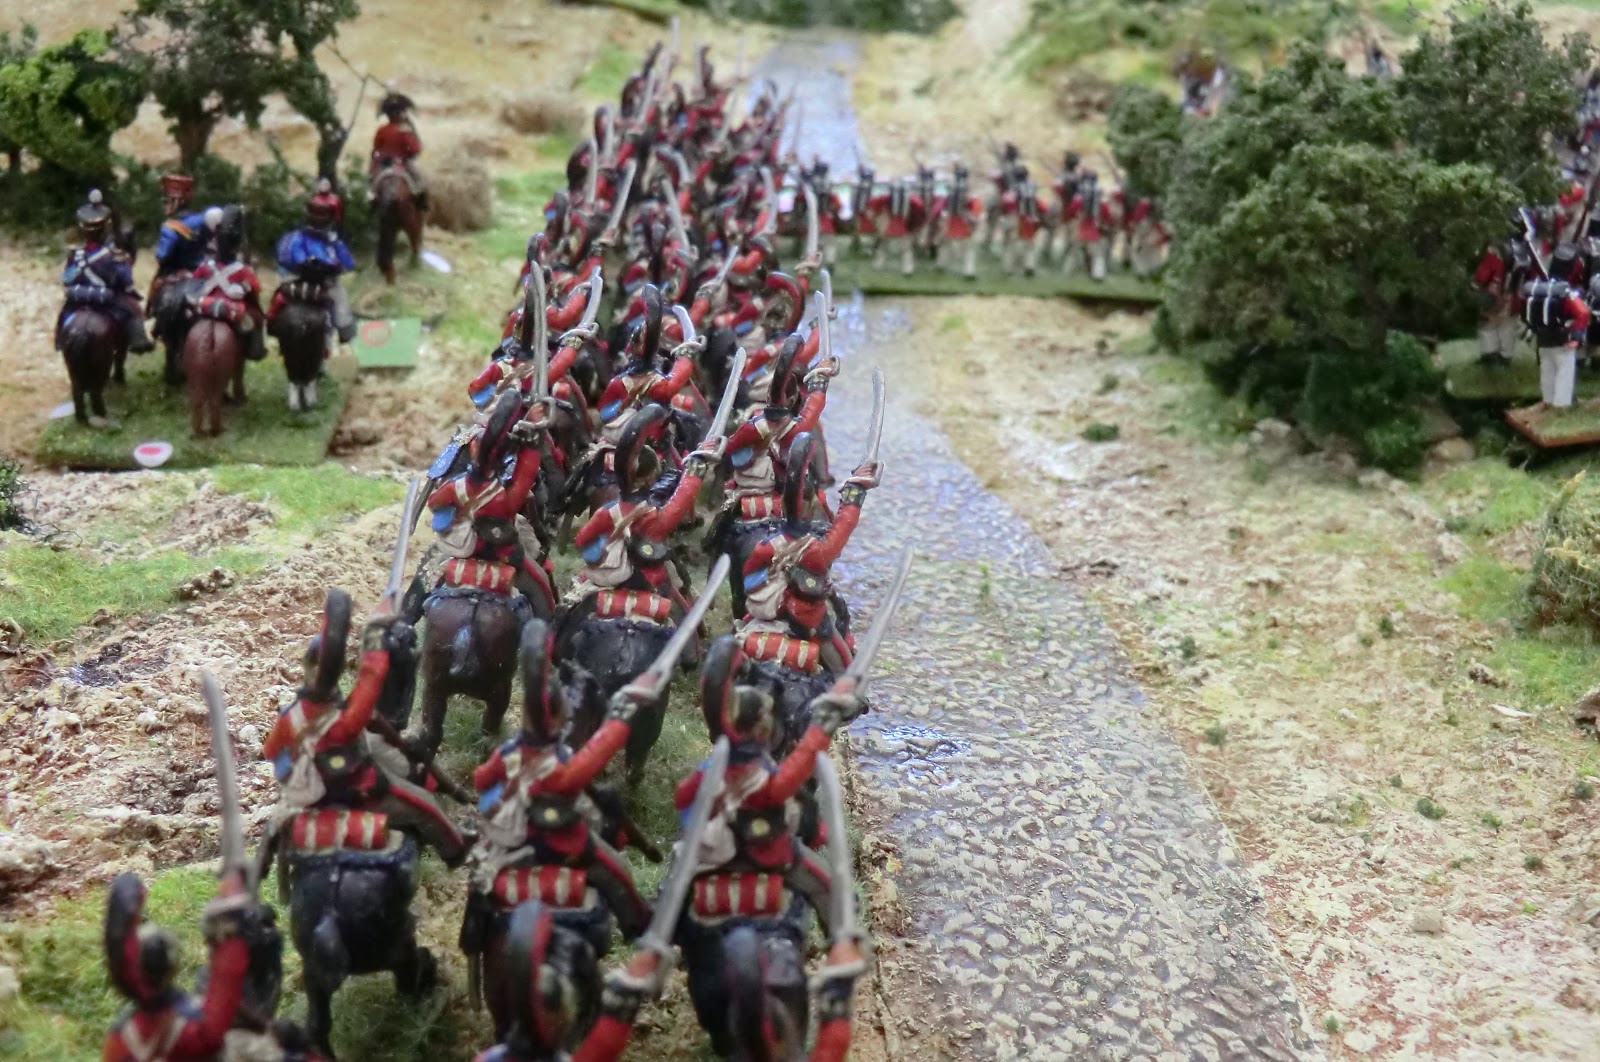
The overall photo below, taken by Kevin, was early on the second day of our game.
In the foreground from right to left: 5th Line KGL in three lines back from the sunken road; 8th Line KGL similarly deployed but with their Grenadier company in front and Light company skirmishing on the far side of the road; two squadrons of 2nd Life Guards making their way forward past the crossroads; 32nd Foot to their left in the sunken road; a weakened Rogers battery of RFA. In front of 5th KGL Ross's battery of RHA can be seen heading off for other duties further West.
On the forward slopes of Mont St Jean at right the Luneburg Battalion is in three lines with skirmishers ahead; 1st and 2nd Battalions of KGL Light are in and around La Haye Sainte; remnants of the Advanced Wing of 2nd Light KGL are hastening in disarray back up the main Charleroi - Brussels paved road; 95th Rifles are spread out in mixed formations across to "the extra bit" of terrain, too closely engaging French infantry; remnants of the Royal Scots Greys are trying to gain the cover of the rear slope.
In the distant gloom, in the far corner of the extra bit are two squadrons of French Line Lancers and two battalions of 28th Ligne infantry; level with them on the main table are two battalions each of 55th and 54th Ligne hotly struggling for possession of LHS and its surroundings; to the right can just be glimpsed French Horse Artillery and part of the 1st Cuirassiers. On the shelf in the window are three batteries of artillery representing that portion of the Grand Battery deployed against this part of the front.
Game Masters dilemma?
I had spent a somewhat agitated night worrying about whether the balance of the game was going to work and whether the extra players expected today would have some worthy entertainment. A very amicable breakfast meeting between Ney and Wellington and the two umpires set about resolving some of the issues. We decided to change all the Rifle-armed green jackets (probably about 350 figures still alive) from 3 figures per firing die to 4, as they had been taking a dreadful toll of their totally outclassed French rivals. I decided to countermand the "Event", and deem it a glitch in orders, that had sent the best French battery away from the firing line (see previous part of this report) as I feared the French would not cause enough casualties for the rest of the game to represent the attrition from long range artillery fire. We also set some conditions about distribution of units among the newcomers, subject to their wishes. Both decisions proved beneficial to the remainder of the game and were received graciously by James even though they benefited the French and not his Allied army.
 |
| Richard and Pat explain the French set up to newly arrived Paul and Dillon |
We recommenced on the second day's play with Move 6 and the arrival of Dillon from Buckinghamshire and Paul from Cheltenham swelling the quota of French generals.
2.45 - 3.00 pm
The French Event proved very pleasing to Richard and Pat as the Engineer company arrived early and was placed in the LHS orchard. This meant they could reorganise the attack in the expectation of breaking through a doorway somewhere. At the Front entrance to the farm the Grenadier company of 2/55th Ligne stormed the barricade across the chausee; surprisingly they were held by the KGL defenders, scoring a "Halt" in their Morale test.
 |
| Piling on the pressure at the barricade by the main gate. Elements of 1/95th in the foreground. |
50 metres or so East of the farm Paul had taken control of 1/28th Ligne and formed them into line to get to grips with the skirmishers of 1/95th Rifles. As I said earlier these had got a bit too close in Mike's eagerness to get his plus 2 firing bonus at Very Short Range, under 6 inches and the Rifles were hit in open order along most of their line. Morale suffered with the losses, a retreat was blown on the company's bugles, but even so, tenacious Mike would only withdraw up the slope by the small minimum distance.
 |
Fire begins to take hold of the farmhouse/stable roof. On the far side the rather odd formation is one of those "frozen" photo moments in time during a wargame because the 95th skirmishers were forced to withdraw after being overwhelmed by 1/28th Ligne who had sufficient figures and space to envelop them, but won't follow up till it's their Initiative turn. General Ompteda can be seen in the LHS courtyard taking charge of 2 LB KGL survivors after the loss of Major Baring.
(Photo KE) |
On the "extra bit" the exhausted Scots Greys got hit in the rear by the pursuing lancers and suffered 12 casualties. They were already 30% down at the start of our game so the resultant Morale test forced their retreat even faster and enabled them to pull a bit of distance away from their pursuers. I know this may be unrealistic but compulsory Morale is a "free" move and I was content with this to give those beautiful Scots Greys figures a fighting chance to take some further part in their Waterloo. That is indeed what happened as you will read on Day 3.
 |
| The Scots Greys have retreated after the big hit from the lancers, though in fact we will turn them facing away a few minutes later. The hapless 95th forward company is getting hit by the lancers and skirmishers of 1/28th Ligne. The survivors will soon run off. |
Not much else of note happened that move but it was as near to a "lull" as we were likely to get.
3.00 - 3.15 pm
The Event dice luck was still with the French. This time they had the chance to muster a pioneer party with axes from the nearest infantry unit to LHS (1/55th Ligne). They immediately commenced trying to batter down the main gate. Around the same time the pressure on the barricade succeeded and the remaining defenders were overthrown. The few survivors fled up the
chausee and found their comrades had flung open the small side door just long enough for them to take sanctuary in the farm courtyard. At the rear of the farm the wind direction caused the roof fire to spread and Ompteda tried to organise a chain of soldiers to get water from the pond near the front gate across the courtyard to the farmhouse. This was quite an ambitious ask since the KGL riflemen were highly conscious of French axes trying to break through the gate.....
 |
Above and below: French attacks swirl around and past the LHS building
Photo: KE |
 |
The barricade is taken, pioneers bash at the main gate with axes, and a grenadier
company advances past the small door where the KGL fugitives fled |
 |
| 1st Light Bn KGL and the red coated Light company of 5th KGL occupy the LHS garden |
Opposite LHS the French 1/28th Ligne pressed in on Mike's 95th Rifles' skirmish line and caused the significant loss of 9 figures as casualties.
On the French left all four squadrons of 1st Cuirassiers advanced steadily up the slope. This was not a full charge as Dillon wanted to ensure artillery fire on his immediate opponents - the Luneburg battalion - and the Horse Artillery were still trying to deploy in a good firing position. In anticipation of a mauling by fire this had the effect of encouraging James to pull Luneburg right back to the MSJ crest near the sunken road. Events were to show that Dillon had probably missed his best chance of repeating history and riding down the Hanoverians while they were unsupported, but he had other issues as we will discuss later.
 |
| 1st Cuirassiers in column of squadrons flanked by deploying Horse guns |
To the East side of the Elm tree crossroads the two squadrons of Life Guards moved obliquely with a view to confronting Paul's French infantry East of the sandpit; all the while they were losing men to long range fire from the Grand Battery.
 |
| The right hand squadron advances to the crossroads |
 |
| View along the sunken road showing 32nd Foot and the Life Guards |
 |
| The left hand Life Guard squadron goes through a pre-made gap in the hedge |
Finally for this turn the Scots Greys continued to rush up the slope to safety and got nearly to the sunken road on the MSJ crest.
 |
| Scots Greys hasten through some 95th skirmishers towards the sunken road. Rogers battery had already withdrawn to a more sheltered position in the sunken road in view of their earlier heavy casualties from the Grand Battery. |
 |
Close up of part of the three French batteries we represented on the La Belle Alliance ridge.
Tired gunners could at least admire the Cotswold valley through the window! |
3.15 - 3.30 pm
"Events" caused Marshal Ney to decide he was more useful somewhere else at this point! On the Allied side General Alten arrived which was useful in view of the amount of German units needing a morale boost.
Things were really hotting up round the LHS farmhouse where Pat was relishing all the opportunities for his French infantry. French sapeurs broke through the main gate distracting the nearly forming fire fighting party; consequently, uncontrolled, the fire in the farmhouse roof spread further. Fusiliers of 55th Ligne burst through the gate and a melee ensued. French grenadiers, unable to scale the high wall, began a spirited point blank fire up at the defenders - 2LB KGL was now being reinforced by 1LB men. On the other side of the farm a column of engineers formed up to attack the door connecting the stable entrance with the courtyard.
 |
| French infantry companies stream up the slope while others batter the gate with axes...... |
 |
| ........and break through, shocking 2 LB KGL so much one stand has got knocked over in the rush! |
 |
| The view outside: Grenadiers fire up at the walls, Fusiliers line up to fire on the garden and sand pit. The barricade across the chausee has been scattered by the surge of soldiers. |
In the open ground to the West of LHS, Dillon now got his chance with the Horse Artillery and delivered some satisfying canister fire on the Luneburg skirmishers and their KGL Light company compatriots. This of course meant his cuirassiers delayed for another turn to keep the field of fire clear.
 |
| 1st Cuirassiers Elite Squadron has suffered 10% casualties so far from Ross's departed battery and skirmishers |
 |
| Close up of the Horse Artillery battery. 1/54th Ligne Voltigeurs, at right, have got out of the line of fire trying to recover from severe losses in taking the orchard. |
 |
| Checking the angles and gap for Dillon's canister salvo |
 |
| An impression of the chaos round LHS |
Paul continued to threaten forwards up the slope of MSJ towards the sandpit and formed up his 28th Ligne to present a solid line confrontation to the Life Guards who were looking menacing, until.......
The infantry fired a volley and many saddles emptied so the front squadron looked a fair bit weaker but their morale held. Behind them, 2nd Squadron's route exposed them to the full force of Grand Battery fire and they suffered accordingly; as far as possible the survivors rallied back into the cover of the sunken road.
 |
| Results of French artillery fire on the Life Guards |
 |
| Above and below: two views of 2nd squadron rallying back where the sunken road is getting rather crowded |
 |
| Beyond the hedge 1st Sqdn carries on to receive musket fire (below) |
 |
| The cavalry pose a dense target in their effort to thread through friendly units and the hedge lines. The French infantry were too close for Paul to try to form a square so he settled for massed fire power from the line. |
 |
| A nice view over the heads of the 32nd Foot as Scots Greys hasten past under cover of 95th Riflemen |
 |
The Scots Greys are heading for the cover of the rear slope of MSJ, taking them through Rogers battery.
Photo:KE |
 |
| A view down the "extra bit" before the Rifle skirmishers withdrew from it up to Rogers battery......but watch out for those lancers. |
 |
| A general view across the main part of the table around this time. On the chausee the remnants of the advanced wing of 2LB KGL which fled from the orchard, have rallied behind the abattis, but are so weak any further casualties will send them packing. |
It had not proved a happy turn for the Allies, but James and Mike were undaunted, stiff upper lips beginning to quiver a little perhaps.
3.30 - 3.45 pm
The French Event saw the return of Marshal Ney to this sector enabling him to urge on the French attacks while the Allies also got lucky with two areas of burning LHS roof put out by a change of wind direction. Just as well since the troops in the courtyard had been pressured by the crush to fight with their backs to the farmhouse wall aided by fire support from the upper windows which otherwise would have had to be evacuated. At the same time those French sapeurs had caved in the small side door on the road side of the courtyard. At the far corner, the barn and stables, a column of engineers was waiting to surge through when the stable door could be axed down, and this would cut the surviving KGL Riflemen into two groups.
 |
| KGL Riflemen fighting with backs to the wall. These battalions had a Morale Factor of 6 - the best on the field. |
 |
Wargamer Aide de Camp status markers much in evidence.
French engineers axing the stable doors.......... |
 |
| .......backed up by ample amounts of line troops |
Forward battalions of Bourgeois' Brigade again assailed the Life Guard squadron with fire as the troopers spread out to attack the line of 1/28th with cold steel. But there were precious few left and they were horribly outnumbered so they lost 8 more figures in the melee, which was another 20%. However, the honour of the Household Brigade was upheld by good morale checks (one for every 10%) and they stayed, pinning 1/28th Fusilier companies in place for the moment. The latter, however, also had a slice of Paul's usual luck and rallied with
elan to add a further Plus 1 to Morale and Melee.
Behind all that Rogers' depleted gun crews manhandled their 9 pounders up the other slope of the sunken road to take up a new position from which they could still fire downhill at the oncoming French but be slightly sheltered from counter-battery fire.
 |
| The Luneburg Battalion companies are back in the sunken road and relatively safe from artillery fire. Behind them 5th KGL are a target for the Grand Battery and are in fact "lying down" to claim soft cover saving rolls; they still suffered 7 figures dead. Wellington remains impassively under his elm tree content that his main line still looks firm. All the forward action is nicely keeping the French from their prize. |
 |
| A view of the action with the very depleted 1st Sqdn Life Guards continuing to melee French fusiliers |
Well, 3.45 pm was as far as we got by 6.30 pm real time on the second day. Two of our number had to return home while the rest of us repaired to the local pub for a meal followed by alcohol, nibbles, good conversation and a play with Kevin's LED flashers to go under his smoke and flame markers. Hopefully you will get the full fun of these when I eventually publish some video.
Only four moves, Hmmmmm. Well some players were still learning the rules and it was just 6 blokes pushing round several thousand figures with, as you can imagine at this scale, often the need to interpret at a "skirmish game" level. In fact the old school removal of figures, particularly under artillery templates did give a more personal tension to the whole proceedings and it still felt "right" most of the time. What would tomorrow bring? Hopefully enough moves to get some kind of decision for all our efforts.


Chris,
ReplyDeleteWhat you and your friends have produced is quite amazing. Worthy of a book, or at least 10 parts in a magazine.
Well done to you ALL.
John
From the first posting about the 1:3 scale of your efforts I knew this would provide the most eye candy!
ReplyDeleteBRAVO!
Very very impressive sight!
ReplyDeleteChris,
ReplyDeleteYou should be very proud of your achievement, especially the terrain,it really captures the scene. Well done.
Most impressive pictures for a most impressive report, love the mass effects...
ReplyDeleteThank you all for your most supportive comments. Again I'm sorry it took so long for me to get this part written and published, I hope it was worth the wait.
ReplyDeleteThanks for the full, detailed report! that was amazing!
ReplyDeleteMerci, Monsieur Blancard. Judging by your own blog, http://ofeaglesandfrogs.blogspot.co.uk/ , you will enjoy the next part too.
ReplyDeleteI am looking for the cuirassiers charge indeed!
DeleteHi Chris, Couldn't forget the game but it is interesting seeing all the images again and being reminded of the detail. Thanks for putting this blog post out.........ahh those were the days! Thanks. Kevin
ReplyDeleteMagnificent Chris. Have very much enjoyed EVERY aspect of your project.
ReplyDeleteGreat work guys,all the hard work paid off.All the best Mark
ReplyDelete