Friday, 3 May 2013

A variation on "Quickshade" paint jobs

I've occasionally been asked about how I use Army Painter Quickshade and also how I do figure bases. There is no easy answer since, to me, all forms of art can be an adventure in which you might know where you'd like to go but not necessarily how the route will work out to get there.

But recently I acquired a nice batch of  30 Perry designed Foundry Miniatures 20mm World War Two Germans and, as these figures are so good I thought painting them slightly differently to usual could be a good relaxation and diversion from my two-dimensional art. Also I think the German uniform of the early war period was pretty cool even if the motives of the soldiers inside them might have been questionable. Just as a taster here is a photo of the finished result with a squad of Landsers advancing across my back garden on a sunny day.

I prefer low profile bases so the family is now well used to me asking for out of date credit cards, plastic store cards or membership cards and the like and I find them strong and easy to cut but don't interfere with the aesthetic value of the figures as they are so thin. I clean up the figures, not that there was much "flash" on these, and then glue them to the bases I had cut ready. This makes them easy to handle and it was a short step to spray the whole lot in one thorough coat of a basic grey. This acts as undercoat and  basic uniform colour but will be mostly covered. I used "Carplan" Grey primer from a local motor parts store.

Now here is where I used my Army Painter Quickshade, dark tone, not at the end of the process but the beginning. Happily I was near the very end of a tin and, I guess for some technical reason, the Quickshade dried matt instead of the glossy you may be used to. I put it on with an old brush, not the dipping and shaking method the manufacturers recommend. As I hoped, when dry, it picked out all the lovely sculpted detail a treat, and would also act like black undercoat for outlining but without concealing the detail from me while I painted.
Here are some of them at this stage
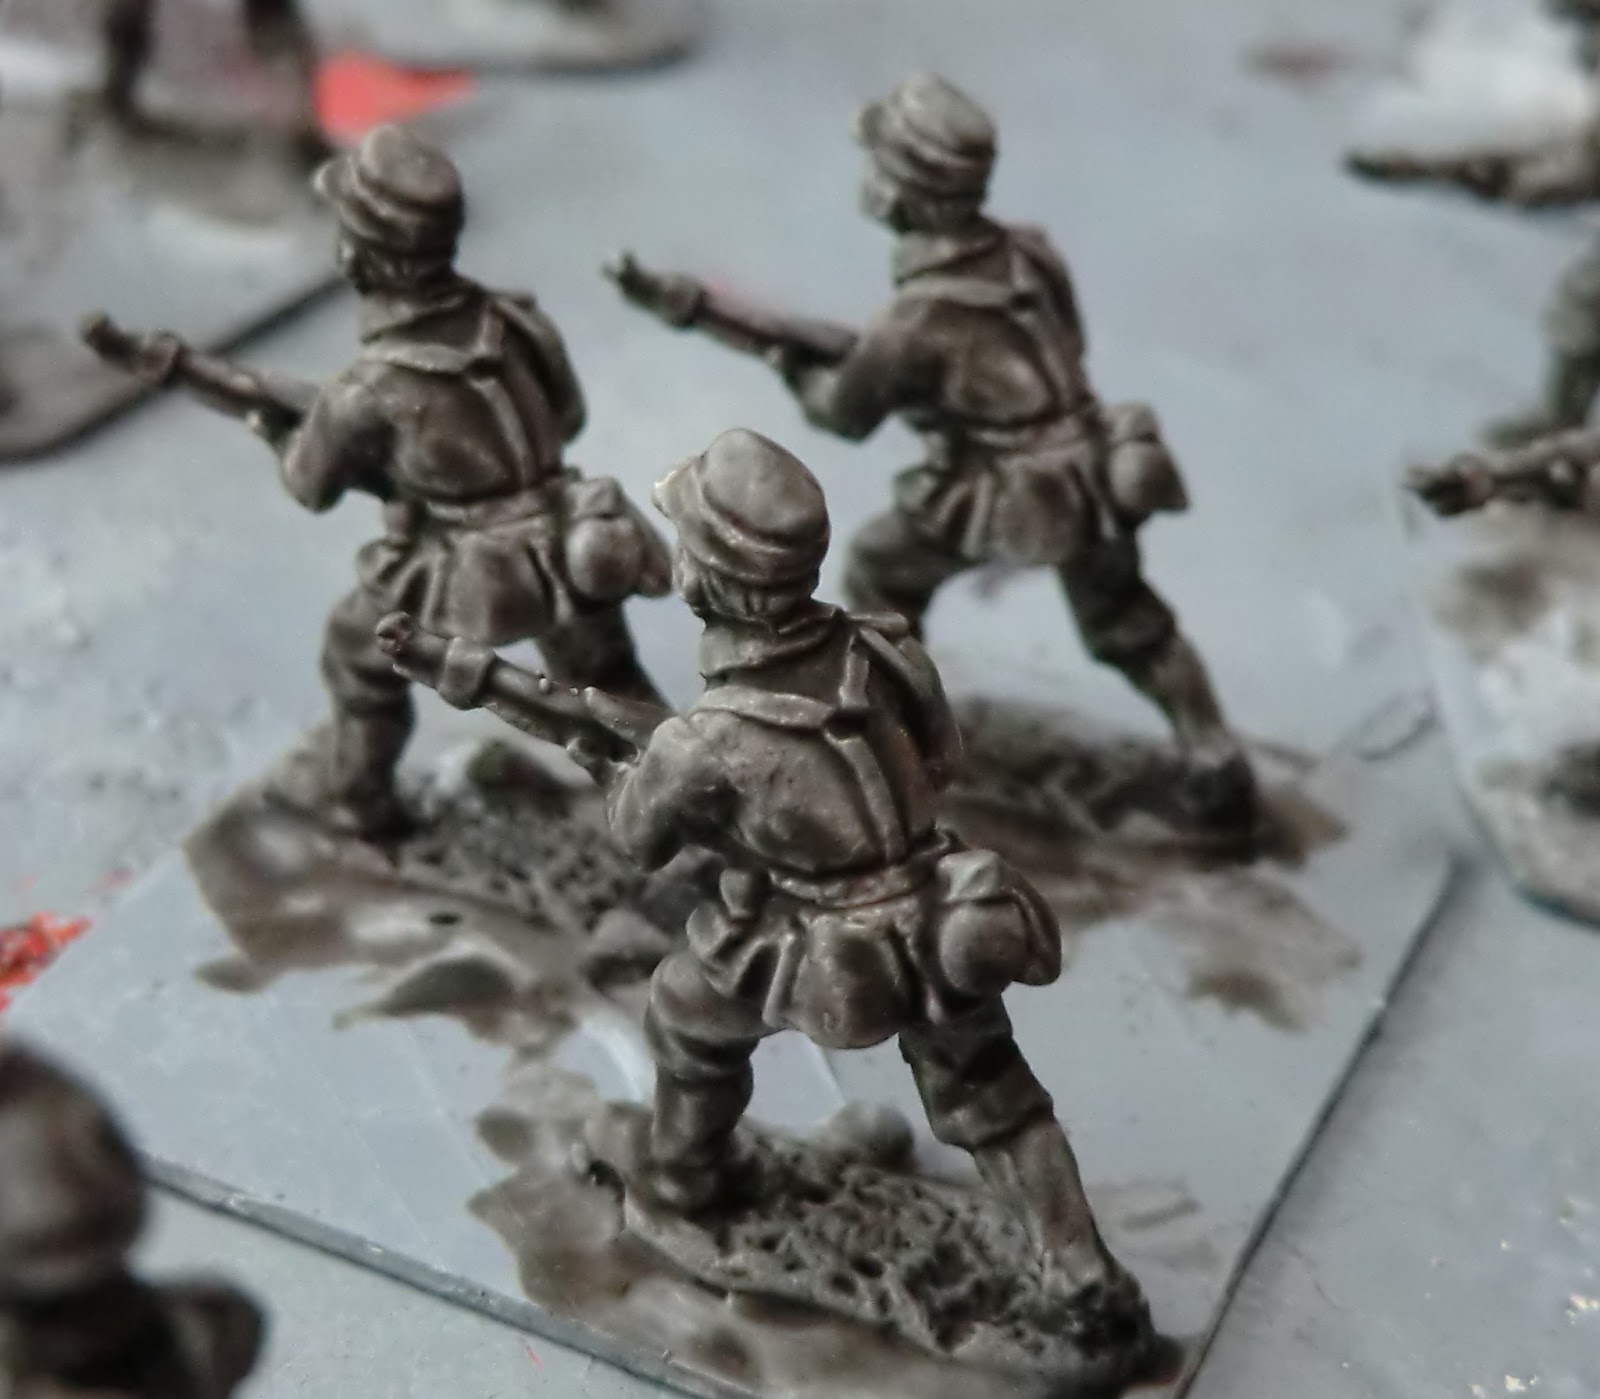
The actual painting technique would involve a few careful strokes of colour, mostly on the highlight folds and leaving as much of the dark folds as appropriate. This was done on the trousers with Games Workshop (GW) Fortress Grey........


 ..........and on the jackets with GW Knarloc Green.

You may well be thinking that this makes the main clothing seem too light but, never fear, that will be rectified later in the process. For the same reason I did not use black for helmet, boots and gun barrels but GW Charadon Granite which is a very dark grey. Similarly though it was only on main highlight areas.  The next photos also show flesh and brown and black for rifles, straps, bread bags etc.

I did the flesh my usual way which is a coat of GW Elf Flesh washed when dry with a diluted solution of  GW Flesh Wash (now called Ogryn Flesh wash).

Once the figures were entirely painted, including fine detail like collar patches and shield motifs on helmets, it was time to landscape the bases. Where I want a particularly good effect I use Winsor and Newton Acrylic Structure Gel as this can be applied with a brush and fills up the spaces between the metal figure bases. It can also be manipulated and textured to some extent and then dries hard to give ruts and puddles etc. I mixed GW Ivanden Dark Sun  (a kind of yellow ochre) and a small amount of fine sawdust with it so that saves another step. Again it's a bit bright but that can be dealt with.


Now comes the really interesting bit. It was my artistic friend Terry Preen (see his guest page in right side bar) who introduced me to the radical idea that you don't need to buy Army Painter Quickshade at £18 a pot or whatever it costs now, but you can use various wood stain varnishes available at your local DIY store. Although I do like the effect of Army Painter products, especially for Horse and Musket period uniforms, for a good overall "drab" effect ideal for WW2, I found B&Q Antique Pine Satin Quick Dry Varnish. It is water based and dries within an hour leaving brown in the folds and a very slight brown film over the rest of the figure. If you don't want the latter then quickly wipe it off the highlights with a tissue or a  clean brush while it's wet. On these figures the effect was to darken the uniform and create interesting puddles of dark shadow in the texture of the base colour/texture.

This is "muddy" when you put it on but does dry clear with a highly glossy finish that actually makes them feel  satisfyingly protected from whatever the wargame battlefield can throw at them "Take cover! incoming dice!!!"


I next decided that I needed to give the bases a highlight with GW Bleached Bone.
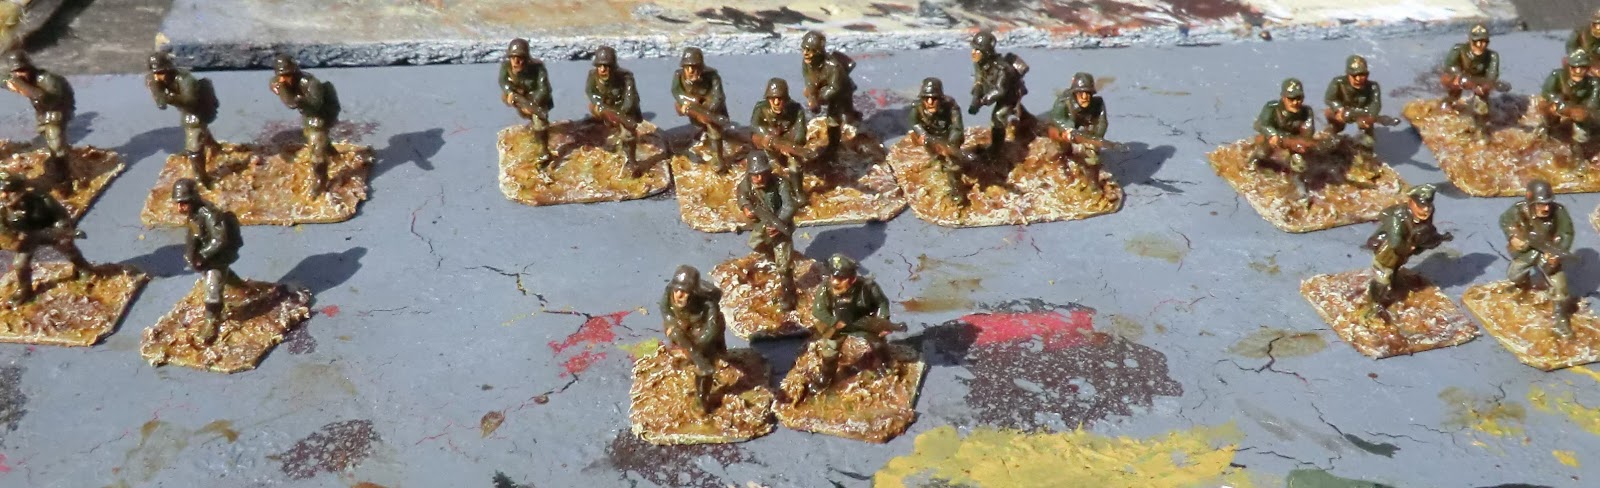
Obviously this is now getting into the territory of personal taste and, for WW2, leaving the bases like this would probably have wider deployment possibilities but I think it looks a bit depressing so prefer to cheer them up with some touches of green. I just use small patches of PVA glue and dip into a pot of Spring or Summer effect imitation grass and then the odd dab of a rubberised fine clumping to look like weeds.

Finally it was time to give them a good coat of Matt Spray varnish as this obviously reduces the glossy shine to a  more realistic look but also ensures the grass effects get a durable bonding on the bases. (Remember to shake the can really, really well to get the matt finish)

If you'd like to see several images of the final effects please see these items for sale on Ebay.

And if you've found this interesting or instructive please leave your comments. thanks 


Friday, 22 March 2013

Painting results to swoon over - Prussian Artillery

I'm very privileged to have been permitted to put some photos on my Guest pages by my friend from Bristol, Kevin East.  As reported here previously Kevin is slowly building up to the "big game" in 2015, and the latest additions are some absolutely superb 28mm Prussian artillery guns, crews and tranport teams.

Here's a sample but you can see all the serious detail and learn about some of his techniques by clicking on the "Kevin East 3" Page on the right hand side bar of this blog.


...and if you haven't seen them before also look at Kevin East 1 and 2 for more Waterloo era Napoleonics, and Kevin welcomes feedback so please comment on his Page.

Saturday, 9 March 2013

Whatever next? Old school Warhammer 40K?

Hope the title grabbed your attention but if you're looking for Warhammer 40, 000  figures on this blog you might be disappointed..if you're an "old school wargaming" enthusiast please try to smile benignly.

Those who have followed my ramblings on art and wargaming will realise that from time to time I get asked to do some art work that brings wargames figures, or historic fantasy/fiction, to something approaching life. This one is probably my strangest commission yet and I call it old school Warhammer 40K because, along with recent blogs discussing "what is old school" (such as this one  - link) it got me thinking. So much of our talk about old school wargaming is because it is something from a lost past that is nostalgic and for me, surprisingly, this painting did just that.
Please take a look at it:
Hikz and da Boyz, Acrylic on canvas 16" x 12"
Games Workshop and Warhammer has been around for what, 25- 30 years now? And being a die-hard historical wargamer I tended to look on it with disdain until my son reached the age of about 6 in the mid 1990s and we were venturing into all sorts of strange things, among which was "Space Hulk" (I think it was called) which eventually led us into the local GW store. It didn't take long to realise that here was branch of the hobby with its own futuristic universe with fully rounded armies, "national characteristics", uniforms and literature (at a price!) to back it all up - and rules that were fun, and, Heaven forbid! included saving throws when your figure was hit! - old school rules indeed.  Space Marines and Eldar "Codexes" became regular bedtime story reading while we planned the next squads or mechanised squadrons, and later produced our own orks for "Gorkamorka". He learned to paint figures to such a good standard I later paid him to paint some of my 18th Century units. It's nostalgic for me as it represents a period of several years when  my son and I actually spoke the same language and enthused about the same things.........until he found Playstation!

So imagine my surprise when, through email correspondence, I found one of my kindred spirit "old school" wargamer clients also had a soft spot for Warhammer 40K, had created his own gang of Ork Boyz with Imperial Guard opposition and had scratch built a superb model armoured train to go with them. He liked them so much he commissioned me to come up with an idea for a portrait of "Hikz" and his two leading henchmen "Spike" and "Shaggratt"  (Yeah I wondered I about that name too!.....well he is a disgusting ork).

So we got to thinking about, if you were an Ork boss in the 41st Century (and not withstanding what will pass for art if the World lasts that long) how would you wish to be portrayed? The answer is obviously - hard, tough, uncompromising, cruel, powerful, commanding etc, so we needed to capture that idea..... And now a bit more nostalgia since the client asked for a ruined city backdrop "like Stalingrad", and of course I first encountered the awefulness of Stalingrad when doing my own "old school wargaming style" research for 1/72 scale wargames back in 1968 (no handy scenario books back then). Then there was that old pile of my son's "White Dwarf"  magazines from 15 years ago which gave inspiration for the garish colour scheme of a 40K World and uncompromising charisma of an Ork Warboss. 

Now "How to paint what doesn't exist?" and I refer you back to James Gurney's wonderful book in an earlier posting imaginative realism. So I got the client to send me some nice quality photos of his ork models and the armoured train, from all angles. I found some grainy, but effective, black and white photos of the real Stalingrad on the internet and married then together in a computer mockup, as I do for most of my figure paintings. The Imperial Guard bodies and destroyed cannon were inspired by the old WD magazines but original poses from my imagination.

And then, with the client's agreement to the basic design and colour scheme I set to with the brushes and acrylic paint to come up with what you see about 20 hours work and 5 days later. Here is the sub-text to set the scene:
Ork leader, and all-conquering hero, Hikz, has masterminded a ferocious assault on this enemy city and now has entered on his armoured command post train to dispatch any remaining opposition. The defenders are mostly dealt with - evidenced by the foreground bodies and wrecked cannon. Those who fight on are being confidently overcome (by, for example, Spike’s blasta and the bomba rockets). Shaggratt is carefully watching his boss’s back.  The city is a raging inferno so destroyed and hot that no one should be in any doubt that is what you get if you mess with Hikz and da Boyz.


Thanks for sticking with this combined nostalgia and advert, and as a reward here is a photo of the client's original armoured train model which is far too good to hide from public gaze.