Showing posts with label Seven Years War. Show all posts

Sunday, 1 March 2026

Seven Years War - The Battle of Hohenburg (a Dinos "Honours of War" scenario) : PART ONE

 No, I haven't forgotten I still have two days of our Battle of Eckmuhl to report, but that hobby workhorse, Dinos Antoniadis, Administrator of the Honours of War Facebook group, has urged me to put my efforts on this out into the public domain as soon as I could. And why not? His book published last Autumn "Honours of War, Scenario Book One, The Seven Years War" deserves promoting and I thoroughly recommend it. Available from Caliver Books here.

"So good they played it twice!"

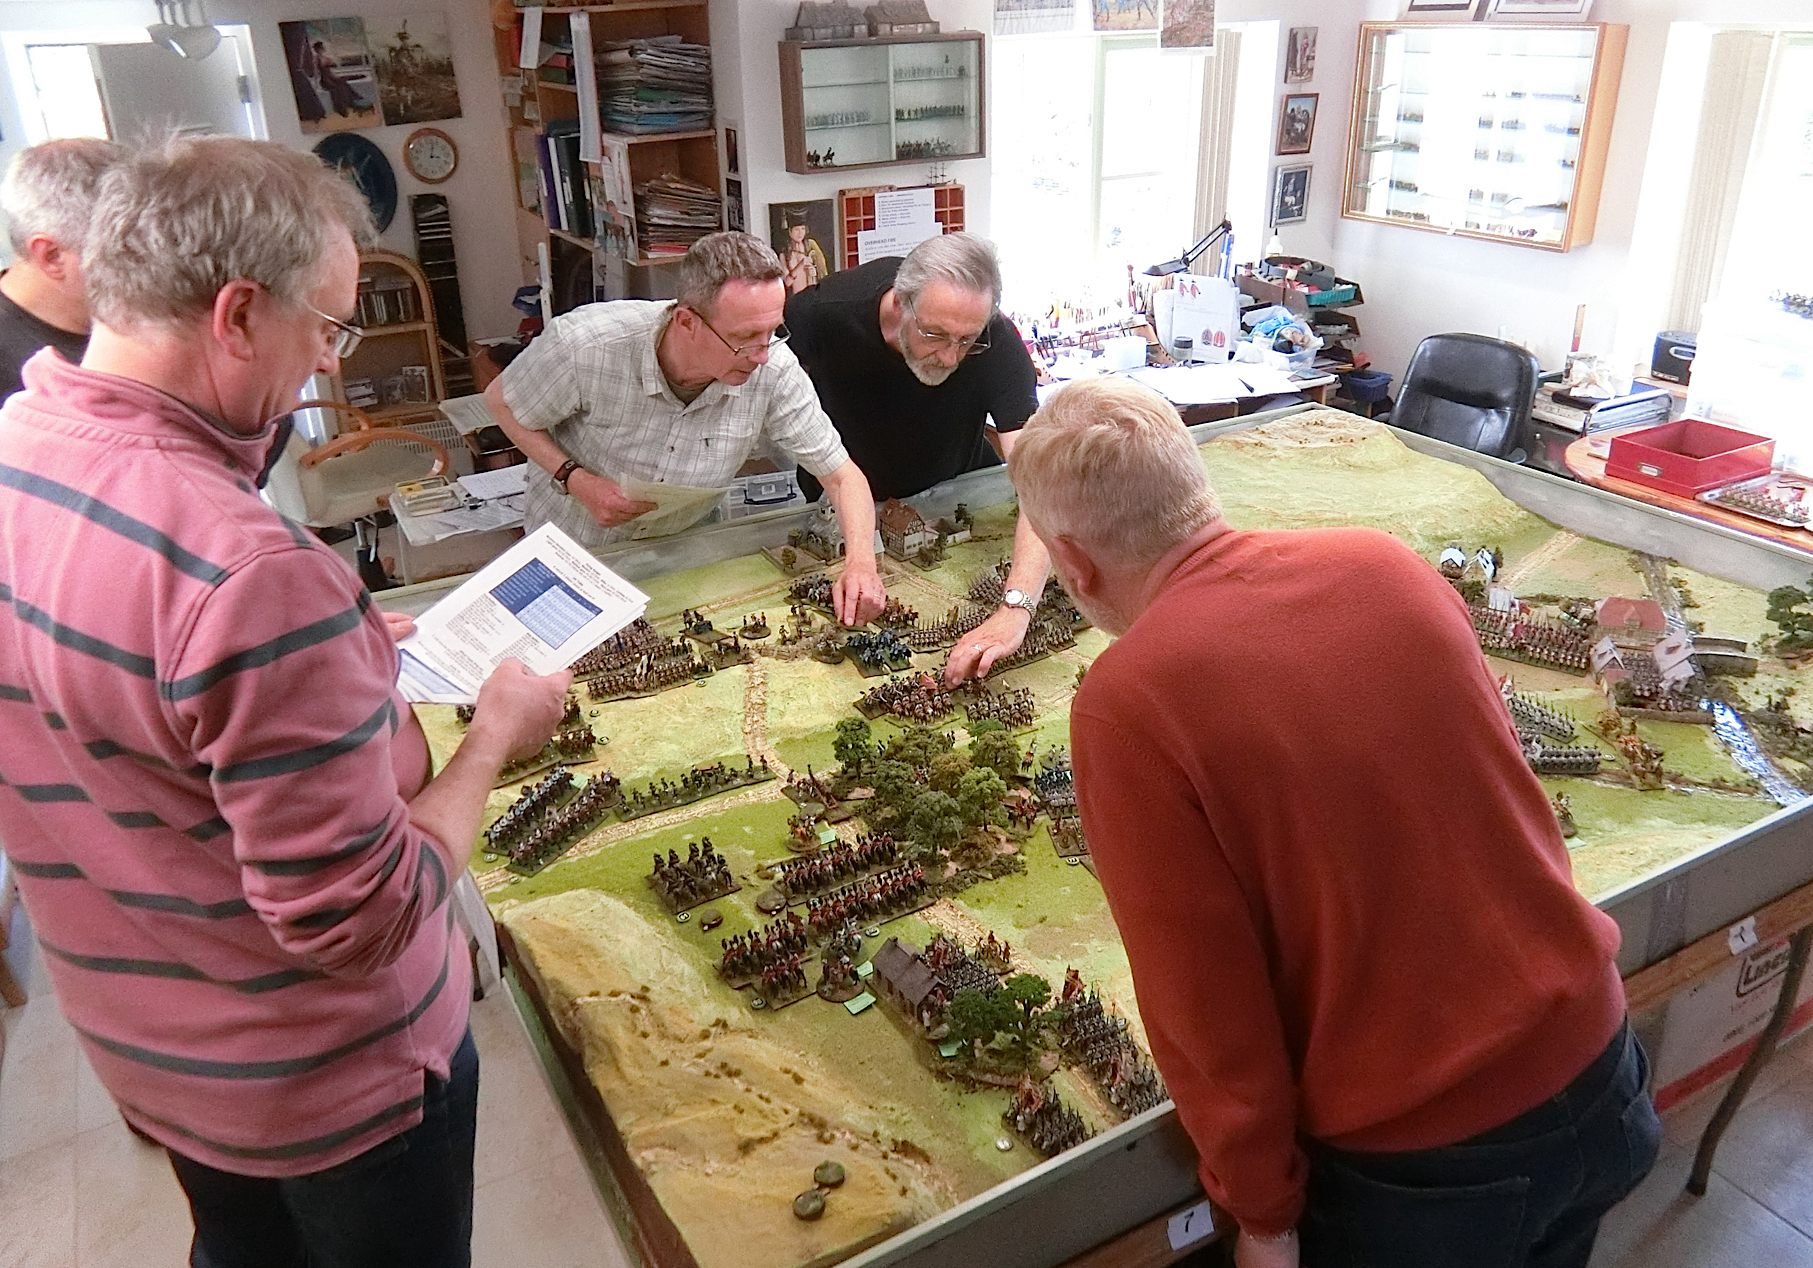
I try to organise a game of some sort for a few friends around my birthday in late January. This year I found it particularly difficult to muster two friends on the same day willing and able to get to this out-of-the-way peaceful Cotswold village. Ken Marshall and Richard Newcombe played Hohenburg 1 on 1st February and Paul B played Hohenburg 2 against me on 22 February. So I was a lucky boy to have two birthday treats and two Sunday lunches with friends at The Butchers Arms, Oakridge. As it turned out I'm glad I played it twice as this scenario is particuarly deceptive for both a Games Master to balance and the players to play.

The first Battle of Hohenburg in full flow

Notwithstanding a slight quirk of  "lost in translation" from the original Greek "Take these guns, by all means!" is not a friendly invitation to increase your ordnance inventory for free, but a challenge meaning "Take these guns by any means possible (and you'll be lucky!)".

The battlefield and the deployment areas I gave each side -
see the briefs for explanations
Why is it "deceptive"?

Tell the average SYW wargamer :

"You have "Dashing" quality Frederick the Great commanding a division equivalent force of 10 infantry battalions, 6 of which are Prussian Grenadiers and all have superior fire ability, backed up by four cavalry regiments, three of them large size and commanded by "Dashing" Hussar General Zieten. All you have to do is take three redoubts with field guns in, protected by a couple of ordinary Austrian battalions and some cavalry and commanded by a "Dithering" aged Austrian general.  Oh yeah - they are are on a difficult hill you have to approach over open ground, and it's thought there are a couple of reserve regiments lurking around which might surprise you".

And he would answer  - "But hey, we're Prussians and this is 1759, so what! It'll be a doddle".

Well that's what I thought when working out how to adapt this scenario (originally played by Dinos lengthways up a table with fairly restricted manoeuvring room) to my widththways, post Eckmuhl, sculpted table. So I built in a few adaptations such as an Austrian/Imperial Dithering commanding general with a bit extra capability, making the redoubts have flexible gun ports for about 270 degree coverage (at only 15 degrees fire angle per model though, not 30), some fairly indifferent subordinates rather than the "none" in the original scenario, and giving more choices of entry points for the "surprise" reserves. 

For the Prussians I may have boobed. The scenario states superior firepower for all which I thought excessive so I gave the third brigade battalion guns instead which increases the "musket" range , but not hit ability, to 30cm from 20cm. I did not give the Prussian infantry the fast change of face and formation they get under normal HoW national characteristics. In retrospect that was a mistake for this scenario where speed and manoeuvrability were critical.

I changed the Army Points to suit our 0. 5 to 5 per unit, depending on size and quality. and consequently the durability of "large" units, and the Victory Conditions where Army Points might be relevant. That did not affect the balance. I made the game last no longer than 10 Moves. If the Austrians held out, they would win.

There are some clever period details written into this by Dinos, such as Fred deciding, if he has four units "Done For", he will quit the field personally and leave the army in the tender mercy of his subordinates. Given the extreme usefulness of a Dashing C-in-C for a hard fought attack, that was not something to be approached lightly.

All the figures and terrain are from my collection.

The First Battle of Hohenburg

(no prizes for fans of this blog spotting I have reused the name from the high point in the Battle of Eckmuhl game)

Richard's deployment for the
 Prussians. Anything off table is
 concealed by mist

Ken's deployment for the
Austrian/Imperial defenders.
Cavalry in A1 were concealed at the
start by the hillcrest as was an infantry
 battalion behind the big redoubt

For full background I urge you to read the briefing documents and orders of battle I have put in the 18th Century Historical download sidebar here. There is a slightly different Austrian Brief for Hohenburg 2 as I changed the reserve entry options.

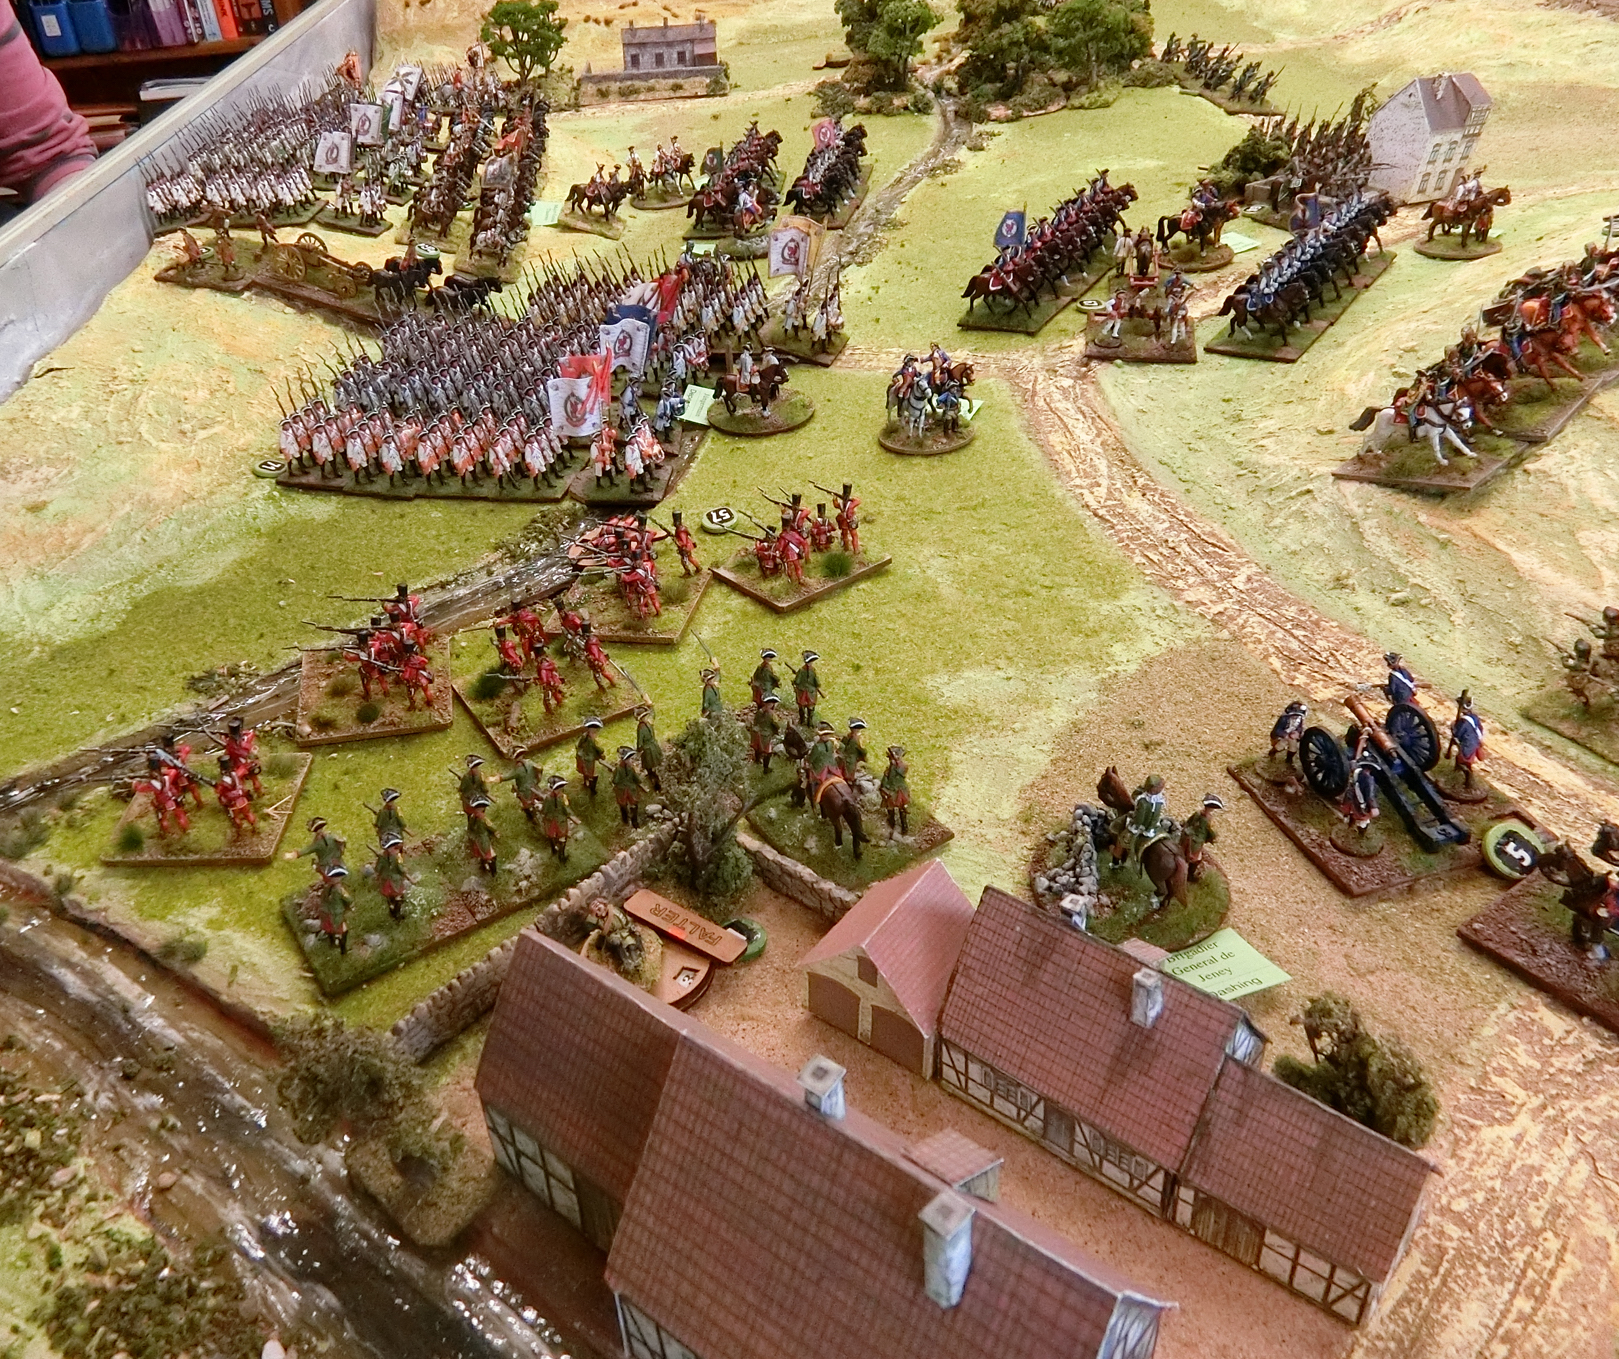
Ken had very limited choices for the Austrian /Imperial force. He had two cavalry regiments behind the crest concealed on his right flank, and one regiment visible on the left. One infantry battalion was between the redoubts and visible while one was concealed to protect the left flank and that redoubt. The Imperial camp was also at risk so Ken was aware that it probably needed protecting eventually. Initially he placed all his three gun models, (representing batteries of about 4 cannons each)  facing forward.

Austrian deployment. Most of this army is made up of French and Imagi-nation figures

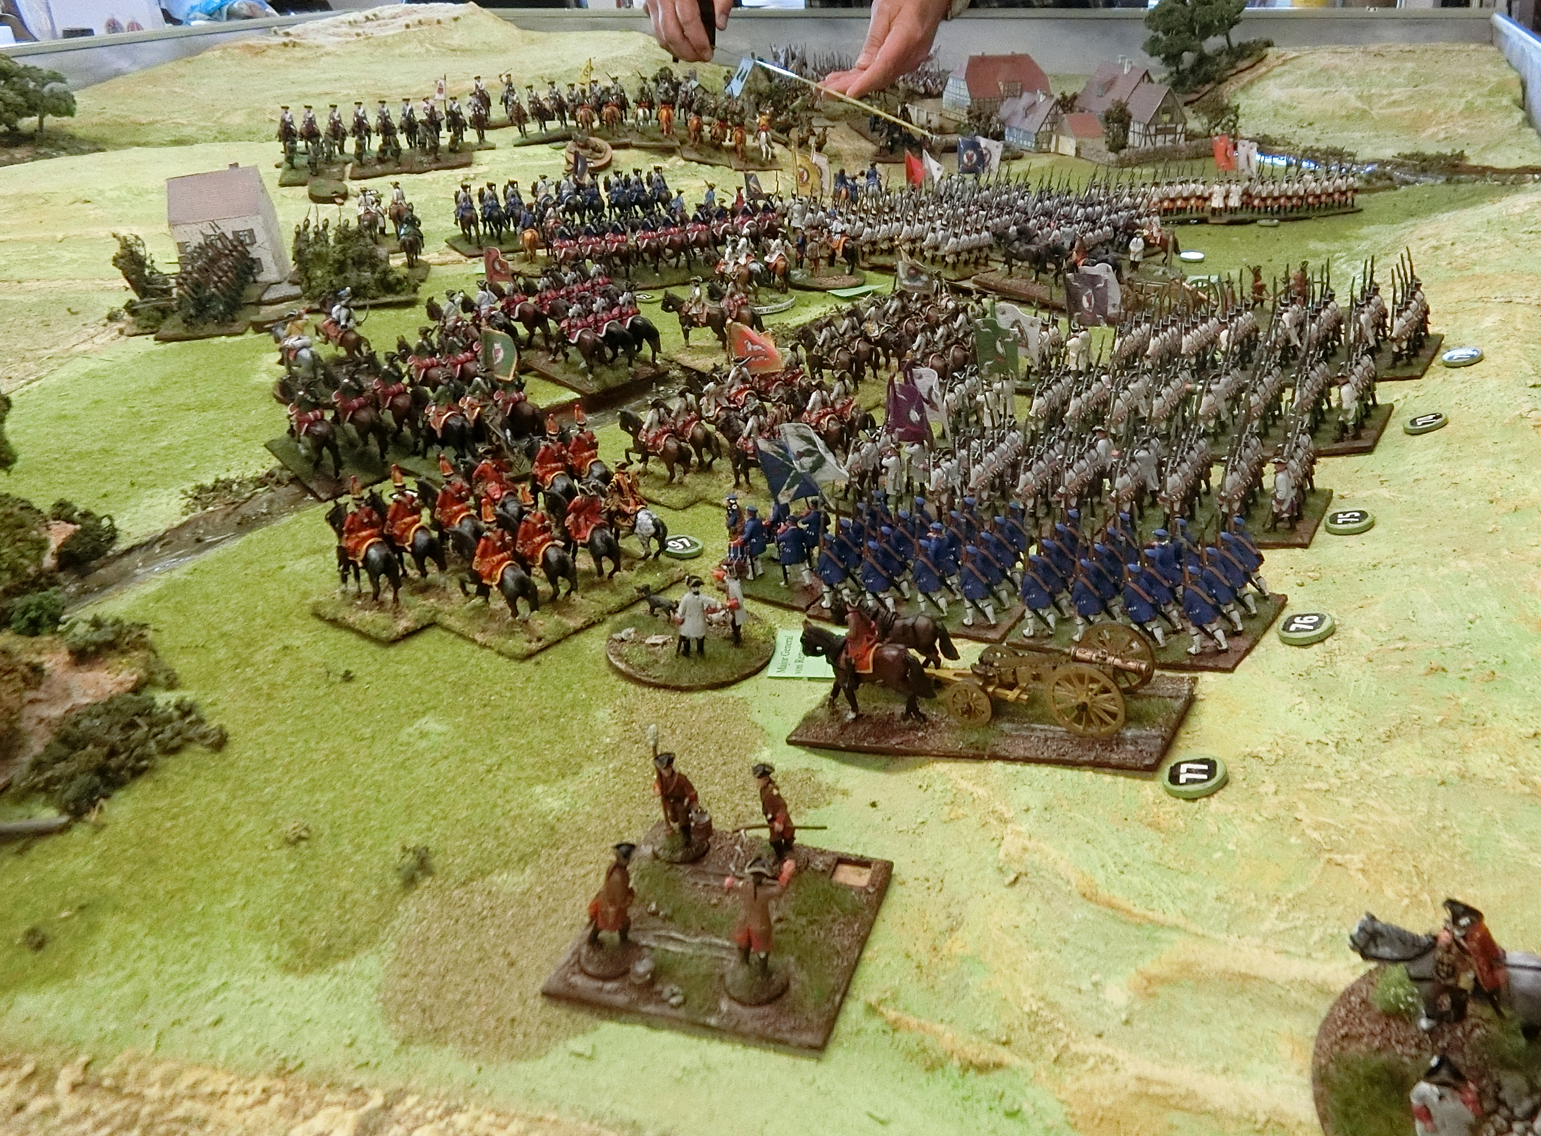
Richard deduced that he had to find a way to avoid a head on attack on the guns (that 4 unit Frederick withdrawal threat at least) but the scenario committed his first line of Grenadiers to be in line where they emerged from the orchards. His second line of grendiers was in fairly close support . It gave a good impression that a conventional line attack would take place. His third line however was to be a right hook already formed in march columns facing right, to come through Apfelhof and march round the enemy left; anticipating the way would be cleared by the cavalry. Frederick was placed in Apfelhof farm where his 20cm Dashing command range could reach various of his subordinates and keep open his upgrading options. On the extreme right were his three heavy cavalry regiments with Zieten, expecting to make quick time up the hill to their front. A regiment of Hussars was on the extreme left. The Grunburg Foot Guards formed the fourth line, and as you can see from the brief, Frederick felt his reputation would be at stake if he used them, so there are severe Victory Point penalties for realisation of that presumption.

What was visible of Frederick's force at the start.
This army was made up of Prussians, Hessians, Hanoverians,
 Wurttemburgers, and "Grunburg" Imagi-nation figures
 dressed by the British! 

What was visible to both commanders at the start. Austrian guns were allowed notional ranging shots so Ken could check the ranges as he was in a fixed position. The Prussian front line is at medium range; close/canister range just on the other side of the valley floor.

Drone view from above the Austrian position.......

.......and from the guns in the great redoubt 

This is what they looked like to the Prussians ..... that's a long way march under fire!

The game gets under way, I'll try to keep it simple as there are two games to get through. The Prussians have a Plus 2 on Movement initiative each turn. However, Richard was to be plagued by consistently poor brigade initiative rolls, despite the good influence of Frederick's command stand. That meant he did not make the quick progress we had expected.

Prussian cavalry change formation and advance

Major cavalry clash with the Prussian "right hook" . Second line (Greanadiers) is in march column attempting to turn left when it gets to Apfelhof  Through Apfelhof the third line (Hessian Fusiliers and a Musketeer battalion) are beginning to make progress behind the cavalry encouraged by Frederick. Richard is heqding this brigade for the little bridge as he did realise at this point that the wheeled restriction for streams does not apply to battalion guns (my fault).

The Grunburg Dragoons met their match as the front line when their opponents held them at the halt on the high ground and added an extra Hit from firing from the saddle.  Followed by a good Melee combat roll the Grunburgers are shattered.  Not a great start for Richard

Only slow progress for the Prussian infantry - poor initiative rolls, woods to progress through, and a crowded deployment area being raked by solid shot with the occasional successful "grazing fire" from the Austrian batteries

The Wurttemburg Grenadiers zu Pferd are next up and hit the now weakened "Austrian" Dragoons who have counter charged to gain a bit of ground

Unsurprisingly they are defeated. Ken is removing them, but he has gained time and a few casualties on the mounted Grenadiers 

A moment of reflection as the Austrian cavalry breaks . HoW is very heavy on Hits when two large units of cavalry cross swords. 

As the dust settles from the current cavalry charge we can see a brave Grenadier battalion approaching the Austrian redoubt. It's trying to take advantage of the cannon being turned on those near cavalry. In the distance Ken has brought two Austrian cavalry regiments over the hill

Just as well the black Hussars are there to put them off charging up the valley. The next photo shows a severe potential risk of a flank attack

At right you can see the tail battalion of the 1st Grenadier brigade still in the orchards. In the foreground Richard has brought forward the Grunburg Foot Guards, deliberately only showing the command stand for intimidation purposes. Fred loses no prestige as long as they don't venture much nearer danger.

I don't think Richard had considered that the small redoubt, just out of this photo, could enfilade the flank of his attacking Grenadiers, that, and the canister fire from the front, was unsurprisingly devastating. Superior artillery firing at Superior infantry 

The Prussian hill assault in profile 

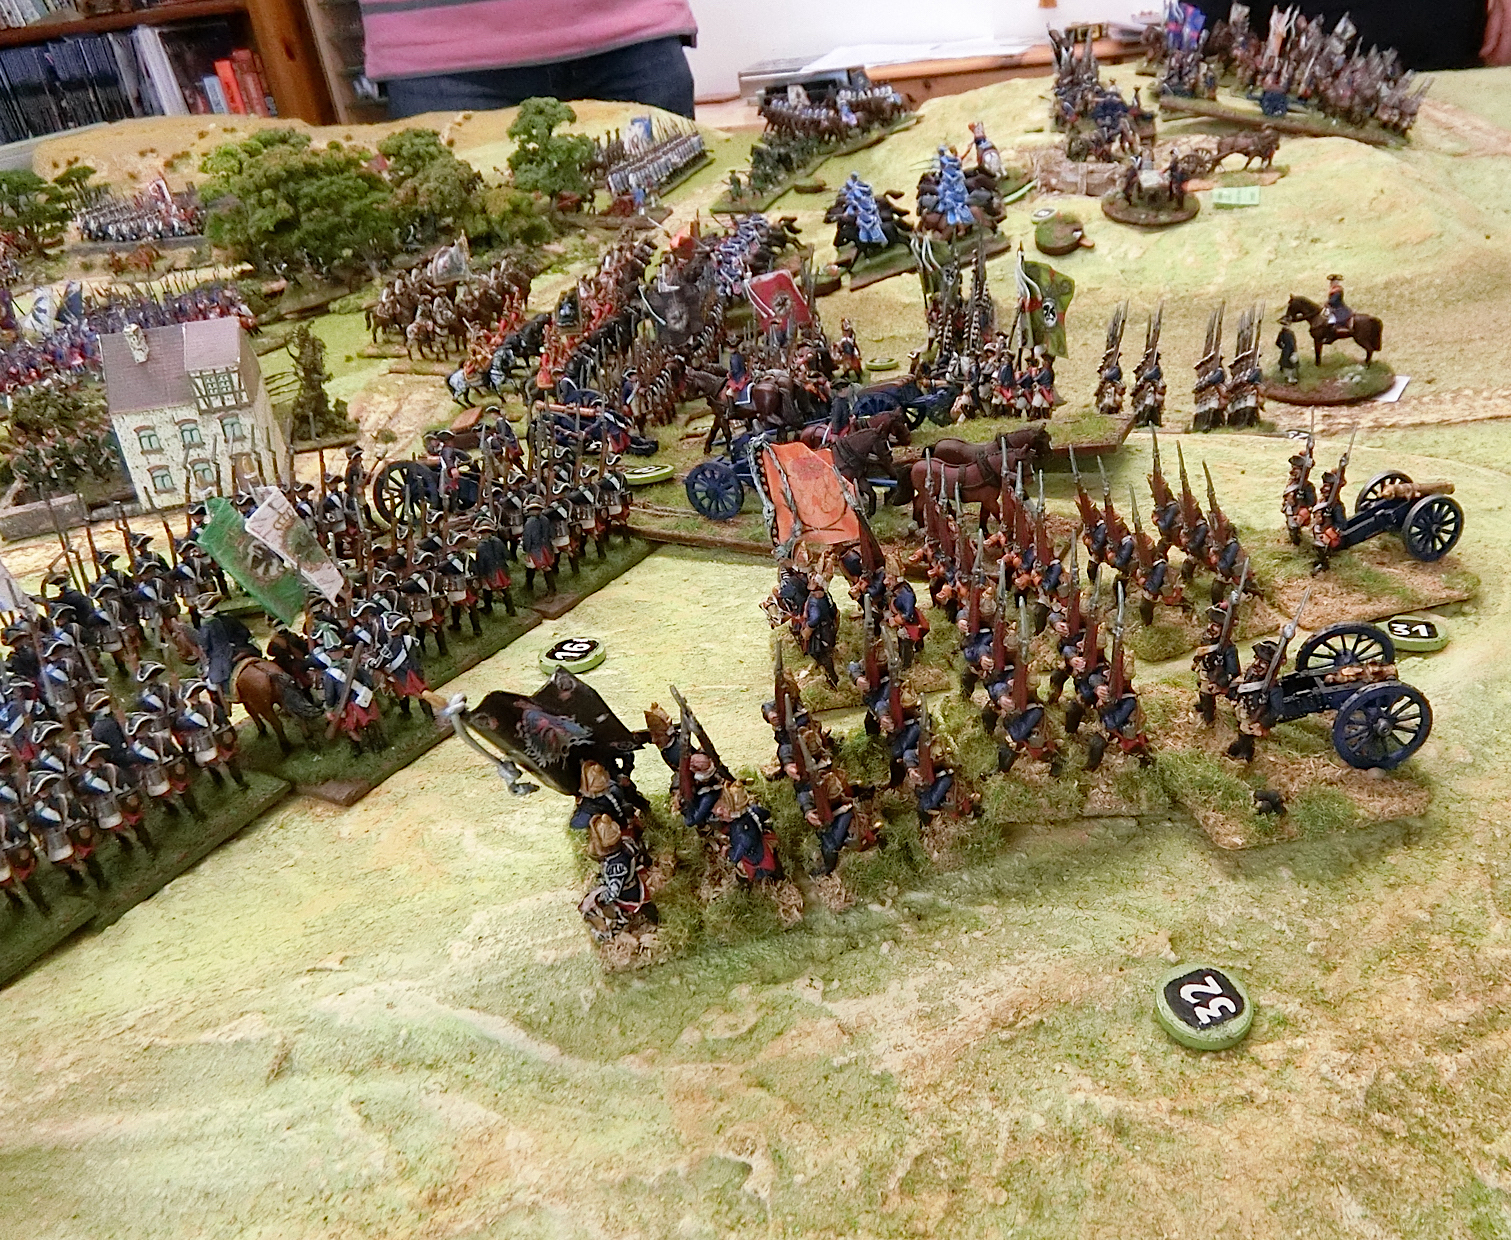
Unit 32 Grenadiers is "done for". That's two Prussian units gone to one Austrian 


In the nick of time Ken got a reinforcement in the form of another regiment of Dragoons, which had arrived earlier just by the camp, and now charged with a double move. They hit the Prussian Dragoons (blue and orange) which had taken the place of the Horse Grenadiers in their time of needing a breather.


The Dice Gods were smiling on Ken with what was in retrospect, a turning point in the game (photo above). He had a battalion of Grenzer light infantry lurking off table. In Move 2 I got him to decide/predict where they would arrive. He chose this bridge, now behind enemy lines. But he needed a 10, 11 or 12 on 2xD6 to get them at all  so I felt it was unlikely they would arrive early. But we are only Move 5 and here they are! Their effect will be seen......

In overview, at the far end Ken's cavalry are facing off to the Prussian Hussars while continuing to threaten the infantry. That position suits him fine. The Prussian infantry attack on the redoubt has temporarily stalled. Near flank cavalry action continues and another Imperial reserve battalion is arriving near the camp. Ken now has all the units he can get and is in a good position.

Close up of the Imperial Dragoons controntation with the Prussian ones 

Dragoons of both sides have suffered badly and forced to retreat and reform. Fusiliers have attacked musketeers near the redoubt while their battalions behind are floundering from casualties, grazing and enfilade fire and the appearance of those d****d Grenzers! At right the newly arrived "Grenadiers de France" have plugged a gap on Ken's flank to protect the camp.

Two Prussian Grenadier battalions had fallen back to the orchards to reform but now form a fire zone which the Dragoons opposite enter at their peril. Trouble is the Grenadiers are still under artillery fire there.

Ken has moved his Grenzers to an optimum position and I have indicated with the red "fence" a notional 30 cm radius which inhibits any Prussians needing to recover Hits, or worse, remain stationary to Reform (red markers) So poor Richard's now diminishing army is being squeezed from both ends with the fire from the guns in between. This side of the redoubt the infantry fight has resulted in both sides retreating through 4 Hits.

A Hessian fusilier battalion goes in to attack the redoubt with the bayonet. Grenadiers zu Pferd charge the Grenadiers de France, and in the foreground those Prussian Dragoons are desperate for a safe place to reform.

The Imperial General is able to consolidate and reform between the large redoubt and the camp

Another fusilier battalion falls back repulsed from the redoubt, while nearby the Grunburg and  Hanoverian Converged Grenadiers battalions  try to sneak past to extend Frederick's advance

This view from above shows that Fred's infantry is now split with a couple of Grenadier units stuck in the orchards for cover, and the rest edging uncertainly up the hill and round the redoubt. But those Grenzers have moved to the second bridge where their 30cm "enemy influence" range is stopping any Prussian recovery nearby. Note the Grenadiers zu Pferd now bottled up against the river as there is nowhere else to go

Lacking targets to its front Ken has brought one of the guns out of the redoubt to play on targets down the left flank slope.

Fire from the other gun breaks one of the retreating fusilier battalions - so that is the third Prussian unit "Done For". (Yellow marker)

A useful overhead shot showing the Austrians making a "comeback" between the redoubt and camp. The Prussian blue and orange dragoons are getting out to reform. Frederick's infantry line is at last looking tidier, but it's an illusion likely to be thwarted by the strong defences still ahead and those Grenzers behind them. The open space to their right along the river is testimony to their passive effectiveness - the Grenadiers zu Pferd had nowhere to run except an impassible river so were "Done For".

The word soon spread along the line back to Frederick who then got "p*****d off  and, according to the Prussian brief, must go away to see if the rest of his army needs him.......

This was the end of Move 8, and I had allowed 10, so theoretically the Prussians could have fought on but, with Frederick departed  and Ken having to leave soon, we all realised there was very little hope of the Prussians turning things around so we called a halt.   This was not about Victory Points as such, but the overall situation of defeating the Austrians before 10 Moves.  With my Army Points system the Prussians had 60.5 with a break point of 28. Only taking "Done For" units they actually lost 16 with no additions for objectives taken, nor subtractions for using the Reserve unit. By contrast the Austrian Force had only 4 Army Points lost out of 46 and a break point of 22.

The Players' Views

Richard wrote a lengthy analysis, for which I am very grateful, and I've drawn on some of it in my narrative. However, I quote verbatim from his critical summing up.
<<I determined that as well as outflanking on the right it would be necessary
to devote a brigade to a frontal assault on Ken‘s left gun. If I did not the
gun would change angle and enfilade the outflanking attack (as did happen).
In these rules canister from a superior artillery gun is pretty devastating
and I did not wish to see the cavalry  (Hussars) wiped out too early.

As it transpired the dice thwarted any coordination between the flank attack
and the frontal attack. Inevitably the appearance of Ken‘s cavalry on
my left meant I would have to leave some forces to cover them.

The untimely appearance of the grenzers in the rear of my cavalry meant that
I had to divert a brigade of infantry to cover them. All to no avail because
the cavalry were trapped between Ken‘s main force and the grenzers meaning
that rallying off became almost impossible.

In retrospect I made a mistake in keeping Frederick with the infantry, where
I expected heavy casualties and thus a need for him to assist in rallying
off. Perhaps I would’ve been better to have sent him with the cavalry and
use him in that way there.

All in all I didn’t do well but cannot recall a game in which my dice was so
consistently bad and the usual probability of the dice evening out over the
course of a battle just didn’t happen. Nevertheless, a bad workmen must
not blame his tools and Ken played a blinder in turning up at just the 
wrong moment (from my point of view) at every point.
Well done, Ken for playing so well, and well done Chris for organising such
an excellent game.>>

Ken summed it up even more succinctly:

 << Chris, you asked for feedback - I think the biggest challenge was the Prussian dice throwing. The Prussians looked to have a good plan and I think they have a reasonable chance of winning but were just let down by poor dice. And when the dice cooperated enough to let Richard assemble an attacking force on my left flank, they also allowed my grenzer to appear behind his lines (1/12 chance achieved on the second roll so a decent throw) when I needed them. Makes for a great story if you're Austrian but not necessarily a good game. 

You may want to consider rolling for their entry point rather than letting the Austrian player choose.

I don't think there was much wrong with your plan, Richard, it was pretty much what I'd have done in your place. If you'd managed to screen the left gun and got a couple of regiments of infantry to the top of that slope, you'd have punched a hole through my defence. On the day it really was a case of Frederick the Unlucky because I don't think the dice gods gave you anything. 
I think we chalk that one up to everyone has an off day occasionally>>

As I told the guys it was a super birthday treat for me even if it was one-sided. I had learned a lot and planned to play it again, so would make some tweaks. Paul B from Cheltenham was lined up to play the Austrians in Hohenburg 2. I canvased a few folks to try to get an opponent, but no one was available on the day. The more I thought about I did not actually want to inflict this tricky situation on any other friends, but challenged myself to try to do better than Richard. Couldn't be that hard could it ? - his dice luck was awful!

This post has gone on long enough - so Hohenburg Two very soon. 

The relatively passive Prussian left flank not far from the end of the game - stalemate here suited the Austrians very well indeed. 


Wednesday, 1 January 2025

New Year Greetings from a "Corsairette"

Many of my regular visitors will recall that this time last year I posted a feature on a lost masterpiece by my namesake Sir Joshua Gregg RA. See A Corsairette for Christmas

Well, my blog post must have stirred up the watching aristocracy to search their dusty attics or basements for their (not-so?) illustrious  ancestors' hidden chatels. Another one, presumably from Sir Josh's 1780 under-cover trip across the channel. Nothing much is known about this one, recently emerging from an estate in Derbyshire which must remain nameless........so we have to guess.

Apart from the obvious naval garb - the gold lace on her tricorn suggests an officer, and the shipboard setting, we note the initials on a barrel - which could be "DA" for Capitaine Julienne's corsair brig "La Dauphine Amusante". Also in Josh's usual fashion he managed to work the lady's name somewhere into the scene, in this case on the barrel at right foreground. So we could call her Lieutenant Polina. With a name like that I'd like to think, despite that cute face, she is really a hard bitten Ukrainian pirate lady. Probably recruited by Julienne due to her experience and to help keep the crew, and those visiting merchants referred to in the previous blog, in order.

Lieutenant Polina - original painting in Acrylic on canvas 10 inches x 8 inches

It's not known if Sir Josh stayed long enough on board La Dauphine Amusante to go on a voyage, or merely painted crew members while in port. Such records as exist hint he might have even met on board some representatives of the French Government for "secret" talks on behalf of The Admiralty and the Diplomatic Service. That's why the need for the paintings as cover, as well as salacious art work to pay off those back home who turned a "blind eye". Whether this trip had anything to do with the French decision to side with the Americans in their Revolution we may never know......  As a mere artist I'm just wondering if you can get such a bright looking sunny day in a channel port? Or is it artistic licence?


......thought my military minded followers might like a closer look at the ....ummm...... weapons

I've continued to use this story again this year to do this small painting as my annual military pinup for a  Christmas card. Many of my wargaming buddies and military art clients will have received one. I hope you (and they) like it. Last year one client suggested the pirate theme was worth expanding so I had the opportunity in the Summer to work with a professional model who gets what I'm trying to do and loves to model exotic subjects. We had a fun day in the sunshine on various 18th Century themes and I've got lots of new reference material , including 5 different pirate ladies.

The set below gives a very quick idea of the art process I've been developing lately, involving Artificial Intelligence (AI).  At left is my model, Jo,  in a super confident naval officer pose - minus jacket! Her sword is elsewhere from other posing. I ran this as a prompt through an AI system with some suitably descriptive words. I tried lots of variations, and you can see this system (Nightcafe) wants to sanitise and cover the naughty parts. The next picture is my preferred AI result and I thought the face was suitably playful for a greetings card. The system was having a great time interpreting my photo as a formal garden with a boat and sail in it!! Who says it's "intelligent".  Well actually along the way I got lots more bits of costume and ship parts and I put them together with Photoshop to arrive at the mockup seen in the third photo.  The essence of it is still the majestic pose of Jo but enhanced. So the fourth picture is my finished painting, though a rather dull rendition in that reproduction. It's got a certain vibrancy in the original that does not reproduce easily at this scale.


"French" Naval Lieutenant Polina is my second "corsairette", and Number 38 in the general "Hussarette" series. She is for sale priced at £80 so please get in touch if you are interested, or wish to purchase or discuss any of my other work. 
I can be contacted through the Contact page in my Art website here
or have a look at more of my Hussarettes and Military art 

And now another idea to see if it appeals.
Fancy an original painting of a nice lady in uniform playing with your own .....toys?
Well I got mine out and Jo was happy to take up lots of poses as both officer and musketeer across the wargames table with part of my 28mm Seven Years War collection 

Mousquetaire Joleen behind the Hanoverian army

Colonel Joleen about to move some of the French army

Game underway getting a bit more into the mood!!!
 - a forward observer?

I also did a couple of sets around a wargames table with another model - as a Napoleonic Hussarette and a Zouavette of 1860 - 1870 period, so I have loads of interesting material from which to make paintings
and I don't need to be restricted to just these periods. Let your imaginations go and contact me if you have an idea you'd like to commission - either with your own models (the miniature ones) or my set up. Faces of course can be used to suit your taste, I can even put you in the picture too if so desired.

For more of the charming model Jo, please see the links to various social media and professional sites she appears on from her Linktree page. And if you feel like supporting her work financially there are opportunities there. I do recommend the "Admire Me" site in particular.

FINALLY - a heartfelt thanks for another year of great support for this blog. I really do appreciate you taking the time to look at the pics, read my descriptions and follow stories and the wargame AARs. In particular it's great if you can comment in some way - like all bloggers I like to know what you think and to know there are folks out there who like, or get inspiration from, my efforts.
HAPPY NEW YEAR


Sunday, 12 June 2022

The Battle of Madling 1753: Part Three - Day Two and conclusion

 I left readers with a view of our battlefield at  dusk on the first day here, in which a Ducal Vanguard had gained limited ground within the Electoral territory. The first brigades of line infantry and cavalry were beginning to arrive on both sides.  Those who have looked at Ken's instructions ( here linked again) will have noted that reinforcements are due to arrive at flexible times - subject to dice rolls and only Ken knew how he was interpreting that. We did, however, have a turn record sheet on the wall (see the last photo below) in which at points he judged appropriate Ken forewarned of the arrival one or more moves ahead. So players could have an impending dread of opponents massing by the brigade name but not knowing what or how many troops it represented.  

I have to come clean here and admit that as I was helping umpire that day, and was in the know, I could see that, as the terrain favoured the Electoral defenders, a balanced game should see their force grow more slowly than the attacking Ducals.  In fact this was not happening, yet, on the day, the Ducal attack did look a bit overwhelming, the Electoral players did feel outclassed and outnumbered (they weren't really), the Ducal players did feel as if they stood a good chance of breaking through. Such was the good nature of the players that I never heard a cross or disappointed word all day....maybe it was just us all being overawed as yet more toys packed the table (ouch!), or was it Steve J's never failing sense of humour keeping spirits up? We shall never know, but Ken's great write-up captures the spirit - hope you enjoy it.

As before - my photos and captions, and the occasional clarification in italics.

So let's have a look at who these splendid and contented chaps were

The second day participants - (from left):
 Keith Flint (Ducal), Ken Marshall (GM), Paul B (Ducal), Steve Johnson, Steve Pearse(Electoral players), CG (dogsbody tea maker)


The view at the start of the second day. The central high ground now has nothing but the (notional) corpses of the previous day's struggle 

The Ducal C -in -C, General Count Guilau, has taken charge of the left flank leaving the tougher job to his subordinate!

Lt General Ulrich has placed himself on the wooden bridge across the Lunzenbach to orchestrate the new arrivals

In the centre the Ducal army hopes to use the hamlet road junction as the jump off point for a major attack uphill. Von Scheither's tired light troops still stand ready

The second day opened dry and bright, and all eyes turned to the West where the Electoral lines looked painfully thin, almost non existent. It was going to be a race to see whether the Ducal infantry could push through the gaps in the line and open a way South before Electoral reinforcements could fill the gaps in the centre of their lines.

Von Scheither urged his jager and the supporting light cavalry on in the direction of the Rosenkrantzhohe but they were too late. As they crested the adjacent hill they were greeted by von Bohlen’s electoral cavalry forming line. Both sides came to a sudden stop and eyed up the opposition, not wanting to be the first to commit to the attack.  

View from the Electoral side of the hill

Over the central hill there is a temporary stand off while new brigades are brought on for both sides

Now the Electoral lines can be seen to be bolstered on both flanks and from Kaindorf
In the foreground the Ducal Grenzers have come back for another crack at the Anhalt riflemen........
......but it did not last long!
Lt Gen Ulrich bravely leads Jungermann's infantry brigade forward into the line of fire

Reinforcements for both sides were quickly appearing. Marching columns of Electoral infantry appeared in Kaindorf and were quickly directed forward to create a line from the Schwedischer Hugel towards von Bohlen’s regiments. 

A strong-looking heavy cavalry brigade bolsters up the Electoral troops on Schwedischer Hugel

On the Ducal side, Jüngermann’s infantry brigade continued their steady advance across the Lunzenbach angling toward Madling whilst on their left flank, Schirmer’s heavy cavalry brigade pushed on ahead to support Scheither’s regiments. Behind them, Ruechel’s cavalry and Rettenburg’s infantry moved onto the table in support. It was becoming clear to Electoral C-in-C, von Stutterheim that the enemy main effort was going to be aimed at his left flank and he was currently outnumbered by four brigades to two. 

Steve J has moved those heavy cavalry up onto the ridge and Keith is bringing yet another Ducal brigade in his centre. On the central high ground a close-quarters struggle is taking place

The Ducal left flank at the head of the Lunzenbach valley


Faced by the Lowenfeld infantry regiment advancing towards them in line, the Anhalt jager retired back from their positions along the Lunzenbach into Madling ready to contest the town. The remainder of the Ducal brigade formed into column of regiments on the left flank of the Lowenfeld regiment and advanced along the road to the south west. 

In the distance von Bohlen's cavalry are engaging von Scheither's lights on the ridge, while the Ducal big central attack is taking shape

The Lowenfeld regiment forms line to try to deal with the riflemen in Madling

They were countered by Lattorff’s Garde brigade forming line south of Madling. A third Electoral infantry brigade followed on behind and angled right to form line behind von Bohlen’s brigade before advancing.

At right the Electoral infantry are expanding the line behind von Bohlen's cavalry who are about to see off the Ducal Hussars. In the foreground the Anhalt riflemen are crossing the Stronbach bridge. What are they up to?


Now confident of support and spurred into action by the need to create space for the infantry, von Bohlen’s cavalry charged forward. Von Scheither’s jager and the light cavalry in front of them caused casualties on the cavalry but were quickly scattered. Pursuing the Ducal light troops downhill, von Bohlen’s regiments encountered Schirmer’s supporting heavy cavalry who countercharged.  Schirmer’s troops made short work of their tired opponents and the remnants of von Bohlen’s cavalry were forced to retire behind their supporting infantry. Buoyed by their success against the cavalry, Schirmer’s troops followed them and charged the infantry.

Above and Below: Von Bohlen's successful but tired cavalry about to be charged by Schirmer's fresh Ducal heavies

Towards Madling the dense Ducal lines are closing in.

Above and below: While the cavalry fight out on the hill the Steves are expertly planning how to complete the ring of steel of their infantry lines. "Hessians" have moved up behind Von Bohlen and a "Hanoverian" cavalry brigade pushes through on the Ducal side


A close up of Ken's gorgeous Prussian/Hessian style Grenadiers and Fusiliers on the Electoral side


An infantry attack goes in on Madling

By contrast action on the Ducal left is developing slowly.....

........but it looks like Electoral cavalry and infantry are building up a counter-attack into the Lunzen valley
The Ducal centre is packed with more arrivals, but in front of Madling Ducal infantry are falling back through each other - not good for "Hits!" 

Faced with charging cavalry, the disciplined infantry presented their muskets and fired at close range. Men and horses crashed to the ground, disrupting the charge. The remaining horses baulked at the lines of unbroken bayonet tipped muskets and Schirmer’s cavalry broke back towards their own lines. 

(I'm finding it difficult to match the photos in the right places for Ken's streamlined text so please bear with me and enjoy his narrative with the pics for atmosphere! - CG)

In the following sequence of four photos Von Bohlen's cavalry have been broken and are followed up by Schirmer's Horse who hit the "Hessian" infantry and are shattered. At this point it looks like Ruechel's cavalry brigade is going to try to back them up. The fourth photo shows they did but are surrounded by muskets.


A great aerial view which shows that while Electoral lines are now a bit ragged they still hold all the significant features

Above and below: the view at this point behind Electoral lines around the hamlet of Mauthaus and along the Sattelbach


At right Jungermann's brigade advances past Madling in a fine looking line but receives canister and flanking fire. Reinhart's brigade dithers behind them spurred on by Lt Gen Ulrich


As the beaten cavalry streamed back past them, the first line of Ducal infantry was approaching Madling, their left flank open to being outflanked by the Electoral infantry. General Ruechel ordered his cavalry forward to fill the gap and charged the outflanking Electoral infantry to delay them and in the hope that they may have more success than Schirmer. They didn’t and although they inflicted casualties on the infantry, his brigade was wrecked.

The demise of Ruechel's cavalry; and Jungermann's infantry are having a hard time too


With the Ducal cavalry now dispersed and retiring behind their infantry, it was going to be an infantry fight (at least near Madling) as they sought to break the Electoral line. The Malsberg Infantry and Lindstedt Grenadiers led the advancing Ducal troops. 

Faced with canister from the artillery to their front, the Malsberg regiment melted away before they could come to grips with the Bornstadt Regiment. Against the most senior regiment of the Electoral army, the Garde Grenadiere, and supporting artillery, the Lindstedt Grenadiers lasted slightly longer before they too were forced to retire. 


The first Ducal infantry attack on Madling has been repelled


Ken's narrative overlooks the exploits in the centre of the field where another brigade of Ducal cavalry (Maj Gen Thuemen) had been lined up to threaten the western end of Schwedischer Hugel and Kaindorf, backed up by two strong infantry brigades awaiting a breakthrough. The following photos show this attack.

Self indulgence - my favourite RSM95 Hanoverians masquerade as the Ducal von Dickmeis brigade and von Thuemen's cavalry are on the right

More of my RSM95 Hanoverians - Thuemen's cavalry charge is met by Electoral Hussars and infantry. It was to prove a hard fought part of the battle of Madling

More Electoral Hussars pile in.....

....watched by reinforcing "Hessian" Fusiliers pulling battalion guns with them

Whilst additional brigades were arriving in support, Count Guilau could also see the Electoral infantry lines thickening and knew it was going to be a hard slog to achieve any breakthrough on his right flank.

This aerial shot shows the difficulties of Ducal infantry before Madling village; the complete Electoral dominance of the central high ground; the cavalry charge towards Kaindorf; and on the far flank at the top of Lunzen valley, Electoral cavalry are moving forward.
Von Thuemen's cavalry are forced to fall back.......
.....exposing Scheither's Grenadiers to volley and artillery fire that finished them off too


The following sequence follows up the Ducal right flank around Madling

The Anhalt Jagers have got in position to enfilade every Ducal advance with rifle fire across the river........

........with predictable results

More Ducal infantry are brought up.......
.....with some artillery support too........
...............but are eventually broken


On the left, the successes of the Ducal light forces from yesterday was working against them. Reinforcements were slow to arrive in support of Cartier’s Advance Guard brigade, having to cover far greater distances (a situation not helped by a dispassionate umpire confiscating one of Count Guilau’s dice after it rolled nine 6s in a row – while he may have needed the help of the dice gods, he didn’t need that much help!). Conscious of the weakness of his position, Lt General Rosen (Steve J) content for his light troops to remain at long range, exchange fire and barrack the Ducal opposition. 

A second Electoral cavalry brigade appeared south of the Schwedischer Hugel and was directed forward in support of Czettritz’s heavy cavalry brigade. Realising he at last held the advantage of numbers, Lt General Rosen ordered his brigades forward. The Kleist Jager pushed forward against the Effern Infantry Regiment who had been under fire from the Electoral artillery all morning. Now cursed by the bad luck dice, they were unable to respond effectively to several rounds of firing from the jager and broke. The heavy cavalry followed up and charged into the supporting Freytag Chasseurs who were also overthrown and pushed back towards Lunzen.

The following sequence charts the progress of the Electoral cavalry attack on their right flank which helped decide the battle.


Electoral Jagers and artillery fire manages to shatter the weakened Effern infantry regiment

Allowing Czettritz to engage the Freytag Chasseurs

Brandenburg's Electoral cavalry then attack the supporting Ducal Cuirassiers of Serbelloni,
some of whom had already broken the Jagers and chased them up Schwedischer Hugel

A mutual exchange of cavalry defeats at the head of the valley.....

But the Electoral side looked as if it had come off best in the end

View from where the senior Electoral commanders had stayed safely on the reverse slope!

And there we pause, as Count Guilau and General Ulrich concede having recognised the strength of the electoral position and their attempt to bludgeon their way past having failed. The Ducal forces will retire blooded but with a large proportion of their army still intact. Congratulations to the two Steves and Kevin, and commiserations to Paul, Keith and Chris. 

An overview at the point we stopped- a decision had been reached

Overall, I’d consider the battle a success although with scope for improvement if playing again. The participants appear to have enjoyed it which is my main measure. Day 1 was required to achieve a partial result and provide the space for the Ducal forces to deploy on day 2, whilst not significantly handicapping the Electoral side. This happened but the subsequent timing of the Electoral arrivals left the Ducal forces with an uphill struggle that they never mastered. 

The arrival of Electoral reinforcements was also key to the result on day 1. If Czettritz’s brigade had not arrived when it did, the Electoral right flank was close to collapse. Omitting a couple of brigades from the Electoral line up would have helped, as would the umpire intervening in the timing of those arrivals. That requires the umpire to be prepared to take on more of a games master role than traditional for this type of game.

The Ducal Army had to retreat and recuperate over Winter

For now, the armies have been returned to their storage boxes, the dice (including the loaded one) are back in their bags, Madling is again a quiet backwater somewhere to the East of the Mur valley and we can await the next phase in the campaign as our two protagonists plot their next moves. 


This photo captures the intensity and concentration which everyone except me showed the proceedings

Afterwords

Ducal

In a small office in the Ducal palace, the Grand Duke waited until Count Guilau closed the door behind him before turning to his War Minister. 

‘So he may have been unlucky, he may have been outclassed or he may have been outnumbered. Either way, we are blocked from moving along the Stronbach and we lack the means to cross it. We will not evict the despot from our land this year’.

His Minister nodded. Years of dealing with his master had taught him when to get concerned, and whilst Count Guilau’s defeat was inconvenient, the Grand Duke had already accepted it and moved onto future planning. There weren’t going to be wholesale recriminations over this setback.

‘Yes Sire. I agree this is a missed opportunity but it does have benefits. We still have most of the army and more importantly the coalition forces were not heavily engaged. When I first heard the news I was worried that our more nervous partners would use this as an excuse to withdraw their troops but I don’t believe that will happen. Most of the damage was to our cavalry and we can rebuild those units over Winter.’

The Grand Duke thought for a moment.

‘Our light troops appear to have performed well. Let them loose over winter to harry the enemy and we’ll see if we can persuade them that the price of our land is more than they can afford. 

For next year we also need a bridging train. Talk to our allies and find out if anyone has those resources. If not, we need to build one. 

And find out about this General von Stutterheim. If we are now faced by an Electoral officer who knows his job, that’s a problem. Previously, although they had more troops, we relied on their officers being incompetent and not knowing how to use them. If they are starting to become competent then we have more than one minor defeat to worry about.’ 

Recognising his dismissal, the Minister stood, bowed and walked towards the door. There was much to do. 

Electoral

In his headquarters South of Tamsweg, the Elector paused his interrogation of his two aides and looked again at the crumpled report in his left hand. It was from von Stutterheim (thanks to Steve Pearse for the report), giving an account of an action around Madling, and the General appeared to be claiming a victory against the Grand Duke. 


Gentlemen at War - Lt Gen Ulrich helps General von Stutterheim
clarify a point in his rules of war!


"Your Highness,


I have the honour to report that the forces, which you bestowed on me the honour to command, have been completely successful in defeating your enemies. The Ducal forces attempted to gain advantage against your Highness’s army by advancing through the valley of Lunzen, and seizing the crossings of the Stronbach at Madling. 

General von Stutterheim"


Our record of Initiative success and when reinforcing brigades would arrive

Both Steve J and Keith have written very nice succinct accounts of their day at this game on their blogs and I recommend them both for a different perspective and loads more photos;
Steve's Battle of Madling


Postscript:

We were very lucky that it was a nice Cotswold late Spring weekend and we were able to enjoy lunch, tea and cakes out on the terrace both days.  Our celebrity local author Keith thought he was off duty, but suddenly, beer in hand, he was assailed by sundry fans clutching copies of Honours of War  and Shadow of the Eagles for an impromptu book signing! Thanks for joining us Keith it was great to have your company and inspiration.