Showing posts with label Archduke Charles. Show all posts

Saturday, 15 November 2025

1809 Project in 15/18mm: Battle of Eckmuhl Part One - Historical and Wargame Background

 As outlined in a brief post about a month ago we staged a three day wargame refight of the Battle of Eckmuhl in mid September at my den in the UK Cotswolds and I'm now getting round to reporting on it properly. This post covers the historical and wargame background, and next time, how I went about making the terrain. 

CG with two of the 1809 core team - Paul B and Steve Johnson, seen near the start of our Eckmuhl refight

Wargame Background

Regular readers will know that my resurgence of interest in 1809 started about 3 years ago when I got a touch of collecting megalomania and bought a lot of ready painted miniatures from Ebay in earnest so that I could start testing rules and get cracking before I get too old. I took Keith Flint's excellent 18th Century Honours of War system and spiced it up a little, better to reflect the greater flexibility in Napoleonic organisation and tactics and leadership qualities. We did a big test game once per year - fictitious in 2022; Hausen-Teugen-Dünzling in 2023; Abensberg in 2024, and by the latter we'd arrived at a fairly settled set of rules - just as well really as I had already called them "Abensberg to Wagram" (A2W).  Having used them successfully for Eckmuhl I've got the confidence now to post them for readers to see, and use if they care to, in my Napoleonic Download section in the right hand sidebar or here.

(Please note they are not a completely self contained set of rules as I expect anyone seriously interested in trying them will be familiar with the basics of Honours of War, or be willing to buy the Osprey rule book. There are ideas in there though worthy of a look whatever rules you like.)

Serious thinking about Eckmuhl started in early Spring this year but I had not found time to blog about wrapping up Abensberg (October 24) so in brief here goes:

Finishing off Abensberg

Historically Abensberg was a sprawling battle which ended in something of a rout for the Austrians due to a major flank attack on Hiller's army by Lannes' makeshift, but excellent Corps. Fighting in the southern half of the battlefield did not get going till afternoon and then just became a running fight. In our refight Paul B, Martin Gane and Steve Johnson put up a good resistance and made enough time for Archduke Louis to rally much of his Corps and unite with the Reserve Grenadiers to defend a portion of the southern battlefield, while Lannes chased off Hiller's own troops towards Landshut. I was keen to see what could happen in the South and two old friends who had been unable to attend the main weekend, Graham Ward  and Richard Newcombe, were keen to help me in October 2024. We used just the 8 x 6 table  and Richard had Marshal Bessieres commanding a small corps made up of  the Wurttemburg contingent of VIII Corps and Deroy's 3rd Bavarian Division plus a brigade of French Cuirassiers later on. Under fairly sluggish commanders I gave Graham a good sized force of rallied and retreated Light and Line troops from Archduke Louis's Corps and the Grenadier contingent  from II Reserve Corps with artillery and cavalry too. Graham opted not to defend the whole area but kept some dummy markers cleverly concealed in his right flank woods and villages in an effort to gain time. Time proved not to be on Richard's side as he had a sequence of poor command Initiative rolls for the Wurttemburgers , causing them to fail to make ground and steadily suffer from Austrian artillery and skirmisher fire. By the time Deroy's Bavarians had pounded with artillery and closed in Graham still had a consolidated line defending a stream and an open means of retreat.

But for the imbalanced command rolls it would have been a very tight game and I'd recommend this kind of scenario to you to try out - all my briefing documents and orbats are here

If you can't get enough photos of Napoleonic miniatures then here is a link to the full set of my Abensberg late afternoon game 

For the casual reader here is a brief taste in pictures

Red lines mark the 8 x 6 area of the original table used for this game. Blue and red dotted lines for the deployment limitations of Allies and Austrians respectively


By about Move 3 Richard had cleared off Graham's dummies and advanced through Kirchdorf.....

........but poor command rolls meant his Wurttemburgers never progressed beyond this position on the right flank

Graham is consolidating in an L shape at the far corner of the table. In the centre Wurttemburg Light Infantry and Bavarians are trying to breach the Austrian line

But Graham has amassed a formidable array of cannon on the high ground and he has a regiment of Lancers just off table  to the left of what we see here.

In the foregound Bavarian cavalry retire having been seen off by the aforementioned Lancers. Bavarian infantry cross the Perkabach but to their right the hard fighting Wurttemburg Jagers retreat to reform.

Overall both sides had fought each other to a standstill but the Allied victory conditions required a more impressive "victory" and Graham had achieved the standoff he required for the Austrian left flank of Hiller's army to retreat in good order and not the historical rout. Thanks to both these stalwart wargaming veterans for giving me the chance to work out this part of our "what if" 1809.

My mind was now clear to think ahead to Eckmuhl.

Historical Background to Eckmuhl
As you will have gathered from the above my approach (and my mates seem to approve) to "refighting"a campaign is to minimise the admin by taking each battle on its own historical merits and then applying logical "what-if" elements to try to make a balanced game, while keeping true to the historical terrain, forces and commanders. So for Abensberg the Austrians put up a much sterner resistance than historically and ended up retreating through Allied pressure, rather than being routed wholesale. It was thus with a clear conscience I could proceed with Eckmuhl on the same historical basis.

The main sources of reference I found useful were not surprising:

Thunder on the Danube, Volume I   by John Gill. A thorough, detailed  historical account with good maps and orbats.

Eagles over Bavaria 1809 by Michael Hopper. Brilliant breakdown into manageable wargame scenarios, roughly at my 1:40-50 scale, so particularly helpful and I pulled on it enthusiastically for my version.

Eggmühl 1809 by Ian Castle, Osprey campaigns series Nr 56. A really nice book on the whole Bavarian campaign with useful maps and illustrations including some modern day photos of the terrain

Echmuhl 21-23 April 1809 - Great Battles of History Refought by P.P.H. Heath . I was only referred to this after I'd done the work but it's an interesting breakdown of the detail for wargame purposes 

and for nostalgia's sake:

Napoleon and the Archduke Charles, by F. Loraine Petre 1909 but mine is the 1976 reprint (Charles Grant's old copy in fact!). Not so detailed but back in the day when I first got into this (mid1970s to early 1980s) it was about all there was apart from Chandler's Campaigns of Napoleon

I like to ask what it was that each commander was trying to achieve in  the big picture. In Napoleon's case, on 21-22nd April, to unite his army for a crushing blow which would push the northern Austrian army across the Danube, out of Bavaria, and into Bohemia, so he could once again destroy Austria's military power.  For Archduke Charles, ironically, it became the same in reverse. By 22nd April he had gained Regensburg and the Danube crossing so wanted to unite his army from the northern bank to the southern and create an offensive against the Allies to  curb any further Allied attempts to thwart his invasion of Bavaria. Neither commander actually knew the true position of his opponent, but Napoleon got his act together first with fast moving troops while Charles was having one of his many "off days" it seems, making over-complicated instructions not really rooted in reality.

Archduke Charles watches the
 Allied approach from above Rogging
 (AB Miniatures by Paul B)
Napoleon and Lannes supervise
the Wurttemburgers' assault on Eckmuhl
(AB Miniatures by CG)


Here is the map I worked up on one of Gill's to give to the players to explain the strategic situation.
Marshal Davout with about half his infantry and most of his cavalry from III Corps had been watching , and skirmishing with, the Austrians from Abbach to Schierling since the battle of Hausen-Teugn on 19 April.  By 21 April he was being backed up by Bavarians under Lefebvre  who had come from the Abensberg battle.   He was convinced that he faced the main Austrian army  to his East, around Eckmuhl, but Napoleon didn't believe it. On that 21 April  Napoleon, Lannes, Bessieres and Vandamme  had pursued the routing troops of Hiller's wing all the way from the Abensberg battlefield to Landshut. The Austrians lost huge amounts of ordnance and baggage en route until they were finally able to reform on the South bank of the Isar at Landshut and begin an organised retreat Southeast. Only then did it click with Napoleon that this was not the main Austrian Army and that Archduke Charles was in fact much further North. 

During the evening of 21 April - with order changes throughout the night into 22 April, a rather mixed up Charles created a plan to take back control. His northern force consisted of the rather disheartened and weakened Corps of Hohenzollern and Rosenberg (III and IV Corps) and the I Reserve Corps of Cuirassiers and Grenadiers. Since the bridge over the Danube at Regensburg was now gained his II Corps was ordered to cross and, with the others, form five "columns" to drive a wedge through some fantasy Allied force between Abbach and Alteglofsheim. To do this he totally wrecked the Corps structures of III, IV and I Reserve and effectively emasculated whatever leadership cohesion there had been hitherto (not much!). In practice the constant reorganisation, new instructions and confusion left  too large an area to defend south of Schierling and Eckmuhl and the defensible area contracted as the realisation gradually dawned that he'd been outwitted and outmanoeuvred. 

In the early hours of 22 April Napoleon had split his southern force, with Bessieres to watch Hiller's retreat, and all the rest, including Massena and the entire Heavy Cavalry Corps, marching at full speed due North from Landshut. This is one of those forced marches for which the early Napoleonic Imperial period is famous and so, while Davout and Lefebvre watched patiently from the hills above Schierling, thus pinning their opposition to the Eckmuhl high ground, Napoleon, by early afternoon, brought  the equivalent of a good sized infantry Corps and a Cavalry Corps into play, with more to back them up. Charles' immediate force was completely outnumbered and ironically, in ignorance he had withdrawn strong forces of Grenadiers and Cuirassiers which could have made a big difference.

Two French Cuirassier Brigades. Various manufacturers from collections of CG and James Fergusson. Artillery - AB Miniatures by Paul B. (Photo credit - Stuart C.)

Austrian infantry - AB Miniatures by Paul B. (Photo credit - Stuart C.)

Making Eckmuhl a "fair" wargame refight

Maybe I've been a bit tough on Archduke Charles in the above, but seriously, even the most hardened Austrophiles (and there are two in my group) need a bit of TLC and a helping hand to make this a balanced wargame. I started by metaphorically throwing all the cards up in the air to see how they landed. By that I mean Charles had destroyed his own Corps structure and command chains so I looked at all the various Brigade and Division sized units which could have been in striking distance of my battle area (the green rectangle on the map above)  - there proved to 15 of them. Then gave Charles his three Senior Commanders - Hohenzollern, Rosenberg and Liechstenstein and he could allocate 13 of the 15 among them as he wished. The Austrian deployment area was large and I divided it up into layered Zones 1 to 5, with theoretically a senior commander in each of 2 - 5. The units only had hold/defend the local area type orders, until messengers were received from Charles. In extreme cases that might take 6 Moves.  Here is the map I gave the Austrians to help Paul B decide on his deployment .

This is the overall map. Big rectangle is the usable "battle area", the inner rectangle 12 squares x 8, is the actual tabletop. Austrian zones in red and the indication of Allied deployment in blue dotted lines. Much more on this map in the next post

The remaining two units were Vecsey's flanking force in Zone 1B and Vukassovich's light troops in and around Eckmuhl (Zone 1A). Paul was also plentifully provided with dummy blinds too so could choose where to give a stronger impression than he had troops for.

This is the map I gave to Richard Newcombe and Tony Dillon as Napoleon and Davout for the Allies.


This was a lot nearer the historical dispositions per Corps/Division than for the Austrians since I felt it would work to develop the advance with the three days we had, and the amount of players. Zone A is an "imaginary" Montbrun as the French flank guard force of light cavalry and infantry - he was not on my official orbat as I did not really want a massed French cavalry outflanking move so far off the table area. Zone B is Davout's III Corps and also under Tony's command at the start Lefebvre's Bavarians and Demont's French in Zones C, D, and E. St Germain's Cuirassier brigade was also at the forefront of this force in Zone C.
South of the Grosse Laaber river Zone F was for Vandamme's Wurttemburg Light infantry and cavalry with horse artillery who will be expected to engage Eckmuhl schloss and village at the outset of our game. In Zone G are the main mass of the French Heavy Cavalry (14 regiments in total for our whole refight across the southern part of the battlefield). These are nominally under Lannes' command but Napoleon is also near at hand. The A2W rules make allowance for a combination of exceptional commanders acting in cohesion to get things going quickly. Zones H and K are for Lannes' two French Infantry Divisions. That Zone J off the map represents the approach route for more cavalry and infantry under Massena later on.

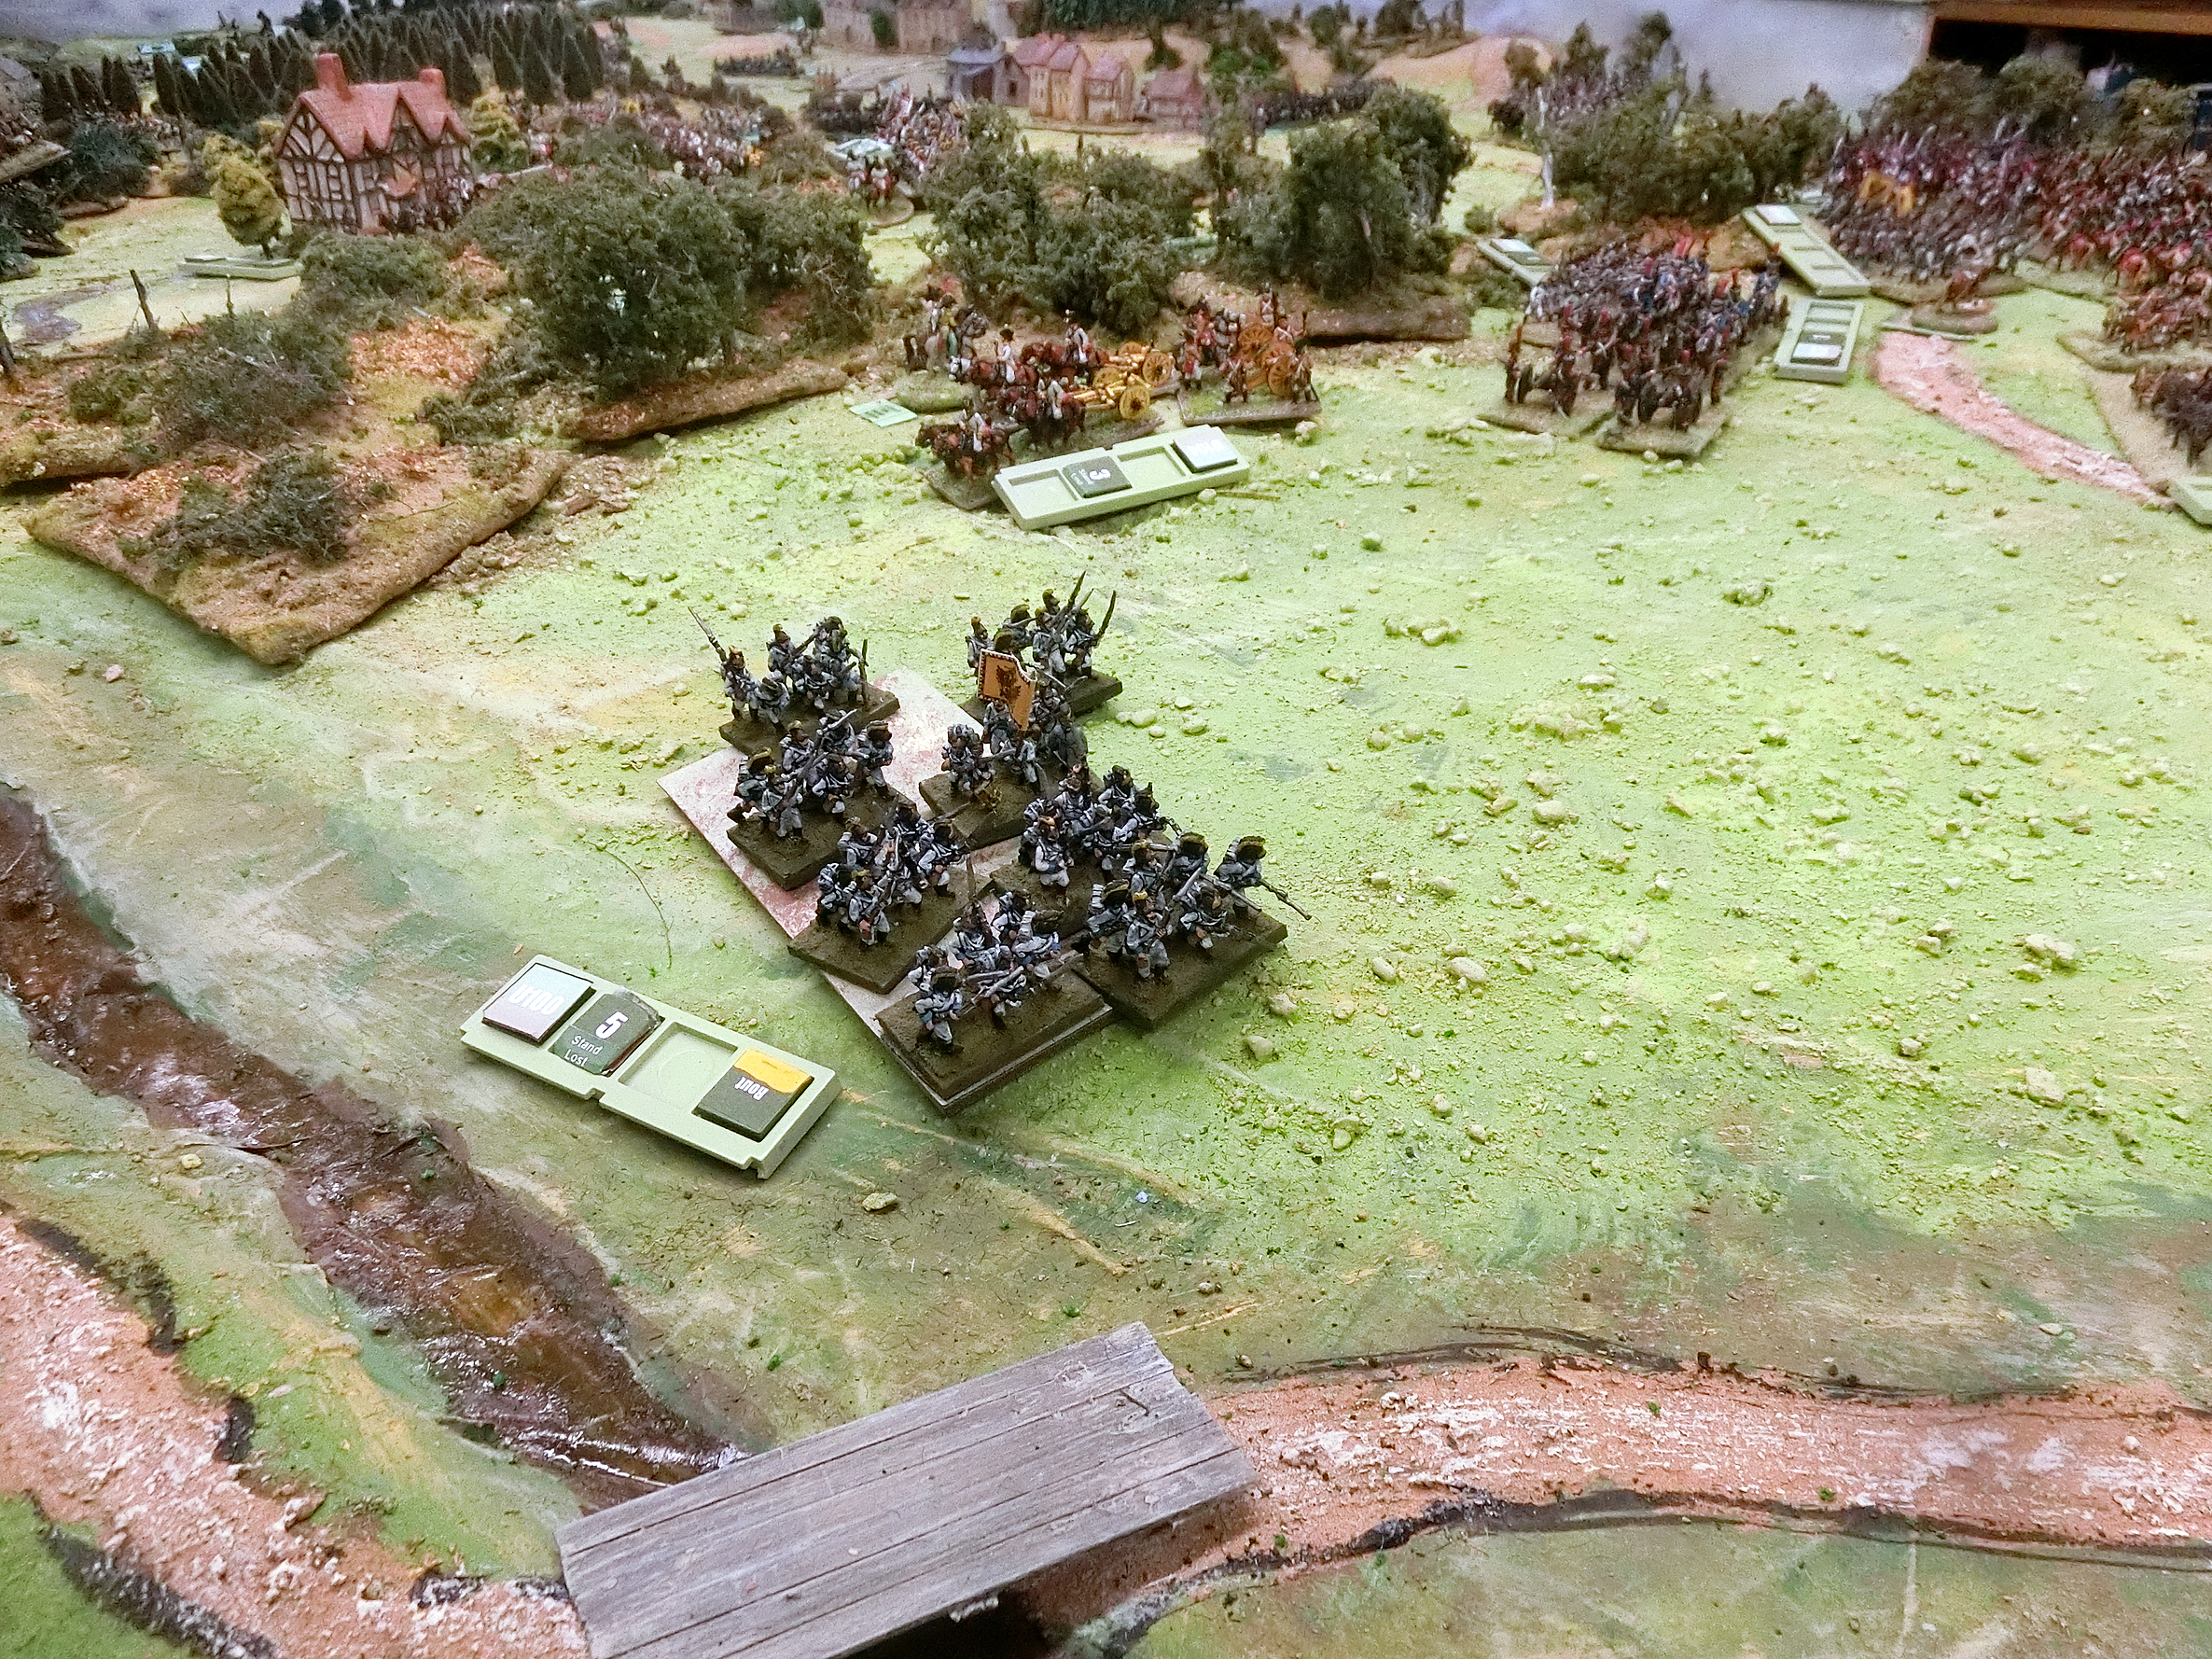
General Vukassovich defends Eckmuhl bridge and schloss with Grenzers, light cavalry and artillery, while the Wurttemburger Light infantry are poised to attack from Unter Deggenbach

To their left, along the Grosse Laber, Austrians prepare to defend Rogging and Pfakofen against the approaching columns of Lannes' infantry 

The game was to start at 1.40pm on 22nd April and if we could got through 18 Moves at 20 minutes per Move it could take us up to the start of dusk around 7.30-8pm. The whole available Austrian army amounted to 67,000 men represented by around 1500 figures . The Allied force which I would allow to arrive in time totalled 89,000 men represented by just short of 2000 figures.

I think that is enough for now and next time I will explain about the design of the battlefield and how I constructed it.
For those who want the full briefs and orbats the resources I made for this refight can be found here , or under Eckmuhl in the 1809 Campaign folder in the Napoleonic Downloads at right. 

The initial deployment of those troops which are visible. Green plastic "blinds" conceal those which are not revealed yet, or are dummies.


Friday, 22 December 2023

1809 Project: Hausen-Teugn-Dünzling Part 3 - Noon till the Thunderstorm

I will assume my dear readers are familiar with Parts One and Two of this refight - here is a link to the previous part.

This post describes the second day of our weekend. At close of play on Saturday I had managed to use the available French to hold back the Austrian surge long enough to present a reasonably coherent line, protecting the main objective of the Abensberg - Saalhaupt road. This meant Paul B and Steve J, when they arrived about 0930ish,  were able to have a brief chat, divide the French forces and work out what to do. Dillon and Guy had operated the Austrians the previous day, stayed overnight, had breakfast and therefore plenty of time to work on their own course of action.

All assembled, from left Guy, Dillon, Steve J, Paul B, CG

Guy operated Rosenberg's IV Corps on the Austrian right; Dillon had Hohenzollern's III Corps on the left and was also Archduke Charles, C-in-C and with control of the Reserve Grenadiers. Marshal Davout was played by Steve operating the French right with St Hilaire's Division and elements of Friant's and sundry reinforcements. Paul B used the rest of Friant's troops and the Division of General Montbrun to hold the left flank.

I apologise in advance that there are rather a lot of photos, but a lot happened and in particular in the closing stages it is worth showing individual unit successes and failures. I'll try to let the photos tell most of the story. We recommence at Move 5 starting at Noon.

The main revelation from scouting was Guiton's Cuirassier brigade securing the line of communication to Regensburg near Saalhaupt. (Super AB figures from Paul B's collection) (NB - Paul's command bases are all named but for the purposes of our game read the green printed commander labels)

At the Hausenerburg crest Dillon's Austrian infantry have retreated to safety West of the road, but he's pressing downhill on the right. Below is what it looks like to the French

Badly outnumbered Paul is making a fighting withdrawal while Guy resumes his great Initiative dice for the mediochre Austrian commanders to press on into Westerholz

For the moment the Experienced French Horse Artillery battery is covering a
 vital road gap and inflicting sufficient casualties to worry Neustadter's Brigade

Above and Below:
Two views along the French right where Davout
 is having to settle for protecting the road line

Gautier's Brigade manages to see off this Austrian downhill attack - for now, and his LI are attempting to outflank through the thick woods

In Part One I explained that Archduke Charles had to gain some certainty by exposure of at least 50% of the on-table French before he could release the Reserve Division. That was achieved by about 1115 game time and so by 1245 or so the Grenadiers had arrived from Grub to a reserve position just on table. They were split into two blocks - the larger one just West of Schneidhart village and the other, with artillery,  a "Huge" single unit by my designation, just to the East. 

Grenadiers arrive by Schneidhart

Archduke Charles personally directs the larger muti-brigade contingent. The huge brigade is a little to the East

About half an hour later they moved off in march column towards the
other shoulder of the Hausenerberg ridgeline

Close-up view of French Legere putting up some resistance near
 Moosholzen. The 3-model battery should really be 2 but Paul had
 some fixed larger battery models we had to use.

Pajol presently with the 7th and 5th Hussars in a holding position awaiting developments North of Westerholz. Montbrun keeps the Cuirassiers further back still.

Prior to another downhill advance the big Austrian battery
on Hausenerburg crest (see below) has at last forced Davout's
heavy battery to retreat from Buchburg through Teugn

Meanwhile Davout organises another attack on the extreme right shoulder of Hausenerburg

A large mass of Austrian Grenadiers proceeds between
 Schneidhart and Hausen

This aerial view shows a dangerous hole in the French line just South of Teugn. There are some Blinds unrevealed behind the village and the rear woods. I don't get the impression Dillon is put off, just lacking sufficient command initiative to exploit it.

Rosenberg's Corps has now got some serious numbers North
of Moosholzen but French line regiments are putting up resistance

Where the arm of Westerholz is nearest the road the Austrian 44th Inf Regiment has evidently found an easy way through and is closely engaging those Horse artillerymen....but Montbrun is in the opposite woods with the 11th Chasseurs a Cheval......

In the foreground an Austrian regiment is heading downhill to confound the French line, but help for Steve is at hand. The French have done well to keep the Abensberg road open this long for Petit's Brigade of Gudin's Division had been recalled and now made it along that road.

That gave the front line brigade courage to press on again up the slope and beat back the Austrian infantry

Back at Moosholzen all those Austrian cannon had broken
 a French regiment

At this point in the game, around 1  to 1.30pm game time, a remarkable set of moves was set in train on the French left flank from Westerholz across to Dünzling and the hill slope between them. It's difficult to present coherently but I will try by two picture sequences. It started by the Horse Artillery, against the odds even though they were a high quality unit, beating off IR44 and evading away but towards other enemies. You can see them below at top left being attacked yet again from the woods.  That made space for Montbrun and Pajol to organise all three light cavalry regiments to combine to charge the Austrian 10th Hussars and 4th Chevauleger. The 11th Chasseurs charged out of the woods to take the Austrian Hussars in flank. The French Hussars managed to resist fire from some of Neustadter's infantry and charge home.

The big cavalry melee just near Gattersberg village

Before being flanked those stalwart HA got some more salvos off
and have shattered a weakened Austrian infantry brigade down
by the Dünzling bridge along the road to Paring

Above and below: Out of the melee 11th Chasseurs emerged triumphant as the Austrian cavalry have retreated and must go back multiple moves, and the Austrian Cavalry battery was broken and has surrendered........
.........7th and 5th Hussars also suffered enough hits to have to withdraw
 to the woods to reform. I will pick this up later.....

Above and below: At Moosholzen French units have melted away
and had to retreat, giving Rosenberg's men the opportunity to turn
 left to attack up the Hausenerberg from this end.

By the Buchberg roundshot from the crest battery has
seriously wounded St Hilaire, casing a basic quality
subordinate to take command of the Division

Steve looks dismayed as it is proving incredibly difficult to hold the road open under the fire of those 16 guns on the crest.........

....but he has Petit's fresh brigade, and attack seems the only worthwhile option. I imagine by now Dillon has realised all the Blinds on the North side of the road are dummies or trifling sized Corps HQ units

On Dillon's side of the Hausenerberg it's getting congested as there are so many large infantry units, many are retreating or reforming and the Grenadiers are keen to try to get through.

Trying to make the most of this apparent respite Steve attacks
 uphill (yet again), this time with Petit's French line regiments

The sweeping French cavalry attack on their extreme left takes on yet another shape. Below we see Guiton's Cuirassiers move into Westerholz, backed by the 7th Legere. The Hussars are reforming  and the HA battery had finally taken on too much and is back in the open woods recovering. That just left 11th Chasseurs à Cheval remaining to carve a name for themselves.


Led personally by Pajol the 11th attack and shatter an Austrian battery just outside the Westerholz....

Then, in accordance with the dice rolling for victorious cavalry follow up, they took the weak 55th infantry in the rear, with predictable result

There was now no valid Austrian opposition East of the Westerholz
which now had French Cuirassiers trying to trot through.
Only a small light infantry force and a battery held Saalhaupt but
Montbrun had effectively stabilised this flank and inflicted grievous losses  

At the Hausenerberg crest Austrian supremacy was now obvious though it would take time to organise
an attack on their main objective - Teugn village

Never giving up, French regiments continued to attack the now-revealed Austrians West of the Hausener high ground. For the moment at least that road to Abensberg still remained secure.

Result
Historically the two sides fought each other to more or less a standstill by late afternoon. Then Charles made a half hearted effort to use some Grenadiers, to no effect. The much anticipated huge thunderstorm broke and everyone scuttled off to cover. By next morning it emerged that the Austrians had retreated back to Hausen and their start positions more or less, leaving Davout in control of the Hausenerberg crest. Montbrun was content to protect the flank and had caused a standoff with probably three times the amount of enemy, who remained around Dünzling and back to Paring. Davout managed to get his baggage and most of his corps to safety and join up with the Bavarians.  It is generally judged to be a French victory both positionally and psychologically, as retrospectively, it was seen as the turning point of part one in the campaign. Afterwards most Austrian commanders felt confused and demoralised and a big retreat began leading to some strange manoeuvres South of the Danube which we shall refight in future.

Thunder and Lightning over Westerholz

In our battle our finishing time caught us at end of Move 9 - 2.30pm game time. I decreed the thunderstorm stopped the action early.  I'd hoped for about 12 moves to give the objectives a proper chance to be tested. If it had I think the Austrians were beginning to do better everywhere but on the Dünzling flank. If we'd had two players per side each day we'd have achieved that. 

For those interested in the detail here is a link again to the briefs and orbats for this game. I'm beginning to realise that Victory Points(VPs) for Army Point losses with my system is not very decisive - it's got quite hard to get units "Done For", so my targets for Victory were off. That was however balanced by the Terrain VPs.

As you can see from the chart 
Victory Points gained for Enemy units "Lost" was French 17.5, Austrians 11
Victory Points gained for Terrain won/held was     French  13,   Austrians  7

TOTALS                                                                                30.5      to      18  in the French favour


Conclusion
For my part I loved it! The players were absolutely great - both commanders duly marked up their maps clearly and took time to explain things to me, and all played to their utmost skill and ability throughout. They understood the objectives and tried their best to keep at it until successful or circumstances prevented progress, I could not  have asked for more. This version of the rules worked very well for the most part, and I felt gave a good atmosphere of large Napoleonic forces striving over difficult terrain and with limited knowledge of the enemy. Yet it still had sufficient granuality to identify particular units and follow their progress.  I really enjoyed seeing some of the tactics in play - particularly with the extensive number of light troops.  Paul B's handling of Montbrun's cavalry, LI and HA was masterly. It was particularly gratifying seeing that a combination of command characteristics (Pajol and Montbrun at the high end of the scale) and troops types could occasionally produce decisive, yet realistic and exciting results against superior numbers.

Thanks to all the participants at this event and to Richard N for helping to develop the rules. We've had lots of email discussion post event to work on the few extra changes, and once the next version is sorted I will probably do a blog post giving a brief outline and some downloads.

Footnote
Couple of things I forgot:
Steve Johnson gave a nice report of the second day of this game on his blog Wargames with toy soldiers 1685-1985.blogspot.com

Also as Guy reminds in his Comment, it is worth putting in a plug for the ancient Bear Inn at Bisley where he and Dillon kindly treated The Duchess and me to a fine dinner. Bear Inn