Those followers with longer memories will recall that, over the last two years I have been reviving my long term interest in the 1809 campaign between Napoleon and the Archduke Charles. I'm trying to refight the main battles in chronological order and the last one was over a year ago - the connected battles of Hausen-Teugn-Dünzling. I'm using 1 figure = roughly 50 men and my own variation for Napoleonic atmosphere of "Honours of War", calling it "Abensberg to Wagram" (A2W). Various playmates, local and further afield, have helped play test and this year, with the latest updates, I'm pretty happy with it.
It's appropriate that I've got this far for the namesake battle of my rules as Abensberg was not only a grand scale Napoleonic victory (that is not well known) over a 10-15 km frontage and depth, but started the debacle that so many associate with this campaign for the Austrians. As so often with history written by the victor, there are hidden depths to it for us wargamers.
We played a kind of "what-if" over the UK August Bank Holiday weekend with my wargames room/studio in the Cotswolds crammed full of 94 square feet of sculpted terrain representing an area about 9 kms x 6 kms, and using around 2000 figures. As many will know the Bavarians and Wurtemburgers formed about two thirds of the Allied force against this flank of the Austrian army, and as I trawled my project colleagues I drew a blank! So if you think I've been quiet since Tony Dillon's Lutzen in April it's because I've had my head down producing about 600 Allied figures including well over 20 gun models and limbers. (Who'd have thought the Bavarians would have been so top heavy in artillery?). That meant I did not have time for all the Austrians and I'm indebted to Paul B from Cheltenham for contributing a large part of Hiller's force as well as some French, and to James Fergusson for Austrian Landwehr. To kick off and whet your appetites here are a couple of views of the action.
 |
| Early stages of the Bavarian advance on Day One |
 |
| Intense action with some new players on Day Two |
Background to Abensberg
On 19th April Archduke Charles in Bavaria was organising a drive northwards towards Regensburg where he hoped to catch Marshal Davout in a pincer with the Austrian I Corps coming South over the Danube from Bohemia. But Davout's Corps had already left Regensburg for Abensberg and, in an encounter battle near Teugn, bested Charles' left centre two Corps and effectively blunted any chance of success for further meaningful Austrian advance into Bavaria. As usual the Austrians were dogged by a combination of poor communication, indecision, unfamiliarity with the new corps-based strategic doctrine, and inept or inexperienced leaders given high command due to connection to the Emperor's family. So it was that FML von Hiller, commanding the whole of the Austrian well spaced out left flank, was left with great uncertainty about what was intended on 20th April for the Army as a whole, and his command in particular, and what the enemy were really doing.
This is the strategic map I gave to the French and Allied players to help their deployment, but after that is it was "what if?" and wargamer vaguaries that would take over. Obviously the Austrian positions are unspecific (more on that later) but what were the French cooking up?
 |
| Blue areas are an accurate representation of Allied possible deployment areas. Austrian positions are much larger than in reality and the broken terrain played a big part in the Allied sluggishness in effecting Napoleon's plan. |
Napoleon had arrived at the front line the day before. He had set a wider movement in train with Marmont to the South but he had quickly assembled the Bavarian Corps (7th Corps, 3 Divisions under Lefebvre) around Abensberg and Biburg and intended to pin down the isolated Austrian brigade under Thierry and the two Divisions of Archduke Louis' V Corps. Meanwhile he had organised a Provisional Corps under Marshal Lannes - 2 Cavalry and a strong Infantry Division, to strike southwards on the unsuspecting right flank of these Austrians. Lefebvre had two Bavarian Divisions immediately available (Prince Ludwig and Wrede) backed up by Deroy's 3rd Div just recovered from their great holding action at Landshut and 40 km overnight retreat. Approaching from the West was Vandamme's 8th Corps of Wurtemburgers and second line French battaillons de marche. But Vandamme himself was already up with Major General Hugel's Wurtemburg Light infantry brigade, and his 8th Corps infantry and cavalry were to follow later.
Historically, Lannes swept down on the unready Thierry and tumbled his troops back to Rohr and beyond. Archduke Louis made the best attempt he could at holding with an exposed flank and made a fighting retreat which caused the Bavarians a lot of pain and delay. Apart from the highly useful Hugel brigade the Wurtemburgers, nor Deroy's Division, nor one of Lannes' Cuirassiers brigades, got there in time. Despite his promises to Louis, no troops from Hiller himself were anywhere to be seen. The Bavarian pursuit was initially halted at nightfall, but turned the Austrian retreat into a rout that night by a surprise attack by Wrede, pushing the Austrians beyond Pfeffenhausen.
 |
| Massed Bavarian artillery. (Photo by Glenn Lowcock) |
As a historical simulation wargame it would be a rather unpleasant walkover, but careful reading of such detailed works as "Thunder on the Danube" Vol 1 by John Gill, and the stimulation derived from the excellent wargame scenarios in Michael Hopper's "Eagles over Bavaria", can make one think more widely. There is in fact lots of scope for both sides to think and act differently if given sufficient rope by a Games Master to lasso each other! That is what happened in our game, with the Austrians being able to give a very good account of themselves. To give those as nerdy as me an insight how I tried to do this please take a look at the Napoleonic Download sidebar for the briefs, maps and orders of battle for our Abensberg refight here.
Making the battlefield
I get quite a lot of nice comments that viewers like to see how the sculpted battlefields are created. I'll try to keep this simple as the basic methods are the same and in this case most of the buildings and woods were created for the two previous games in this series. You can see lots of posts in recent years about my terrain making, and if you prefer, check out the labels at the very bottom of the blog for "Making...."
Here is the map I made to make the table up. The black lined area is the usable tabletop space and the rest is a couple of notional feet around it for manoeuvring reserves and retreating troops.
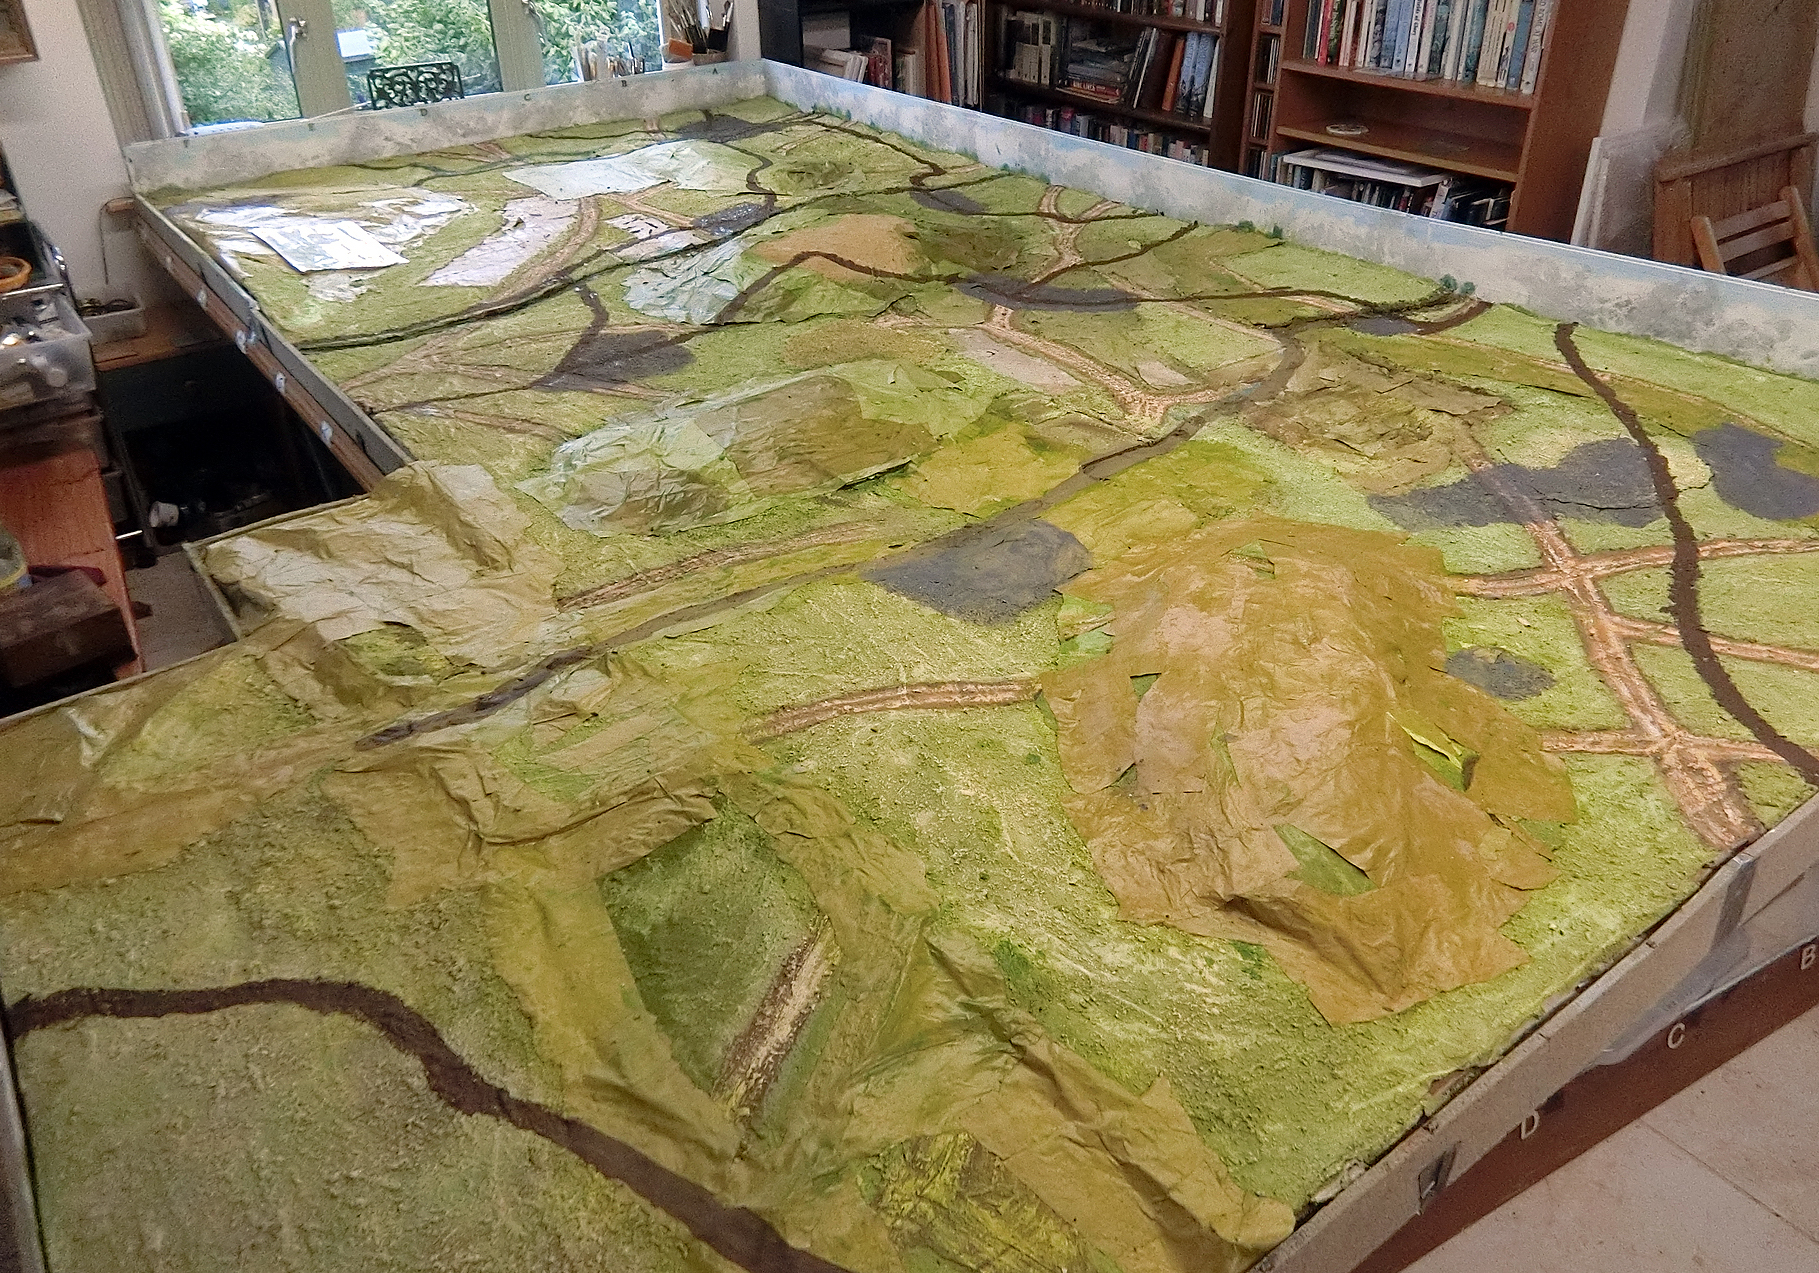
I started off by stripping off the extras like fields from the previous Lutzen terrain so they could be used again. Buildings and woods obviously came off as they were "add-on" pieces anyway. Then I used loads of old pieces of past terrains (polystyrene, cardboard and papier mache coatings) from the garage store to shape roughly the high ground for Abensberg. then I did my usual method of extensive papier mache work to blend them in. Thin green paint was roughed in to give me a feeling of unity of old and new.
I'll let the following sequence of photos tell the story
 |
| Above and below: The old pieces combined with new contours produced an odd patchwork. This shows the "extra bit" of 13 square feet of terrain used to extend the battlefield essentially to Bachl village. |
 |
| To give me a sense of progress and scale I have marked the roads and rivers (thin dark lines) but thse are nowhere near their final look |
 |
| I've painted the BUA footprints in grey at this early stage to help focus on map locations for all the features |
 |
| It's still a mess but I know where I'm going.......! |
 |
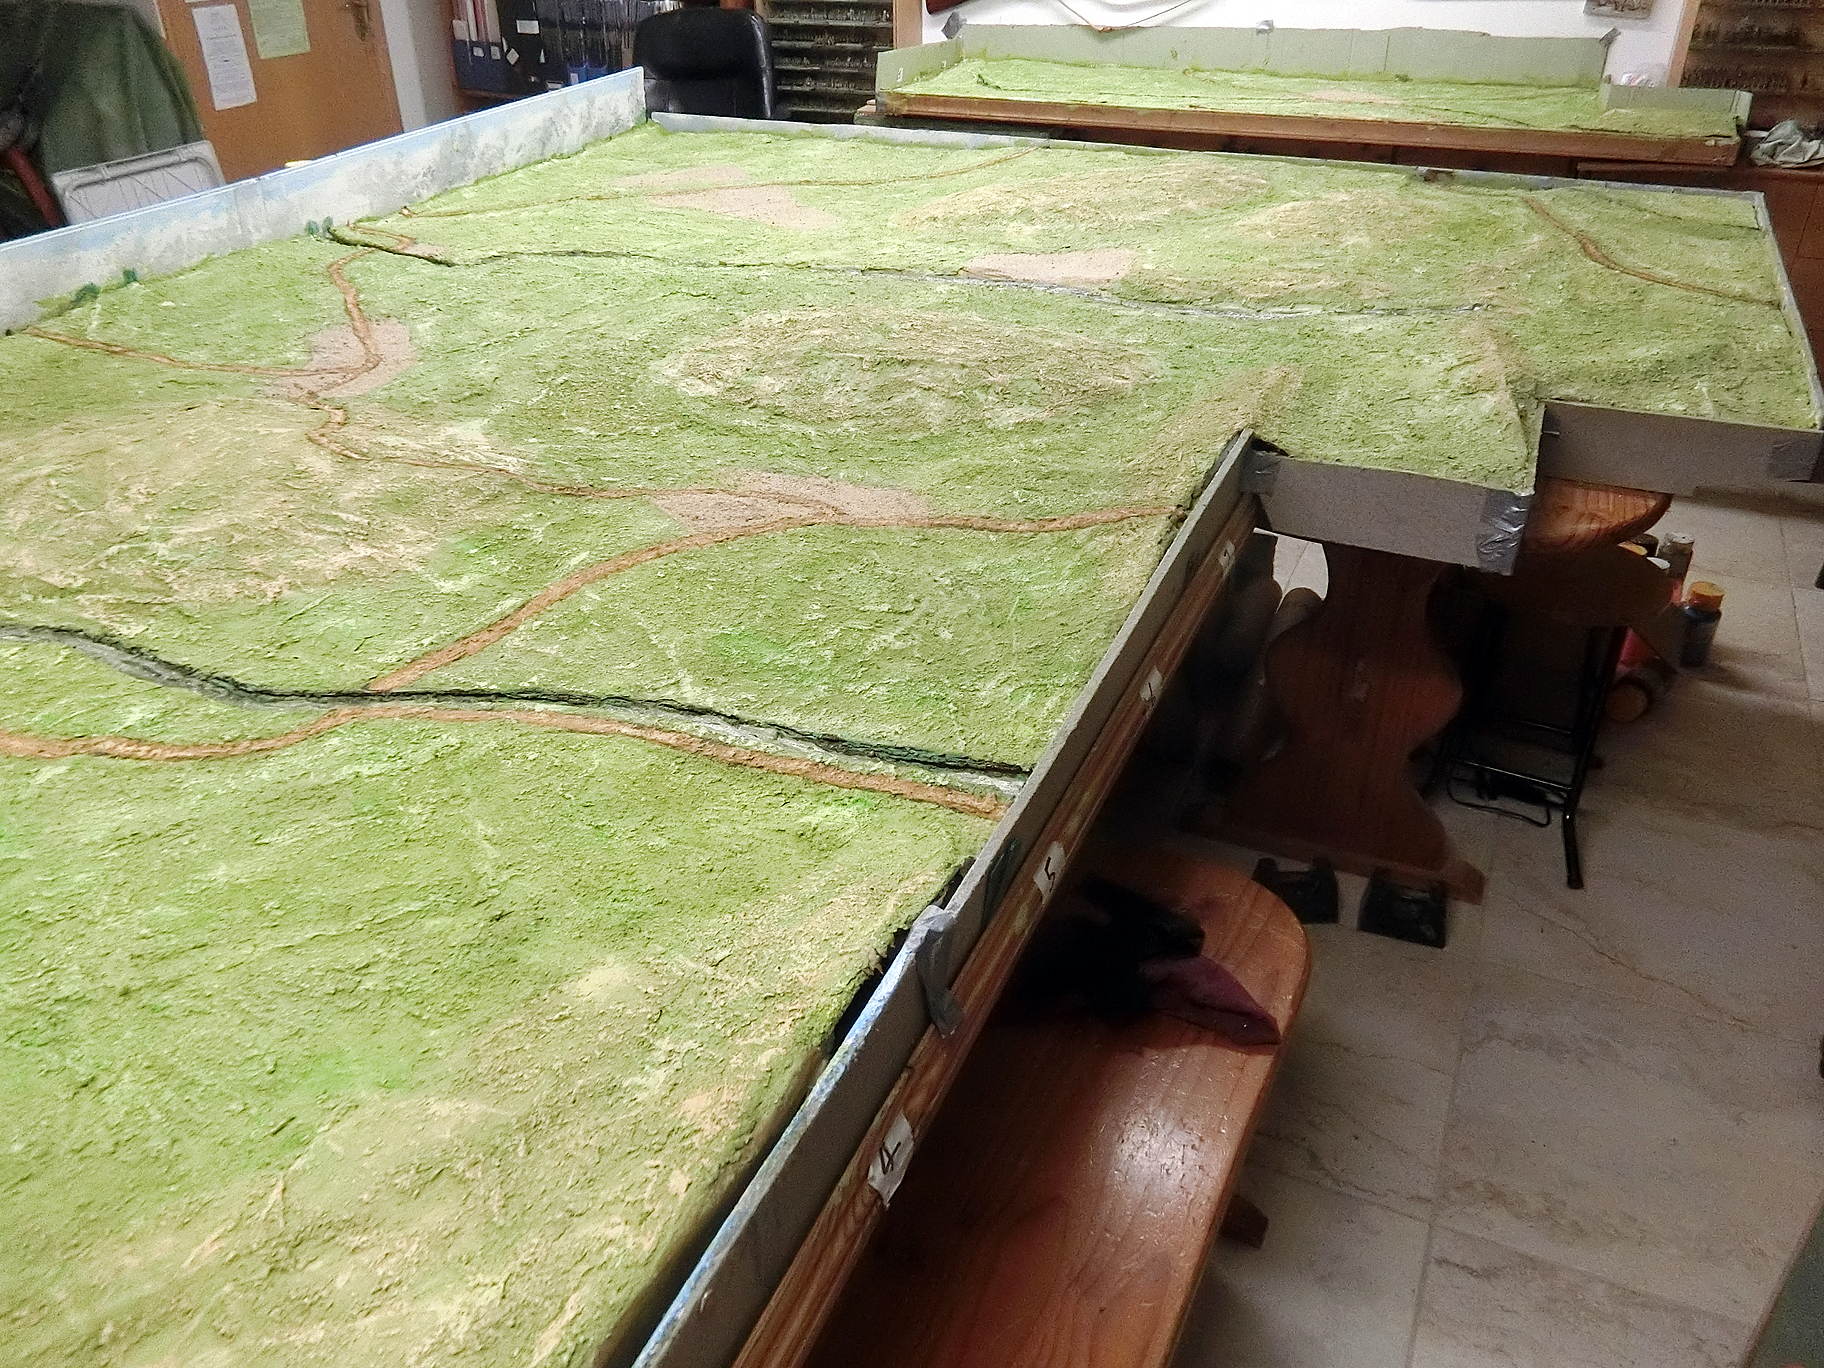
| .......Here - a coherent look through a couple of days' work of mixing sawdust, sand, dry plaster, paint, PVA and water, and painting the whole thing |
 |
| Close up of drying surface with unfinished road and river |
 |
| This shows the extra bit which is designed to fit on my side chest of drawers exactly parallel to the equivalent squares on the main table. It would be fairly easy to transfer troops across during the game. |
 |
| Mostly the rivers sat in a recessed channel in the cardboard surface. They needed many coats of paint/PVA mix to give a shiny, hard surface, and later several coats of acrylic gloss varnish |
 |
I used a Surform tool to chip off the nibs of sawdust when the surface was completely dry. That
helped a smoother effect (right for 15mm figures as opposed to 28mm) and also produced some nice "grass" scatter the same colour as the table. |
 |
| A fun part for me was taking a variety of acrylic colours and applying in various shades by dry brushing to get a coherent look but with variety in it. I find it useful for players to see the higher ground dry-brushed lighter. (I try to use cheaper paints like school squeezy bottle pigments, but also use Rowney, and Winsor and Newton ones from my 2D art stocks). |
 |
This stage takes about a day to dry out during which time the
colour generally lightens |
 |
By now I'd painted the rivers a blue-grey with considerable white tops to
represent the light catching the flow of hillside water courses |
 |
| Ready for the detail add-ons now. |
The completed tabletop terrain
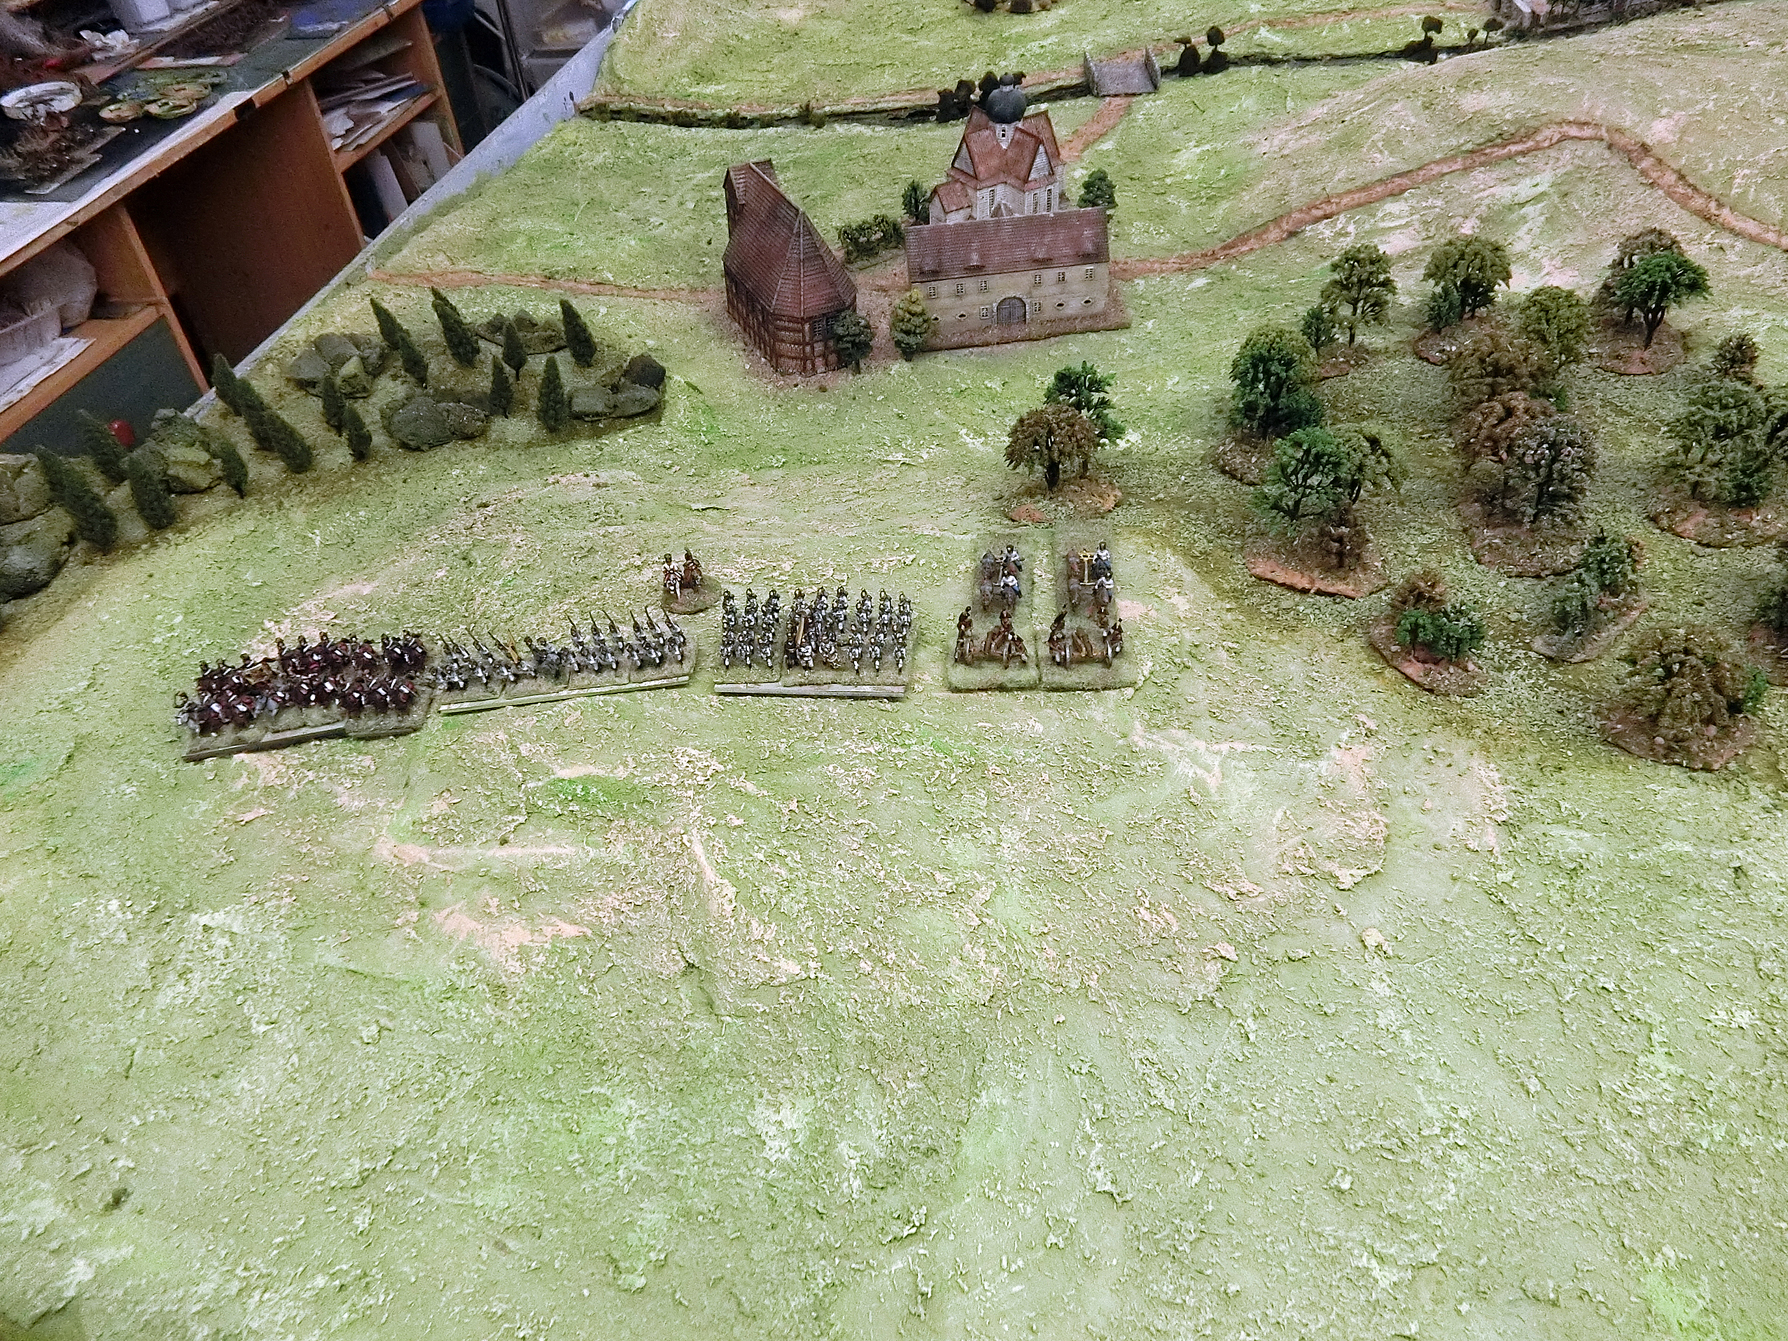
Once I'd worked out where the woods were to go I painted their footprints too. Then selected all the buildings and trees I needed from my store boxes, and assembled the whole thing to send the players their "walking the battlefield" photo tour. I put some units of Austrians in to assist them marking their maps with correct unit sizes. There are rather a lot of pictures but they make a nice set and will give viewers a good sense of how the armies might manoeuvre through the light woods and open spaces.
 |
| To ease play I ensured most of the woods were designated as "open". However there were 4 smallish areas of dense wood, shown darker on the map, and here represented by larger, darker and more pointy fir trees. |
 |
| This village was made of small (about 8mm) homecast plaster town houses, and 10mm 3D printed ones in the foreground |
 |
| By the river crossing I have used some Peter Dennis downloadable buildings printed at a size suitable to fit in with the 12mm and 15mm 3D printed ones |
 |
| Exceptionally, Keller was made from 6mm resin buildings and scratch-built walls arranged to take my 15mm figure bases. I wanted to give some sense of a fortified and defendable farmhouse - presumably from that name a wine-making or brewing enterprise? |
 |
| Most of the villages were made up using Germanic 3D printed buildings seen on this blog in previous games |
 |
| Houses in The Horlbachs - Unter, Mittel and Ober shown as one BUA, are some of my home made card balsa wood and plaster thatched ones seen in the Lutzen game in April |
Just to finish off this part three more pictures taken by Glenn on Day Two.
Part Two - start of the game , will be about two weeks due to other commitments.


Chris, your custom tables are truly works of art. Spectacular!
ReplyDeleteThankyou. I do my best to please
DeleteThis in an inspiration to all Napoleonic wargamers . A wonderful “ how I done it” on terrain building.
ReplyDeleteThanks Martin, it was great that you were there to try it out in person this time
DeleteLots of lovely eye candy to enjoy there Chris, courtesy of your and Glenn! As always great to see the construction of the board from early stages to the finished article. Looking forward to another game in the 'series' in due course, hopefully with another Austrian 'win'.
ReplyDeleteWell, no guarantees but I always try to create a game that is fair to both sides!
DeleteAnother game set up that I could never hope to emulate but nevertheless enjoy reading about. The 1809 period is one of my particular interests so I am looking forward to see how this develops. Thank you. Jim walkley
ReplyDeleteThanks Jim for your appreciation. I am a slow blogger so please be patient with me for more, and check out the links to past games if you have not done so already.
DeleteStunning work with the terrain as always - I’m looking forward to your next post!
ReplyDeleteanother great set up from a true veteran of Nap wargaming. Love the terrain and the figures.
ReplyDeleteWow! That battlefield looks epic! Looking forward to seeing some more posts with future battles on it!
ReplyDeleteThanks Guys for your appreciation - the next part of this one coming within a week hopefully
ReplyDeleteSplendid work as always, Chris. :-)
ReplyDeleteThanks a lot David, we'll get you to a game here one day
DeleteYou have done it again Chris, with another superb looking table. I am so pleased that you were able to re-use some of the Lützen battlefield. I don't know how you can bear to pull them apart after the game!
ReplyDeleteYour preview photos of the game have certainly whet our appetites!
Regards, James