The first problem with the Formal Garden was what did it really look like before the battle. Kevin sent me this extract from a book he has, plus a written description of the whole complex
 |
| There was no date and all those curly shapes looked daunting. |
So I then had a good look at the plan in Adkin's Waterloo Companion and thought this very practical; at least geometric shapes could be measured and planned, even if I didn't know if the stylised plants represented anything in particular. It also shows probable veg patches outside the garden wall, and some ideas for the Kitchen Garden on the West side of the farm.

But how to render some of the formality in 3D? Luckily I had taken photographs of the splendid model in one of the museums at Waterloo itself. Given that it had whitewashed walls and some thatched roofs this was different from our Hovels model, but I guessed more authentic? So I reckoned these ideas for the garden were worth having high on my list


There were a few other sources along the way but the main thing I learned from it all was that no one claimed a definitive garden design for June 1815, so I could do what I usually do - pragmatic and practical using up the materials I had rather than buying fresh. One fundamental question, though, has never been answered in any of the accounts I read and that is "What state could a formal garden be in after a very heavy rainstorm and bivouacs by hundreds of soldiers?" I suspect it would have been a muddy, soggy mess but that wouldn't look very nice, and you lot would have been muttering "he bottled out of doing it formally!!" Can't have that so I have taken up the challenge. However, it appears that all the concentration on straight lines meant I wasn't reaching for my camera very often in this process - so the examples are rather random! I was using the large gravel effect as a base for all the garden work therefore would not have to make any more paths. Everything was stuck down on that so it would not move during play.
 |
| First I did a generic pleasure garden to walk in with a design not unlike the Union Jack! I cut some templates first to test for size. The lawns are green pan scrub which I had used many, many times as fields for my 6mm ACW games. They were already dry brushed with highlights but needed cutting to the right shapes as per template. The low ornamental hedges in between were strips of Astroturf plastic mat. It was hard work cutting them, but worth the effort. |
 |
| It still needed tidying up and putting some leaf-type scatter to top up the hedges |
 |
| Then I needed a classic octagonal garden but thought it could be dormant so that I could render it mostly as lawn. The template was quite complex but vital to get it right with all those angles and allowing room for paths. You'll note that drying tension between my silicone "gravel" covering and the underlying papier mache has caused a big crack. I toyed with filling it up but that would have meant matching up the dry brushing, etc and so i decided to leave it. Frankly in the excitement of battle I don't think anyone cared. |
 |
| I employed some "pre-loved" green felt that my late mother had used as a base for her dolls (thanks Mum) then used PVA and a sieve to get an even surface of grass scatter for the formal lawns. Once it was dry (as with all the other surface effects) I used a very soft wide water colour brush to sweep up the residue and recover it for re-use. |
 |
| Next was a low hedged garden with what in my mind were small fruit bushes or maybe rose bushes. For these I used some of my 6mm trees which were made from natural seed pods that looked like small fir cones, painted, flocked and based. These covered some of that crack anyway! |
 |
| Here is an overall view of what I had achieved with the Formal Garden. Round three sides I added a border of "soil" which was in fact more of my dried tea leave mixture graded using a sieve. I opted for simplicity as I knew we would be using lots of troops stands near the walls and any clever plants would just have got in the way. I still had to add flowers and Kevin was bringing them so they would not be added till the troop set-up day. |
 |
| This is a rather odd product from Woodland Scenics that opens out into a foliage textured "sheet". They encourage you to stretch it and use as kind of a framework for wispy plants. However in my case I just cut it up fine and stuck it down in rows. |
 |
| This bed was just coated in strips of PVA glue and sprinkled with very fine light green scatter. As ever, once dry it was cleaned up with very soft brush. |
 |
| The end strip was probably the most successful. It was made by tearing up a piece of green foam packing sponge that had come in a box with some small appliance. So, the moral is, for modellers - if you think it might come in handy for something one day keep it, as it probably will! In all these cases there is the option to coat the textured foliage with PVA and sprinkle on a different shade and gauge of scatter/imitation grass or leaves according to taste. |
 |
| Here is the Kitchen Garden. I've used the same principle but with slightly more wild plant foliage. On the right are small strips of cut Astroturf and beyond them lots of strands of Astroturf made by cutting them off at the base without the plastic backing. That can probably be understood more easily in the photo below. |
 |
| I think the somewhat trampled look is appropriate |
For completeness, although you are probably bored by now after 4 Parts, here are a few more photos of the practically finished table awaiting the troops. By now I have repainted the inside of the boundary walls along most of its length, opting for a more subdued smoke effect than the lively one for LHS. If you look hard you'll see I've also put in some trees to blend diorama like with the 3D versions - but they are rather crude as I had to paint them "upside down" bending in over the walls! Just think of it as suffering for my art :-)
 |
| As seen from the French batteries on higher ground to the South-west |
 |
| Bird's eye view from the North. You can see I have added lots of imitation grass scatter to help define the tracks and also as weed growth round the bases of walls |
 |
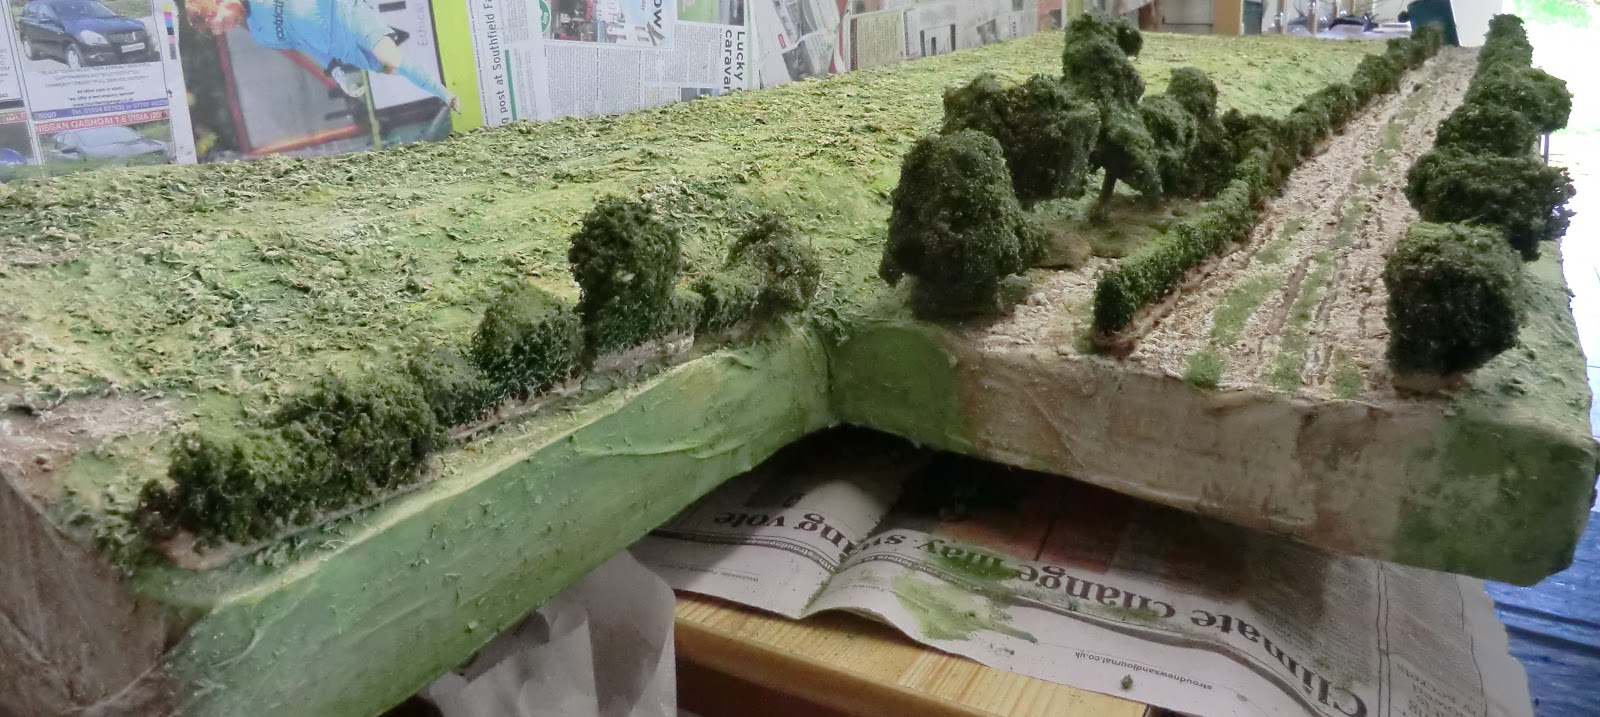
| The small orchard borders the North edge of the Formal Garden, where I have made a hedgerow of small trees and bushes. |
 |
| General view of the Great Orchard. All the trees are moveable to allow for large troop formations to move through. (see bottom photo of this post) |
 |
| A nice view of the South Gatehouse, with some of my renovated "Supertrees" in the foreground |
 |
| View from the South, showing the 20-30 yards of "killing ground" outside the walls and up to the wood. Here Kevin's trees are in the foreground. |
In Part One a viewer kindly complimented me by saying I made the terrain-making look easy. Well, I suppose it is easy if you take it in small chunks and set yourself wise limits, but a project on this scale is not to be undertaken lightly and, compared to most, I'm probably slightly mad (which is what we said at the outset of the project in August 2013!). When the LHS game finished in mid July, I had a week to recover then started the deconstruction of LHS and the construction of this Hougoumont table. I worked on it almost every day till early September, several hours a day. Final touches of the little red flowers were stuck down on 10th September and we played the game 11th - 13th. But in a team we all play our part, and my dedication to this was to reciprocate the two years of enthusiasm and hard work put in by Kevin. Hopefully I had managed to put his Hougoumont Chateau in a setting worthy of it, and worthy of the hundreds, if not thousands, who died and were wounded in the battle for it in 1815. Kevin and the five other project members between them provided more than 3000 figures to play the game; my contribution of miniatures for this one was a mere 100.
I will finish off with a few randomly selected photos of the game in progress just to give a taster of what is to come. These five photos by Kevin East.


Next time - Hougoumont wargame planning and methodology, though that might be a couple of weeks yet before I can manage the time.