Background
Some of you may have seen some photos already on Facebook relating that it was Kevin and my mutual birthdays on the last weekend of January so we thought it might be fun to move on to the next project. After the success of Waterloo there are a lot of 1815 figures in our collections needing more exercise. This time four of us have the aim of organising refighting Quatre Bras (QB) at 1:20 scale. That will mean about 2800 model soldiers so we are giving ourselves till late Summer 2017 to stage it over a weekend, here in The Cotswolds.
R and F rules test - The Set-up
We have looked at maps and decided on scale and orders of battle and had some discussion about rules but not firmly decided yet. While "Blackpowder" has some appeal it also has many drawbacks in our opinions. I was introduced to "Rank and File" Horse and Musket rules last Spring by Simon Millar who staged a Seven Years War game at his place near Warminster, Wiltshire. I was impressed by the simplicity and slick system, which reminded me in many ways of "Fire and Fury". Anyway, it was a short step to use the period-specific Napoleonic amendments for our QB test and adapt the units on the base sizes we have. Although these rules have been around a few years I thought it worth giving an in-depth look from our experience; I hope it is useful. It's worth adding here that they are applicable to games between 1742 and 1900 and any size of figures; we used our 28mm collections.
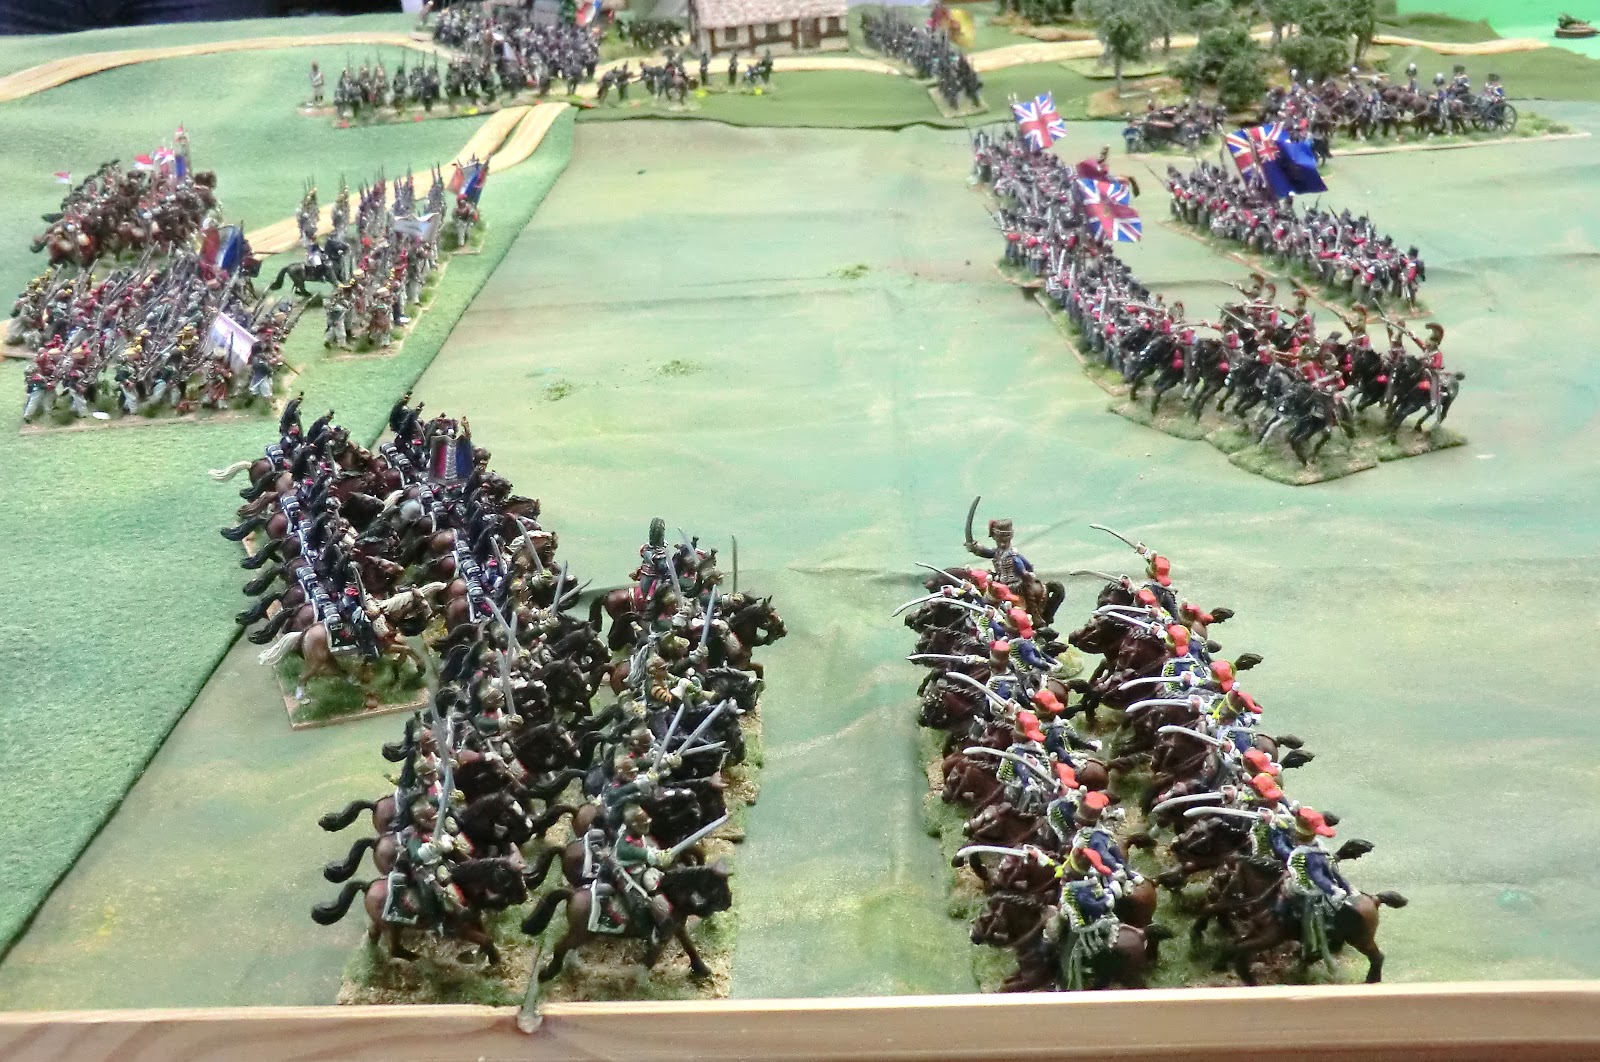
We used a simple battlefield with a ridge along one side, on which are some woods, and a couple of buildings around, what do you expect - a cross roads! Here is a photo using a 6 feet x 6 feet area of my 8 x 6 table.

Sides were deliberately asymmetrical to give the rules and unit strengths a good test.
The Allies (CG) had 3 strong British battalions, one of which was veteran, an average Hanoverian battalion (Luneburg) and two smaller rifle-armed Light battalions - 2LB KGL and 95th Rifles, A strong KGL Hussar regiment, a weak, but veteran, Life Guard regiment and a 2-gun field artillery battery. The Life Guards counted as "shock' troops.
The French (Kevin) had 2 average Line battalions, 2 green Line battalions and 2 average Light battalions. Their strength lay in Cavalry and Artillery. One strong regiment each of Dragoons, Cuirassiers and Lancers, of which the heavy cavalry were "shock" status, a 3-gun field battery and 2-gun light Horse Artillery battery.
The Game
I won't go into great detail but it wasn't a complex game so the pictures and minimal captions, will tell the tale, with assessment at the end.
 |
| Move Two and Kevin makes one of many consultations of the rule book |
 |
| Above and below: Overall views at the end of Move Two: French right, Allies on left in photo above |

 |
| KGL Light have occupied both buildings in the foreground and the Rifles skirmish closely. Between them they have thwarted a faster French advance. |
 |
| On the other side the cavalry shape up for a scrap |
 |
| Cavalry engaged on the left; French Line infantry attack in ordre mixte in the centre; French lancers have joined the front line and persuaded a British battalion into square. Allied Light are successfully holding off the French Legere battalions. Legere Colonel has been wounded and sent to the baseline where you can see him awaiting the right die roll to return! |
 |
| View from the advancing French Horse Artillery battery |
 |
| Close-up view of the infantry in the centre |
 |
| A combination of artillery fire (before the skirmishers blocked line-of sight) and musket fire from KGL Light in the buildings, has pushed back one Legere battalion as "unsteady". The C-in-C has come over to rally them. |
 |
| In the foreground KGL light are grimly holding on to the right hand building, The Rifles as skirmishers have been pushed back and formed close order while Luneburg moves in on the enemy flank |
 |
| The artillery at left have been successful in thwarting a Lancer advance so the infantry square has reformed its line. However the French battalions are now concentrating on the exposed single British battalion. |
 |
| The overall view shows the cavalry fight which was see-sawing. Surprisingly the KGL Hussars were holding out well against the Dragoons, and the Veteran status of the Life Guards, plus unfortunate dice by Kevin, helped them push back the much larger Cuirassier regiment. |
 |
| CG looks pretty satisfied at the Allied successes so far, helped by chocolate cake and Belgian Waterloo beer. |
 |
| By this time the lead British battalion had been forced back "unsteady" (right of pic) so one French battalion is edging round the flank of the British "veteran" battalion. However the build up of fire from the British infantry meant all the French battalions had been weakened, and the "green" ones were looking a bit flaky. A superb example of Kevin's beautifully painted Perry Miniatures in action, all the foreground figures are from his collection. |
 |
| On the other side a weakened French Legere battalion is being enfiladed by the Luneburg battalion. The other Legere battalion is about to eject the KGL Light from the far building |
 |
| The Life Guards kept failing to rein in their attack on the Cuirassiers, but did not regret it as their opponents lost strength and morale. Here each side has a senior commander present, both have lost a stand (indicated by "Minus 1 Figure" marker till we get something better) plus the MDF casualty figure dial shows another "hit", and the M means a Morale check pending for the French. |
 |
| While Luneburg was enfilading the Legere they in turn got roundshot down their ranks from the French medium battery. This sent the Hanoverians scurrying for the cover of the building behind them, still in Allied possession. |
 |
| This overhead shot shows the position at the end of our playing time. In the distance you can see that the Legere battalion has been reduced to one stand and is in retreat pursued by skirmishing Rifles. |
 |
| The Life Guards' success may be about to be cut short by the Lancers closing in on their flank |
 |
| Fire from the British lines has halted the French advance, probably for good. |
The result
We didn't mind too much about the result but I generally "play to win" and on this occasion Kevin's dice in the early stages let my plan work a treat. By about Move 5 or 6 his dice success was picking up, so although it balanced the run of play, in his words "it was too late". All the French infantry had suffered to the point of being unreliable if pressed further forward; although the French artillery and cavalry could still do a lot of damage it probably wouldn't count for much since their toe hold on the crossroads buildings was considerably outnumbered by my units there. Kevin was content to concede to an Allied victory. If it had been part of a campaign he was probably in a good position to withdraw to reform before the "Army Break Point" rule kicked in. Most important we'd had an enjoyable day's gaming, got a conclusion to the game, and very useful input to our rules test.
(For the rest of this post I'm using photographs of vignettes or wargame close ups of Kevin's collection taken at the time of our 1:3 scale Waterloo refights last year. Click to enlarge)

Initial impressions of "Rank and File"
R&F purports to be usable with a variety of scale of game, from one base = 50 men up to 250 men, but appears to be presented mainly as a battalion-level game at a more usual 1:20 or 1:30 figure:man ratio. That may be why (unless I've missed it somewhere) the weapon ranges are a bit odd, but no alternatives are offered. For Napoleonic weapons, it seemed to me that musket range was too long and artillery too short. This is easily fixed if you reckon on your battalion width in line being roughly equal to musket range and your artillery ranges then 5 - 10 times longer according to taste and calibre. So I made musket range 8 inches, rifle 16" and artillery 36", 48" and 60" for light, medium and heavy respectively. That seemed to work fine. We didn't interfere with any of the other rules but there are many, many options given, some of which seem just obvious to experienced gamers and others need thinking about.
As you can probably tell from the photos we used 6 figures for an infantry base and 3 figures for cavalry, so an average size unit was 5 or 6 bases.
Move sequence
Appearing somewhat strange at first once you've played it through the order of play appears very slick and logical:
1. Charge phase - both sides have to decide which units are charging
2. Rally phase - both sides try to rally any unsteady or fleeing units
3. Initiative - Highest die roll can decide whether to move first or second
4. Movement - in turn according to decision at 3.
5. Firing Phase - simultaneous
6. Morale Phase - simultaneous
7. Melee - both sides
8. End Turn admin including attaching and detaching leaders

Command/Leaders
The rules are refreshingly free of a complicated (or dice driven) command system. Kevin commented at first that maybe it was unrealistic as he liked the feel of the player not being certain his orders will be carried out. So we went with the flow and my feeling by the end was that, out of contact with the enemy all is generally well, but within charge distance and post-melee there are quite a lot of restrictions on movements, and combined with the single die initiative roll per side per move, there were times when I felt realistically chastened but not entirely helpless. Leaders have the usual kind of additions but are not too dominating and can be killed or wounded (we actually had quite a lot of casualties which felt exciting) and can rally unsteady or routing units. There is no real risk that any player need have a boring game if his correct command dice don't come up as with some other systems.

Casualties
Both firing and melee depend on getting hits on the enemy usually 1 die per base - 3 hits removes an enemy base and causes a Morale check. Apart from ranges as mentioned above it all seems very logical and easy to apply and remember. Artillery use multiple dice depending on range, and at the closer ranges this can cause significant casualties and therefore reverses of fortune. Games with grand batteries could be very daunting for the victim......We never got any hits or morale on our artillery and I suspect they are suitably vulnerable to compensate.

Morale
A beautifully simple system involving a Morale check every time a base is lost. A minimum of additions and subtractions makes it quick to apply combined with only three morale status levels - Good order; Unsteady, or Rout. Units go up or down throughout the game by one step at a time. Loss of melee causes a compulsory morale drop and withdrawal. Below 50% strength units cannot rally upwards but only get worse. This means they can stay on the field and don't contribute to the Army Break point losses unless they are pressed and forced into rout or annihilated.
Melees
Not to be entered lightly, melees carry on in a Move till a result is achieved and there is always a winner with compulsory actions, often for both sides, (eg British cavalry are realistically unreliable if they win!).
Winning and Losing
The rules describe an Army Break Point system based on the make-up of the force and approximately half of the units being destroyed. Probably useful for a competitive or club game but for a historical refight I'm not convinced it is necessary. By 7 moves, with the size of force we used, it had become obvious to us which side would prevail.
Anything I didn't like?
All pre-melee firing takes place at 2" range - presumably to simplify things but I'm not convinced that is the best we can do, especially as it means guns being charged will get double canister effect at 2" - painful! More play testing is needed for us.
Skirmisher rules are involved, meriting their own double page in the rules, and I'm not really sure we interpreted them correctly. However for our QB game I think we can get by happily with only representing full Light units and not individual skirmish companies so we can adapt them if necessary.

The explanation of limitations on artillery moving/limbering/firing seem a bit muddy to me. I'm sure I can come up with a simple, workable change within the spirit and scale of the game.

The quick reference sheet is good as far as it goes but it contains elements for all the three subsets of the "period" 1742 - 1900 which the rules specify, and a third of the space is taken up with pretty pictures. I want a QRS that is as full as possible with what I need move by move and there is scope for much more in it. Nothing I can't modify if we take these rules into more regular use.
"Rank and File" - in conclusion
I loved them! I think these are "the one". We got 7 moves done, with some sort of result, in about 6 hours casual play with loads of consultation of rule book and discussion, yet by Move 5 or 6 we were playing all aspects of the system with confidence. At my age I find it difficult to learn new rules that are complex and full of difficult explanations so I found these refreshing - presented in a clear style (though often repetitive and aimed at complete beginners) and with an overall system that makes sense without unnecessary baggage. We are scheduling a test weekend in April hopefully to introduce them to the two other members of this project core group and we'll see what they think.
A visit to the Crusader Publishing RandF rules website shows there are a number of additional rules and aspects in downloads and I admit I haven't explored these yet, so apologies if I've overlooked anything important.
Please let me know if this test/review is of any use.
 |
| Figures and photos by KE, digital effects by CG |