In earlier posts I gave a taster to our battlefield for Futonville
(
http://notjustoldschool.blogspot.com/2011/11/spookily-deserted.html) and also to the rules used
http://notjustoldschool.blogspot.com/2011/11/about-wigs-and-wine.html ). A bit late but here is the report of the game. Full briefings containing the details of why the forces are fighting in the Vallee de la Chambreuse, and orders of battle for both the Imperial and French commanders, can be found in the “Imagi-Nations Collection” section of Downloads in my sidebar.
My games are set in 1760 when the Duke of Deuxchevaux (DC) from Savoy, backed by King Louis XV of France, has aspirations to extend his own lands in the name of the King. Across the mountains to the North east lies Reikland. This is an extreme outlying province of “the Empire”, loosely based on the Hapsburg Empire which I take as extending for my purposes virtually up to the border of France, and ignoring Switzerland (sorry any Swiss readers!). Reikland has it’s own sub-divisions, one could call them cantons perhaps, based on major towns and these provide contingents mainly for local defence. They are backed up judiciously by Austrian forces and any other Germanic contingents that can be pressed into service. Thus my Imperial troops have a hard core of British-looking infantry and Austrian-looking cavalry and artillery, aided and abetted by Prussians/Hessians/Hanoverians or whatever takes my fancy. The Savoy forces are all French-looking but also have mercenaries made up of whatever I think suitable - such as in this battle a band of free Scottish highlanders selling their services as light infantry, and the Grenadiers of Hainaut.
 |
| Colours of the Duke of Deuxchevaux's 1st Regiment of Foot |
 |
The Imperial Coat of Arms with motto
"Dracke uber Alles" |
The inspiration for the scenario came from Terry Preen (of South Norwood, London) in his game called “Three Crossings” which he devised principally for a smaller table, less figures and 20mm SYW armies. I was keen to adapt it to our group of players here at Greatfield and my own 28mm armies using mostly old school style “big battalions”. Unlike Terry’s scenario which gave one bridge 2 Victory Points (VPs) and the other two 1 point each, I opted to spread VPs all around the table to try to give more to fight for. The map shows the various values - note that Futonville bridge is the highest prize. Terry had random dice rolls both for arrival and entry points for the various commands. I decided I wanted to give the players more decisions so I got each Commander-in-Chief to decide
where each brigade would arrive but left it to dice to decide
when. The really clever bit in Terry’s game was that when the entire forces had arrived on the table (being vanguards of larger armies) an imaginary clock started a countdown, so that we allowed 4 more moves of play then rolled a die to see if either main force arrived. Worried about finishing on time I built in a plus one addition each move to ensure it wasn’t open ended. The side controlling terrain with most VPs when the first main army arrived would win.
I had 3 players and 4 brigades per side, as follows:
Savoy/French:
1st Infantry Brigade - Pete
2nd Infantry Brigade - Richard
Light Cavalry Brigade, then Heavy Cavalry Brigade - Mike
Reikland/Imperial
1st Infantry Brigade - Tony
2nd Infantry Brigade - Sam
Light Cavalry Brigade, and Heavy Cavalry Brigade - Edward
Here is the aerial view of the battlefield with entry points and VPs:
I will unfold the battle briefly using using photos, but you can view the entire photo folder here.
https://picasaweb.google.com/109237116437799043486/FutonvilleGamePhotos?authkey=Gv1sRgCO-DusmX8czUHA
Move One and the French Generals are looking worried. This is because General von Urff got lucky dice for the Imperial brigades and both infantry, plus the light cavalry, arrived in the first turn. Only Baron Valorcine's Light Cavalry have arrived for Savoy (next photo).
Move Two and General von Uberlegen encourages his Cuirassier Brigade towards Pont de Berger. Le Noble Jaeger battalion is crossing Pont du Duvet. The 1st Savoy Infantry Brigade can be seen in the distance arriving just beyond Futonville.
The Hussars de Bechard get a good view of the Reikland 2nd Brigade deploying in the valley below East Ridge. However, failure to press home quickly using a double move would cost them dearly.
General von Pocks calmly inspects the grenadier company of Grunburg IR3 near Futonville bridge, while behind him the Fusiliers of Argentiere are engaged in a deadly struggle with Valorcine's hussar brigade. The Fusiliers had been allowed to form line and their volley fire emptied quite a few hussar saddles before the melee.
Eventually both the Valorcine and Bechard Hussars are beaten down to critical levels and face morale checks, but they have taken a lot of the fusiliers with them. The cavalry figures in front of the red-coated IR3 are in fact prisoners!
Meanwhile Imperial troops had exploited both the smaller bridges and made such good progress that the Kotztoter Uhlans had closed off the intended entry point for the French Heavy cavalry. Frantic secret discussions then took place between the French C-in-C and the umpire to find a logical way to bring them on the table.
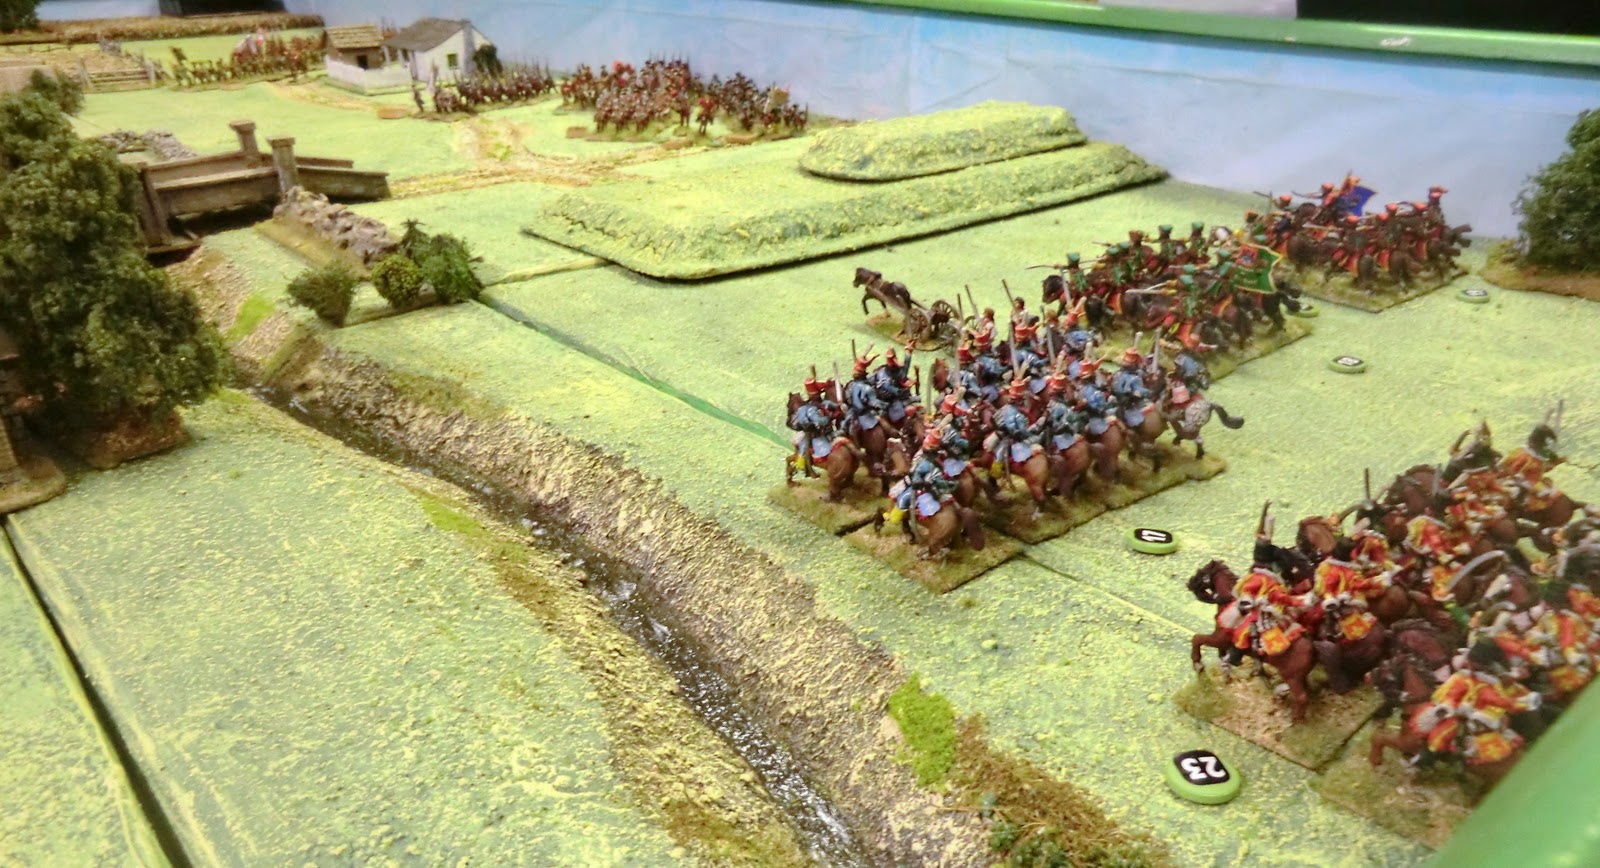
That proved to be a deviation to the North of the Hauteurs des Moutons but once the French Heavy cavalry got clear of the woods (notionally off-table) they were spotted by General von Kotztoter's light artillery on the hill and General von Uberlegen alerted to about turn his brigade to face the new threat. In the distance, in front of Futonville, the black Death's Head Hussars have charged full tilt into the Duke of Deuxchevaux's first infantry battalion, catching them before they could get a volley off. Here is a close-up of the Savoy line:
The crate by the artillery piece actually contains little round black
ammunition counters which are removed as the gun fires.
Better late than never! Poor Richard had a series of very unfortunate dice rolls to get his Savoy 2nd Brigade on the table via La Grande Colline, the slopes of which were also a movement hindrance.

Back at Futonville bridge two squadrons of hussars had been wiped out and the Chasseurs de Fischer squadron nearly so. The Hussars de Bercheny had faired quite well having less opposition and better morale dice. They had achieved so many casualties on the Fusiliers d'Argentiere that this green-coated battalion had fled for two moves, and were rallied by von Pocks, but then took a look at how few of their comrades were left and marched away from the battle! Nothing new for this mercenary battalion as they had started the campaign in the pay of the Duke of Deuxchevaux but he left them in an exposed position at the battle of Strudeldorf and they marched off the field in disgust and defected to the Reikland Army. However, the intact Grunburg IR3 is forming a firing line to deliver a deathly volley to the Bercheny lads.
General view on Move 5.
Baron de Valorcine only has a light gun on the east bank of the Chambreuse stream now that the remnants of Bercheny's have beaten a hasty retreat to their baseline. At the left the French 2nd Brigade is marching into Futonville. Beyond the town a bitter struggle still ensues between the Black Hussars and DC's 1st Regiment a Pied. In the North-west corner Mike and Edward are sorting out the mutual annihilation of their heavy cavalry brigades!
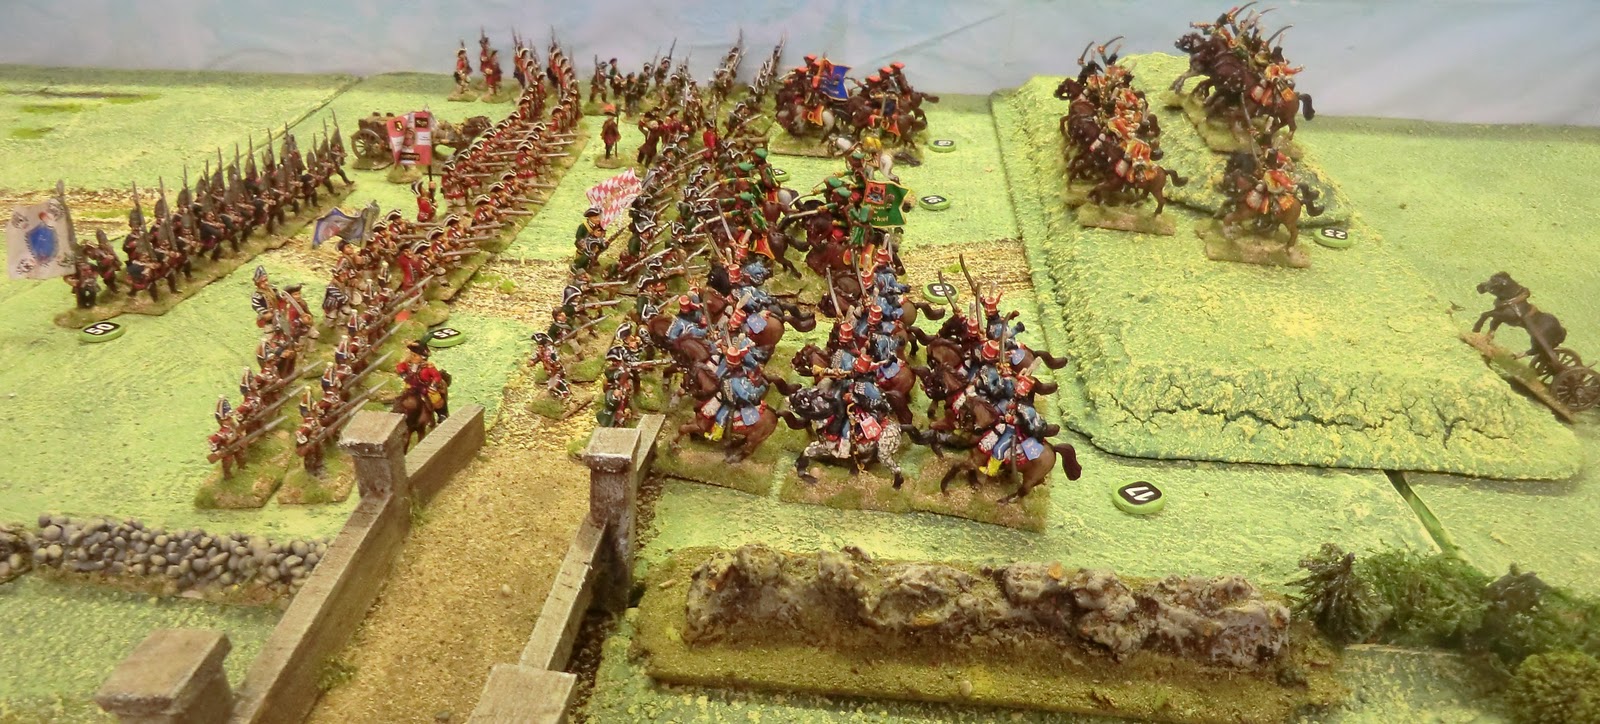
Sam, in his youthful enthusiasm, has made IR3 look rather an undisciplined rabble in his effort to defend the East end of Futonville bridge. The Scots light infantry are taking up position on the East bank, backed up by the Grenadiers de Hainaut. Unseen, DC's 2nd Regiment a Pied has occupied the warehouses on the bank of
the stream. Below is the same scene from Baron Joubarbe's 2nd Brigade perspective showing the Languedoc and Bearn Regiments .
The Savoy 1st Regiment has disposed of the Hussars by superior numbers (prisoners in foreground) and survived their morale checks, encouraged by General d'Ancolie. But his influence couldn't run as far as the artillerymen who have temporarily left their piece to lick their wounds. Beyond, the Imperial occupation of the valley objectives is nearing completion with light infantry on West Ridge and both Grunburg Regiments forming impressive blocks in the confined space threatening to attack towards Futonville.
On the East bank Richard has opted for an outflanking movement to East Ridge with most of his brigade while also pushing across the stream from Futonville. Sam has reformed IR3 and is using the elite Erbprinz Grenadier battalion to defend the end of the bridge itself. Part of DC's 2nd Regiment a Pied can be seen by the bridge warehouse.
The decisive struggle begins!
Here we have a lightning double move charge ordered by the Duke of Deuxchevaux across the bridge against the Erbprinz Grenadiers, while the Grenadiers de Hainaut have charged into Grunburg IR3, withstanding the volley fire and actually putting a depleted IR3 to flight who had no stomach to receive a bayonet attack.
An overview near the end.
Outside Futonville Grunburg IR1 and artillery had been exchanging fire with DC's 1st Regt a Pied and easily saw off this battalion, much weakened after its fight with the Black Hussars. So d'Ancolie had to reform his line to cover the gap to the town while 2nd Regt a Pied had stormed across Futonville bridge. In the distance General von Urff has rallied Grunburg IR3 and brought across the Kotztoter Uhlans from the West bank. This light cavalry regiment completed its move by charging the flank of the Hainaut Grenadiers. You can see a better view of that below:
Thus we had an interesting mix with each side having two units engaged and a mutual flanking attack. The French narrowly won, and as it was at this point that I rolled the right die to announce the arrival of a main force we checked the Imperial morale and both units stood firm!
Conclusion
Winning the dice contest to get more units on the field first, Tony had set up his Imperial forces in a good position to gain many objectives, some unopposed. As it worked out his dispositions could hardly have been bettered as he had good troops in place to hold the Futonville bridgehead (Sam did well there in his first SYW game) and fluidity with his cavalry to use the river crossings to meet contingencies. Unfortunately for Pete, the collective French failure to arrive early enough meant a sound enough plan was not going to work at all well in reality. There were very few things I could do to try to even things up, but I did allow the heavy cavalry to shift entry point off table, mitigated somewhat the extent of difficult slopes for 2nd Brigade on the Grande Colline, and gave Peter's troops the benefit of some confusing figure juxta-positioning in the melees round the far end of Futonville bridge. I have to say in retrospect it seemed like a fairly sedate waltz by the Imperials compared to an audacious quickstep by the French, which resulted in more objectives gained by the former by Move 10 - the end of the game. Since the Imperial troops at the bridge stood fast at the end I split the Futonville Bridge points 2 to the French and 1 to the Imperial troops, but all the rest were obvious, resulting in 8 for Tony and 4 for Peter.
Since I had set this in my Reikland campaign the players kindly collated their losses. I can apply to this my post -battle triage system and will probably use a variation on this battlefield to allow larger forces to compete for the Vallee de la Chambreuse in my next big battle in the Spring. Thanks for the inspiration Terry!
This is my first full wargame report on the blog, so I'd be particularly interested in readers' comments, and any suggestions for improvement. Thanks