(
NB: For reasons unknown to me Blogger failed to allow me to "Preview" this post at all so apologies if you find any of the formatting or typos irritating, or any of the photos of inadequate quality. Please let me know in a comment if so.)
It was nearly six months since our previous Honours of War test game
Clash at Kutzdorf and I think Ken and Guy, like me, were both keen to try something bigger and see if we could get it finished in a day's game. Since this was scheduled as near as possible to our joint birthday weekend Kevin was invited too. It was his first "serious" foray into mid 18th century wargaming.
Thanks to the good company, the pub lunch, and birthday cake provided by the Duchess d'AreteDuchene the day proved far from serious; here is a "selfie" near the start.
The scenario is called "Surprise at Spittelwitz" but it's no surprise to anyone who has the rule book as the the map clearly shows the Blue Forces ready to take Red in their open flank across a river. However, I hope I managed to build in some fog of war by expanding the armies to fit my 8ft x 6 ft table, changed the composition while keeping a balance of small, standard and large units and made them of differing qualities. There was also a fair sprinkling of Dashing generals and the Blue (French) force had a Lieutenant General as befitted the larger army and two wargamers.
As before I set this within the context of my ongoing Imagi-Nations contest between the French -backed troops of "Savoy" and the great variety of Germanic types backed by a loosely Austrian Empire with the Elektorate of Reikland as its front line with Savoy.
Here is the map of my terrain, showing the deployment zones I gave to Ken's Reikland army. It also gave him an indication of the Savoy deployment but without the flanking force. The Savoy map for Guy and Kevin gave them areas D and E more or less as in the book scenario. You will see I added a camp as I thought it appropriate for a force having to man defences and it justified more Red troops as well as another objective for Blue.
So this is a generic version of the tailored briefing given to both sides
4th June 1760
Background
The Chevalier de Neuvalee, under direction from Count Deuxchevaux of Savoy, failed twice in his attempt to break across the border into Grunburg county of the Elektorate of Reikland. Those were the two actions at St Ulrich. A day later Neuvalee had retreated to high ground overlooking the village of Kutzdorf where he withstood an attack by a force under the Count of Grunburg. However his army got a bit distressed in its counter attack but nevertheless succeeded in giving Count Grunburg a bloody nose. In the following week Neuvalee spent time resting and regrouping the vast majority of the Kutzdorf force and greeted the arrival of his master, the Duke of Deuxchevaux. The latter has taken command and brought considerable reinforcements of his own army, plus a contingent of Royal troops, and two Legions of mixed units in the service of France. This is a considerable force of 12 battalions, 15 squadrons (in 5 regts) and 5 batteries of artillery. Such is the faith King Louis has in Deuxchevaux that the cavalry brigade consists of particularly fine troops. Neuvalee becomes second-in-command, with Lieutenant-General status, and the brigade commanders from the Kutzdorf battle have recovered from wounds and taken commands in this new army.
The Imperial force retreated back into Grunburg county with the Count taking umbrage and recalling all his own troops to regroup at Grunburg city. Word quickly reached the Empress who, within a week, ordered General Von Erickson forward with a new force to defend the line of the River Triebisch and stop any attempt at invasion.
>>>>>>>>>>>>>>>>>>>>>>>>>>>>>>>>>>>>>>>>>>>>>>>>>>>>>>>>>>>>>>>>>>>>>
Savoy/French Objective
The aim of your army is to mount a successful crossing of the river, take the high ground beyond and see off Erickson’s force while not depleting your own force unduly. This will be the precursor to pursuit on towards Grunburg City.
In game terms that means getting the Imperial force to reach it’s Army Point limit before you do. To assist that there is 1 Army Point lost if he loses the Spittelberg and 1 lost if you trash his camp. (Camp is considered trashed if at least 8 out of 12 tents are touched by a base of your troops for one Move)
Local Intelligence
Erickson’s force is a fair amount smaller than yours consisting mainly of solid musketeer battalions, and he only has two batteries of artillery plus a couple of units equipped with battalion guns and some cavalry. Some of the elements from the Kutzdorf battle - such as light infantry and grenadiers are known to be in small numbers in the front line woods and redoubts and also Spittelwitz town. They are expected to be alert to the possibility of your attack. The rest of the enemy can be expected to be deployed up to the red line in the rear on the map and may not be on full alert. Both hills are defended by a line of entrenchments. The camp has no obvious defences but is expected to be defended by less reliable troops.
Deployment
The blue line shows your deployment limit and the map gives some idea of the size of standard units, please use these and allow a bit more space for large and less for small units.
The Legion de la Morliere must be set up in Area D. The remainder of your army is set up anywhere North of the blue line marking Area E. You may set up some units off the table at the start if you wish (eg. due to space considerations or second line distance from front line) but they must be marked, to scale, on the map. Units may be in line or column of march, artillery may be unlimbered and ready to fire or limbered up .
...............................................
Reikland/Imperial Objective
Imperial engineers have been hard at work preparing defensive positions around and behind Spittelwitz, shown on your map. There have not been sufficient resources yet to cover the small bridge directly to your East. Erickson’s objective is to hold off the enemy force and inflict sufficient losses on it to thwart this invasion attempt, while preserving his line of communication and camp intact. In game terms that means getting the enemy force down to his Army Points limit before you do. Beware, that loss of Spittelberg and your Camp will lose you 1 Army Point for each.
Local Intelligence
Deuxchevaux’s force of Savoy and French and mercenary troops is now lined up along the North bank of the River Triebisch currently enshrouded from full sight by a light morning river mist. However, local scouting has reported that the army contains more then a dozen battalions and four regiments of cavalry as well as outnumbering you in cannon, some of which are light and reasonably mobile. Some of the cavalry are reported to be senior French regiments of superior quality.
Deployment
The red line shows your deployment limit and the map gives some idea of the size of standard units, please allow a bit more space for large units and less for small units.
General von Kotztoter’s brigade must be deployed in 4 out of the 5 locations in Area C and are alert and ready for battle. If you choose to defend the bridge itself then you can have a barricade across (at the red line) which counts as heavy cover (as the rest of the BUA). Note that the two redoubts only have frontage for 2 bases each so part of a unit will be exposed, but a 3-base unit will have more than half in heavy cover.
Colonel Von Muddel’s brigade is initially the camp guard so must start deployed in Area A. It can’t move on Move One.
The remainder of your force can be deployed in both Areas A and B. The infantry and cavalry are resting at arms but are not yet prepared to move. So they may not move in Move One. The artillery are under orders not to fire into the river area unless it is crossed by the enemy or they, or adjacent units, come under fire.
>>>>>>>>>>>>>>>>>>>>>>>>>>>>>>>>>>>>>>>>>>>>>>>>>>>>>
SAVOY/FRENCH Order of Battle
Unit Nr
|
Unit Name
|
Quality
|
Nr of bases
|
Size of unit
|
Comments
|
Commanding General
|
Duc de Deuxchevaux |
Unrated
|
1
|
|
|
Lieutenant General
|
Chevalier de Neuvalee
|
Dependable
|
1
|
|
2-i-c (see Lt Gen on P37 of rules)
|
1st Infantry Brigade Commander
|
Baron Joubarbe
|
Dependable
|
1
|
|
|
1
|
1st Bn/1st Regt a Pied de Deuxchevaux
|
standard
|
4
|
standard
|
|
2
|
2nd Bn/1st Regt a Pied de Deuxchevaux
|
standard
|
4
|
standard
|
|
3
|
1st Bn/2nd Regt a Pied de Deuxchevaux
|
standard
|
4
|
standard
|
|
4
|
2nd Bn/2nd Regt a Pied de Deuxchevaux
|
standard
|
4
|
standard
|
|
5
|
1st Royal Artillery Battery
|
standard
|
1
|
standard
|
Medium
|
|
|
|
|
|
|
2nd Infantry Brigade Commander
|
General D’Ancolie
|
Dependable
|
1
|
|
|
6
|
1st Bn/3rd Regt a Pied de Deuxchevaux
|
standard
|
4
|
standard
|
|
7
|
2nd Bn/3rd Regt a Pied de Deuxchevaux
|
standard
|
4
|
standard
|
|
8
|
1st Battalion Battenburg Regt
|
standard
|
4
|
standard
|
|
9
|
2nd Battalion Battenburg Regt
|
standard
|
4
|
standard
|
|
10
|
2nd Royal Artillery Battery
|
standard
|
1
|
standard
|
Medium
|
|
|
|
|
|
|
Cavalry Brigade Commander
|
Comte de Berard
|
Dependable
|
1
|
|
|
11
|
Royal Dragoon Regiment
|
Superior
|
6
|
standard
|
|
12
|
Horse Grenadiers de Savoy
|
Superior
|
6
|
standard
|
|
13
|
Cuirassiers du Roi
|
Superior
|
6
|
standard
|
|
|
|
|
|
|
|
Mixed Legion Commander
|
Comte de Lauzun
|
Dashing
|
1
|
|
|
14
|
Grenadiers de Lauzun
|
Superior
|
4
|
small
|
|
15
|
Hussars de Lauzun
|
inferior
|
6
|
standard
|
Light Cav
|
16
|
Artillerie de Lauzun
|
standard
|
1
|
standard
|
Light Horse Artillery
|
|
|
|
|
|
|
Mixed Legion Commander
|
Comte de Morliere
|
Dashing
|
1
|
|
|
17
|
Fusiliers de la Morliere Light Inf Bn
|
standard
|
6
|
Large
|
Light inf
|
18
|
Grenadiers de la Morliere
|
Superior
|
4
|
small
|
|
19
|
Dragoons de la Morliere
|
standard
|
6
|
standard
|
|
20
|
Artillerie de la Morliere
|
standard
|
1
|
standard
|
Light
|
|
|
|
|
|
|
21 Independent Artillery unit
|
Pils-Holstein Artillery Battery
|
standard
|
1
|
standard
|
Heavy
|
22 Independent Light Inf unit
|
Battalion Arquebusiers d’Argentiere
|
inferior
|
3
|
small
|
Light inf
|
|
|
|
|
|
|
|
TOTAL
|
|
91
|
|
|
|
Army Break Point
|
10
|
|
|
|
REIKLAND/IMPERIAL Order of Battle
Unit Nr
|
Unit Name
|
Quality
|
Size of unit
|
Nr of bases
|
Comments
|
Commanding General
|
General Von Erickson
|
Unrated
|
|
1
|
|
Infantry Brigade Commander
|
Major General Von Pannewitz |
Dependable
|
|
1
|
|
25
|
Vestlich Grunge Regt
|
standard
|
standard
|
5
|
|
26
|
Grosse Hinton Regt
|
standard
|
standard
|
5
|
|
27
|
Alte Barnisch Regt
|
standard
|
standard
|
5
|
|
28
|
Ost Kennetten Regt
|
standard
|
standard
|
5
|
|
29
|
1st Reikland Artillery Battery
|
standard
|
standard
|
1
|
Medium
|
|
|
|
|
|
|
Infantry Brigade Commander
|
Colonel Von Canitz
|
Dependable
|
|
1
|
|
30
|
Hessian Inf Bn Canitz
|
standard
|
standard
|
5
|
inc Bn gun
|
31
|
Hessian Inf Bn Prinz Ysenburg
|
standard
|
standard
|
5
|
inc Bn gun
|
32
|
Bogenhafen Artillery Battery
|
standard
|
standard
|
1
|
Heavy
|
|
|
|
|
|
|
Infantry Brigade Commander
|
Colonel Von Muddel
|
Dependable
|
|
1
|
|
33
|
1st Battalion Salasund Militia
|
inferior
|
standard
|
4
|
|
34
|
2nd Battalion Salasund Militia
|
inferior
|
standard
|
4
|
|
|
|
|
|
|
|
Cavalry Brigade Commander
|
General Von Trump
|
Dependable
|
|
1
|
|
35
|
St Ignon Dragoon Regt
|
standard
|
standard
|
6
|
|
36
|
Bathiani Dragoon Regt
|
standard
|
standard
|
6
|
|
37
|
Reikland Horse Grenadier Regt
|
Superior
|
small
|
5
|
|
|
|
|
|
|
|
Light Infantry Brigade Commander
|
General von Kotztoter
|
Dashing
|
|
1
|
|
38
|
Liccaner Grenz Light inf battalion
|
inferior
|
small
|
3
|
|
39
|
Le Noble Jager Battalion
|
inferior
|
small
|
3
|
|
40
|
Le Noble Light Infantry Battalion
|
inferior
|
small
|
3
|
|
41
|
Erbprinz Grenadier Battalion
|
Superior
|
small
|
3
|
|
|
TOTAL
|
|
|
75
|
|
|
Army Break Point
|
7
|
|
|
|
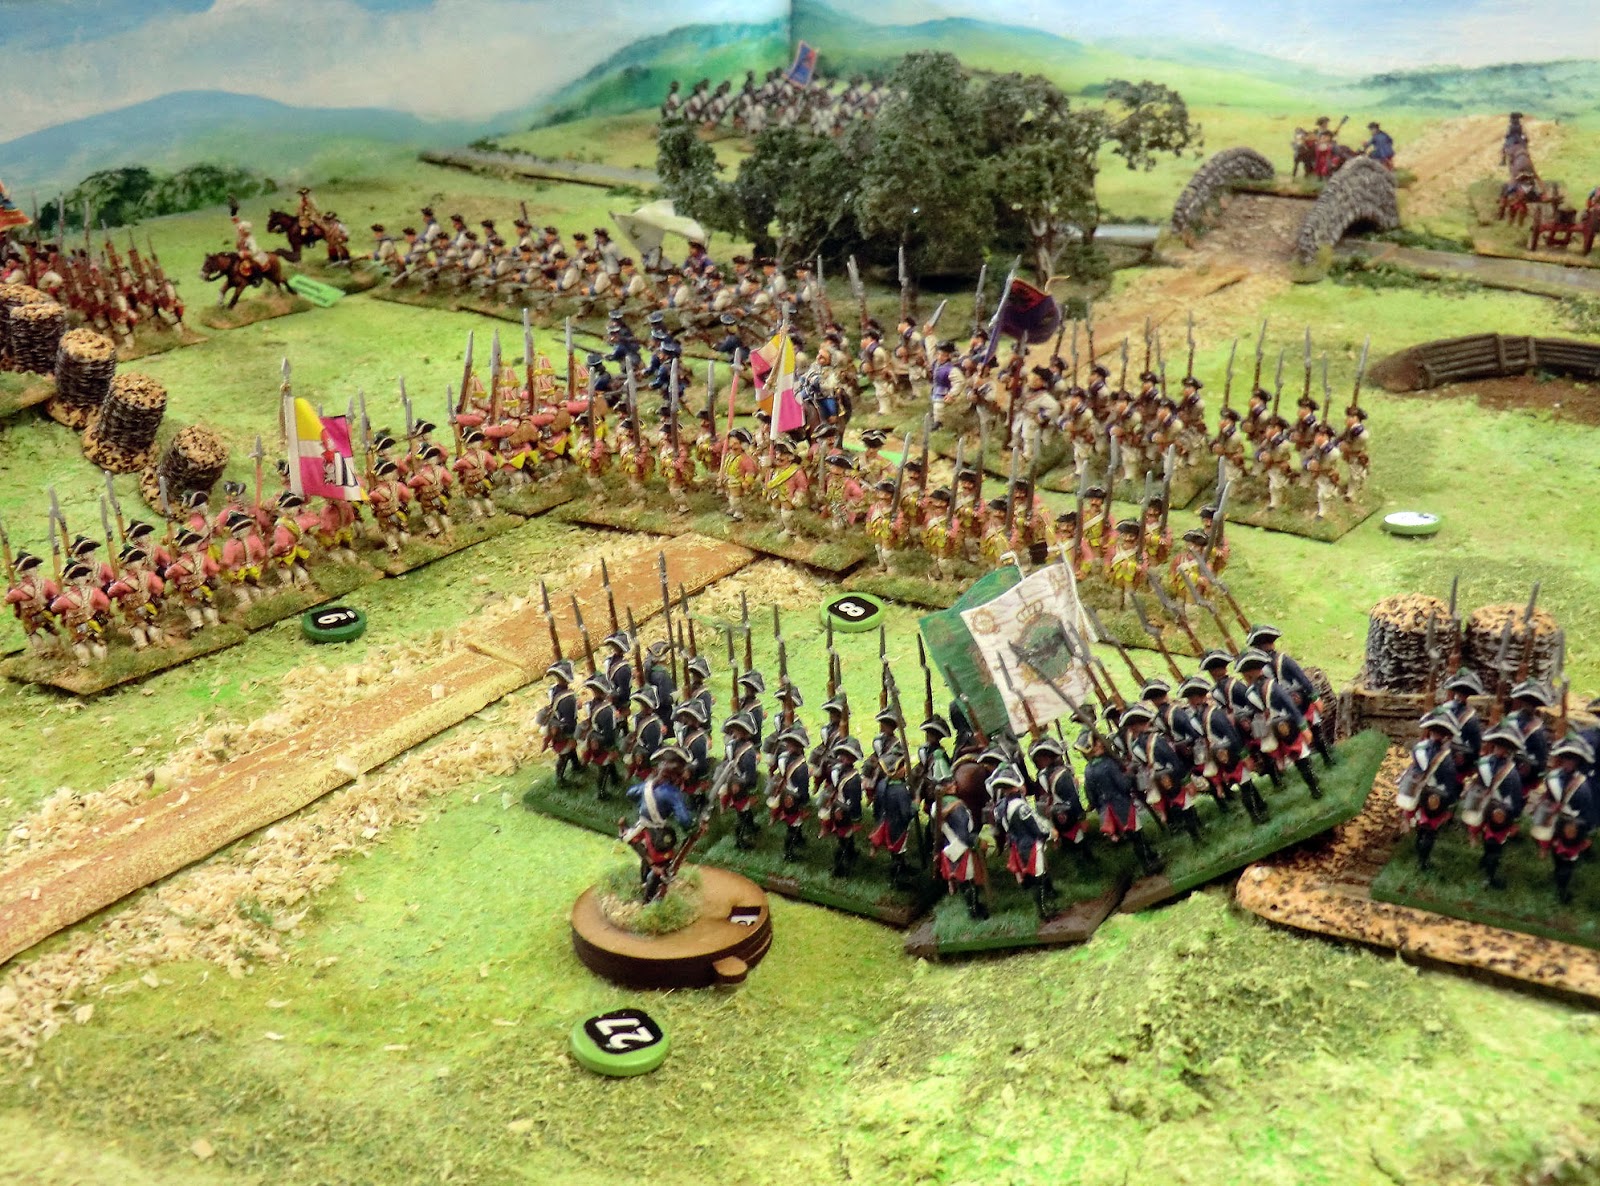
These two photos show general views of the opening dispositions.
About half of Ken's Imperial army is considered out of sight and only represented on the table by numbered counters at this stage
Ken, as General von Erickson did not have a lot of choices but made sure he did not neglect the open right flank. He held back infantry battalions from the front line fortifications at first, fearing heavy enemy fire. Guy's plan, with the Duc de Deuxchevaux, was to concentrate as much as possible of the infantry on his right flank to press hard against the Imperial left and the gap between the hills. Meanwhile Kevin's force, under the Chevalier de Neuvalee, pressed forward to distract as many enemy as possible then sweep into the flank with the heavy cavalry brigade. Guy was adamant that he as not going to waste resources attacking the town or the redoubts.
And here are some close ups
 |
| The Imperial right flank, facing East. These infantry battalions are by Fife and Drum/Crann Tara from Ken's' collection. Austrian style dragoons are old RSM figures I bought at a Bring and Buy many years ago, and equipped with Reikland flags |
 |
| Legion de la Morliere provides the French "surprise" left hook. All Crann Tara figures apart from the fictitious light artillery converted from some spare Foundry Russian "characters". The Legion's first appearance on a wargames table so anything can happen! |
 |
| Legion de Lauzun, including a galloper gun, backed up by three regiments of heavy cavalry, ready themselves to join the left hook and thrust into the heart of the Imperial defences. |
 |
| Eight and a half battalions and three batteries comprise the French main attack on their right |
 |
| In the distance the Savoy attack has got under way, crossing the river with a double move. Canister from two batteries has caused the red uniformed Grenzers to retreat from their redoubt back to the main position. |
Two pictures of intense concentration by the players as the French/Savoy attack makes good progress
 |
| In the foreground the Morliere Legion also got a double move to cross the river so Ken is having to reform his line to cover the gap |
 |
| Guy's second brigade is changing into lines as they march up the road towards the gap in the hills, led by the Battenburg Regiment, and some of his artillery limber up to join the advance |
 |
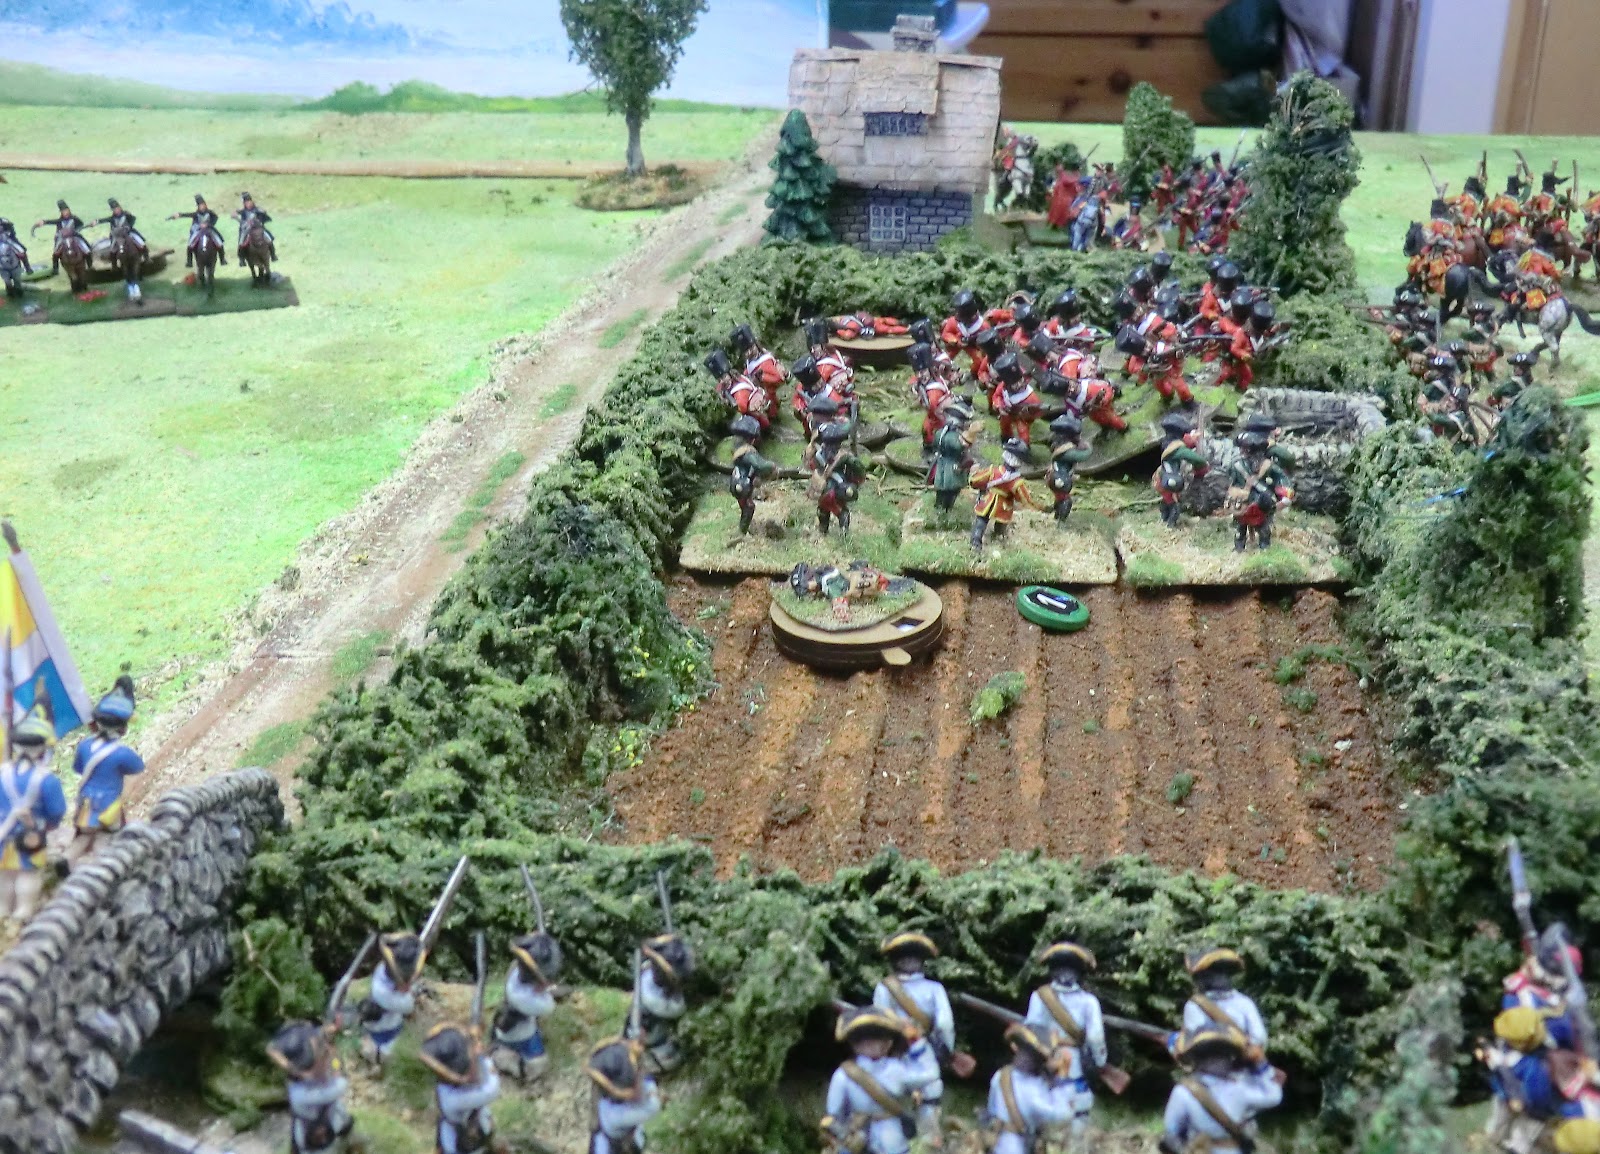
| Meanwhile General von Kotztoter got 6 on his Performance die and, being a Dashing commander of light troops, urged the Le Noble Light infantry out of their redoubt to harass the Savoy 1/3 Regt a Pied who were evidently not budging. Pils -Holstein mercenary heavy battery ex Phil Olley's collection, Front Rank figures; and some very old Hinchliffe Napoleonic limber horses with an Old Glory civilian driver |
 |
| The Duc de Deuxchevaux encourages Baron Joubarbe to get his infantry round the flank of the entrenchment....... |
 |
| ......but opposite them Ken gets his Hessian brigade well placed, with support from heavy artillery and battalion guns |
 |
| Moving on a bit this photo shows that the lead Savoy battalion managed to form a line and got engaged in a fire fight with the Hessians. |
 |
| 1/1 Savoy Infanterie a Pied has forced the Le Noble Jagers to withdraw from the wood but in the distance its sister a battalion has been routed by fire from the entrenchment |
 |
| This general view shows that all the Imperial battalions have now been revealed and are manning the defences where possible. The cavalry are shaping up for a scrap. |
 |
| Imperial light troops have hurried back through the gap to reform but hard on their heels Guy decided he wanted 1/Battenburg to wheel and take the enemy battery in the flank |
 |
| Here is another view. The Salasund Militia have realised the threat to the camp and Colonel von Muddel orders both battalions to move forward. The Jagers try to recover but being "inferior" can't seem to get far enough away (60cm) from Guy's advance |
 |
| The Erbprinz Grenadiers in Spittelwitz were always "out of command" and Ken retreated them back from the bridge. Their only moment of fame was to get off some pot shots at the passing French dragoons, but without effect. Much to my surprise Ken did not use their "superior" status, giving better initiative, to do anything else with them at all. |
 |
| In the foreground the Le Noble Light infantry are making a bee line to enfilade the flank of Savoy's 2nd Brigade, but they are still within canister range of the Pils-Holstein heavy battery |
 |
| Kevin brings up the cavalry brigade to support the Morliere Dragoons.......... |
 |
| .....under the approving gaze of Guy |
 |
| And here they are piling in, but those Hussars de Lauzun are right under the guns of Ken's field battery in the corner redoubt on Spittelberg.......... |
 |
| .........The Hussars suffered hits which would be telling in due course but here they are being backed up by the Royal Dragoons and Horse Grenadiers de Savoy (more below) |
 |
| A nice shot along the Spittelburg showing two of Ken's beautifully presented blue-coated units |
 |
| The inferior quality Salasund Militia are all that the Imperial force has left to plug that defile. Will Battenburg turn to face them or charge the Heavy battery on the hill? |
This next sequence of 6 photos shows a developing situation on the Imperial open flank which would be instrumental in deciding the game .
 |
| General Von Trump leads the St Ignon and Bathiani Dragoons in a charge against the Morliere Dragoons, the latter don't have the necessary half move to counter-charge |
 |
| Major General von Pannewitz manoeuvres the Grosse Hinton and Ost Kennetten regiments to shape up to the Morliere infantry while under fire from the skirmishing Fusilier battalion and the light artillery |
 |
| The Grenadiers de la Morliere prepare to charge |
 |
| The Comte de Morliere and the Chevalier de Neuvalee carefully stay 5cm away to avoid flying lead! |
 |
| These Grenadiers are only a small unit, but superior quality, against a standard unit of Ken's. The Chevalier did not avoid dicing against stray sword thrusts from the nearby cavalry melee, but survived. |
 |
| Whatever the outcome for the French the Comte de Lauzun was bringing up his Grenadiers, backed by the Cuirassiers du Roi (Converted Victrix Austrian Napoleonic infantry and Perry plastic French Napoleonic cavalry). |
 |
| In the centre the Le Noble LI had been forced to flee from artillery fire and unfortunately the hit point lost by the Alte Barnisch infantry tipped them over the edge and all of sudden Ken had a big hole in his line |
 |
| But it wasn't all one sided as the Hessians and Heavy battery had taken such a toll, over time, on the savoy 1st Brigade that three of its battalions were now on the run. |
 |
| This overall shot shows an interesting picture of the French cavalry having been repulsed with only Bathiani Dragoons holding the scene of that action, while Morliere Grenadiers and Fusiliers had prevailed over the blue coats; Ost Kennetten retired in good order and Grosse Hinton's men took to their heels. |
 |
| The Morliere Dragoons are "Done For" (well, it was their first game, what do you expect?) and Lauzun Hussars are retreating with 4 Hits |
 |
| Despite losses in his main attack the Duc de Deuxchevaux is still making a stern fight. A batalion of Savoy infantry is contesting the earthworks while Battenburg have taken possession of both trenches and the heavy battery |
 |
| Bathiani bravely charges the Royal Dragoons but we don't rate their chances against "superior" cavalry with 2 supporting units |
 |
| Despite things going pretty well for them Guy and Kevin still look apprehensive |
 |
| Now a Battenburg battalion has forced one of Salasund's to break, and flanking fire along the Spittelburg behind the defences finishes off the 4th battalion of Von Canitz's brigade. The retreating St Ignon Dragoons risk losing a Hit point for them running past |
 |
| A final view: Not surprisingly the Bathiani Dragoons have broken leaving the Reikland Horse Grenadiers as the only cover for the line of communications on this flank. the Arquebusiers d'Argentiere have made it onto the Spittelburg and are likely to cut off Ken's battery there. |
Conclusion
We concluded that any more moves of play would just have seen Ken trying to hold on at his left flank while evacuating the camp and trying to cover the withdrawal of the right flank units. We looked at Army Points lost and this was 2 for the French and 3.5 for the Imperial army. Nowhere near the limit for either but it was 20% French and 50% Imperial so that says something about the state of the armies.
I may have over compensated for the defensive works by giving the French more powerful forces, but all credit to Guy's tactics because if he had dissipated that strength along the front it would have been a different story. Ken did the best he could in the circumstances. Holding back his infantry battalions from the entrenchments proved a good idea, but if it were me I'd have had the second and third line units in march column, ready to speed to fill a gap. I think not trying to do something with the Erbprinz Grenadiers was a mistake as, used with their Dashing commander, or relying on initiative, they could have distracted some of the enemy cavalry away from his right flank.
I really enjoyed organising this game and the players said they enjoyed it too. Kevin has been turned on to mid-18th century and is now asking about figure manufacturers etc; as if he hadn't enough Napoleonics to paint!
What about Honours of War?
A wonderful flexible set of rules that have a few things we don't like but nothing we can't master. We used all the downloadable amendments, clarifications and optional rules and adapted a few of our own. We cut down a bit on grazing fire (though little of it in this terrain anyway) and I introduced a six shot artillery ammo limit. I think that is about right even though we did not get enough moves to run out. We believe that the Hit Points lost for others routing through or past you cannot be justified when they are of lower class, nor does it seem fair to lose the same when friendly troops retreat through you. Maybe some would say it is realistic and at least speeds up the game, but it is a bit soul destroying when a player has a lot at once and no chance of rallying them. I also introduced a block on rallying off if a unit was still under threat from artillery fire - that could be eased by retreating, moving into masking cover, or the shelter of other units. I think it worked well.
A lot happened in only 5 Moves! And we got a result so they are good if you like using a lot of toys and expect them to go quickly once the action hots up. We used about 700 figures but were limited to the speed of one player at a time, so I'm pretty confident that 1000 figures on a more open battlefield and several gamers playing concurrently would give a result in about 5 or 6 hours.
Thanks once again Keith Flint for a good set of rules and an interesting basic scenario on which to build.