Maps
I'll repeat the simplified map which I used to construct the terrain
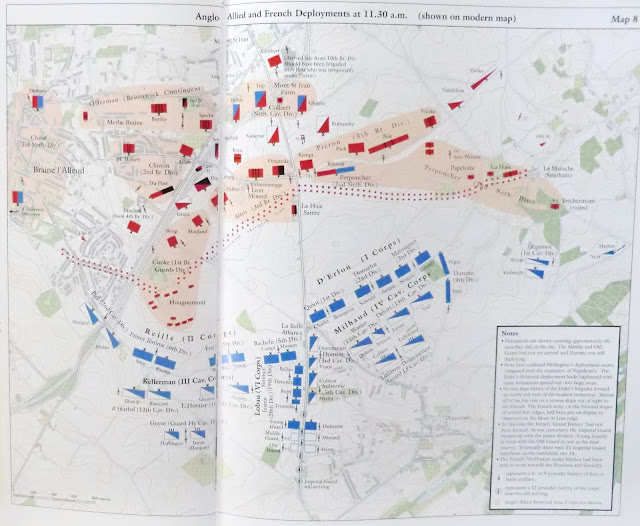
And this one from Mark Adkin's "The Waterloo Companion" shows the historical dispositions which we more or less followed. Refight 1 is based on the premise of historical deployment followed by wargamers trying to use it to advantage. Our second one, this coming weekend, is "Le Woteef" scenario giving commanders a freer hand.
The Rule system
Paul's rules have been honed and simplified over many years and have standard unit sizes of 24 infantry and 9 cavalry representing coherent bodies of troops roughly 2,500 and 1000 men in historical size. In a similar way that Charles Grant translates historical strength to match his "regiments", Paul adapted the historical orders of battle to match the size of his "brigades". In each case the figures represent some of the more iconic units within a brigade, for example Scots Greys are used to represent the Union Brigade. Compromises also have to be made to fit the command system, so for example the 4 Divisions of D'Erlon's Corps were represented by D'Erlon and 3 Divisional commanders but still had 8 "brigades" of infantry and 2 of cavalry. The aim was to get armies that still had all the character of the originals, covered the same scale area, and had similar battlefield problems to overcome.
Fitting in with the rules and their deliberately adaptable ground scale Paul had sited the French grand battery further back than its historical counterpart but gave reasonable visibility, making some allowance for French troops in the valley below and the good concealment of Allied troops on Mont St Jean (MSJ). I had misgivings, having designed the battlefield to scale, but to Paul's credit the result worked very well and felt right to the players.
The game goes along on an initiative system whereby the Commanders in Chief choose subordinate commands to go alternately. The Command figures are important to activate Corps and Divisions and keep them attacking or recovering. Tactical actions are very simple "hits" and representative, having a morale test for every "Fatigue" point suffered and a diminishing scale through Fresh, Tired to Exhausted, with Morale status of Shaken, Disorganised and Broken. As brigades are broken the "Fatigue" level of the senior commander also diminishes till unfortunate results occur for the rest of his command. Paul introduces random event cards into his games to add flavour and he wrote some special ones for Waterloo.
Positions at 1130
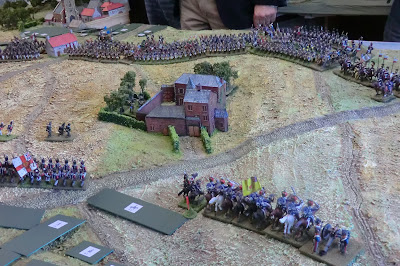
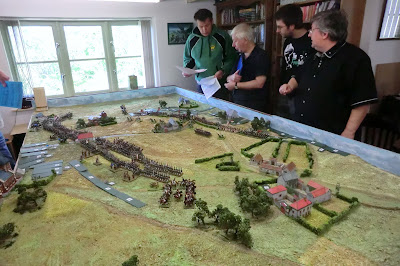
Here are some photos of the troops visible at the start
 |
| Overall view from the French right flank. Units not yet visible are represented by appropriate sized cards |
 |
| Looking West along MSJ towards La Haye Sainte (LHS) |
 |
| The infantry of D'Erlon's I Corps with La Belle Alliance (LBA) beyond |
 |
| Paul allowed the Grand Battery to be in place at 1130 , but further back |
 |
| Nassau troops and British Guard Light Infantry in Hougoumont |
 |
| The back table holding French Guards and Reserve troops near Rossomme farm |
 |
| Reille's II Corps is massed above Hougoumont |
Objectives and Plans
 |
| Victory Points and special conditions for this game |
I was making the coffee while each side made its plans so I was told later, in my note taking capacity, that the French had recognized the value (given by the umpire) to Hougoumont and would try hard to take it while shifting Reille's corps to the left flank and rolling up the Allied right (the left hook of "what-if" fame). They would refuse their right where terrain was very broken up. With Ney in charge for the opening sequences it did not quite work out that way!
I was also advised that Wellington had emphasised the importance of holding the good position on MSJ ridge but Hougoumont was more expendable. Instead the Allies would shift a lot of their reserve to their right and make an all out attack on the French left flank. The expectation was, as historically, that the Prussians would arrive to safeguard the left flank. This plan too proved subject to change in due course.
 |
| The umpire provides some clarification to the Allied generals |
 |
| The Earl of Uxbridge receives his orders from Wellington |
 |
| Now it is Napoleon's turn to receive some encouragement from the umpire |
Day 1 Players
Allies
Wellington - Richard Newcombe
Earl of Uxbridge - Owain Atkins
Prince of Orange - Tony Woodman
Lord Hill - Mike Tovey
French
Napoleon - Kevin East
Ney - Peter G
D'Erlon - James Fergusson
Reille - Pat Burden


Looking very good Chris. The game certainly to be one yo watch closely as you post mate.
ReplyDeleteBRAVO!
ReplyDeleteExcellent setup, looking forward to seeing more!
ReplyDeleteLooks even more impressive with the figures on the terrain. Looking forward to further reports about this one and then, of course, the big-small one at 1:3!
ReplyDeleteWonderful!
ReplyDeleteLooking good
ReplyDelete