I've had a number of folks respond favourably to my offer to give an idea of how I made the terrain that I showed you in my previous post
waterloo-project-our-1:100-refight so here goes.
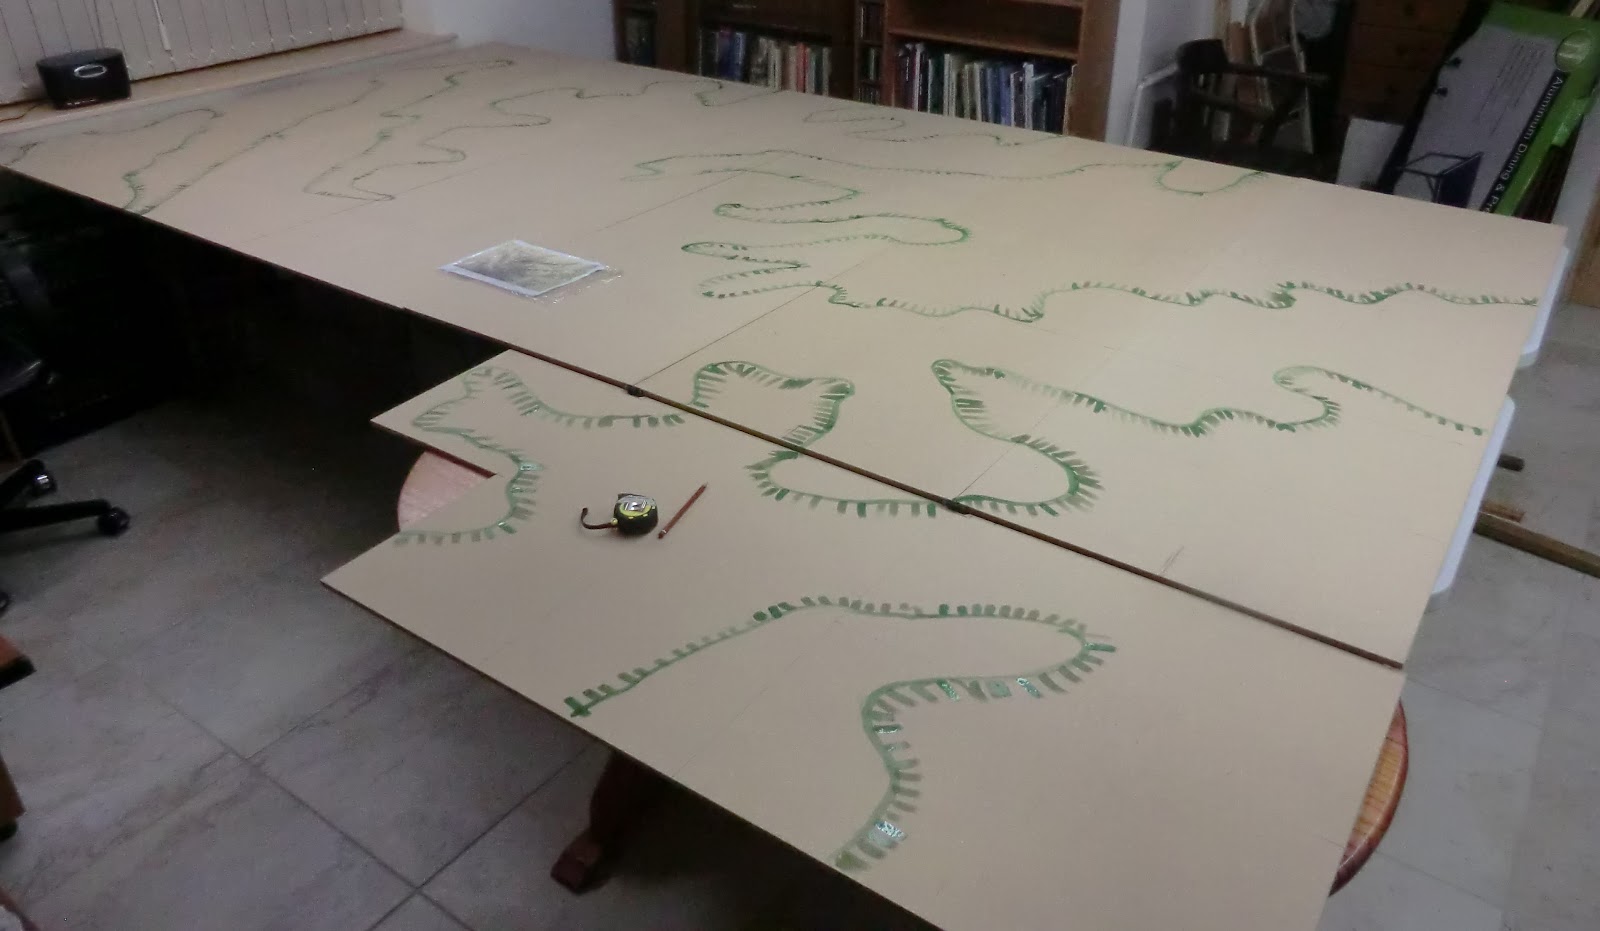
You might like to refer back to that post for the map but the design was based on the simple contours in the centre fold of Ugo Pericoli's book "Waterloo" which was written to go with the 1971 film. Paul and I had studied many maps, contemporary and those in the standard works, but found that, for our purposes, this one was quite accurate and good enough. It doesn't have a scale but when compared to more precise ones that can easily be deduced. Our area is big enough to accommodate the Prussian approach and for the French to move forward to hold them off if so wished, and also for a problematic "left hook" by any audacious French player.
 |
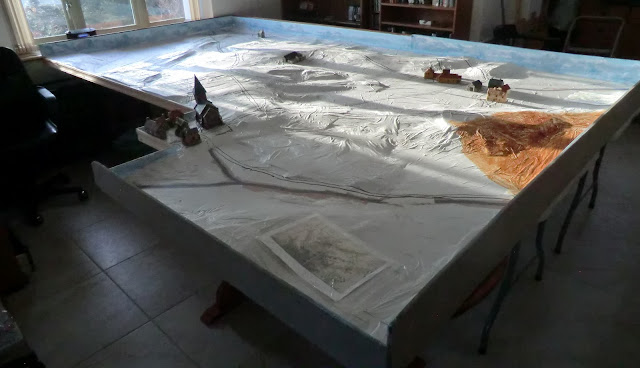
| Seven 6ft x 2ft strong MDF boards were placed on large folding tables so I can take it down eventually. The first layer of contours is marked directly with green marker pen |
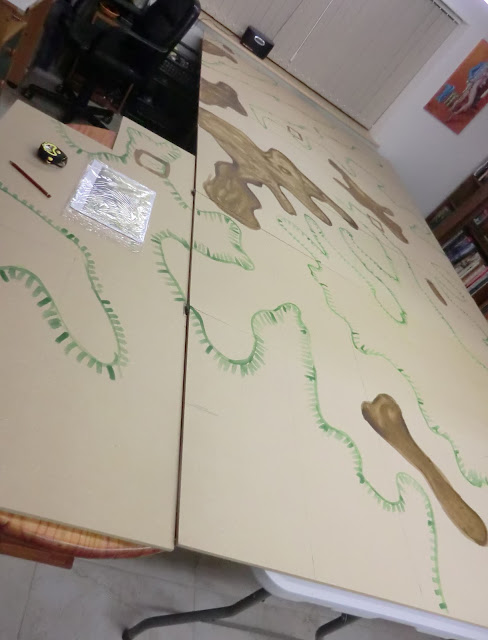 |
The higher contour is now marked with brown acrylic shading, and the rough positions of built up areas
indicated as a reminder |
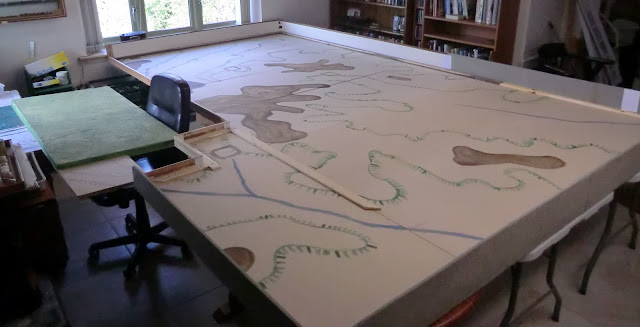 |
| Satisfied that it will work I now had to batten everything together to avoid warping later. I screwed on side panels so I can dismantle it easily, and likewise wooden battens at the edges across all the joins. Very little glue was used except in vulnerable places. At left you can see the "extra piece". An eighth MDF board had two of my old polystyrene tiles stuck to it for later sculpting. You can imagine how this will fit but with space for player transits. |
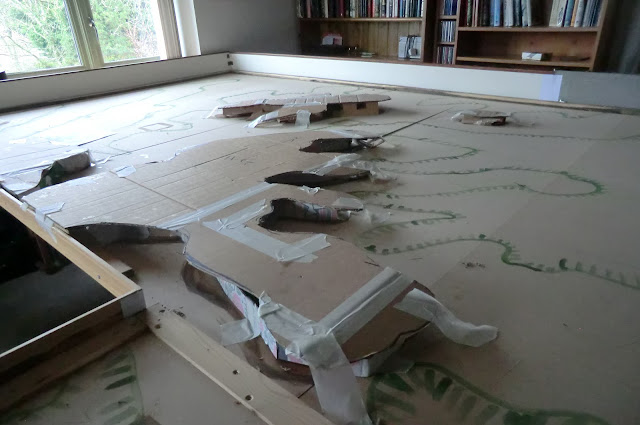 |
| Now, I've built terrain with polystyrene and I don't like all that mess and static, and I had lots of other raw material which I'd paid good money for left over from our recent house removal(s) . So I used lots of cardboard and paper for the next processes - making the contours. PVA glue and masking tape were used with cardboard cut approximately to the shape of the upper contour. The top surface was flat for playability and left to set overnight. |
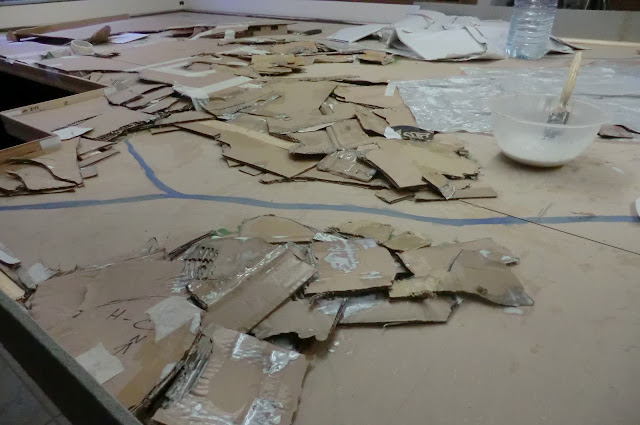 |
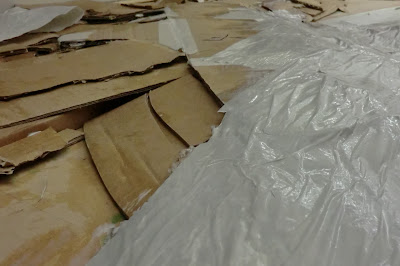
| This next process was quite laborious as it involved tearing the cardboard into manageable pieces and using liberal quantities of PVA. I deliberately exceeded the drawn on lower contour so as to blend the slope better with the baseboard and then soften the join with the top plateau. It looks a mess but will come together! |
 |
| This was messy play as my 3 year old grandson would call it! Big plain sheets of removers wrapping paper were laid over one another with slightly dilute PVA glue using a wide brush to make papier mache |
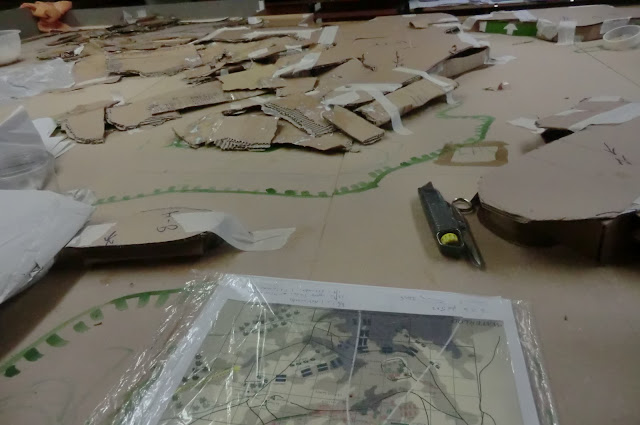 |
| A view of the map in what will become Mont St Jean ridge. The position of La Haye Sainte is marked with the square at right. |
 |
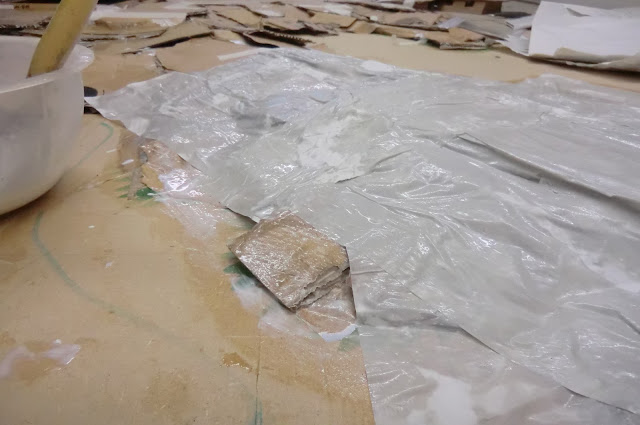
| PVA saturated wet paper in close up - yuk! |
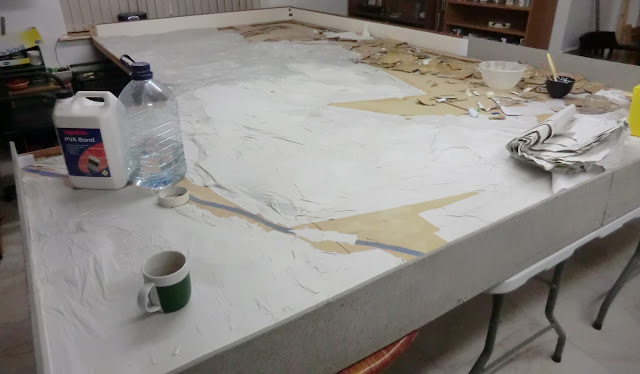 |
| This process took several sessions and when it dried produced a nice uniform whiteness |
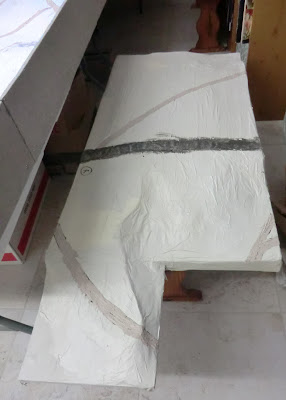 |
This is the extra bit sculpted and wrapped in the same PVA/paper method,
with roads indicated |
 |
| Now all the paper has dried thoroughly and is hard. I indicated the roads and streams with acrylic paint and tested out some thinned burnt umber acrylic on the paper to see if I needed a base coat. Couldn't resist playing around with some 15mm buildings to see what they felt like. I still hadn't made up my mind what to use apart from Kevin's Hovels church. |
Well that's enough for now, we'll get on to the colouring next time.


Thank you for this 'how to' terrain talk.
ReplyDeleteFascinating Chris - who would have thought paper and card with some white glue, MDF and a bit of skill could produce such fine looking terrain. Exclelnt tutorial so far mate.
ReplyDeleteExcellent write up there Chris. Interesting to read about your plans and development.
ReplyDeleteReally interesting and informative - thanks for posting!
ReplyDeleteThanks Chris! Very interesting.
ReplyDeleteWhat? No ground scanning radar or lasers? Take that Peter Jackson!
ReplyDeleteFascinating look beneath and a reminder that old methods still work. I'm pretty sure I would not have been savvy enough to cover everything in the white glue glop to get a uniform base texture.
I don't expect to ever build fixed terrain again but I'm looking forward to the next installment.
BTW the PG reference is well earned.
This comment has been removed by the author.
ReplyDeleteVery inspiring and informative, thanks!!!! Bill
ReplyDeleteThank you all for your supportive comments.
ReplyDeleteRoss, very amusing reference to the Gallipoli terrain I presume? My equivalent was camera, eyes and feet when Kevin and i visited the Hundred Days battlefields with a local guide this time last year.
The white paper and PVA did not give texture but a pretty smooth base - the texture will follow in the next instalment ;-)
Yes Gallipoli and yes, a uniform base surface, I chose the wrong word. Looking forward to the next installment.
Delete