Introduction
Better late than never, hopefully. Most readers have probably forgotten I am still in the midst of writing this report - too much 2D art, photo-sessions with a model for art commissions, and general family "real life" has prevented me getting round to it. If you need a reminder here is part one Hausen-Teugn-Dünzling in which I gave a very brief historical context, explained the scale of the game we were attempting to refight, and gave a detailed "tutorial" on making the customised, sculpted terrain on the 12 feet x 6 feet table.
In this post I will attempt to give sufficient details on the forces and plans of the protagonists, and use loads of photos to help explain the run of play over the first couple of hours of historical time. That actually took all day as I found that, somewhat ironically, I was doing the classic "holding action" not just as a gamer but for real, as the French players weren't arriving till the next day! We had allowed a whole weekend to play this out, and we needed it - this was back at the end of July 2023. In round numbers I was allowing for around 35,000 French and Allied to fight up to 55,000 Austrians, we had just over 2000 figures available but not quite all of them made it to the tabletop.
 |
| A light hearted candid shot of me worn out as the single French commander on Day One |
Game context on the day
First I will regale you with some maps to help understanding.
Those who wish to see the detail can get the full briefings and orders of battle from the Napoleonic Download section on the right hand sidebar, or follow this link Hausen-Teugn-Dunzling briefings and orbats
 |
| Map given to Austrians -red areas correspond to particular Divisions or Brigades on the orbat. Blue areas are the very few French they are aware of around 10 am |
 |
| Dillon's intended Austrian deployment. Hohenzolern's III Corps is on the left flank, still deploying through Hausen. Most are in the safety of reverse slope on the Hausenerberg in relation to the French at Teugn. But Stutterheim's light troops North of Schneidhart are expecting opposition in the woods ahead. Rosenberg's two Divisions of IV Corps are deployed side by side on the right, approaching Moosholzen, Westerholz and Dünzling. |
 |
| The French map, pink areas are spotted Austrian units. All except areas A15 and A16 represent marching formations along the road towards Abensberg, through Teugn and Saalhaupt. A15 is a strong Light Infantry (Legere) brigade on the Hausenerberg. A16 is Montbrun's Division consisting of 3 strong regiments of Light Cavalry and a regiment of Legere. |
 |
| Paul's actual deployment and attack intentions which had to be interpreted by me |
As a reminder, we were using my adaptations of "Honours of War" rules for Napoleonic Imperial period warfare at a scale of 1 x 15/18mm figure representing 50 men (Abensberg to Wagram, A2W). So most tactical units are full regiments or small brigades, some Light Infantry (LI) units were just battalion strength, the artillery batteries were two gun models each. The rules are still a work in progress but most aspects are finalised. Although I had provided most of the troops (which are an eclectic mix, many bought painted from sellers on Ebay) I'm indebted to Paul B from Cheltenham in lending his wonderful AB Miniatures armies before the day for me to pick from. Nearly all the beautiful staff groups are Paul's as well as a lot of the cavalry and some of the Austrian infantry.
On this first day Dillon Browne and Guy Barlow had come from Buckinghamshire and Windsor to command the Austrians. On Day Two the French commanders, Paul B and Steve Johnson, would be here, but until then it was up to me, as Marshal Davout, to do my best to carry out their orders, but be sensible and not lose too many troops before they arrived!
The plans Simple really for both sides, and somewhat dictated by my limitations placed on them driven by historical deployments adapted by my reading of the situation at about 10 am. Full credit to Michael Hopper's Hausen-Teugn and Dünzling scenarios in "Eagles over Bavaria" for focusing my mind on what was needed, and then enlarged a bit into "what-if" territory by opportunities shown in John Gill's "Thunder on the Danube" Volume 1. I had given both sides a lot of dummy units to help with "fog of war", and added Blinds, concealment and scouting to the basic HoW system.
French
Paul had grasped the nettle, and ordered all his forward units to attack. He intended to establish a battery on the Buchberg to protect Teugn while sending infantry up the Hausenerberg to try to secure the critical crest line. A dummy Division was all he had to give the impression of protecting the line of communication to the distant Divisions of Gudin and Morand, now on their way West to Abensberg. Gilly's LI brigade was to take and hold the extreme eastern end of the Hausenerberg overlooking Schneidhart village. Morand had a difficult job on the French left. Paul maybe had not realised the potential strength of Rosenberg's corps and he'd initially ordered Montbrun to secure the covering approaches to Westerholz through Paring and other off table villages, since safeguarding this flank of Davout's march from Regensburg was critical. I managed to temper this to sending only scouts and LI forward aggressively at first and keeping Pajol's cavalry Division back to await events. A reserve was provided by Saalhaupt village in the form of Guiton's Cuirassier Brigade.
Austrian
Although I was given some mild criticism after the battle for making the Austrian objectives too difficult, all I was trying to do was provide strong incentives to advance as far as possible - even off the northern roads! That was in keeping with Archduke Charles' historic orders, and I did not want to give our Austrian players any excuse for the dithering shown by their historic counterparts. So Dillon ordered all Hohenzollern's units to advance over and down the northern slope of Hausenerberg and onto Teugn; Vukassovich on the left was tasked with trying to block off the Abensberg road. Guy ordered Rosenberg's infantry to advance straight ahead with the Westerholz, Moosholzen, Saalhaupt and Gattersberg in mind, while he hoped cavalry would be able to advance through Dünzling. Stutterheim was to take that vital shoulder of the Hausenerberg above Schneidhart. I had given Dillon, as Archduke Charles, the potential to command personally the strong (10 battalions of Grenadiers) I Reserve Corps from it's off table position at Grub, but there were restrictions of course......
 |
| The situation at the start - all units, real and dummy were represented by a blind of some sort - different sizes helped balance out real versus bluff formations. |
The Blinds help to demonstrate one of the key elements I waated to represent to get across the character of the April leg of the 1809 campaign - the diverse and close terrain of Bavaria. A lot of the mess, confusion and apparent ineptitude of both sides was due to lack of visibility and knowledge of the enemy and their own troops. Each side had "squadrons" of scouts attached to the key commanders (Corps level and above) and we had a scouting phase at the start of each move. We simplified things somewhat with a die roll to indicate if "spotted" enemy figures were revealed this turn or next. Scouts had no fighting role except in defence of their General and his staff, and to fight or push away/evade from enemy scouts.
Let Battle Commence - 10am 19th April 1809
 |
Play commences - here Guy brings Rosenberg's Corps through
the woods, while Dillon is thinking about which of
Hohenzollern's units are revealed |
 |
| The majority of my French stay back as yet unrevealed |
 |
| There were some "what-if" elements to this refight. Dillon's first thought, as Archduke Charles deployed off table at Grub, was to despatch his squadrons of scouts forward across his front up and over Hausenerberg. |
I had set a condition that at least 50% of French units/dummies had to be revealed before Charles could issue any orders to the Reserve Grenadiers. I hoped that would take about 3 or 4 moves. This was to build in the kind of reticence experienced by an Army C-in-C deep inside enemy territory up against an unknown enemy. Players don't usually show this kind of hesitancy unless you impose it as Games Master. After all, Dillon would be driven safely afterwards to a nice pub dinner, whereas Charles would have to face the wrath of Emperor and country if he lost the Grenadier Corps gratuitously!
 |
| Carrying out Paul's orders I am pushing regiments from St Hilaire's Division up the Hausenerberg even though Rosenberg's troops are deploying on the crest already |
Dillon's second option was as Hohenzollern, to send an ADC to recall Thierry's Brigade. You'll recall from Part One Thierry was part of III Corps sent westwards to shadow the Bavarians. By Move Two Dillon felt he needed to call up those reinforcements so despatched the ADC but the mandatory dice rolls could hardly have been worse - they would not arrive not till Move 10! Neither side knew that, as a balancing factor, the arrival of the Bavarians on the French order-of-battle was dependent on the Austrians getting Thierry.
 |
| Although his commanders were generally poor quality Guy kept rolling 6s for his critical Command Initiative which gave him much faster movement than any of us had expected |
 |
Above and Below: Austrian scouts (foreground) reveal Pajol's
Light Cavalry Brigade just West of Dünzling. I had pushed forward
his Horse Artillery battery and began very long range harassing fire |
 |
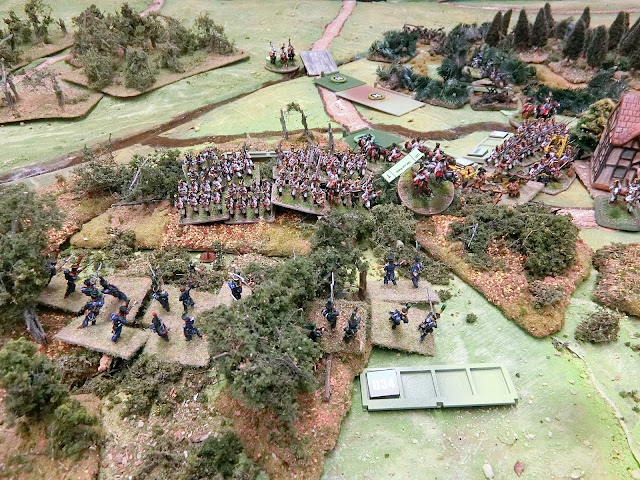
| This is the situation in the centre above Schneidhart village. An Austrian Grenzer Regiment has pushed up the Hausenerberg to take on similar numbers of Gilly's French Legère. The taller dark evergreen trees denote dense woods only passable by skirmish infantry |
 |
| At the main crest I have pushed in a regimental column attack on the right and formed an elite regiment in line left of the road to take on the Austrian mass with fire. Note the Austrian Grenz marksmen in the woods on my right flank - Ouch! |
 |
| I'm giving fire support though from St Hilaire's heavy battery on the Buchberg by Teugn village |
 |
| Here is the view on the French extreme right. Skirmishers engage in the hilly area to the right but what is ahead of my columns is still to be revealed...except all those skirmishers in the dense woods on Hausenerberg |
 |
| A good view of the Teugn-Hausen road through the pass with a desperate struggle taking place for the summit. Austrians have higher ground advantage and "large' unit status here. |
 |
The Westerholz is in the centre of this photo.
Two French Hussar regiments are chasing away Austrian LI before
they can do much damage. French LI approach Moosholzen
and the rest of Pajol's brigade has withdrawn to a safer position at the left |
 |
| This overall view from the SE shows that Rosenberg's right hand Division has reached Dünzling, which is why I retreated Pajol. (see below for a closeup). The Austrian IV Corps left hand Division is getting a toehold on Westerholz |

 |
It's causing me a lot of problems but it was all good-natured historical
fun............ |
 |
| .........even though things had gone badly at the Hausenerberg crest. My elite infantry had been depleted to 5 hits and broke! (Yellow marker), however I've forced their opponents to retreat (red marker) |
 |
| Stutterheim's Grenzers had been pushed back by superior fire from Gilly's LI brigade (who have retreated to concealment) and thus I had achieved one of Paul B's objectives by securing this end of Hausenerberg. Guy used Stutterheim to keep the French guessing here but never caused a serious threat again. |
 |
This is the Austrian regiment that the elite French infantry
pushed back from the crest - soon to be spending a couple of moves
reforming in front of Saladorf village |
 |
Afternoon sunshine spoils the photo at the Austrian left flank -
time to close the blinds! |
 |
| This overhead shot shows Hohenlohe's Division consolidating a position from Dünzling up the slope towards Westerholz. Montbrun is continuing to play a waiting game by refusing the flank while using the 7th Legère and Hussars to keep the light elements of Somariva's Division at bay through the woods. The latter's infantry and artillery have reached Moosholzen |
 |
Dillon is boldly pressing his advantage at the main Hausenerberg
slope. One French regiment has had to retreat back behind Teugn to reform,
the others are now desperate just to defend the road line.
Marshal Davout can be seen to right of the Buchberg |
 |
| Two views of fighting around Moosholzen hamlet. Above: I've had to pull Grandeau's Brigade of Friant's Division across to plug this gap. They are gamely trying to take on Somariva's Division, with their left flank protected in Westerholz by Pajol. Below: Guy's big dice rolls for movement have now ceased (he's using high scores for firing instead!) but he's yet to uncover the strong, experienced 7th Legère still concealed under Blind Nr34 |
 |
| Here they are revealed, and can cause losses if I can keep them out of musketry volley range |
 |
| Gilly has come near the edge of the forest on Hausenerberg and it's a stand-off with Stutterheim just extending his skirmish line (the "1 stand lost" marker just means 1 Hit in HoW terms) |
 |
Along the ridge Hohenzollern is bringing up more regiments,
and LI are now in the forest. From now on both sides will
try to use skirmishers in the dense woods to outflank the lines
fighting at the crest.
Way in the distance Dillon has taken the battle towards Teugn.......see below |
 |
| .....and finding it is not easy. The heavy guns on Buchberg have turned to give enfilading fire. Together with volleys from the French infantry, that proves enough to see off this already weakened regiment. |
We'd battled till about 6.30pm and I could breathe a sigh of relief. Although we only had done 4 Moves, (Two hours tabletop time) on behalf of Paul and Steve I had held all along the line where it mattered. Though my attack on the Hausenerberg pass and crest had caused the French losses it had blunted the Austrian advance.....for now. Better yet I had only lost one unit - the "Experienced" 3rd Regiment de Ligne (unit 20), and a few others were in need of pull back and reforming. On the left flank Montbrun was directing his "Experienced" Horse Artillery battery to cause considerable discomfort to Guy's troops. The next hours of battle would bring a lot of excitement in that area in particular.....
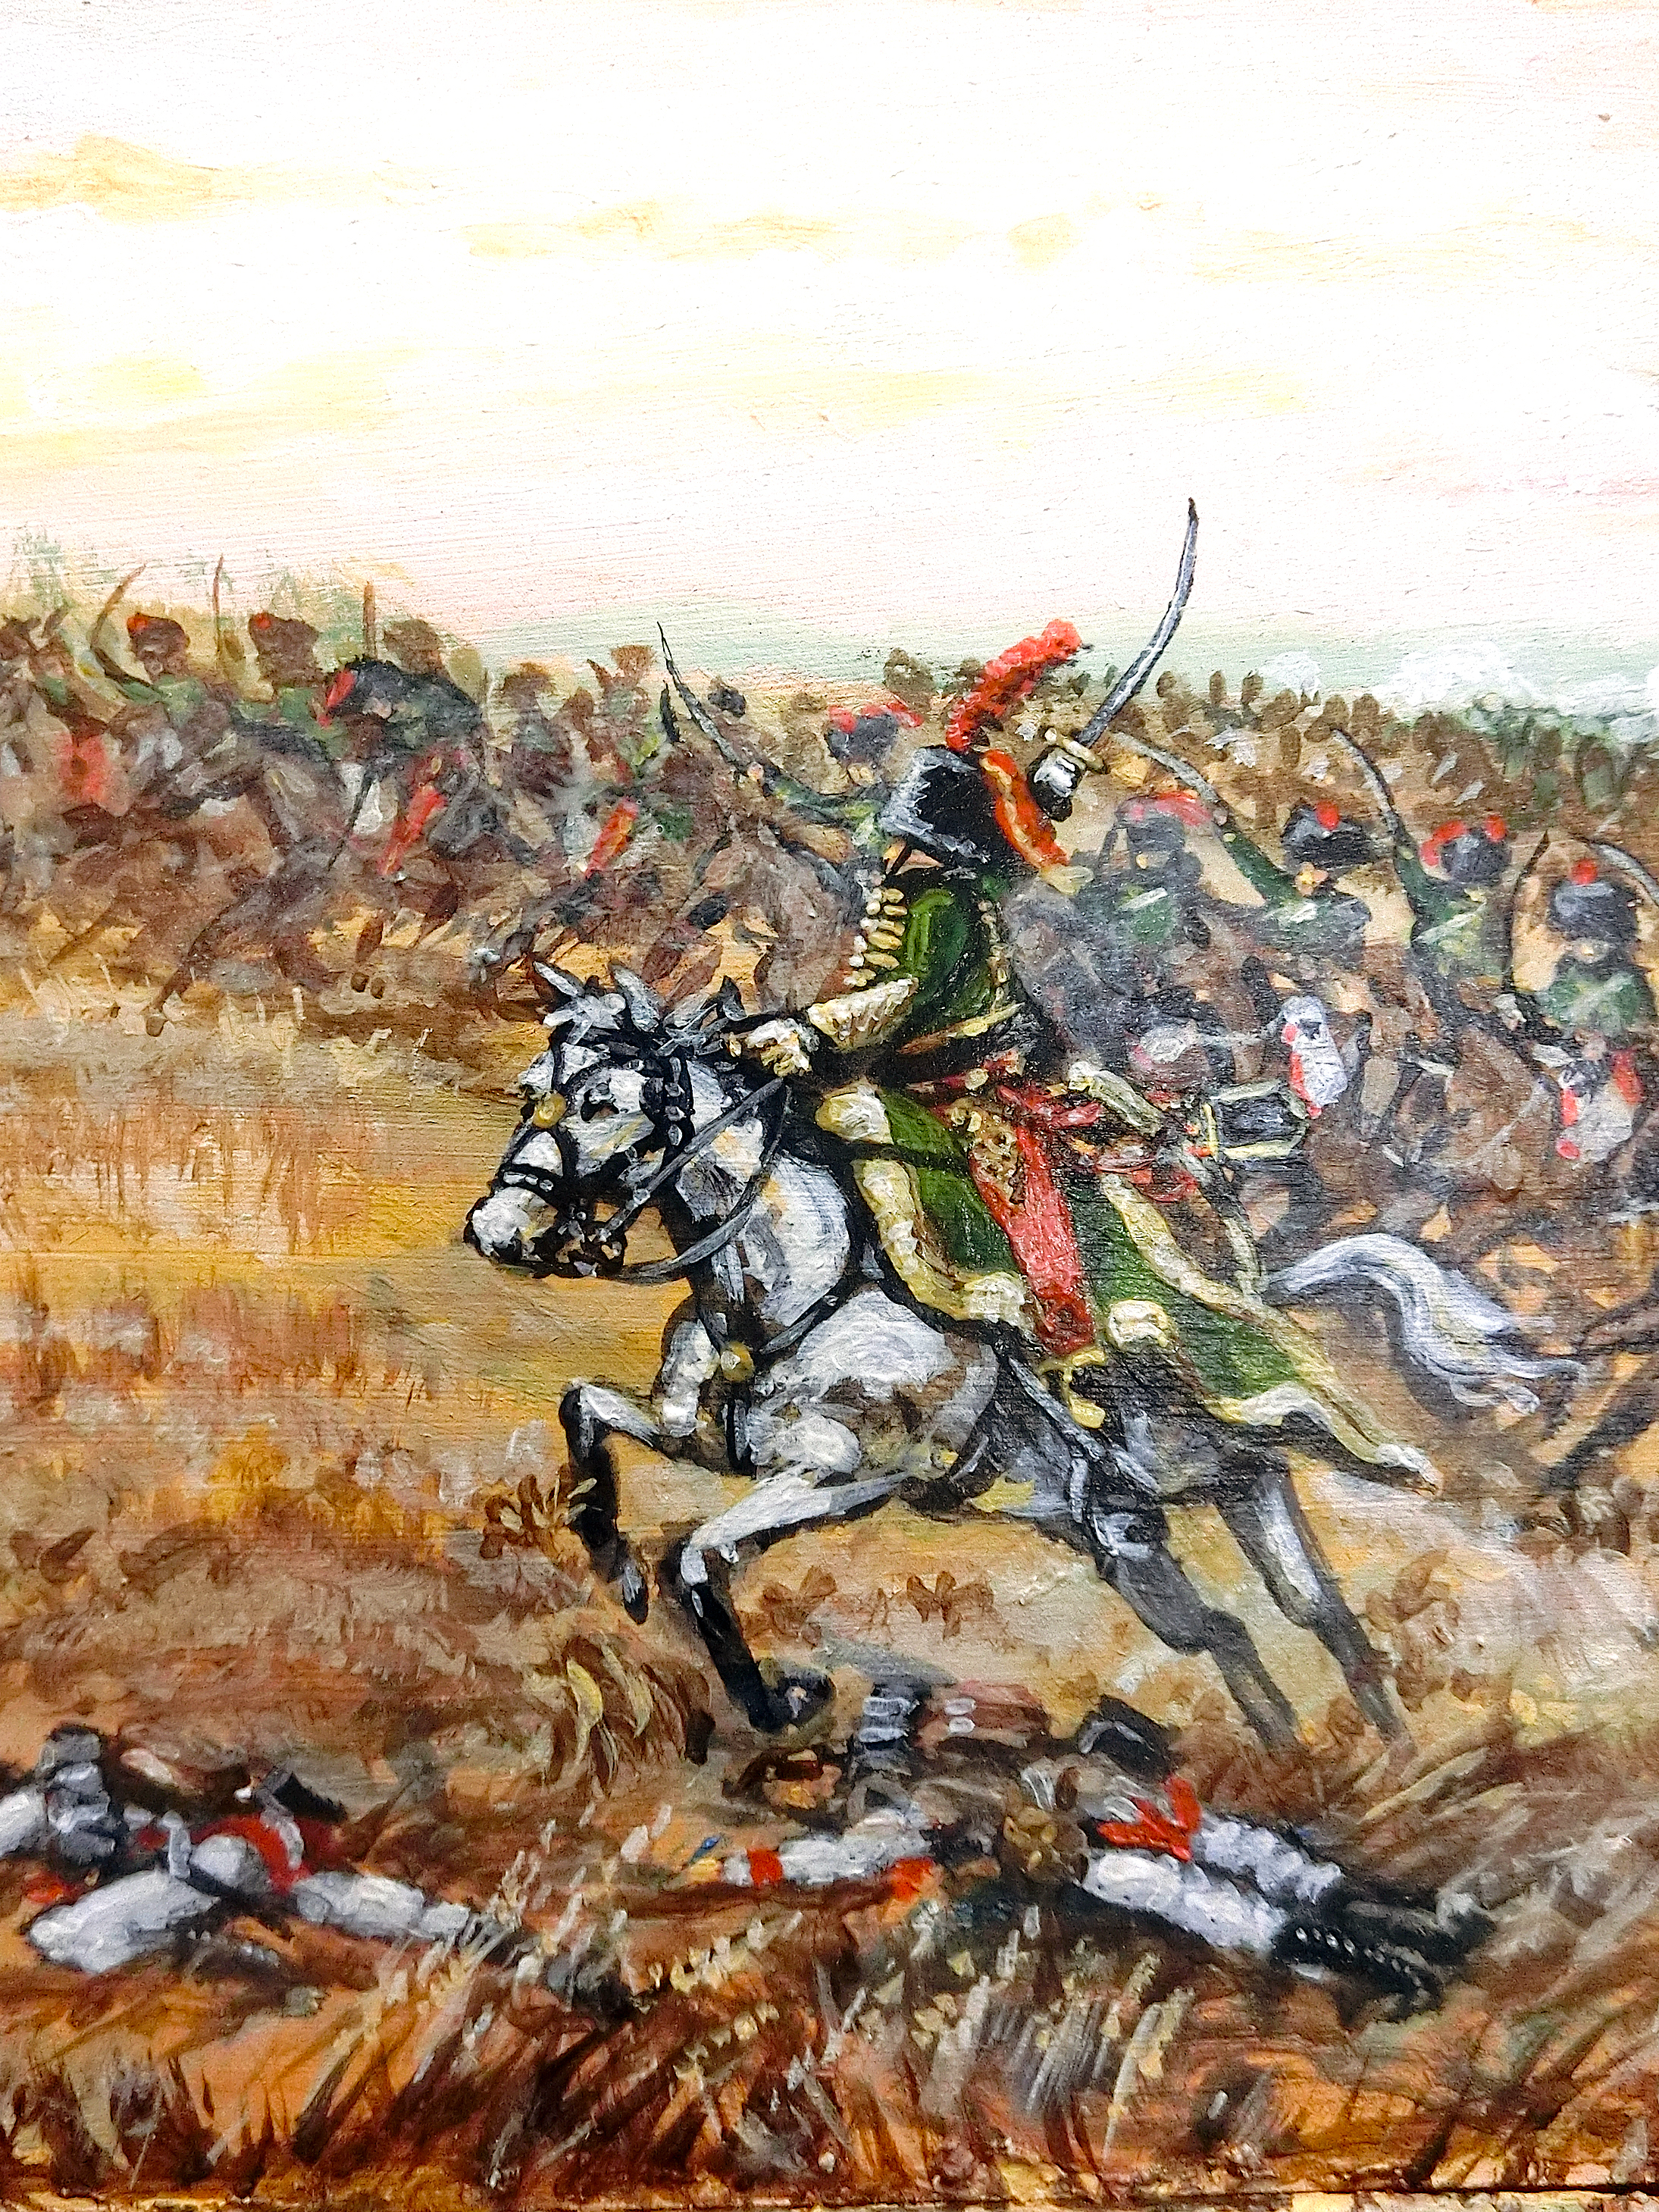
So I will leave you for now with a new painting I did, loosely inspired by the action yet to come in our game. I've called it "Montbrun's Division retakes the Westerholz high ground"
 |
| Original Acrylic painting on board, 20 inches x 8 inches. Late afternoon 19th April 1809 - Montbrun takes advantage of Hohenlohe's hesitation to let loose the 7th Hussars (painting for sale please email me if you'd like more info. Chris Gregg) |
 |
A Captain of the 7th Hussars Elite Company leads the charge
(inspired by the memoirs of Jean-Nicolas Curély
"The Life of a General in Napoleon's Light Cavalry") |
 |
| The 7th Legere in Westerholz are inflicting damage on the 8th Infantry Regiment, including its leadership. Smoke rises from a hasty volley but they are now unloaded...do enough senior officers remain standing to organise a battalion mass to resist the cavalry.......? |
Part Three very soon!


That's a great write up Chris, I just can't believe the trouble and depth you go to in order to re-create your actions. What an amazing talent to be able to put on a battle and then commemorate it on canvas afterwards! Can't think of anyone else that could do that!
ReplyDeleteHi Kerry - glad you enjoyed it - more to come soon. Well I seem to have been putting on canvas the ideas of other wargamers for some years now so when looking for inspiration - there's no place like home....!
DeleteGreat to revisit this battle after a few months away from it as it were. As always fascinating to see how Day One unfolded and the situation as it was set for Paul and I on Day Two. You really do get that feeling of the 'fog of war' with the blinds etc, as I certainly remember desperately trying to get scouts or units to see what was actually coming at my from over the Hausenburg, as I tried to defend the French right flank. That not knowing adds another wonderful level of friction IMHO. Looking forward to part two as and when time permits:).
ReplyDeleteGreat to hear from you Steve and thanks for your thoughts. I hope you will see from this it was far from easy stemming the rolling tide of Austrian superiority in numbers until your arrival. Must admit the Blinds don't look great but they did give, in my opinion, essential fog for this campaign.
DeleteHi Chris Wow ! An excellent battle report , thanks ! Your sketches of the initial position remind me of the wonderful games since 1969 .
DeleteSorry anonymous is me Graham Ward
ReplyDeleteGreat Graham. Thanks so much for your continuous enthusiasm for my games and the blogging. You have a long memory!!!
DeleteWonderful part two Chris. Your games really are such a pleasure to view as you’re attention to detail, beautiful eye for scenery, figures and photography make the battle reports incredibly entertaining. It’s wonderful that you’ve brought together like minded gamers to enjoy the spectacular table.
ReplyDeleteThat's so kind of you to say Carlo and glad you feel it is worth your time to visit the blog. It's what makes the hobby so special for me, to be able to bring all that into one weekend, with friends. Sadly my remote location (by English standards) means I don't attract nearly as many as I would like.
ReplyDeleteThis comment has been removed by the author.
ReplyDeleteThanks for an excellent write up and wonderful photos of the game.
Deletewell done for all your hard work and cheers for my Christmas card.
Merry Christmas and a happy new year.
Happy gaming,
Willz.
Thanks for finding the blog post Willz and for your praise. More to follow soon and hopefully a piece about that Christmas card
DeleteWow, I am so envious of your games room and table, I have to put up a temporary 6x4 table for a game which, as you will understand, takes a fair bit of time to get all the buildings and scenery in place before the figures.
ReplyDeleteIt looks like a great game and between my favourite opponents. I do wonder how the Austro-Hungarian armies would have faired if they had had better leadership.
Great artwork too Chris!
So glad Chris that you've managed to overcome the Google problem and commented. Hoping to work on the final part today so can tell you how things worked out. Balancing the generalship and unit qualities is a key part of how I'm adapting the rules. You can get some idea of this by looking at the orbats in the link I gave to my Downloads. Let me know if there is a problem. Keep at it with the 6 x 4. When I first started on 15mm 1809 as a young Dad with two small children I had to manage on a 4 x 4 in a box room so that makes my revival so much more special to me.
Delete