It's been a long time - July and September 2015 to be precise, but I still get the occasional email with questions, and often praise, for what we did then and which was mostly reported on this blog.
That was:
LHS
A three day long wargame refighting about 3.5 hours of the action round La Haye Sainte. The French cavalry and infantry assaults up Mont St Jean, and support from part of the Grand Battery near La Belle Alliance. In our game the French did not make quite enough effort in the time available and we declared it a victory for Wellington. That game has been reported in great depth on this blog - a summary and links are here......and terrain building here. For now just two pics as a reminder:


Apologies for taking 18 months to report this game. A three day long wargame refighting the French infantry attacks, over about 4 hours, on Hougoumont Chateau, Farm, Gardens and Orchards and then trying to gain a foothold on the lower slope of Mont St Jean. In our game the French upset history by pushing the British and Nassau defenders out of all the major objectives and even got a small way up the ridge behind.
For both these games it was difficult to keep track precisely of how many 28mm figures were in use, but it was probably about 3000 in each game and, allowing for about 1500 being common to both games, around 4500 figures over the two games from the collections of 6 wargamers. Each involved 5 or 6 players and two umpires on most of the six days.
I never got round to reporting Hougoumont properly till now, though there are several posts described making the terrain. So here is the biggest selection of photos yet posted of that game in progress. I am lucky though that, whereas LHS was "my" game, Kevin East has written a lot about this one which was "his" game really, so anything in italics are Kevin's words:
"The battle for Hougoumont…….history rewritten?
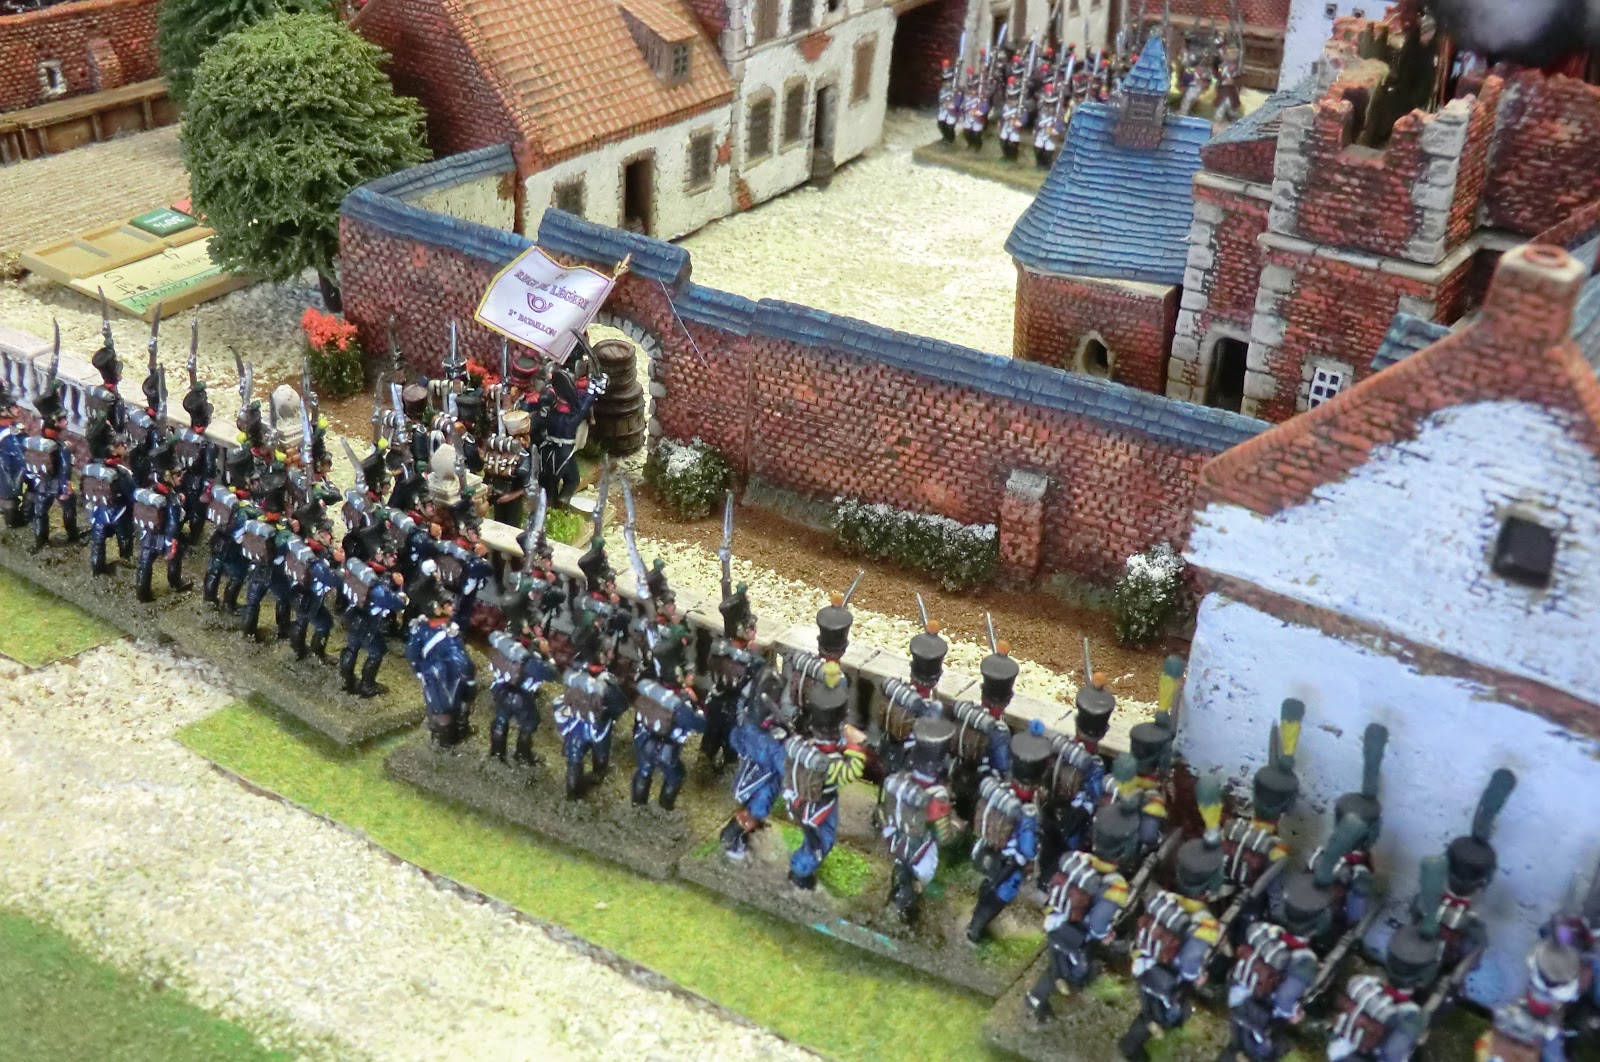
We were not out to re-enact the battle for Hougoumont in all its desperate struggle, but to concentrate on the main attacks by the French that were the most ferocious on the day and actually had a chance of achieving its aim. The main attacks by Baudin’s brigade (11.20 am– 12.30pm approx) and Soye’s brigade (12.30pm – 1.15pm approx) were the ones to concentrate on (some 13 French battalions at 1:3 ratio was quite a sight!). There was also to be a brief inclusion of the brigade commanded by Tissot from 1.45pm. The latter intervention, in 1815, was after a lull in proceedings which gave the brave defenders a chance to regroup, add reinforcements and build additional defences. Ready and prepared for what was to come.
In game turns the Allies could win if they prevented the French from achieving their objective by our close of play on the Sunday evening (3 days gaming). To do so they had to maintain control of all areas of the chateau complex (all buildings, courtyards, formal garden and orchards). To prevent the French from bypassing Hougoumont and so enabling them to attack the main forces on the ridge was also an important consideration. If the Allied units were forced away from the sunken road/covered way just to the North of the garden and orchard this would not have sufficed since if the French gained a firm grip on the road line there would be no cover for the Allies against a full frontal attack on the ridge.
The Allies and French each had a time chart to follow that did let them know what move forces were arriving but they were to make decisions as to where they were arriving on the table (with certain location restrictions – please see charts and aerial view diagrams ) at least two moves before it actually happened. This was to replicate the situation where the Allied commanders on the day saw a weakness and then tried to plug the gap through delivering speedy orders for the release of impatiently waiting troops. The French were given a similar opportunity and had to make several early decisions for the struggle to take the chateau. This, therefore, set the scene and the opportunity to change arrival locations (not times) for both sides, gave us an unpredictable wargame rather than a reproduction of the battle for Hougoumont that took place in 1815.
The Allies had several companies of Nassauers and Guards Light companies already on the table in Move One

ALLIED TIME CHART FOR HOUGOUMONT GAME
11th – 13th September 2015
MOVE NUMBER
|
TIME
|
UNITS
AVAILABLE
|
1
|
11.30am |
|
2
|
11.40am |
|
3
|
11.50am | DECISION: location arrival of move 5 units |
4
|
12.00pm |
|
5
|
12.10pm | Saltoun :arrives lt coys 2/1, 3/1 |
6
|
12.20pm |
|
7
|
12.30pm | Bull: Howitzer battery arrives |
8
|
12.40pm | DECISION: location arrival of move 10 units |
9
|
12.50pm |
|
10
|
1.00pm | Ammunition wagon Mackinnon: Grenadiers 2/C, 2coys centre 2/C DECISION: location arrival of move 12 units |
11
|
1.10pm |
|
12
|
1.20pm | Woodford: 4 coys centre 2/C |
13
|
1.30pm |
|
14
|
1.40pm | DECISION: location arrival of move 16 units |
15
|
1.50pm | DECISION: location arrival of move 17 units |
16
|
2.00pm | Mercer: 2 coys 2/3 gds DECISION: See umpire |
17
|
2.10pm | Hepburn: 4 coys 2/3 gds |
18
|
2.20pm |
|
19
|
2.30pm |
|
20
|
2.40pm |
The Allies will choose arrival locations two turns prior to units arrival on the table. (Please see time chart). The unit arrives on its move as indicated below: -
NORTH SIDE OF BOARD:7,8,9,10,11,12

FRENCH TIME CHART FOR HOUGOUMONT GAME
MOVE NUMBER
|
TIME
|
UNITS
AVAILABLE
|
1
|
11.30am | Baudin: 4/2 legere, 3/1, 2/1, 1/1 legere DECISION: location arrival of move 3 units |
2
|
11.40am | |
3
|
11.50am | 1/2, 2/2, 3/2 legere |
4
|
12.00pm | Engineer company DECISION: Arrival locations for move 6 units |
5
|
12.10pm | |
6
|
12.20pm | Horse artillery (units 41,42,43) DECISION: Arrival locations for move 8 units |
7
|
12.30pm | Soye: 1/1, 2/1, 3/1 ligne |
8
|
12.40pm | 1/2, 2/2,3/2 ligne |
9
|
12.50pm |
|
10
|
1.00pm | DECISION: Arrival locations for move 12 units. |
11
|
1.10pm |
|
12
|
1.20pm | Tissot: Brigade |
13
|
1.30pm |
|
14
|
1.40pm |
|
15
|
1.50pm |
|
16
|
2.00pm |
|
17
|
2.10pm |
|
18
|
2.20pm |
|
19
|
2.30pm |
|
20
|
2.40pm |
The French will choose arrival locations two moves prior to units arrival on the table. (Please see time chart). The unit arrives on the move with further delayed arrivals as indicated below: -
WEST SIDE OF BOARD:A,B,C,D
SOUTH SIDE OF BOARD 1,2,3,4,5,6.
ARRIVAL AT ALLOCATED MOVE: A&1,2,3
ARRIVAL 0NE MOVE LATER: B&4,5
ARRIVAL 2 MOVES LATER: C&6
ARRIVAL 3 MOVES LATER: D
In addition to this there was also the event and command dice rolls to be made by each side (before the start of each move) that aided specific events to happen that had occurred on the great day ……..a touch of good and bad luck was had by both sides in their replication here! (See the end of this post for a link to the briefing, orbats and other activity documents)


Wargame Changes from 1815…………..(as viewed by the defenders)
Allied left flank –the orchard:
Saltoun moved into the chateau complex straight away (in the game) rather than moving in and supporting those Nassauers in the orchard. This did lead to a quicker collapse in the left wing of the allies (a calculated risk by the allied commander) but the Nassauers did hold the French up enough so that Mackinnon could challenge the French at the sunken lane (just as Saltoun had done back in 1815). Mackinnon and his three units, given the challenge alongside the remaining Nassauers on that flank, were fighting hard by the end of the battle but were losing ground to the shear mass of advancing Frenchmen.
Allied centre - garden wall:
The Nassauers in the garden did not hold the wall as well as those from 1815. An unlucky morale dice throw threw them back from the wall for one move which gave the French a great chance to start climbing over. Only half a dozen Frenchman made that fateful decision in 1815 and were to lose their lives in doing so. Not so here, there were plenty of Frenchmen achieving this aim.
It’s strange that despite the terrific Nassau defence in 1815 I have not seen any contemporary images showing the Nassauers fighting in the chateau itself. Yes, they show plenty of British guardsmen but no visual feast of those lovely coloured Nassau uniforms that looked so resplendent, this time in model figure form on our miniature battlefield.
The chateau
Saltoun’s guards were to fight in the chateau alongside Macdonnel’s and the Nassau grenadiers. They held very well until the south gatehouse gates were destroyed ( you will no doubt be aware this did not happen in 1815) and their flanks were exposed. The north gate survived any incursion in this wargame although it was broken down in 1815 with roughly 50 invaders getting inside the courtyard. All losing their lives in doing so except for a French drummer boy. The war of attrition in the chateau complex was as fierce as on the real day. The defenders of the chateau becoming short on ammunition as in history. The much heralded arrival of ammunition in 1815 helped save the day but on this occasion the ammunition wagon was not to appear through the north gate as it arrived just as the French were attacking it. This was to spell the slow demise of a spirited defence of the chateau itself with many troops gradually being unable to defend positions fully. The gardener (Guillaume Van Cutsen who stayed in the chateau and helped load muskets) unfortunately lost his life on this occasion in September 2015 and his daughter was seen cradling her father. The chateau itself was also on fire as were a number of other buildings. The French howitzer battery, that was assembled to do this, achieving their aim just as in 1815.
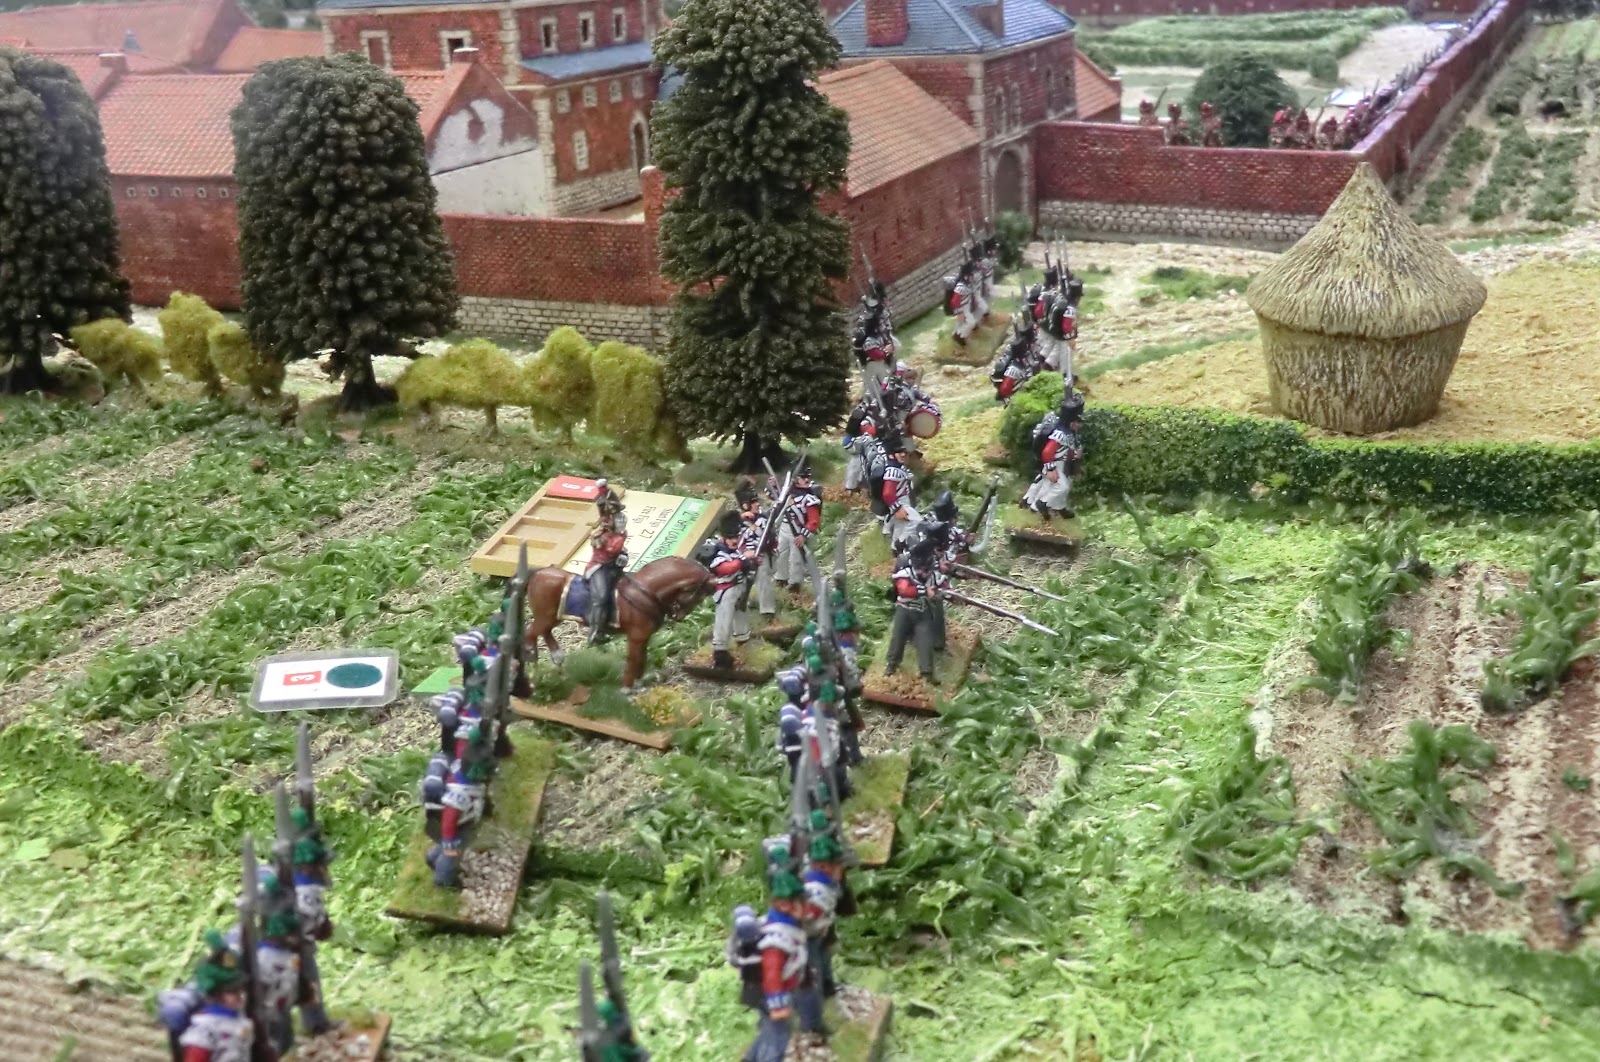
Allied right flank – the vegetable garden
This appeared to follow very much in line with history for the first part (a slow retreat by Macdonnel until moving into the north of the farm). Mercer and Hepburn were deemed by the umpire (myself) to arrive a few moves earlier than expected after having seen the desperate position the defenders were in. This shored up the right flank for a while and directly north of the chateau but they could not support those inside the walls of the chateau directly.
Lots more happening in the photos from Day Two. Richard took over the French aided by Paul D and Graham Ward; Tony Woodman came along to assist James with the British, Nassau and Hanoverian Light Infantry. Random elements introduced some Royal Horse Artillery and some Horse guns for the French too.
 |
| Attack on the South gate by pioneers |
 |
| At bottom left "L'enfonceur" forces the small West side door |

 |
| Graham and Richard sort out French battalions with Kevin's help |

 |
| A single RHA division had arrived on the right flank |
 |
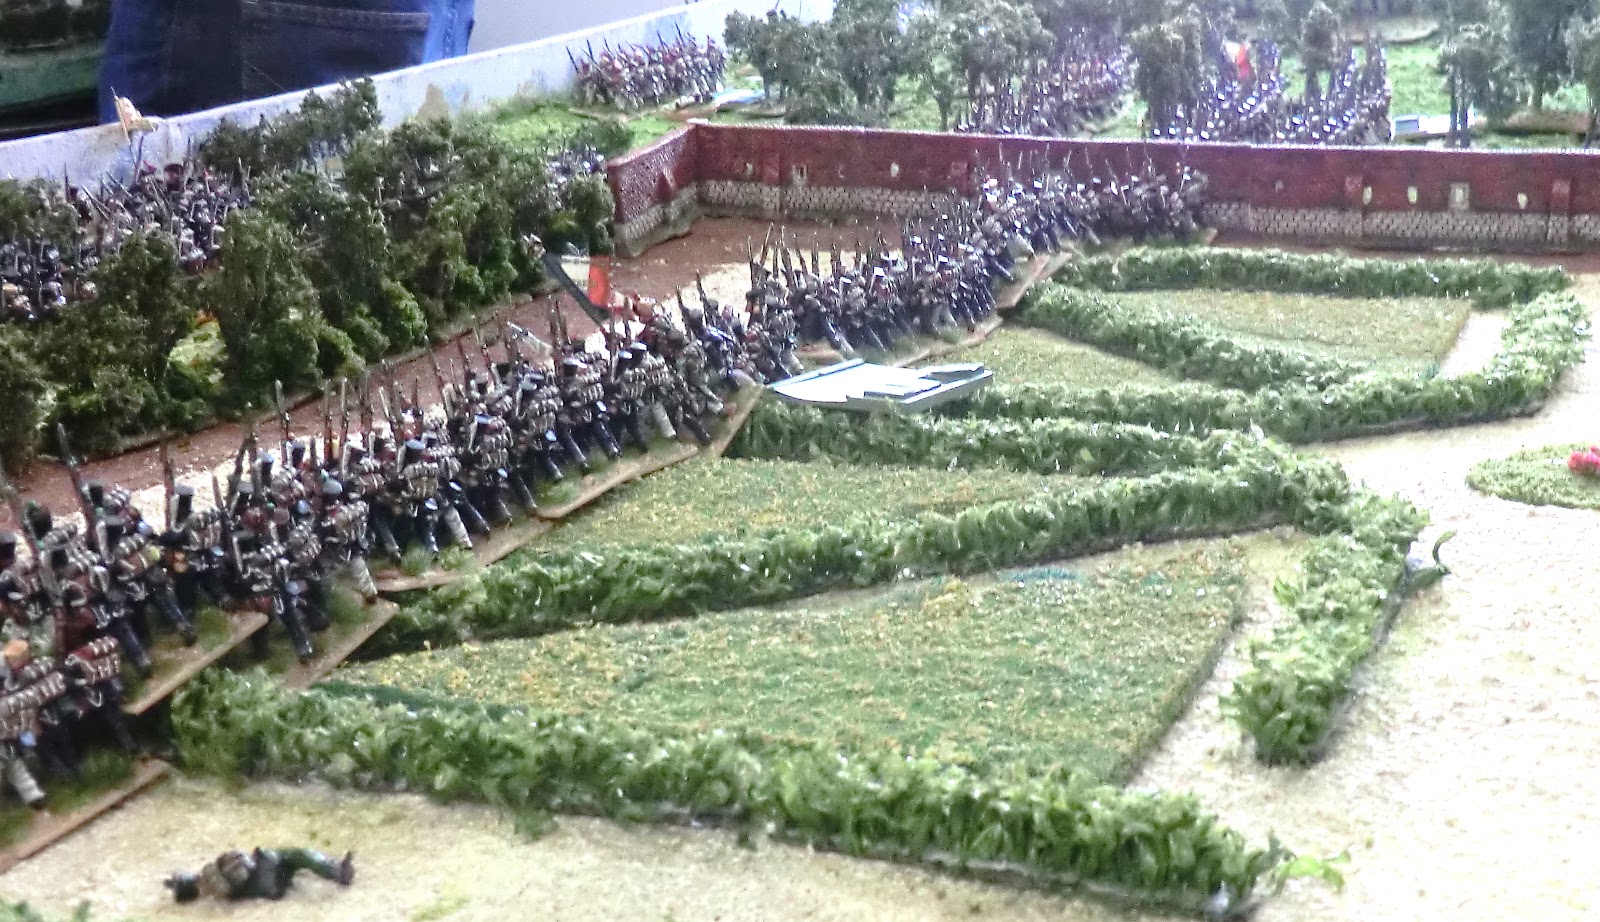
| Massive French assault on the Great Orchard, thinly held by Hanoverian light infantry |
 |
| View from North side of the formal garden |
 |
| James removes Nassau casualties from the small kitchen garden |


 |
| Temporary clearance of the approach to the North gate |
 |
| More French arrive on the extreme right flank |
 |
| French break through the South gate |
 |
| The RHA are overwhelmed and Guard Light Company destroyed |

 |
| Howitzers set the Chateau on fire |
 |
| Progress across the Great Orchard |
 |
| British defend the Great Barn while the Chateau continues to burn |
 |
| And the bodies of Nassauers caught by falling masonry. Photo by Kevin East |
 |
| Two more French battalions on the West side of the Chateau sweep past the abandoned RHA cannon |
 |
| British Coldstream Guards companies come down from Mont St Jean to help....... |
 |
| ...the Nassau infantry who had retreated to the "covered way". This and slopes of Mont St Jean were modelled on the 7 feet long extra bit |
 |
| British "off field" artillery were on the window cill representing Mont St Jean! |

 |
| No more opposition here so French infantry approach the North gate |
 |
| Nassau v. French hand to hand clash in the formal garden |
By the end of this day's play the French had got across the table through the Great Orchard, were threatening the North gate in great strength and had pushed the Nassau defenders right across the formal garden.
Must say I'm getting a bit excited preparing this blog and finding it difficult to exclude photos as there was so much going on! So here is Day Three and a lot more photos! Paul H. joined the British on this day, we were grateful to him for contributing quite a lot of the figures to this and the LHS game.
 |
| A wagon has been drawn across the doorway joining the two courtyards and a scratch squad defends it |
 |
| Nassauers still hold the covered way and try to enable the replenishing ammunition wagon to get through |
 |
| Above and below: 2nd Battalion of 1st Legere is making good progress across the garden and against the East wall gate |
 |
| A couple of battalions lay claim to the woods and ponds North of Hougoumont from where British reinforcements are expected |
 |
| Paul sizes up the view his Little Lead Men might get through the South gate and beyond, backed by an expert legal opinion from Richard :-) |
 |
| A good view of Graham's attack across the Great Orchard. The sky/smoke backdrop marks the edge of the covered way which in turn is shown by the hedge along the near edge of "the extra bit". Lower slope of Mont St Jean beyond with an imaginary gap leading up to British artillery on the ridge several hundred yards back. Smoke balls indicate some shelling from those guns - Bull's howitzer battery |

 |
| I believe that is the gardener and his daughter just to the left of the well tower |
 |
| The above sequence shows more of Bull's howitzer action against the 2/1 Legere at the East wall....... |
 |
| ..........and the effect inside the Great Barn near the North gate |
 |
| A Guards Light company defends the East wall |
 |
| Nassau Grenadiers are still just about holding in the upper floor of the South Gatehouse while French infantry have progressed through the gate and way beyond |
 |
| A weakened Nassau company prepares to defend the West entrance to the covered way, marked by my trompe l'oeuil photo effects on the backdrop |
 |
| Paul H looks pensive before bringing on more British Guards from the North side - with some justification! See below for their first volley,,,,,,, |

 |
| A French Line company organises itself for another attack on the South gatehouse. |
 |
| Tony senses things are not going so well for the Allies as he ponders all those Frenchmen in the Orchard |
 |
| But that ammo wagon is making progress..... |
 |
| ...........None too soon as Graham's French column outflanks the Hanoverian Jaegers at the end of the Allied line........... |
 |
| ........Then just in time another couple of Guards companies are despatched by Wellington down MSJ to try to block them. |
 |
| A desperate struggle ensues |
 |
| A British company defends the NW corner with musketry |
 |
| And the French bring up their pioneers with axes to the North gate....... |
 |
| .......while more Nassauers suffer from French howitzer fire against the stables in the North wall |
 |
| Volleys continue to be exchanged at the Northern edge of our playing area |
 |
| But there is some hope for the Allies as more troops come down from MSJ |
 |
| A wagon has been found carelessly lying around in the formal garden and is used by the 1st Legere to assail the East wall |
 |
 |
| All the Nassau infantry have now departed from the formal garden and small orchard leaving the French to carry on against the covered way...... |
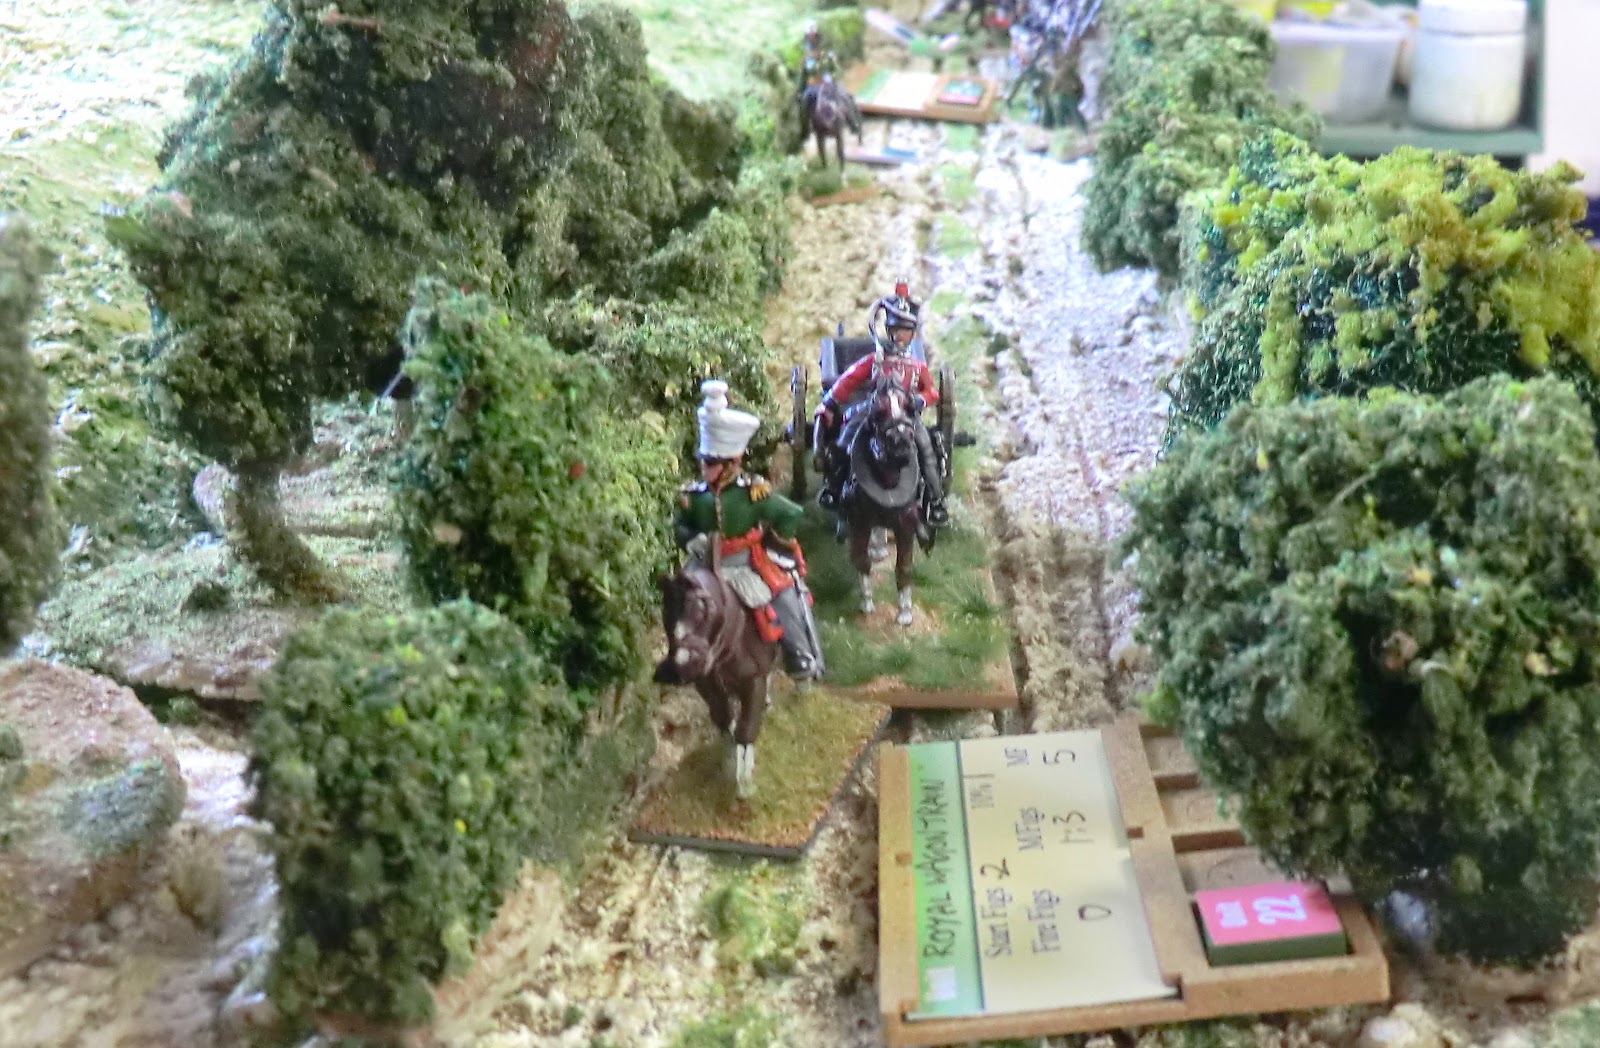 |
| ....where that Royal Wagon Train ammo tumbril is still trying to make some progress towards the beleaguered chateau |
 |
| This wider view of the East wall shows the struggle there and across to the North gate and then the French beyond seeing off some of Paul H's Guards! |
 |
| British Guards still contest their left flank though, using slight uphill advantage as well as better morale and fresher troops |
 |
| French Voltigeurs and Grenadiers try to force a way through into the North courtyard and Great Barn.......... |
 |
| .....where weakened British try to stem the tide now that the East wall has been scaled and crossed. The gardener's daughter cradles her dying Dad near the central tower |
 |
| The thin red line is forced to create a right flank defence behind the West end of the covered way...... |
 |
| ...and French infantry are already assaulting across it (bottom right) |
 |
| This overall picture shows the bleak situation for the remaining defenders of Hougoumont. Horse artillery had been brought up in case the walls or gates needed breaching at close range, but it has not been necessary |
 |
| The wagon party has realised they are too late to get through, so ammunition within Hougoumont continues to diminish |
 |
| With the Guards in front of them having retired these French grenadiers are probably entitled to a drink from a bloody pond! |
 |
| Some shattered French units try to recover in the shelter of the southern garden wall, and the artillery remain idle waiting for an opening to be useful |
 |
| This last view is where the valiant remnants of the Nassau grenadiers finally surrender the gatehouse |
Wargame Changes from 1815…………..(as viewed by the attackers)
The French were very fortunate in 2015. Many major incursions were made in this game, the orchard, the garden wall and south gate as already described. In addition to this the French also managed to gain entry into the west side building walls through a single unlocked door ( undefended and marched past in the real 1815 French attack). It was Lieutenant Legros ( L’enfonceur – smasher who broke down the north gate in 1815) who appeared at this unlocked door in the game with a lucky event dice throw to have a good chance of entry. That he duly achieved! More French pushed their way in.
The French stormed to a victory in this game and fulfilled their brief in most part as the chateau was about to fall totally into their hands as entry through the North gate was just about to happen. The allies were short of troops and short of ammunition, a joint combination that was to spell the end of a valiant defence.
Of course we could only provide a scenario relative to a short few hours but it was the hottest of activity for the purpose of the wargame.
This wargame scenario turned the result on it’s head from those days of 1815. A sad day for the Allies who were on the verge of surrendering in the chateau (some did) as they were unable to fight any longer.
A truly memorable set up with great scenery and lots of lovely figures to game with using bespoke rules to create the atmosphere of historic reality. It won’t be forgotten for a long while……….at least I hope not!
I feel as if we have barely touched the surface of this rich game as Kevin has just as many photos, many of them close-ups of his marvellous figures, or wide angles across the big battalions. However I think this is more than enough for now and I must save them for another post, except for these three by Kevin:
This one is just to prove I was really there and trying to do something useful - to explain to James how his Nassauers could get back into the fight at the garden wall:

A wonderful example of the effect of big battalions when a few nerds, er I mean enthusiasts, put their collections together:

And I was answering a call of nature when the gardener and his daughter tried to make their escape so I don't really know what happened - I think this is the young lady about to administer to a wounded Guardsman:

Thanks to all those who participated in this madness in any way, and to those of you who have given such unstinting support by your comments on this blog since 2013, please keep it up!
FREE DOWNLOADS
Specially created rules for Waterloo 1:3 scale wargaming:
Hougoumont Game Documentation:
Hougoumont FRENCH
Hougoumont ALLIED
Chris, This is a real labour of love and deserves a wider audience. Why dont you put together a series of articles for the wargaming press. It certainly deserves it.
ReplyDeleteHougumont was meant to be a sideshow at the actual battle until everything spiraled out of control. I remember when Peter Gilder refought Waterloo way back in the 1970's he used all the French Reserve artillery howitzers to set the place on fire. Simplistic but very effective. Of course that was only a game. Well done for your hard work and persistence.
Thanks Robbie. To be honest just keeping up the blog is demanding enough, and Kevin, James and I really do like the idea that other ordinary wargamers like us might get some use out of this material or just inspiration to do better. Your and their comments are sufficient reward and I don't see why the wargaming press should cash in on our hard work. This blog is free to the world and I get at least 100 hits a day, so who is not seeing it?
DeleteHistorically both Wellington and Napoleon concentrated howitzers on the Hougoumont area so we were just recreating it and it certainly helped the spectacle and the fun!
Chris. Utterly awe inspiring and blooming marvellous!
ReplyDeleteAbsolutely stunning Chris! Very inspirational too, might have to dig out my Napoleonics now and get the dust off.
ReplyDeleteValley boy, Kerry, from Down Under has asked me by other means to put this comment on:
ReplyDelete"That really is stunning Chris - I don't think I've ever seen anything comparable
Superb doesn't do it justice, it must have been an incredible undertaking"
Thank you Kerry. As the football managers say "It was team work wot dunnit, on the day the lads come good an' played a blinder, we wuz over the moon!"
What a treat to follow through the story and pictures of this utterly amazing project. I'm awestruck!
ReplyDeleteNow that was a very enjoyable hour Chris. So great to be able to view fellow Napoleonic Wargamers putting on such a Tour De Force in terms of visual appeal. Your groups enthusiasm and passion seeps through the photos and narrative for all to see. It is rare to see so many wonderful figures on a table which is as equally stunning and then to see the game turn out to be so playable as well which is a testament to your planning and management. The trifecta has well and truly been met.
ReplyDeleteLooking forward to Quatre Bras now mate!
Outstanding pictures here! A wonderful place (this table is awesome!) and spectacular close ups...Thanks for sharing!
ReplyDeleteThanks to all so far for your wonderful comments. As Carlo said, it was good to see this game follow through to a proper conclusion and all credit to Kevin for his detailed planning and thought about unit values and arrival times. Although we did try to give the French more chance in 2015 it was mainly by putting things in the random events that could have been available in 1815 and many of them came up at the right time.
ReplyDeleteWow what a fantastic game thanks for posting a real treat for the eyes!
ReplyDeleteWillie
Outstanding, Outstanding I say. Wonderful effort, great mini's and terrain, good write up, more detail then one could hope for and refreshing how freely you share this all with no reward but the communities words... Bravo, Bravo, Standing ovation.
ReplyDeleteInspired, Inspired I say.
Thank You.
Thanks very much Unknown. Could you please let us know who you are so we can attribute such praise.
DeleteI'm pleased to report that this enthusiastic Unknown is veteran wargamer Tony LaMorte. Thanks for your lovey comments Tony and for getting in touch. Chris
Delete