Once I had mapped out the potential areas for woods and orchards and painted them in on the textured terrain, I did some rough size calculations and then took a step back rather staggered at the amount of trees it would take if I made them at a size which would look "right". The effect needed for them to be sufficiently small to look, collectively, like woods and orchards, yet large enough not to look silly when peopled by 28mm miniatures. So they would be varying heights from 2 inches to 5 inches and hence, to fill the areas, I would need something like 160 trees.
For the basic armatures I still had a large number of Supertrees which I had bought in bulk from the USA about 10 years ago for my French and Indian War forests. Here is an old photo of my Supertrees in action during the 1756 risings on the Pennsylvania frontier.

And a link to the website
Instead you can always use twigs and add wire armatures for smaller branches
I had prepared three sheets of expanded polystyrene covered with PVA and paper to use as my working surfaces for the various processes as they involve lots of glue and spray paint. So, when the paper covering was dry I stuck all the bases with the pins into the polystyrene surface. In this way I could handle up to 50 trees in one hand! The eventual role of the pins will become evident later but I hadn't realised how useful they would be in stopping the light trees blowing away in the wind, as it was an outside job.
The next task was to get a selection of nails, preferably with fairly flat heads but of varying lengths. These would form the strengthening bases of the tree trunks to attach the Supertree pieces. In this scale fairly small nails were best but if you do standard sized trees for 28mm figures then galvanized nails such as for nailing waterproof covering on shed roofs are ideal. These were stuck to the bases using glue gun and generous amount of glue to form a kind of root. That dries quickly and now it's time to get your tree armature pieces and match them to each nail with more glue gun glue. This forms a solid trunk that is wider at the bottom and thinner as it goes up and in no time you have a forest of bare trees standing proud. Sorry no photos but please bear this in mind when looking at the next stages.
 |
| Above and below: trunks treated with coloured acrylic structure gel |

The above photos illustrate what could be an optional or different stage in that the only aim is to smooth out the combination of nail, tree armature trunk and hardened glue to make it look like a reasonably authentic tree trunk. I used brownish acrylic paint mixed with acrylic structure gel and continued this up onto the lower branches. If you like you can model this to make textured bark surfaces and roots but with 160 to do I was content to keep it basic. Any of your favourite fillers would do for this but I love the plasticised feel you get with hardened acrylic structure gel.
Now I got the spray paints out and had fun just spraying various shades starting dark with black or dark brown and moving through a lighter brown to a cream highlight.
 |
| Completed trees covered with spray paints |
I'd managed to buy packets of Javis Scenics in bulk at a reasonable prices and this is what I used.

These chunks need to be shredded into smaller "leaf clump" sized pieces that I could use with the shaker bottle. This is a bit laborious and messy but OK if you do it with your hands and the foliage inside a cardboard box to catch all the bits. Obviously if you don't mind the expense you can buy leaf style scatter in all kinds of sizes and use that. I even added in some home made green dyed tea leaves I had had for some time. Whatever you use the next bit is the most interesting and I'm grateful to Conrad Kinch on his blog a few years ago for putting me on to Woodland Scenics Hob -e-Tac for adding tree foliage. I got mine from John at http://www.track-shack.com/ and I would recommend him for good price and excellent service.
Next just get a big brush and a pot of Hob-e-Tac or use the brush they supply and coat all the bits you want to stick with foliage. It doesn't matter whether you use a shaker or by hand or dip the tree in box of "leaves" the result is the same. Just make sure you are doing it in box or over a surface where you can shake off the excess and reclaim it.

The Hob-e-Tac stays tacky for quite some time so there is no mad rush and you can add bits later if you miss some but it does dry clear and gives a pretty good bond.


The above photo shows my items finished for my purposes. When the Hob-e-Tac dried I went round touching the tops with PVA and throwing some light coloured scatter on them (a bit like my hedges). This is intended to catch the light and give a greater effect of depth. Finally the bases were coated with structure gel mixed with an earth colour acrylic paint and dipped in scatter mix to harmonise with my table textures and colours. The whole thing was then sprayed with a couple of coats of matt varnish to seal it all in as well as possible.
Just a warning which doesn't come across from the photos. I've been using Supertrees for years now and love the realistic effects you can get but they are not robust in the same way as those specially designed for wargames. I don't travel with my games so this is fine for me and when the bits of foliage inevitably get knocked off or a limb breaks I just gather them up and reuse later. So if you need to take them to the club or for a show demo game please wrap and protect them well.
Those drawing pins? Well, apart from assisting me greatly in keeping the tree bases secure during the making process, with the kind of terrain structure I described earlier I could push them into the cardboard/gloop surface and get the players to take them out when that space needs to be occupied by troops. They can then be pushed back in without damaging the surface when the troops move on.
Finally some views of the woods in action in our game
 |
| Vivian's Light Cavalry Division seen through the Frischermont woods |
 |
| La Haye Sainte orchard is very small in this scale of game |
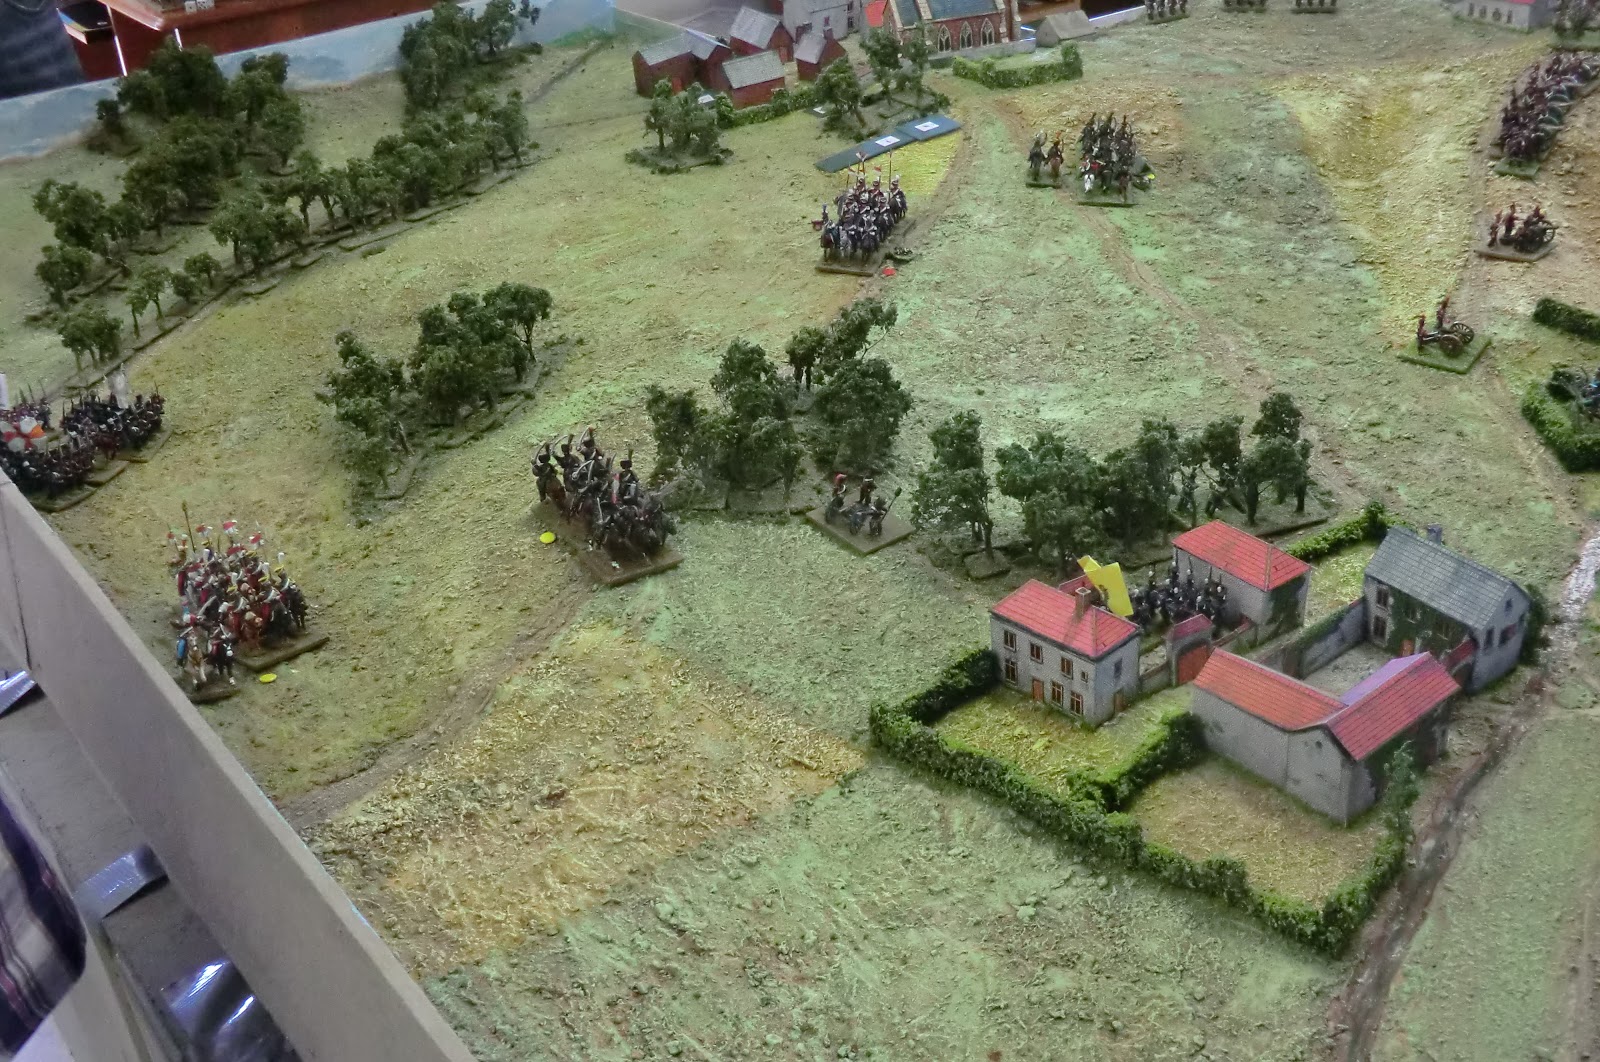 |
| The Prussians arrive stage left before advancing through woods towards Plancenoit. French Guard Light Cavalry have seen off Vivian |
I hope you have enjoyed this series of four posts on how I made the terrain and I look forward to hearing if anyone found it useful in their own projects. It will be a few days yet before I can find the time to report on our two-day "Waterloo 1" I'm afraid - there are over 200 photos to select from!
This I call a splendid tabletop! Great technique to make trees, efficient, fast and realistic.
ReplyDeleteIt´s a joy to look at every picture - thanks for this wonderful post!
Peter
Thanks Peter. Praise indeed from such a master of the model soldier craft as yourself.
ReplyDeleteVery impressed. Great looking trees!
ReplyDeleteExcellent job chris. The tree construction is a revelation to me . I really must find some of the acrylic structure gel....very useful stuff! The whole look of all elements of the terrain on the weekend was just perfect. So well done! It was undoubtedly the most spectacular game I have ever been involved in........but there are the 1:3 games that I hope will be even more impressive! A job well done chris!
ReplyDeleteFantastic!
ReplyDelete