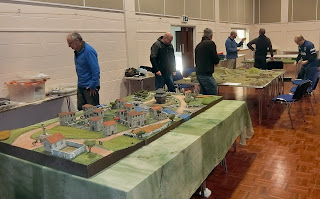
Thanks to the efforts over the years of Keith and Jane Flint to put on a semi-public event in our region I'm a very proud "Cotswold lad" to support and attend our annual games day in Northleach, Gloucestershire, which this year, was on 15th October.
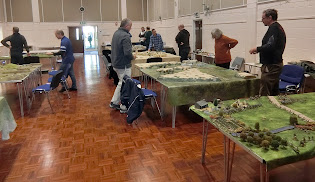
Keith has a policy of opening his community hall to those far and wide who want to put on a game for participation of others, or just to play a mutual friend from the other side of the region who would otherwise remain distant. In one case a local club puts on a game by and for their members but also open to visitors. Theoretically it is growing - this time about 30 attendees, but there would have been 10 games but two had to cry off so there were 8 on the go at various times. I'm very pleased to say we had three wargamer wives not just in attendance but playing and taking an active part in conversations. A bonus was that I got to meet the "real life Amélie" Hussarette whose painting I sold at this event last year! (the likeness was just by chance but close enough even to fool her son!)
Many come from local towns and villages like me, but there are games staged by practitioners from many locations in the South of England. We missed the presence of Willz Harley (of "Wild Geese"/Spencer Smith fame) from Plymouth, but that gap was ably filled by another itinerant Wild Goose - Tony Dillon from Birmingham. At least one visitor came from "up North" - Cumbria, for his second go at a CWD game.
As usual my report is limited by my rare opportunity to try something different and play in someone else's game. That meant, apart from a quick look at setup time when not everything was ready, I had a very quick tour round the games during my lunch "break" and tried to have a brief chat at every table. Thanks to everyone for putting up with an interloper asking questions.
I had taken the precaution of signing up in advance to Ian Bailey's Indian Mutiny game. Ian is a Cotswold resident (that "Royal" town of Tetbury) and I've had the pleasure of entertaining him once at my den, so it was great to at last be using one of his magnificent armies and benefiting from his knowledge and experience as an umpire.
 |
| Mike, Tim, Ian and Paul setting up and photographing the Indian Mutiny game |
A lot more on that later, but now a quick tour.
Art Exhibition
Keith kindly lets me set up a stall to advertise my military and Hussarette art
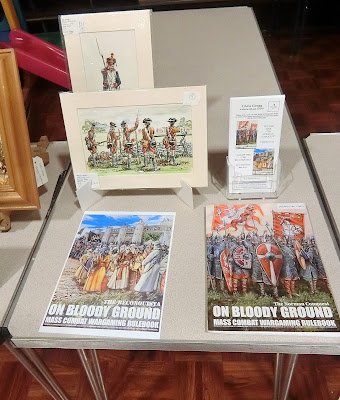 |
I had a copy of Volume One of "On Bloody Ground" rules,
"The Norman Conquest", for inspection, and a handout.
Original acrylic paintings for the covers are coming on steadily.
More details if you need them in an earlier post "On Bloody Ground" |
 |
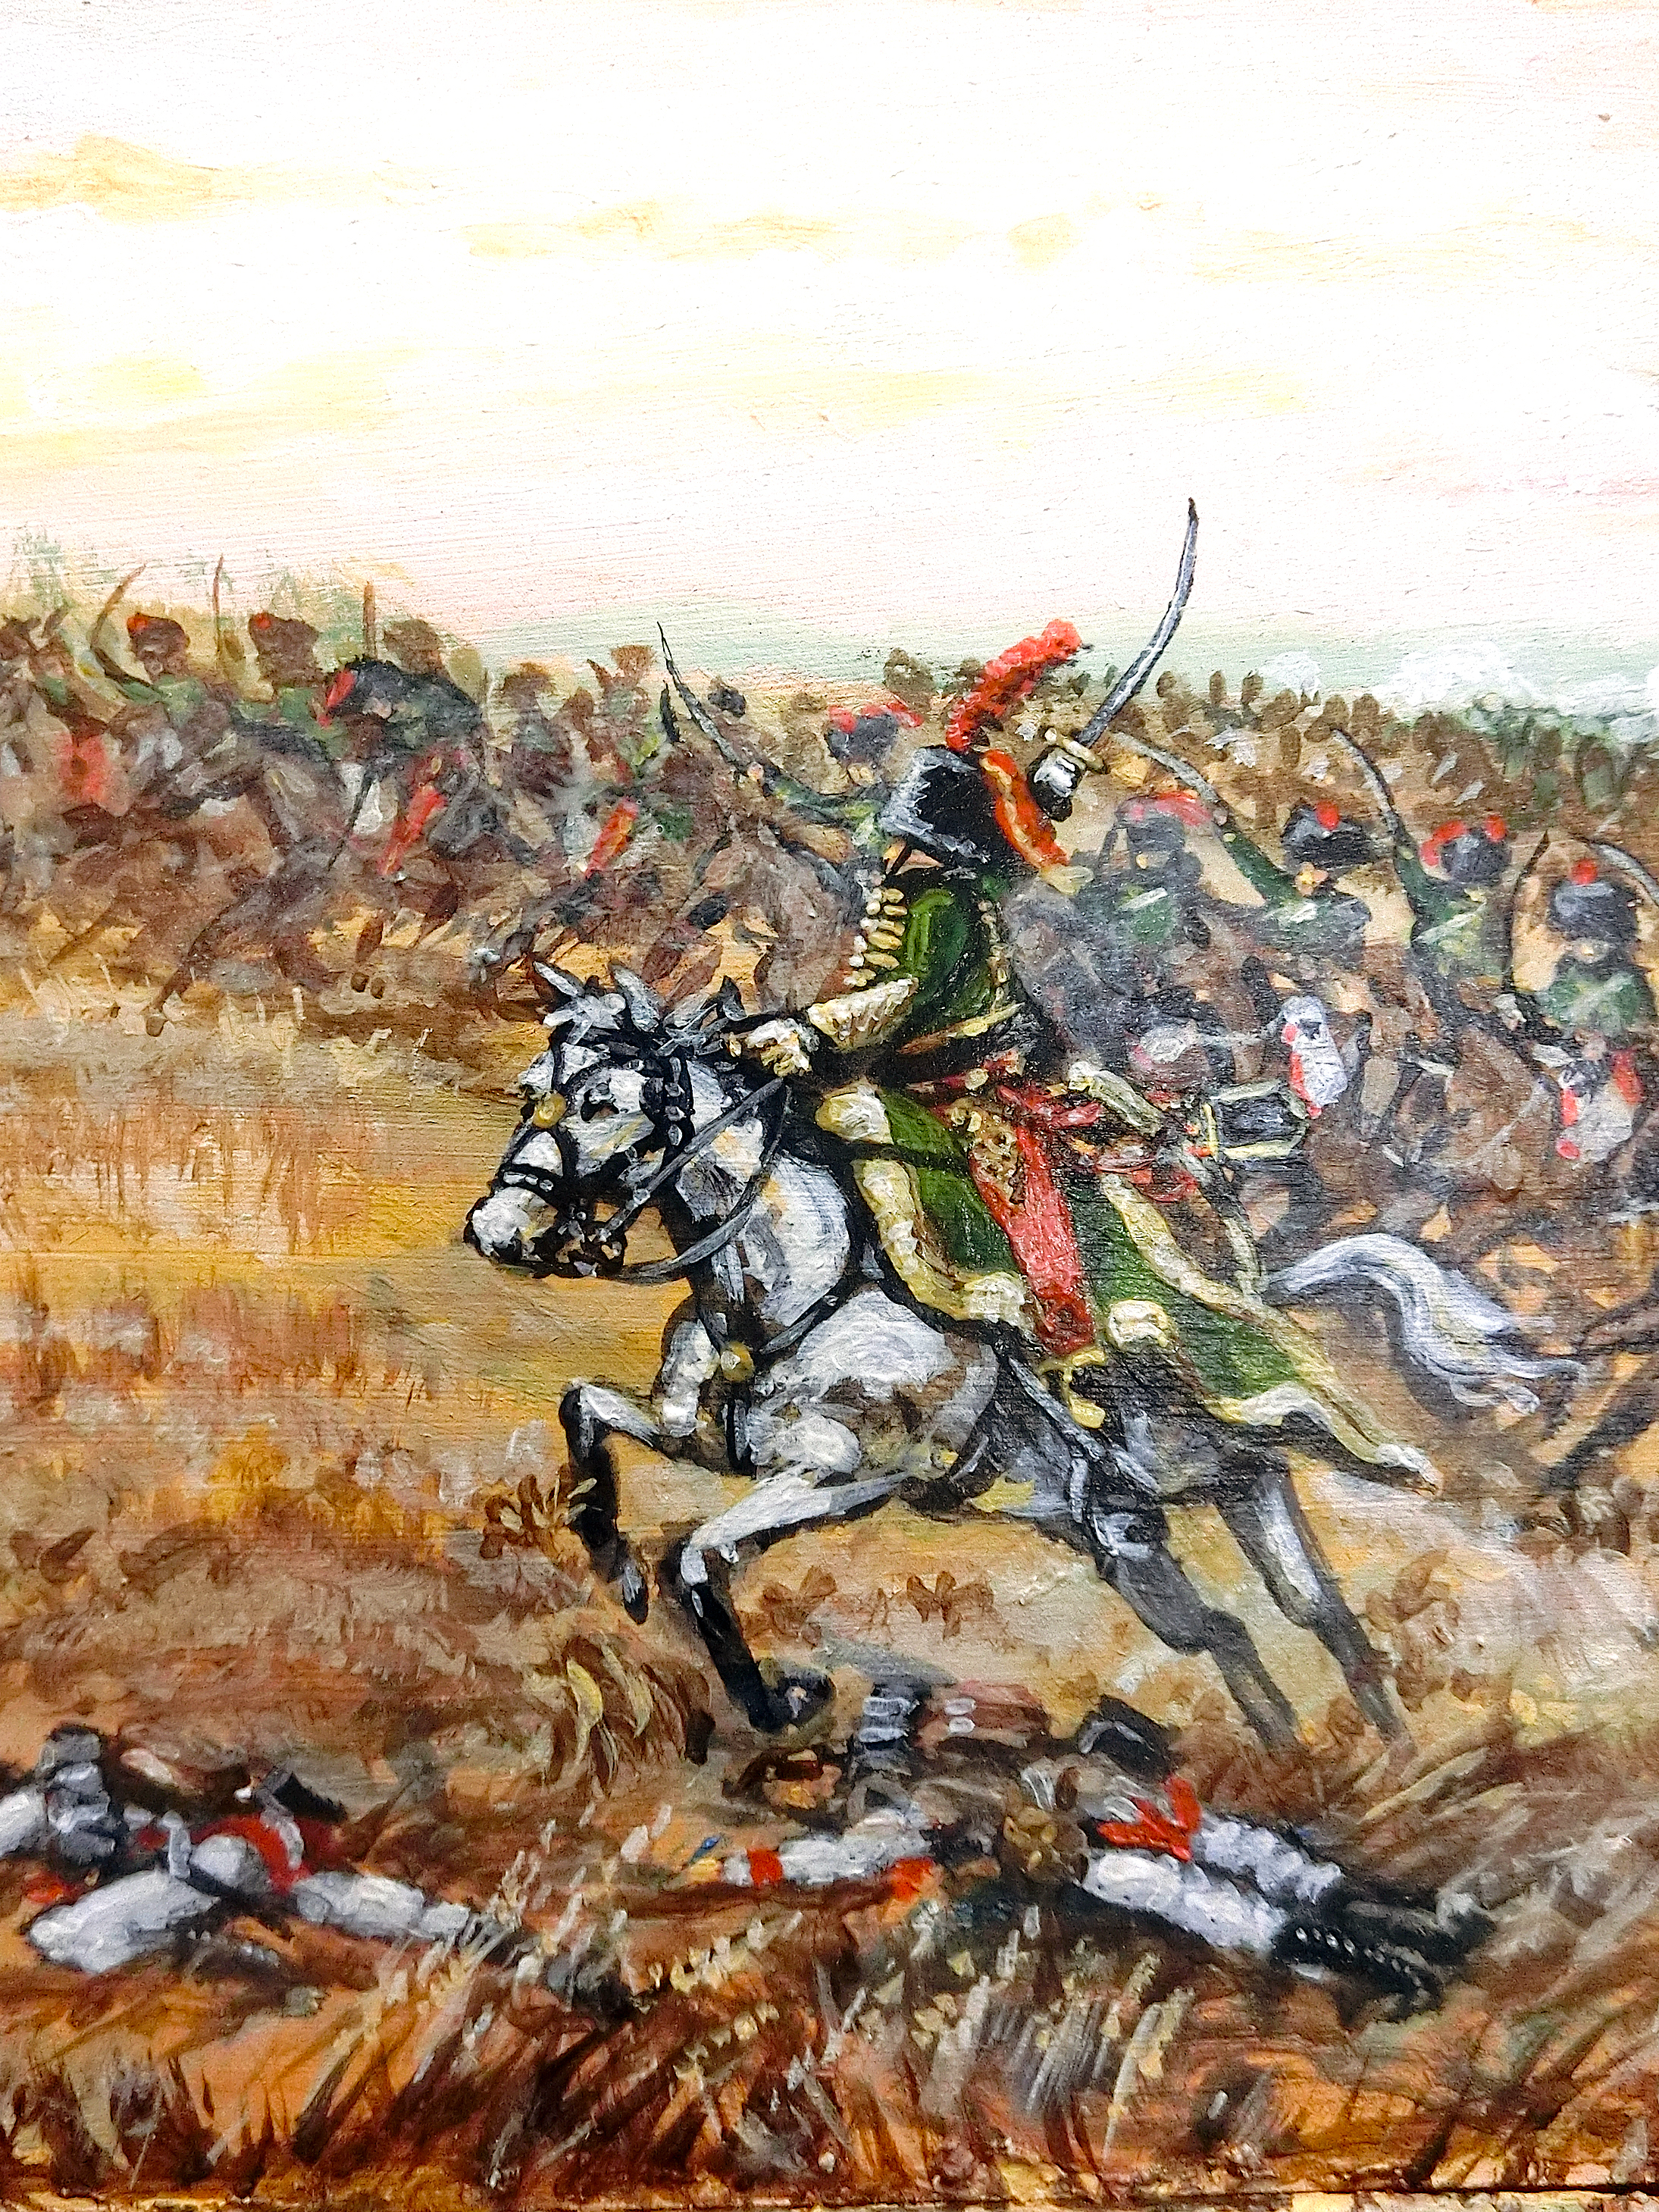
A clutch of small Napoleonic themed water colour and pen miniature
paintings set off a larger, framed, acrylic battle scene.
I plan to do a blog feature on that painting shortly |
Imagi-nations India in 1755
 |
| Steve Johnson showed off his modelling skills to the full with a superbly neat mid 18th century game set in India, in 10mm. This is an alternative history/imagi-nations campaign set in 1755 with the French having sent off their Jacobite hangers-on to India to help fight the Honourable East India Company over trading profits |
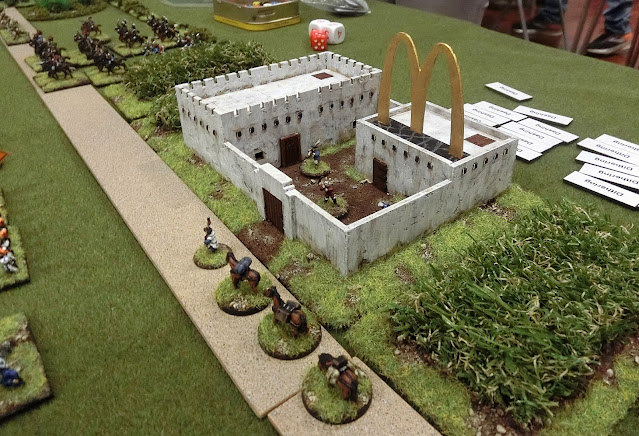 |
| One Ranald McDonald, an enterprising Scot, had set up a factory to manufacture a potent rhubarb drink called Urn Bru. evidently much coveted by the Franco-Jacobite army. Steve was adamant the emblem is merely a Mughal arch characteristic of the cultural architecture of the time (!)😇😆 |
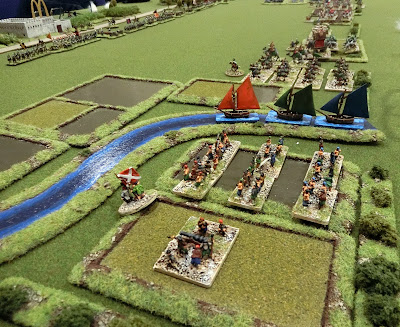 |
| 3D printed boats look the part |
You can see and read a lot more about Steve's game, and others, on his excellent write-up of the day here
Early World War Two desert
I've a weakness for 10mm WW2 models (my collection doesn't get out enough) so was keen to peruse this one - a brigade sized action at the Battle of Sidi Barrani (December 1940). they even had the Royal Navy bombarding the town. The organisers were at pains to apologise to me for the base coat only paint jobs so far - never mind chaps as long as you had a good game, we've all probably got that guilt somewhere in our past (I know I have - oops!). They were using "Blitzkrieg Commander" rules, which I've always promised myself to have a look at one day.
Here is another one - early war must be popular
Syria-Lebanon 1941
I wasn't told personally but got it from Steve Johnson that this was an excerpt from
Operation Exporter,
which I knew nothing about but it was Australian/Commonwealth/Arab forces fighting the Vichy French and the locals to stop the Germans mounting air attacks from Syria and Lebanon against Egypt.
Correct me if I'm wrong, the figures look German and Italian to my untutored eye. Whatever, I thought this looked great; getting desert terrain to look coherent with buildings is not easy and in 28mm scale for Bolt Action I thought they did a grand job.
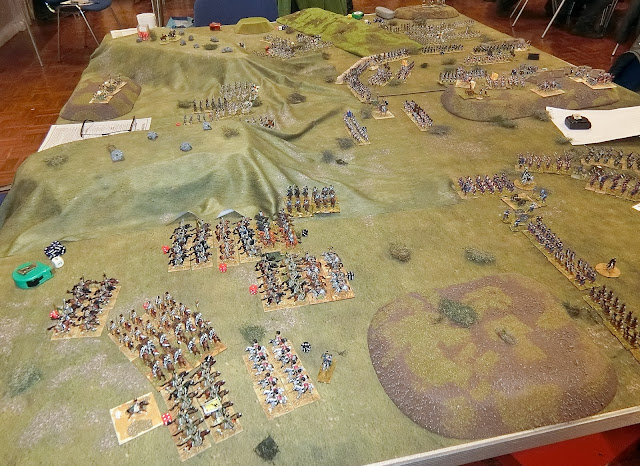
South American Wars of Liberation
Tim Cull advised that this was based on the
Battle of Maipu (1818) during the Chilean War of Independence between South American rebels and Spanish loyalists. Very colourful 28mm armies in Napoleonic French/Spanish/Portuguese style uniforms so initially I mistook it for Peninsular War! The rules were described as those "developed by US enthusiasts over several years". Super effort.
Judging by this 1837 painting the hills really were that steep
Crimean War
Sadly I only took two photos of this one which I understand is the
Battle of Inkerman. I came up to Stuart C to ask him about it and firstly was told the figures were from one of Roy Boss's many collections. I then noticed Roy was sitting there and free to talk to. I hadn't seen him since 2019 so had a lot to catch up on. This totally distracted me from concentrating on the game which is a shame as I would have enjoyed getting into the detail. They look like classic 1970s 25mm to me which is one of Roy's specialities. Apologies Stuart and Roy you deserve better than my cursory look.
 |
| French in the foreground and British manning the redoubt |
 |
| Cavalry of both sides mixing it in the foreground while the big Russian infantry columns close in at the top of the picture. |
Anyway Stuart has now published more photos of this great looking game on his blog
Cirencester Wargames
American Civil WarI learned that this nice looking game was based on the historical action around Stone Bridge, part of the battle of First Bull Run (1861). They were using Sharpe Practice rules which one usually associates with skirmish gaming, but I was told they took the basic 8 figure squads from SP and combined them into threes to make battalions/regiments of around 24. Thus it was a brigade level battle and looked really good.
Napoleonic Peninsular War
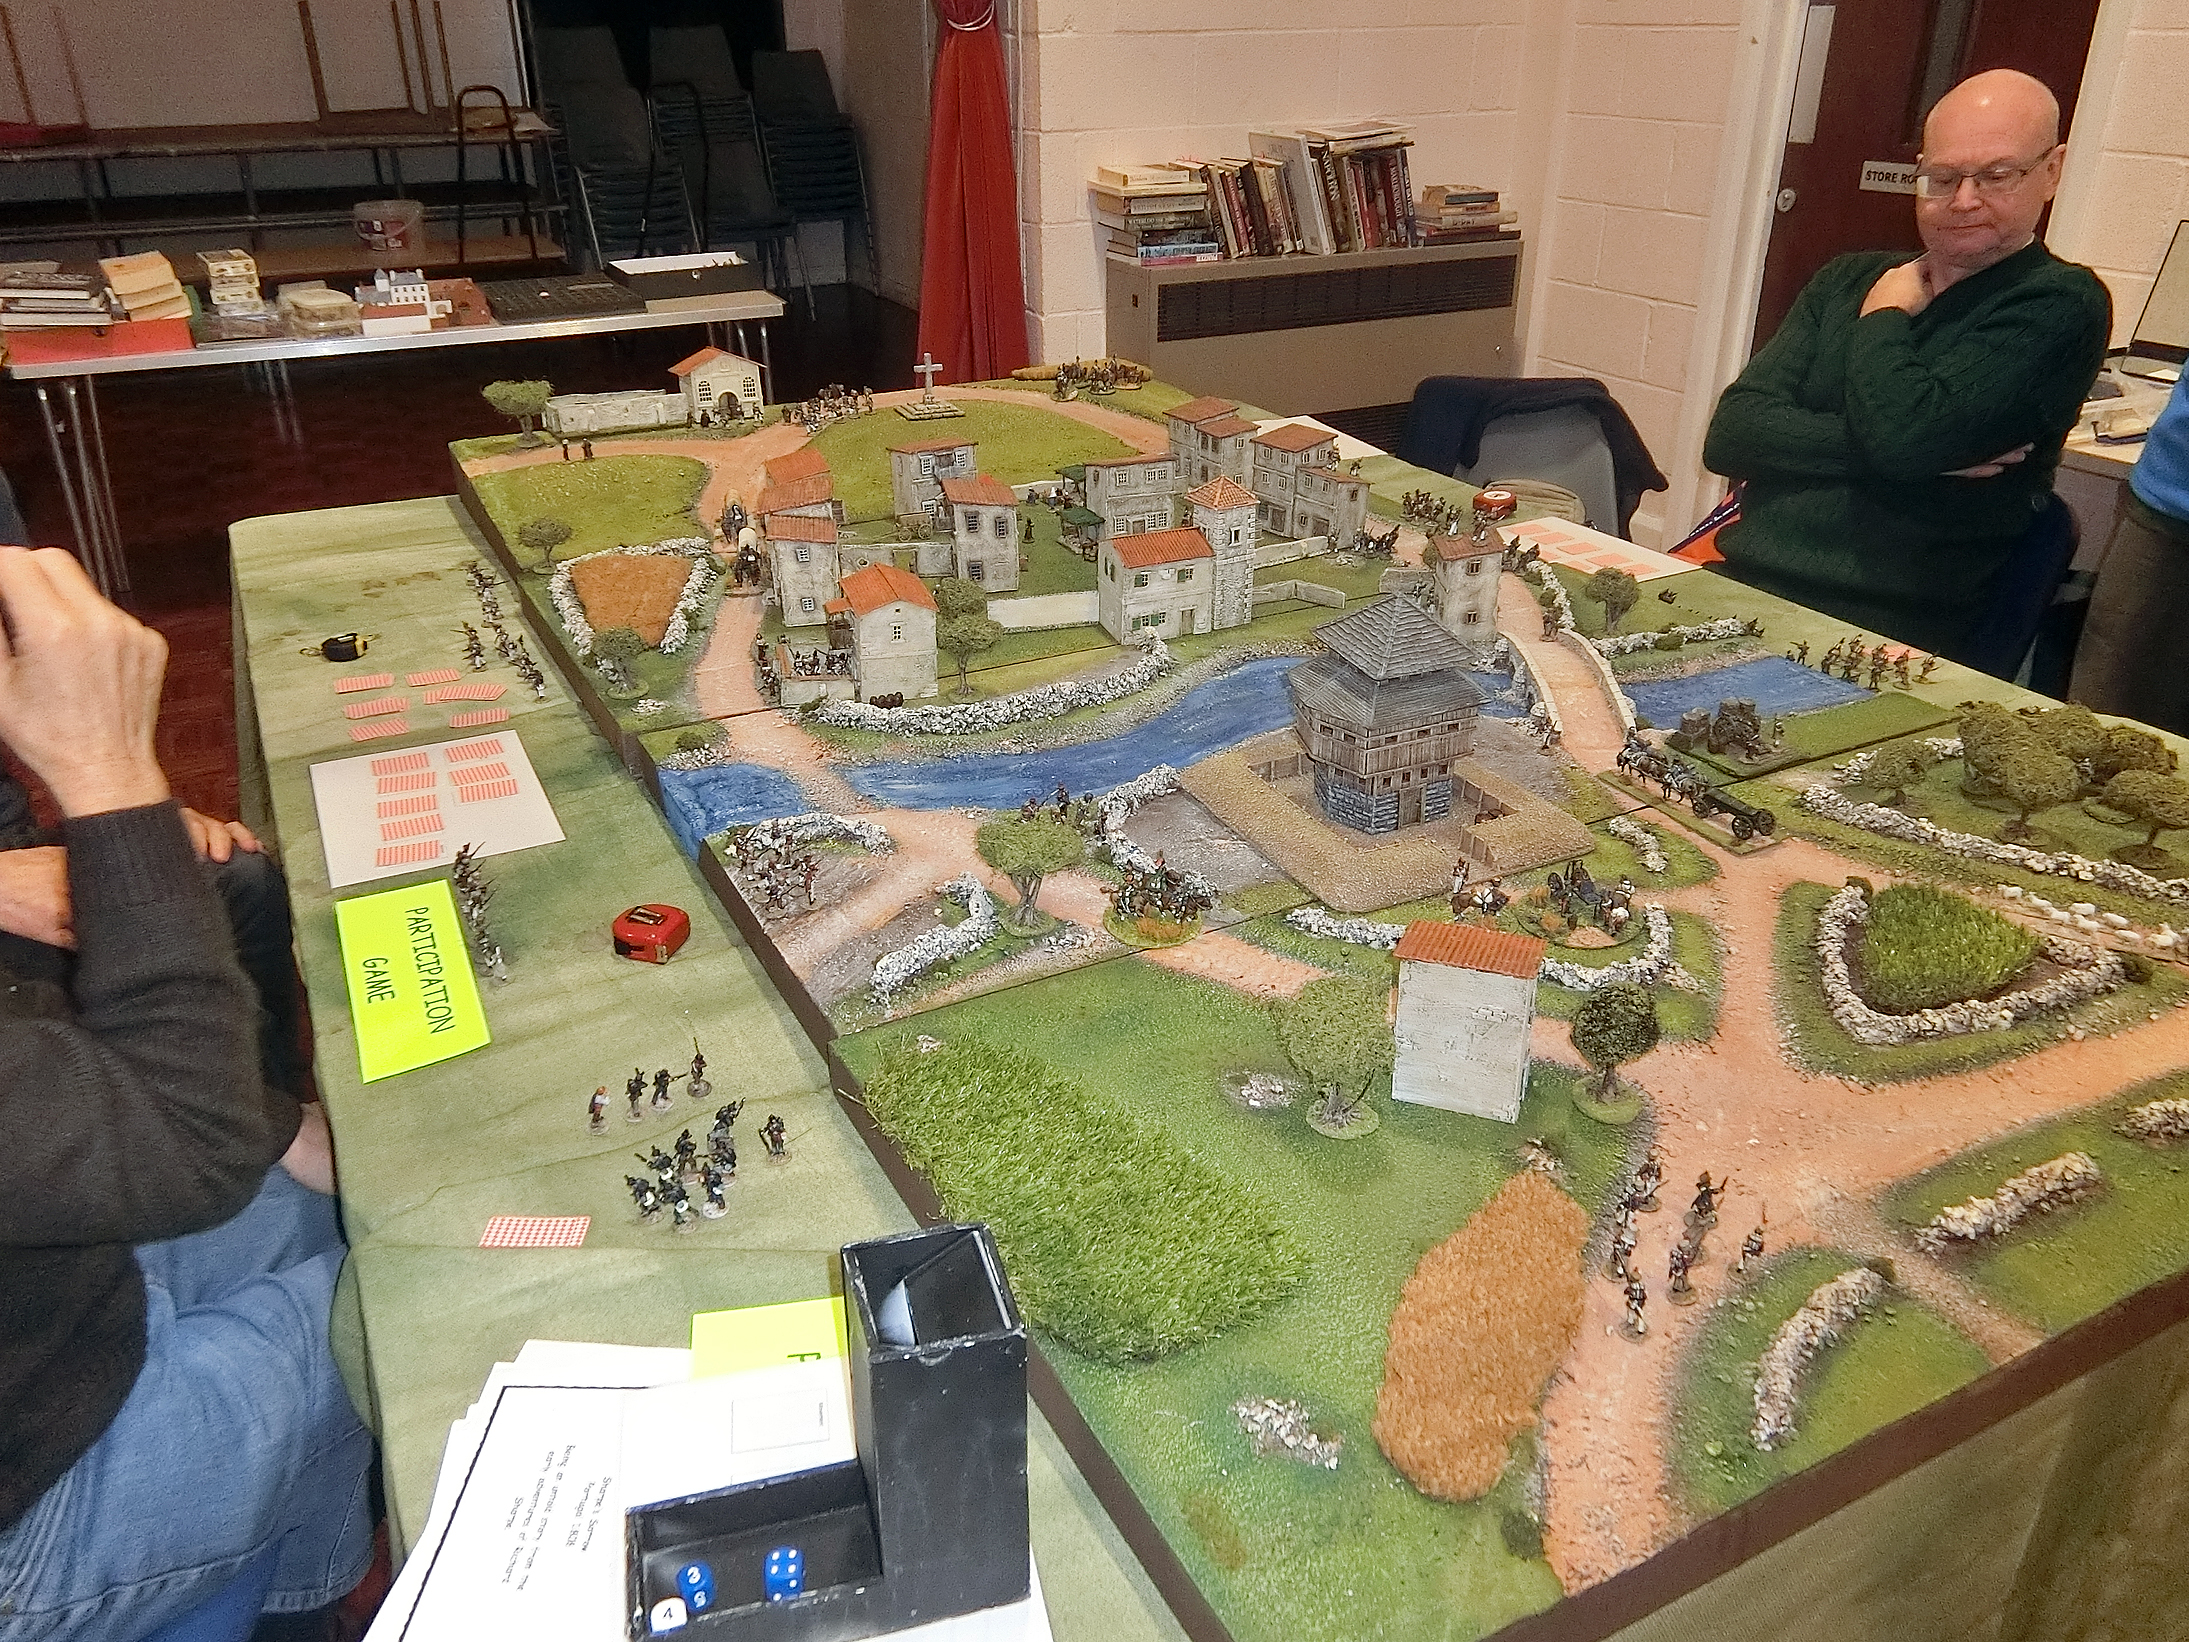
I had invited my old friend Tony Dillon to join us for this day. Not a Cotswolder but a Liverpudlian living in Birmingham, I hoped it would be worth his travel time and expense. He decided he'd like to offer us the chance to play a variation of his go-to game of choice for shows - using his own rules system based on a standard deck of playing cards, redealt to each side each move to determine movement and firing and called "Napoker". I've no idea what the scenario was this time except a variation of "Sharpe's Sorrow" which I played at the Wild Geese get-together in about 2019 and for which he won "Best Looking Game". You can see why from these photos at CWD 23. Tony got to organise two games during the day including one between Keith and Jane Flint, and declared it "A grand day out in a convivial atmosphere"
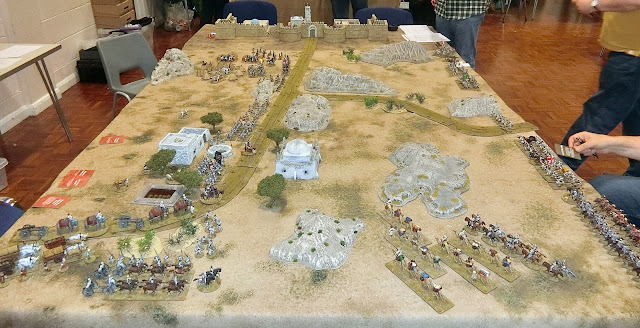
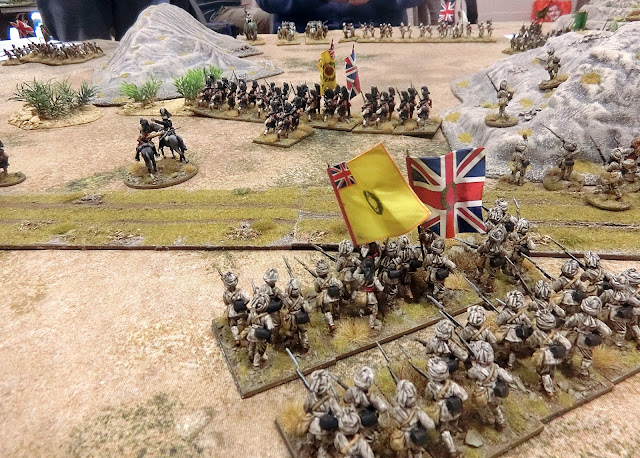
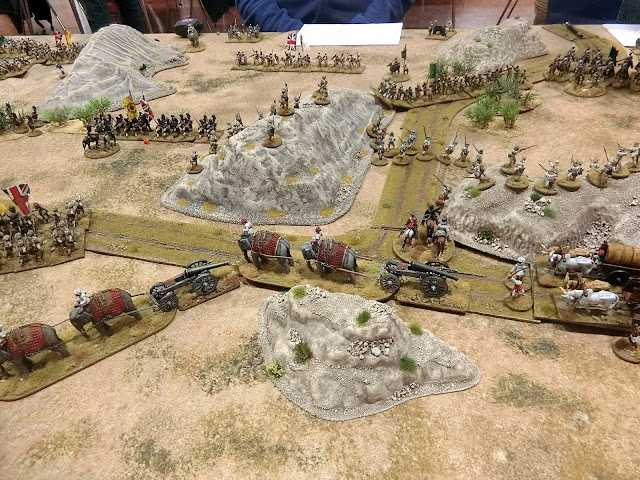
Indian Mutiny - “The Siege of Norfleesh, 1857”
Back to the main event for me, a magnificent game in 28mm using mostly Empress Miniatures and Ian and Paul's variations on "Mad Dogs and Englishmen" colonial rules by Jon Sutherland. It was designed for two players per side - I met Mike Richards here last year and so we combined to play the British. Our opponents were Paul of Empress and Tim as the Mutinous Sepoys. (See here the great ranges marketed by
Empress Miniatures).
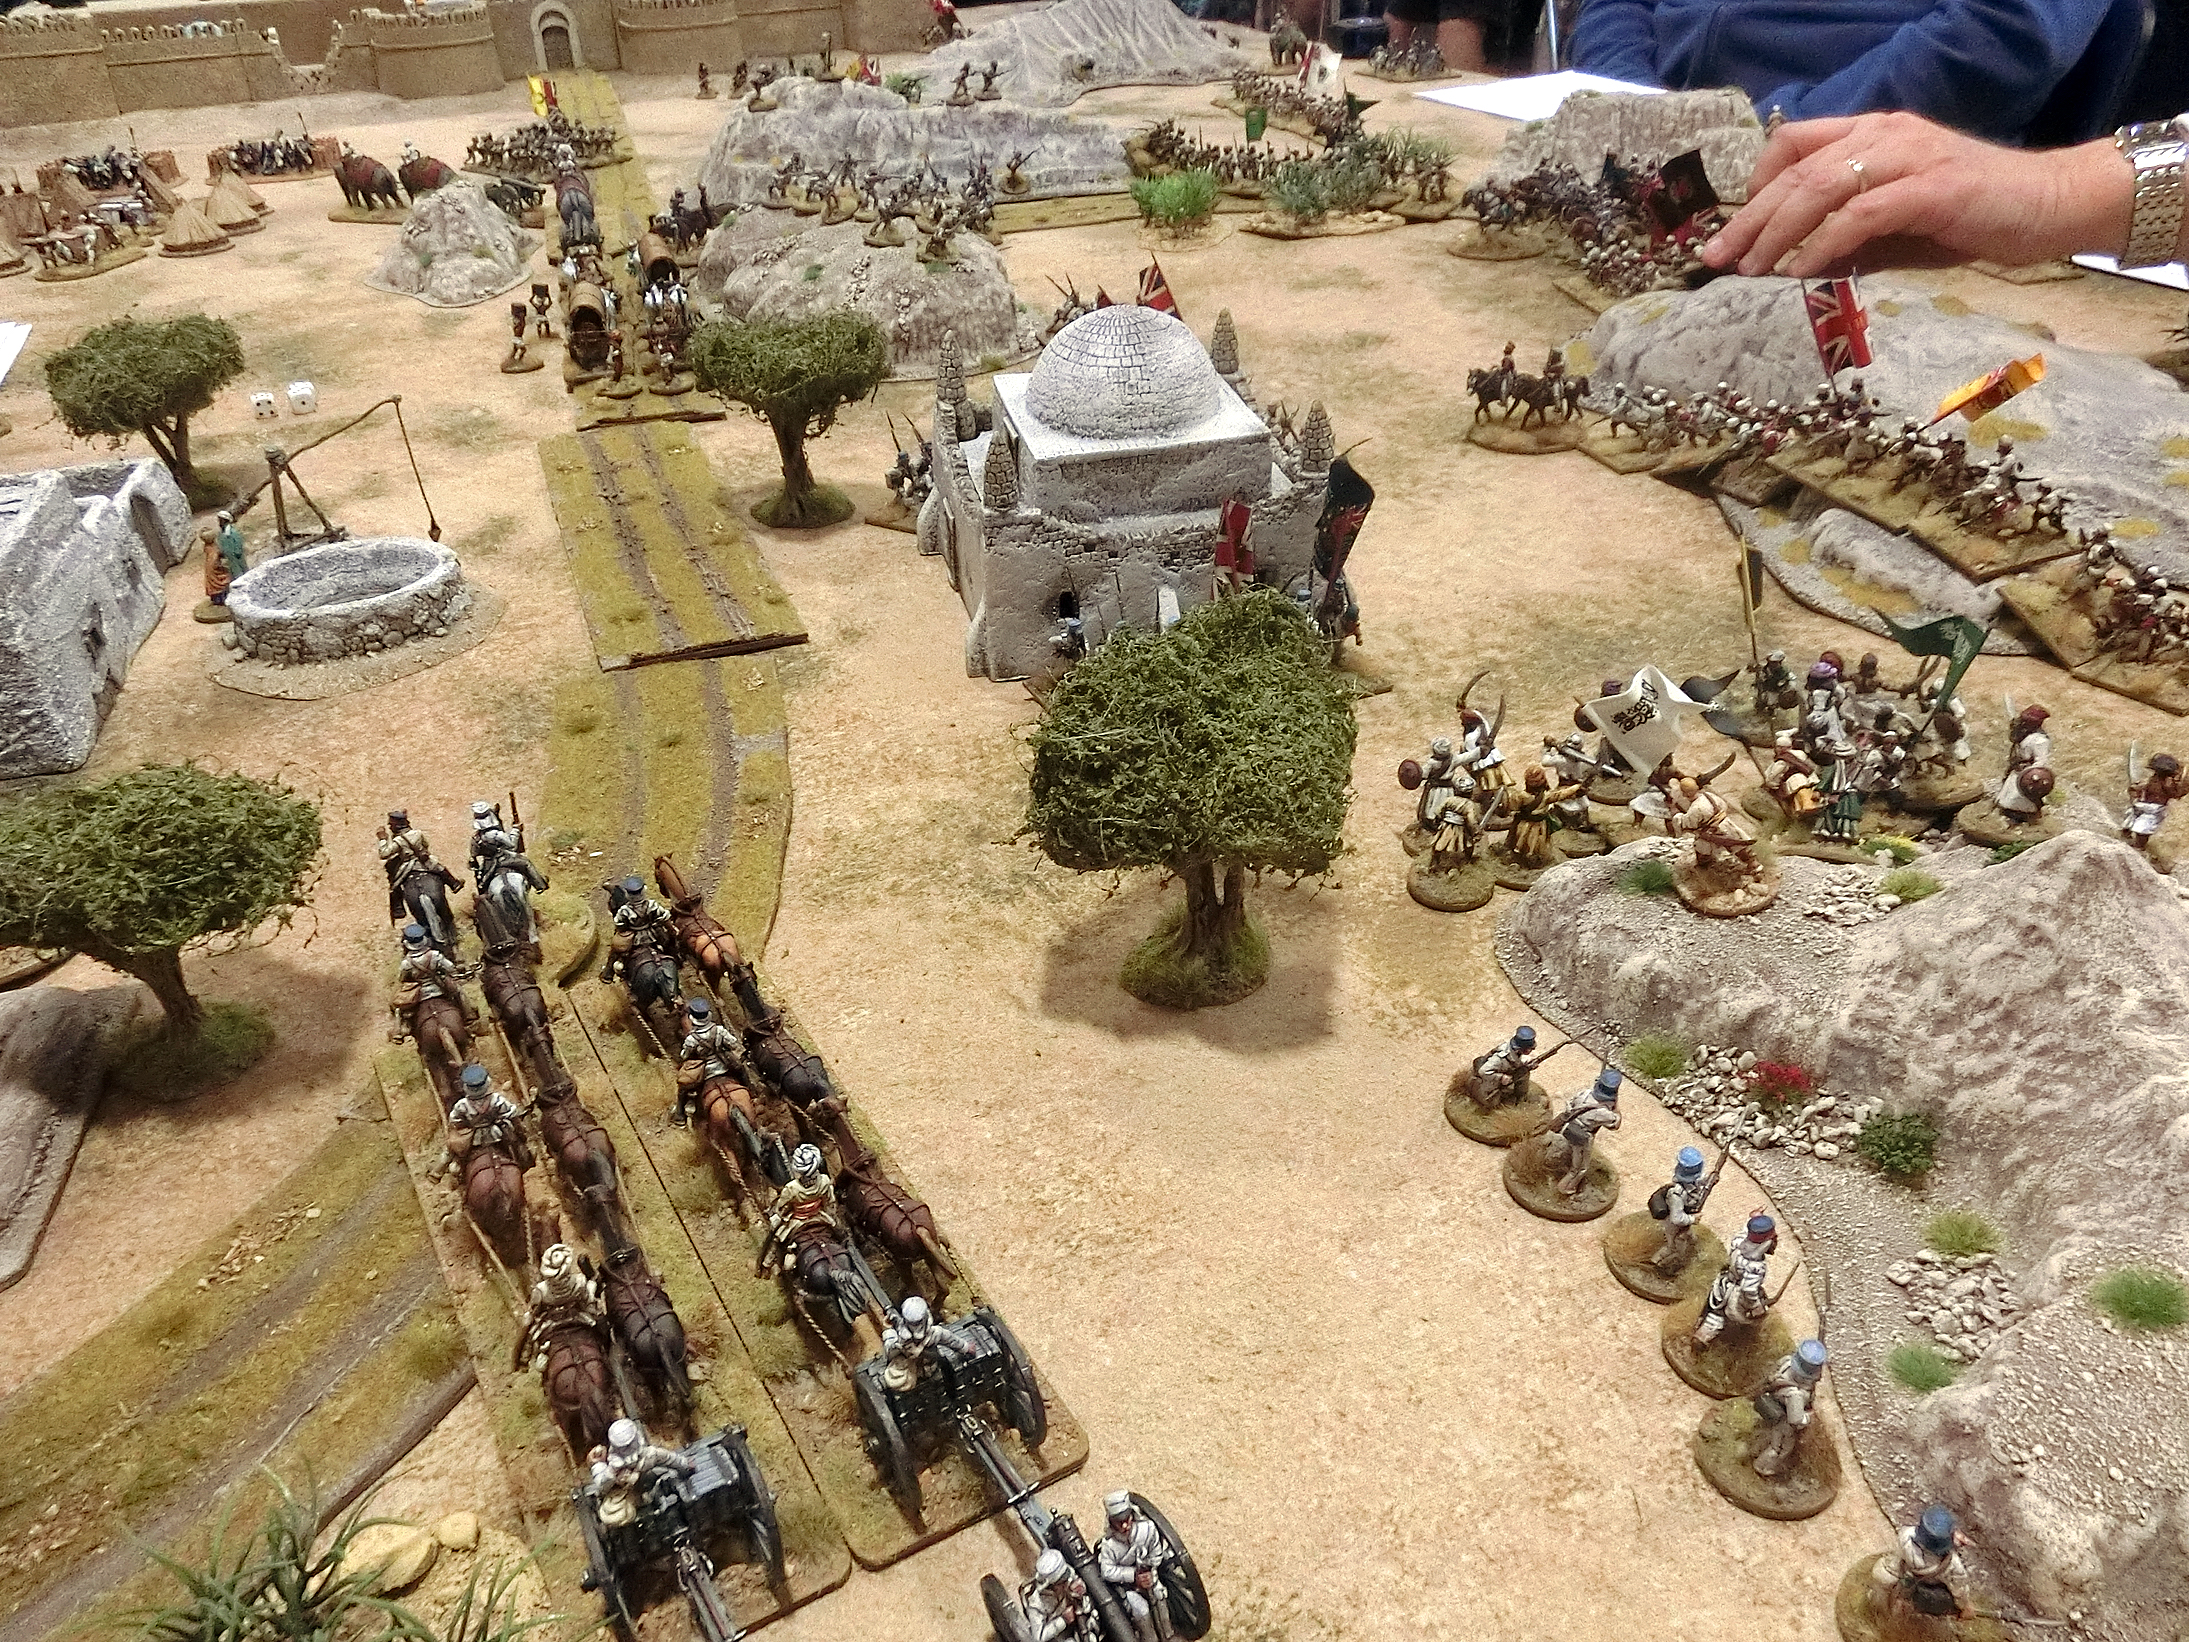
The British are besieging Norfleesh fort and have one heavy battery in place but need more power so my job was to bring up another elephant drawn siege battery and a camel supply column. I had to use my infantry and horse artillery to keep the road safe from an expected big Sepoy surge. Mike had a small but useful brigade with which to keep the enemy away from his siege battery and our camp; sadly the dice dictated his commander was only a "Blusterer" which limited his flexibility. My leaders were "Able" and "Inspired" so I rarely had trouble giving commands, and got a lot of Special event cards which I eagerly used early on to try to thwart Paul. Ian admitted that he was still trialling and developing how he wanted the rules to be and some aspects, like occupying buildings and killing leaders, had yet to be worked out. So the atmosphere was relaxed and (mostly) give and take. I took so many great photos I have to curb my enthusiasm here so will try to show a selection that can tell the story of our efforts to reinforce the Siege of Norfleesh.
 |
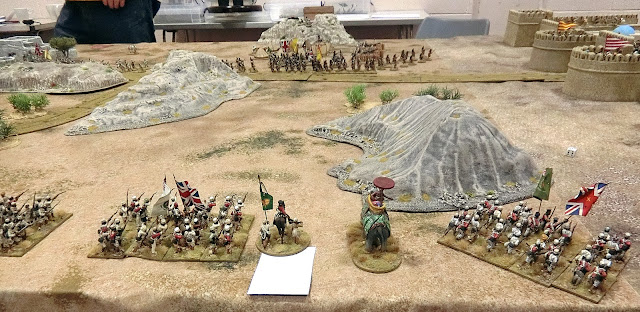
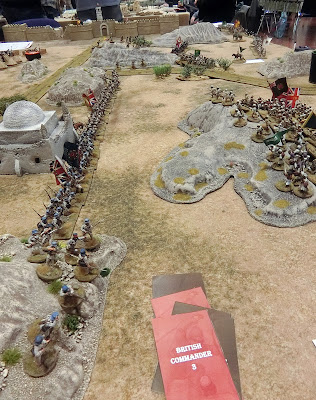
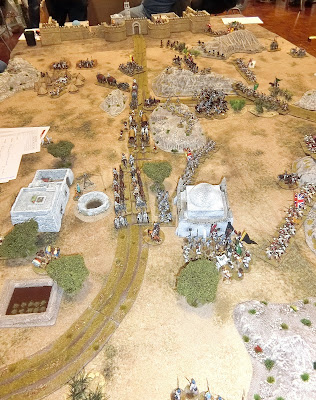
| Initial deployment - Imperial force at left Mutineers at right. Camel train doomed by the umpire to deploy just there |
 |
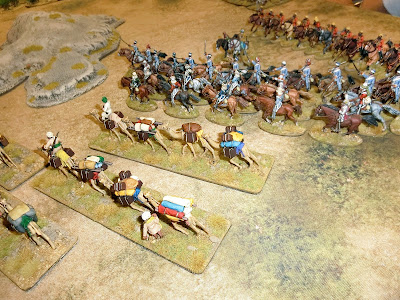
| A small contingent of loyal native cavalry protected the camel train |
 |
| My aim was to get troops across the road and into the hills as quickly as possible to protect my transit route |
 |
| Mike is suitably cautious as more and more Mutineer regiments appear |
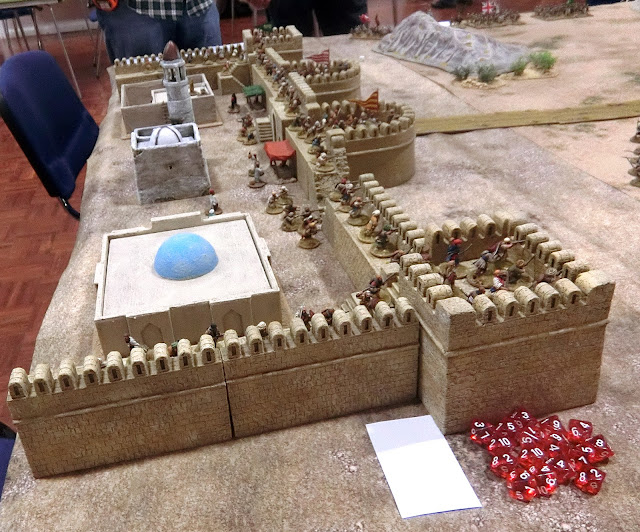 |
| Above and below: The garrison of Ian's beautiful model fort luckily played no active part in our game |
 |
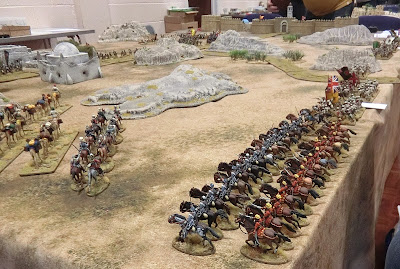
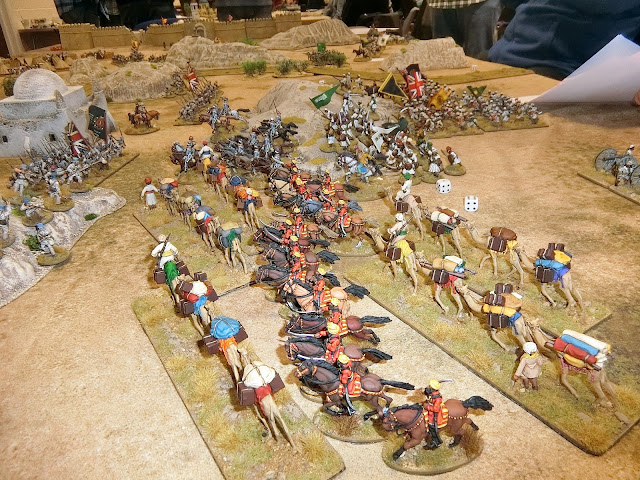
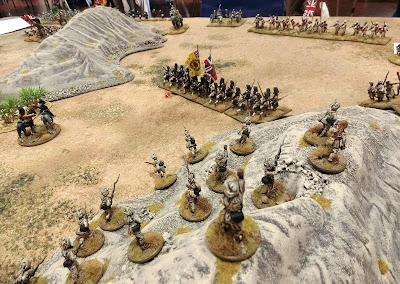
| View from the Rebels right flank - led by an elephant mounted general |
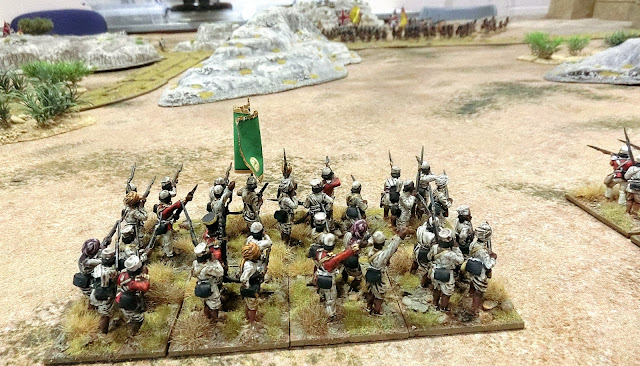 |
| Here is a regiment in close up - lovely worn looking paint job, you can almost feel the lice! |
 |
Paul's Initiative card came up before mine so the
camel train escort was overwhelmed and destroyed |
 |
| He then moved them to the right to face my Madras Fusiliers while the second cavalry regiment ploughed into the camels |
 |
| Both they and camels were peppered by Enfield rifle fire from the Madras Fusilier skirmishers and canister from my Horse Artillery |
 |
I managed to thwart casualties from the Sepoy guns by a fortuitous
use of my "Fouled Barrels " event card |
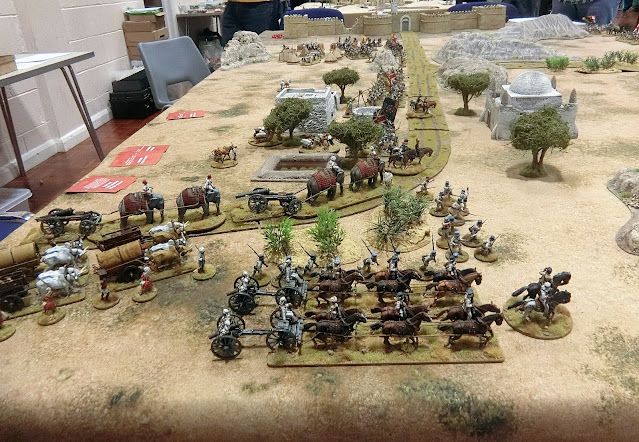
 |
| Foolishly I thought I was safe enough on our right flank. The volume of fire swept away both camel train and the attacking cavalry. Those cool looking grey cavalry received a volley from the Fusiliers and retired behind the hill. In the foreground my elephant guns are now making progress supported by a Madras Fusilier company as escort |
 |
| Attack being the best form of defence Mike pushed forward his Highland regiment down the valley to threaten the, currently rather sluggish, Sepoy enemy. His Sikhs guard our big guns facing the fort |
 |
Feeling smug now as no enemy survived in front
of my solid line of infantry |
 |
| But what a bloody 'orrible mass of darkies over the ridge! |
 |
Mike's boldness got him into trouble as the Sepoys opened up
and were surprisingly effective, forcing him back with heavy loss |
 |
| My right flank was assailed by Ghazi fanatics ("Don't worry", says Ian, "they are not as bad as Afghan Ghazis"). But they weren't detered by either rifle fire or artillery shells and overwhelmed my skirmishers in the rocks |
 |
| Then moved into the flank of the Madras Fusiliers , but I was able to refuse the flank with one company and fight back a little |
 |
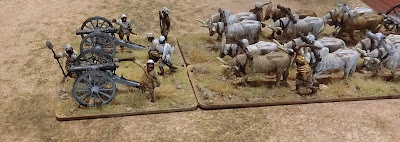
Meanwhile my C-in-C was using his good capability to urge
on the elephant guns and supply oxen with the horse artillery
following up the rear to get away from those Fanatics |
 |
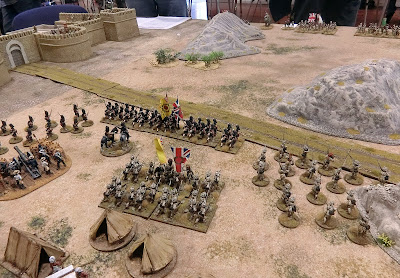
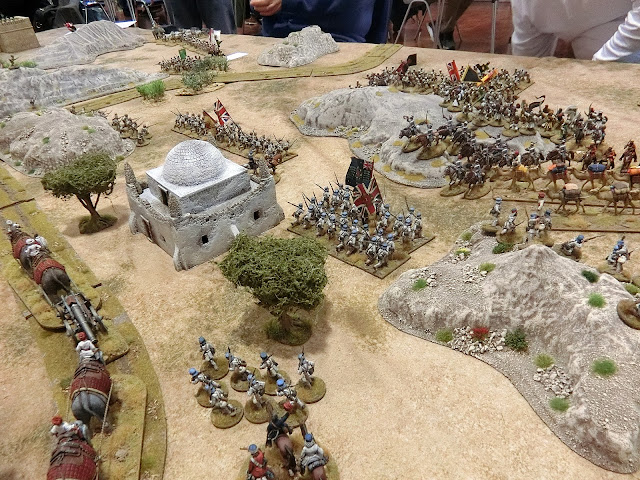
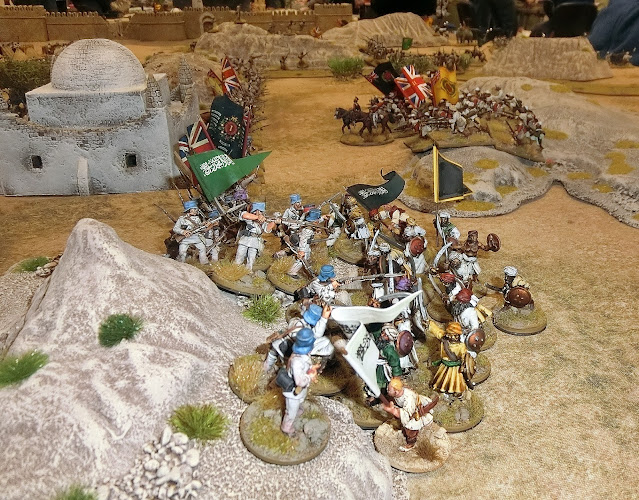
| They'd have to be quick though as the Fusiliers were forced into two parts with the Colour company being pinned against the walls of that the domed building, as seen below |
 |
| It was beginning for me to feel like one of those football matches where the pundits say "They wuz right on top during first 'alf , then completely lost control after t'break" . My elephants were nearly home, complacency set in and I pushed the Madras skirmisher escort up the road between the hills to help fill the gap in our line. It was not necessary but just felt "appropriate". |
 |
Happily on Mike's flank his enemies had been unable to exploit
the temporary setback of the Highlanders and the defence was consolidated |
 |
| But out of the blue Paul's "Cool Greys" had sneaked to the centre, got an initiative card and good movement dice just when it mattered and charged my Madras escort company. Skirmish fire from these Highlanders (without kilts) in the foregound did not put them off |
 |
On my right with cries of "Allah-u-Akbar" the Ghazis
slaughtered the Fusilier Colour party and walked off with
the Colours |
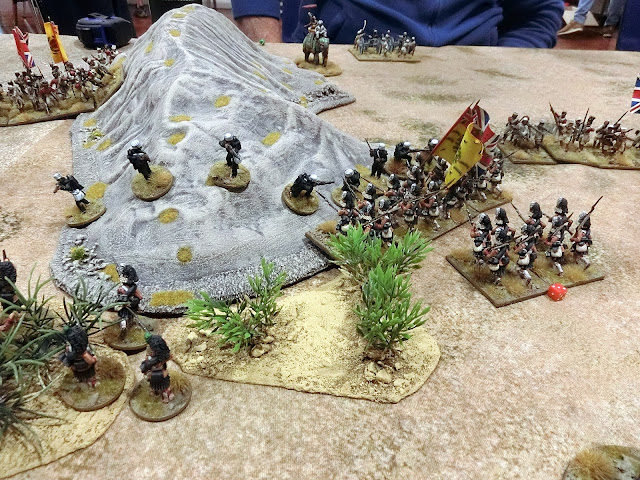 |
| Mike's brave Highlanders charged uphill and successfully saw off this threat to our front line near the Fort |
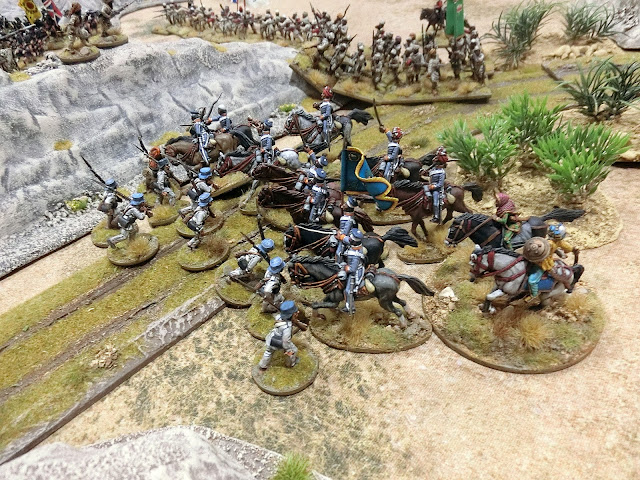 |
| But the final act before our time was up was for the Mutineer cavalry to break through my over stretched escort company and could now make a bee-line for my elephant guns, camp and siege battery |
 |
The Stuart Asquith trophy for "Best Game" was awarded to Ian
Bailey for this hard fought and exciting action |
Ian did a great job keeping this balanced and the scenario was interesting and challenging. He declared it a narrow Sepoy Victory, which was fair; I admitted that if I'd been the real British commander I'd have been very worried by how things were shaping up. My opponent, Paul, used all the ruses available to him to play a clever game and exploit my foolishness and complacency. Mike said he had a very good day even though he did not have a great deal of action. Poor Tim's Mutineer regiments did not seem to move very much due I think to poor quality commanders but I hope he still enjoyed it. Whatever our fortunes in the game it was an absolute treat to play with such beautiful and expertly painted figures. Also I enjoyed the "Mad Dogs...." rules which were easy to pick up - at least the bits I needed. Thank you very much Ian for all the effort and an entertaining experience
 |
Keith presents the
Stuart Asquith Trophy to Ian |
We had the usual prize giving but this time prizes were donated or organised by some participants and not just by Keith. There were prizes from Pendraken Miniatures, Empress Miniatures and a painting from me.
I think Tony Dillon scooped three of them for his Sharpe Napoleonic skirmish game - "Best Presented Game", "Most Innovative Game" and "Best Vignette or Terrain". Grateful thanks to all those who took the trouble to put on games, many to very high visual standards.