Monday, 13 June 2016

First of my reports on AMG 16


No doubt I will be only one among many of the bloggers who will report on their attendance at the A Military Gentleman (of the 18th Century) Forum get-together in a lovely hotel near Warwick last weekend.
Preparations of 4 games each on a 12 feet plus x 6 feet table  designed for
about 4 or 5 participants. In the foreground is Will H who generously gave us each a
memento in the form of a 28mm casualty figure marker which we can put to good use
Reviewing my photos I've got so many I'll have to split my reporting. However, there must have been something about the lighting that conflicted with my normal wargame photo taking method as I've had to ditch very many and only used a few of the poor ones. Happily many turned out good.

This first report concentrates on the main event for me which was the refight of The Battle of Soor, 1745, during the War of the Austrian Succession. This was certainly the biggest and best 18th century wargame I've ever taken part in, at around 1500 28mm figures. It was put on by Robbie Rodiss and Colin Ashton from the North-east of England whom many readers will know  from their wonderful blogs (see my side bar).  They provided both armies and the terrain. Figures, I believe, were mostly RSM and Minden and looked an absolute treat to my envious eyes. Rules were "Honours of War" and for that reason the game was a bonus for me as I'm keen to start using them regularly myself. (See my previous blog post) . Two games were played during the weekend, I'm just describing the one on the Saturday

The participants and umpires

Steve P very competently handled the Austrian right flank
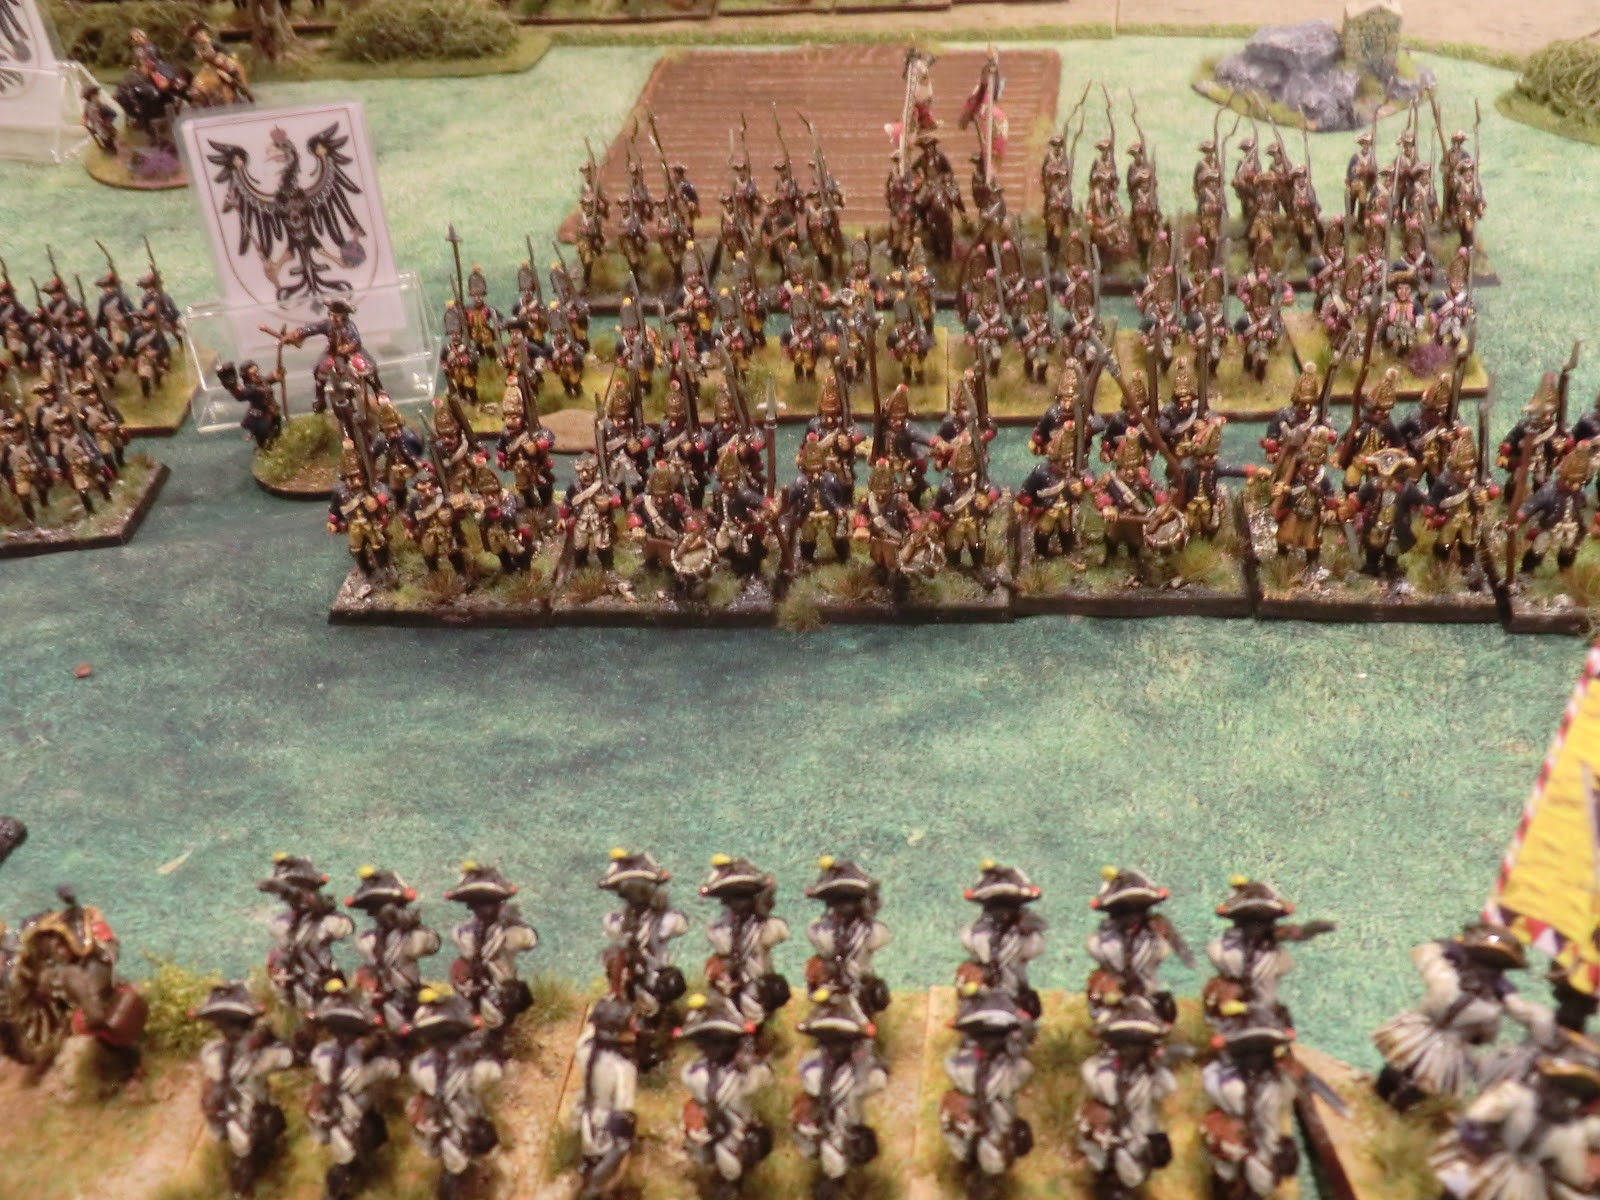
Colin explains their army to Prussian commanders Stuart I and Gary P
Robbie briefs Mark A on the merits or otherwise of his mass of Austrian cavalry
 on the Austrian left flank, before getting to me commanding the Austrian centre
and centre left as Austrian C-in-C
The Set-up
 Basic objective was for the Prussians under Frederick to push the Austrian army off the main road through Soor and the big hill which was on their line of communication.  For convenience all references to flanks will be from the Austrian perspective.
Austrian centre showing mainly the Saxon contingent 
Austrian centre left under Von Daun with quite an impressive hill to hold
The Austrian order of battle (above) and notes of special conditions for this game (below) .
Note the Dithering C-in-C and cavalry commanders

Close up of some of Von Daun's infantry of which the combined Grenadier battalion
was the best. He was classed as Dashing which was not as helpful as it sounds
when defending a good position
Prussian cavalry face our right flank....
.......along with Prussian infantry
Battle is joined
Prussians attack the hill in full force including cavalry. My front musketeer battalion
gives fire while it can.
Poor photo but the Saxon contingent is too pretty to ignore as it changed to
columns to envelope and occupy Soor. Guards on the right of course!
The Austrians, despite their handicaps, gain the upper hand in the right flank
cavalry battle. Steve is cautious over the strength of the enemy infantry position
but his ability not to throw units away needlessly probably helped our victory
Meanwhile Mark is engaged in a ferocious cavalry confrontation on the left
which would last all game due to his canny skills and of his opponent Gary.
Robbie and Colin were constantly helpful and understanding over any issues
in the rules
A closer view - those Austrian musketeers would not last long.  They managed to see
 off the cavalry, but remembering lessons from my first game I withdrew the unit on 3 hits
before the next onslaught
Still loads of Prussians to come (above and below). 
Prussian grenadiers look daunting especially with Frederick himself leading the attack,
however, soon after, I got the firing initiative and great dice rolls with cannon and infantry
 so two Prussian battalions crumbled and broke. Fred was at risk but Gary managed to avoid
 a wound for him (11 or 12 on 2 x D6 would have been fatal)
A command roll of "1" for my "Dependable" Saxon general meant his infantry
columns were held up for a move by the delights of Soor town, allowing them
to be targeted by heavy guns just outside this photo on the left.
The overview at the lunchtime halt. Austrian cavalry have the upper hand on the left for the moment. Austrian infantry units are dwindling under pressure and one battalion falling back to recover. Still plenty of Prussians coming on but crucially they have to face my heavy gun battery. Saxons are now forming line in and around Soor while the Austrian cavalry move forward against dwindling opposition in the distance
The Saxons now in line felt the full force of the Prussian guns, and all 3 units
suffered casualties from "grazing fire" 
The Austrian infantry line is thinning and the Saxon cavalry brigade moves up
to support
Gary looks happy as he feels he's getting the better of my grenadiers with
 initiative to fire first this move
Meanwhile Mark's Austrians look in charge of the left flank cavalry duel
My infantry line is now so thin the only hope is a charge by the Saxon cavalry brigade
Now there is no opposition Austrian Hussars have entered the field and head
for the Prussian camp.......
.....where among the booty are Frederick's pet dogs
While Dragoons take on the guns
Prussian infantry lurk in a walled orchard on the Austrian right flank, Steve's
infantry come on steadily 
Two of my Saxon battalions have fled the field from the Prussian cannon fire.
Saxon Grenadiers, Fusiliers and Guard Infantry still occupy Soor 
Saxon cavalry have pushed back the Prussians at the hill crest but lost a regiment
 in the process 
About this point I asked how Colin and Robbie would decide the outcome - were Army Break Points relevant? A quick tot up found the alarming truth that we were both not far off with Prussians having lost 10 points and the larger Austrian force 12. Moving towards a nail biting climax then, but in a big battle like this there were many opportunities for the deciding factor, and many distractions for the wargamers as the umpires were pushing us on at a cracking pace!
The left flank cavalry engagement is resumed. No fault of Mark's that his
opponents keep pressing as you can see from the Austrian game conditions on
the Orbat above.
At this point the cannon fire was being directed on Soor town and I got "11" on my
 General's saving roll. So the demise of the Saxon commander, and his replacement
by a "Dithering" subordinate
My final photo of the action - Steve's cavalry have attacked the enemy guns from two
  directions and got them on the run, the camp is now completely open.
I guess something critical was happening elsewhere though, as amid the hubbub, I heard Gary shout
"That's it !"   and he was shaking my hand across the table. "Excuse my ignorance", says I ,"but who won?"   "You did " he replied with a friendly smile.

How's that for a close result, and great credit to Robbie and Colin for such a well balanced game that kept my attention somewhere on the tabletop for  the whole 5 hours of playing time and got me so distracted as commander I didn't even realise we were winning. Thanks to all concerned for a very enjoyable game played in the spirit of "Military Gentlemen of the 18th Century".

More thoughts on "Honours of War"
Colin and Robbie had tested the rules with big battles before but still accepted they were developing thoughts. Gary had played three times and displayed a very good grasp which helped keep up the pace . I knew a bit from my test games so was able to follow what was happening. Not sure about the level of knowledge of Steve, Mark and Stuart but they all seemed to manage very well under umpire's eyes. It was great fun having Robbie as an unashamed Austrophile umpire but since his advice proved about 50% sound and 50% c**p I don't think it affected the result. HoW handled all this mayhem extremely well and I'm looking forward to trying bigger games myself.

The national characteristics were applied so the Prussians got extra initiative for Moving and Firing and could manoeuvre and change formation with little or no deduction. On our part the Austrian guns were Superior when firing. Given the Prussian army was smaller and attacking uphill these helped to balance the game well.  I think heavy guns were able to move, change angle and fire a bit too easily for this period though. Our hosts had reduced all canister fire to 30cm as they believe it is too effective at longer range and spoils the game; I reserve judgement till I've tried the longer ranges. For my part I felt that grazing fire for round shot through every line within 30cm was too effective given that in reality every bounce was shorter than the preceding one. I'll have to read the rules and have a think.  The rules are totally dismissive of "Ditherers" as Commanding General to the extent it is detrimental to let one come within command range. This produces the unrealistic side effect that I was told to put mine as far away as possible. I would like to see them at least have the possibility of rallying off casualties within the safety of their own lines. My rationale is that a bunch of top brass would probably have some enthusiastic aides and subordinate officers who could gee up the morale of flagging troops even if M'lord Elektor, or whatever, is a dolt.

None of this detracted from my enjoyment -  thanks once again to all concerned. Another report on AMG 16 as soon as I can manage the time


Wednesday, 8 June 2016

Trying the HoW test game of St Ulrich

Now I know I've left readers hanging without an account of our great Rank and File Napoleonic weekend in April, so apologies,. However that is quite a daunting prospect to report properly and blogs are supposed to be more topical so the flavour of my month is currently Honours of War (HoW).

I'm supposedly primarily an 18th Century wargamer, but you are excused for not noticing that as my 18thC 28mm figures have had little airing of late. Two things came together to spur me to on-table action at last. The first was buying the HoW rulebook early this year, then finding that Colin Ashton and Robbie Rodiss in the North East of England were reporting good things about their test games. Then they offered to run one at the A Military Gentleman (AMG) convention coming up very soon and I volunteered to have a go as a player.  Better still, newly acquainted with fellow AMG member Ken Marshall, a resident of nearby Wiltshire, a practice Imagi-nations game using HoW became a real possibility.

I realised that the terrain on my table which we had used for our R and F game (see here for basic terrain set up) was not far off Keith Flint's basic test game in HoW - called St Ulrich. So here is a map of how I adapted that for an 8 ft x 6 ft table.

Although the scenario has units deployed, Ken and I agreed to notional deployment zones so we could adapt it if necessary. Blue line is for the French, the forward red line is for Imperial infantry and cavalry, and the rear line for artillery.
Using a larger table than in the book I augmented the forces by an infantry regiment per side, then one more cavalry regiment for the French matched by one extra cannon for the Imperial force.
Here are the orders of battle we used
FRENCH
Unit Nr
Unit Name
Quality
Nr of bases
Size of unit
Nr of figures
Comments
Commanding General
Chevalier de Neuvalee
Unrated


2

Infantry Brigade Commander
Baron Joubarbe
Dependable


1

1
Alsace Infantry Regiment
standard
5
standard
30

2
Auvergne Infantry Regiment
standard
5
standard
30

3
Battenburg Infantry Regiment
standard
5
standard
30

4
Combined Grenadier Battalion
superior
4
small
24

5
Royal Artillery Battery
standard
1
standard
3
Medium
Cavalry Brigade Commander
Comte de Berard
Dashing


1

6
Royal Dragoon Regiment
standard
7
large
14

7
Orleans Dragoon Regiment
standard
7
large
14


TOTAL


149


Army Break Point
3


IMPERIAL
Unit Nr
Unit Name
Quality
Nr of bases
Size of unit
Nr of figures
Comments
Commanding General
General Count Von Grunburg
Unrated


2

Infantry Brigade Commander
General Von Reife
Dependable


1

8
1st Grunburg Infantry Regiment
standard
5
standard
30

9
Erbprinz Infantry Regiment
standard
5
standard
30

10
Grenadier Battalion von Bogenhafen
superior
4
small
24

11
1st Reikland Artillery Battery
standard
1
standard
3
Medium
12
2nd Reikland Artillery Battery
standard
1
standard
3
Medium
Cavalry Brigade Commander
General Von Brezel
Dashing


1

13
Grunburg Dragoon Regiment
standard
7
large
14


TOTAL


108


Army Break Point
3


I gave three leaders per side including the Commanding General and rated one Dependable and one Dashing, reasoning that we wanted to get action to test the rules, and we certainly did.

The objective was simple in that the Imperial force had to defend a bridge across an impassable river (suggested visually in our game by a dense belt of trees along each bank) and the larger French force had to take it and then advance on to take the town of St Ulrich.

Game One
For the  first game I had set the forces up roughly in accordance with the rule book scenario and Ken, who was the French commander, opted to keep them like that. I made one change by moving my cavalry to a slightly wider flanking role. Here is a photo of the start.


And I'll let the photos tell the story of this one.
Amazingly my first move with my infantry brigade was a double (Commander within 15cm of Dependable General made his dice role Admirable). Ken kindly checks the rule book to make sure we got it right!
The French infantry begin to deploy into two lines - 3 up front and a reserve, and likewise the cavalry. Imperial infantry stand firm and the cavalry cautiously protect their flank. French infantry are just within artillery range now.
The French line is formed and musketry exchange starts, with the Imperial line slightly refused due to the cavalry threat.
..........and a closer view
Cavalry clash is joined in the foreground, and in the distance the 1st Grunburg infantry sent Alsace packing but then retreated from their own losses in the face of the still oncoming French second line. The infantry lines are now too close for the Imperial overhead artillery so they are picking on the second line cavalry.
The Grunburg Dragoons got the better of their opponents who retreated away from the main action to the North of the woods (and at this point I think we found Ken, unfamiliar with French cavalry uniforms, had got his regiments mixed when they changed formation so we swapped them over - red coated Orleans Dragoons doing the retreat.) The infantry fire fight continued in the centre.
Battenburg regiment suffered too heavily from musketry from the Erbprinz regiment and broke......
.........leaving the Combined Grenadier battalion feeling exposed, and the French cannon was unable to fire canister with them so near.   1st Grunburg Infantry recovered and pushed back Auvergne temporarily.
Poor Ken seemed to be suffering reverses along his front and, being an 18th century military gentleman at heart, muttered something about "I really ought to order a general retreat at this point" My response was "C'mon, we can still get another move in before lunch and these rules needs stretching"
So what happened next was that my Infantry General got a command roll of 6 making him Admirable and having to advance with Erbprinz. The Royal Dragoons counter charged down the hill only to be hit in the flank by the Grunburg Dragoons. Ken can be seen having recovered his Orleans Dragoons and bringing them back to provide a pain in the proverbial for  the Grunburgers.
As I recall the result of this melee was not kind to the Royal Dragoons but I was either so excited or hungry that I forgot to take the requisite photo! 
That was Move 7, we had played for about 2.5 hours and both agreed that, although neither side had actually reached its Break Point (3 average sized units lost), Ken had no chance of getting near the bridge and it was an Imperial victory. We repaired to the appropriately-named Butchers Arms nearby for a pint and sandwiches and to discuss how to proceed.

Game Two
One possibility was to reinforce both sides and play on but that would have meant organising more suitable units and rebalancing the sides. We thought it simpler just to swap sides and use the map to mark our revised opening dispositions.   Rather than go through the game as above I was delighted to receive a write up by Ken written in an entirely unbiased style :-) and accompanied by the words "He who writes the dispatch gets the victory so my comments/ alternate dispatch on the second game is attached." I will illustrate it with appropriate photos where possible.

"Sir
By this dispatch, I have the honour to report a glorious victory over the French invaders by your gallant rearguard. The enemy have today been given a bloody nose, prevented from crossing the River Schwartz and scattered. It is unlikely that they will trouble us again.
This time my French were placed already deployed in two lines. Luckily my first
 move was a double so we got into action quickly. 
Ken's Imperial force opted for an almost identical deployment to our first game
Following your orders to hold the bridge at St Ulrich, I deployed the infantry and cavalry to defend the western approaches to the bridge, with the artillery on the Zeitberg to the east, overlooking the bridge and positioned to support the left flank infantry. General von Reife’s infantry were deployed to the south and on the Mulheim road, with the cavalry to the north on the right flank, where they could take full advantage of the open grassland. 

Battenburg in the infantry front line, and Orleans Dragoons trying to gain a wide left flank advantage
The enemy were soon sighted under the command of the Chevalier de Neuvalee, debouching from Mulheim and deploying into two lines of infantry. Supporting cavalry was on both flanks with artillery advancing to support their centre. 

In the far distance 1st Grunburg have already been forced back to the
 impassable river
A heavy fire fight in the middle but, to my chagrin, I had to concede that
according to the rules, Ken's artillery on the Zeitberg could target my second line
as they were more than 15cm from his front line.
Rather than be caught with our backs to the Schwartz and no room to manoeuvre, our infantry advanced and engaged the enemy in musketry. I am pleased to report that our musketry was effective and we inflicted many casualties on the opposing French regiments before weight of numbers told and our Grunberg Infantry and von Bogenhafen grenadiers were forced to retire. 

"...forced to retire" = economical with the truth!
Mention must be made of the conduct of the Erbprinz Regiment under Colonel von Dickmeis, which was in the highest standards of the army. They flanked and fought off two infantry regiments, stabilising the line and forcing the enemy to retire. I commend the regiment to you. Whilst they are not considered grenadiers, the examples they have today set to the rest of the army in steadiness and dependability under fire are in accordance with the highest standards and traditions of the imperial army and grenadier corps, and I would suggest warrant the award of grenadier honours. (A running joke with Ken that I had used Grenadier figures not given them special status - but I just love those Old Glory Prussian figures in the march attack pose and we didn't want another elite unit. CG)

Erbprinz are attacked by Battenburg but repel them under Count Gregorius'
inspirational leadership

I must also commend to you, General von Brezel and his Grunberg Dragoon Regiment. Having dominated the right flank and dissuaded the enemy dragoons from advancing for the majority of the infantry battle, they seized their opportunity and countercharged an incautious advance by enemy dragoons intent on threatening our flank. Their sword play was a sight to behold and they defeated and put to flight their opponents, giving us mastery of that flank. 

Grunburg Dragoons and Orleans Dragoons in a virtually equal contest  -
I blame the dice of course! 

Mention must also be made of the enemy’s right flank cavalry. Having shown no desire to close with our infantry, they eventually formed into column as the firefight petered out and began an advance toward the bridge, the way being temporarily open whilst our infantry reformed. Advancing in a column formation into medium range of our artillery, it took only a few rounds of shot for them to be sent scurrying away back toward Mulheim.  
The rout of those redcoat Reikland infantry had left the door to St Ulrich open.
My Royal Dragoons, acting far from their brigade commander, got "admirable"
 initiative, changed to column and advanced to the bridge.
They made a great target for Ken's guns and suffered
accordingly. This was a game changing moment where I had
to clutch defeat from the jaws of victory!!!
With the realisation that the same fate awaited any other attempt to cross the bridge, and with half his army attempting to reform, the Chevalier de Neuvalee abandoned his attempts and signalled his battered army to withdraw.

We are reforming before continuing to retire in accordance with your orders. 
I have the honour to be your humble servant, 
Count von Grunburg,

St Ulrich, 26 May 1760 

Ken added, with great honesty:
"Of course it's not the real truth as an independent third party observer witnessing the engagement might write (or paint) but I suspect the Count isn't going to pen something for public consumption that says his premier line infantry regiment ran away like a bunch of cowardly girls at the first smell of powder and he was only saved by his artillery and the unwillingness of the Chevalier to risk his men forcing the bridge. That I'd leave to the French general......... (thanks - see my captions - CG)

"As it stands, the Count has enhanced his reputation to the benefit of his future political aspirations, the Erbprinz Regiment have a reason for their grenadier status (if you ever needed an excuse) and there will be some rivalry between the three infantry regiments who know the truth about what happened that day. I also did hear that the Erbprinz Regiment had taken to referring to von Bogenhafen's grenadiers as marines because of their ability to cross watercourses under fire (backwards!). One of the joys of Imagi-Nations is that they write their own history whether you like it or not."

What did we think of Honours of War?
By Ken:
"I thought the second game was more interesting than the first because we were a little more familiar with the rules. Command, control and knowing when to retire units to rally looks to be the important lesson. And the impact two guns can have on a column at medium range, if you are lucky. That did more to change the outcome of the last game than anything else. That was a surprise given their performance during the rest of the games was not memorable."
By Me:
I loved the speed with which things could happen. Yes if you had lots of poorly rated generals it would be a different story, but we used the Austrian capabilities for both sides and they seemed a fair balance of routine predictability with the occasional flurry of unexpected opportunity.  Once in a fight units don't last very long so expect a small scale engagement like this not to last long (both games were about 2.5 hours to get a decision based on achieving the terrain objective; Army Break points would take a little longer).  This is great because, even with the troops I have at the moment we could triple this size of game and Ken's planning how we can combine his armies with mine in the future. So, subject to more testing,  I think these will give us plenty of scope for multiplayer Imagi-nation and historical games. I won't go into detail about the rules but just say  - Well done Keith Flint for coming up with something that gave us an 18th century feel yet had enough flexibility to allow for good generalship and erratic dice throws providing fun games and a generally satisfying experience.

Finally thanks to Ken.  It was our first meeting and a great day for me in the company of a knowledgable and gentlemanly opponent. Just what you want from your wargaming.