Next Steps in the Campaign
The next step from the small, but successful, refight of Landshut/Altdorf was to test the rules with a much bigger battle. It had always been my aim to adapt "Honours of War" to a Napoleonic "brigade game" on which multiple players would be using up to maybe two Corps aside on a 12 foot x 6 foot table. The first version of that size (played in March 23 as reported on this blog) was useful but unfinished, as I was too ambitious and only had two players in one day. So we now progressed the 1809 campaign 3 days on into Bavaria from crossing the Isar at Landshut to where a major battle took place along about an 8 or 9 kilometre front.
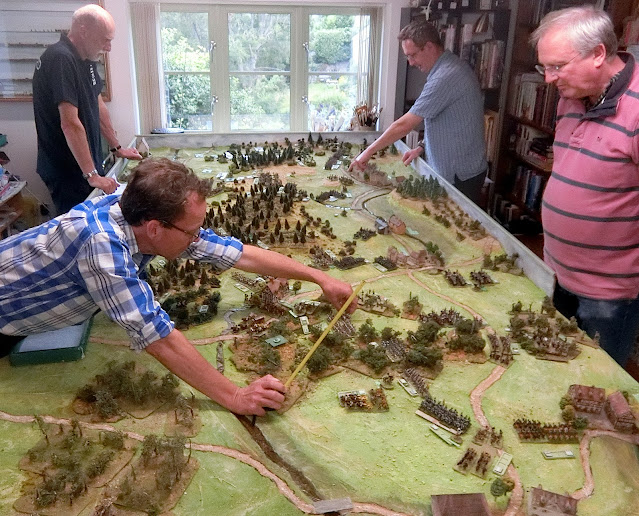 |
| Austrians at the left commanded by Dillon and Guy. French on the right with Paul B and Steve J in the driving seat |
Historical Background
Please bear with me briefly to understand how we got here and take a look at my annotations on this useful map from John Gill's "Thunder on the Danube, Volume I".

|
| The red dotted box shows the approximate area of our battle |
Archduke Charles is with the Austrian (red arrows) "Main Force". He has protective Corps to right and left and another large force in Bohemia, North of the River Danube, hoping to box in the French and catch them in a pincer movement - a good idea but hindered by French possession of the crossing at Regensburg. The French and Allies (blue areas) were in disarray. The Austrian invasion had come as a surprise and Napoleon was not present, so Marshal Berthier was in command of several other Marshals and Generals, most of whom had more fighting operational experience than him. Neither side had a very clear idea of strength or dispositions of the enemy. That was partly due to lethargic scouting and staff work, but mostly to the broken, hilly and forested nature of the Bavarian landscape. This had left Marshal Davout's large Corps out on a limb holding Regensburg and the surrounding area. Charles felt there was a potential gap between Davout and the Bavarians but not where, or for how long it could last. At this stage the Austrian movement was steadily northward, hoping to encounter isolated French and Allied forces and eliminate them. Charles hoped Davout would stay at Regensburg and be attacked in the rear by his army, which would also split left towards the Bavarians. What he did not know, and why we had our battle here, was that Davout was moving all but one regiment of his corps westwards via the Danube valley to Abensberg. Most of Davout's Corps was actually moving westwards along the route Saalhaupt - Teugn - Abensberg while his baggage train was using the good highway adjacent to the Danube and needed protecting.
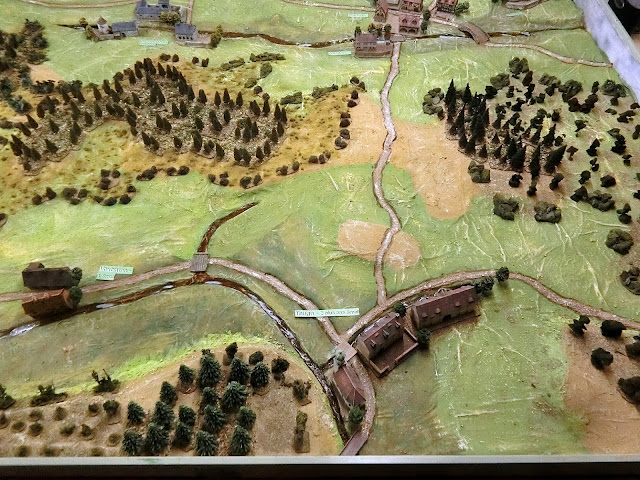 |
| The villages of Schneidart, Hausen, Teugn and Voxbrunn. The labels gave a reminder of the unit capacities I had allowed |
Choosing our wargame parametersI had devised the scale of my game to be 1 x15/18mm figure in close order to represent approximately 50 real troops with tactical units in 5 sizes from 12 to 70 or so figures. The corresponding ground scale for me worked at 30cm (1 foot) = 500 metres. But my maximum table size is 12 x 6, so strictly 6 km x 3 km. Looking at the options I was aware that Michael Hopper in his scenario book "Eagles over Bavaria"(see Footnote in the previous post or more info) treats this as two battles - they were adjacent and fought at the same time. I like to look at the bigger strategic picture where possible and it was clear that they were interconnected and the French all under Davout's command. I reckoned that the total orders of battle for both were within our capabilities and that it would make a good historical refight for two or three players per side over two day's play. I needed to have Dunzling village on the extreme East and Teugn, plus some of the road to Abensberg, at the Western end. That meant fudging the ground scale by about another 20-30%. I don't like to do that but it felt like we could get away with not changing any of the rules or ranges (eg Medium artillery range is 60cm which would be about 1300 metres or so on this table, not too bad). In vindication Gill's great map in his book shows all the villages on one map and the action treated as one battle, just with slightly different phases. Which meant I could take that map and translate the most important section into a Photoshop version as my building guide.
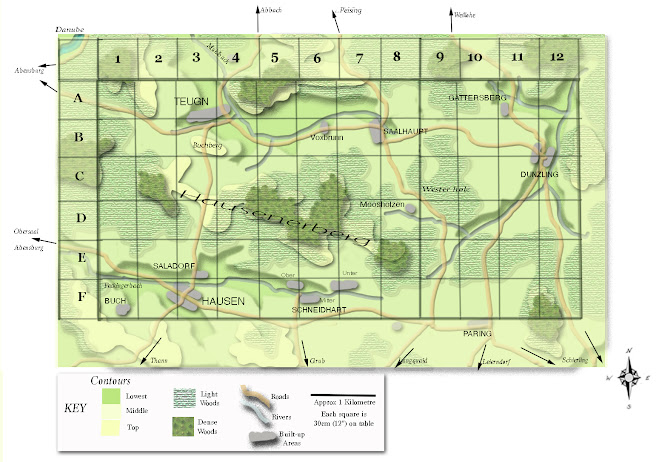 |
| See the Danube River road at top left and it clarifies that the roads through squares A1 to B8 traverse a valley which protects that route. Westerholz and Dunzling need defending to protect the flank. |
So, map decided and players invited, I moved on to model making mode. I had to get everything ready by the last weekend in July.
Building the Terrain
I dismantled the previous setup (Landshut) and recovered all the high ground as separate ridges and hills, thinking I might be able to use some of them for this one. However, this time the higher contours lacked large surfaces or plateau and were too convoluted, so I decided to start from scratch. I took the usual 8 x 6 base board back to its original form (designed for Brampton in Spring 2021) and added the two more 6 x 2 pieces of 18mm MDF I have in store. Then I laid down packaging cardboard in big sheets to produce a roughly flat surface. On this I could transfer a life-size sketch of the design from the map in felt pens and acrylic paint.
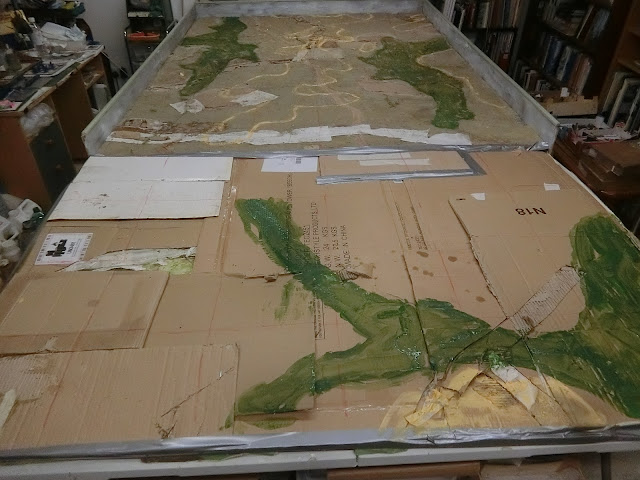 |
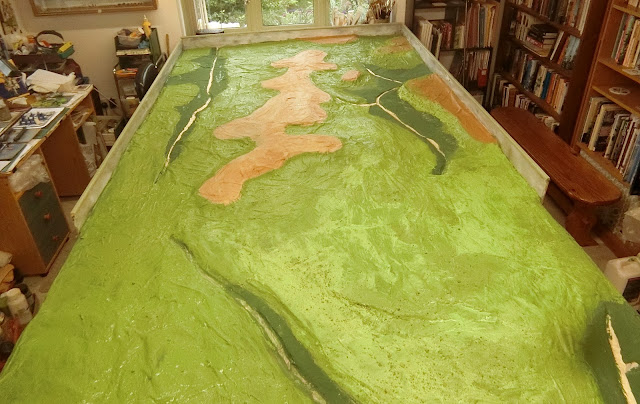
| Above and below: Top contour outlined in cream and the valley bottom contour blocked in green for the moment. |
 |
| Rivers painted in a distinctive blue initially (so they stand out for me) mostly along the valleys - as per the map |
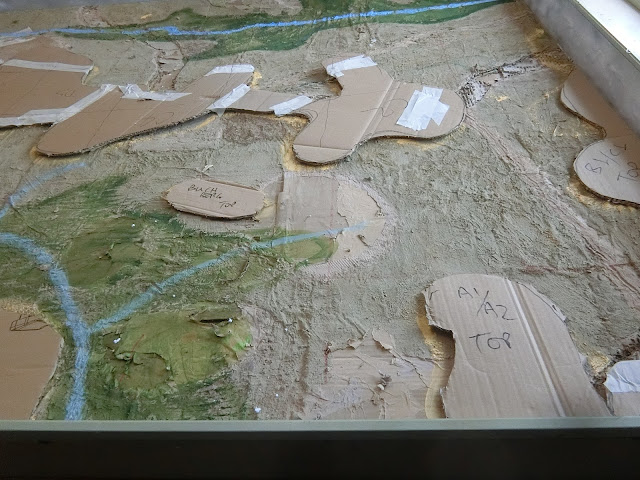 |
| I then cut out a fairly accurate template of the top contour pieces in cardboard and labeled then in case of muddle |
 |
| Recovered pieces of polystyrene were stuck with PVA to the undersides of the template. It's environmental policy in my den never to buy any polystryrene but only reuse what comes my way, and only chuck out when really too small to be any further use. |
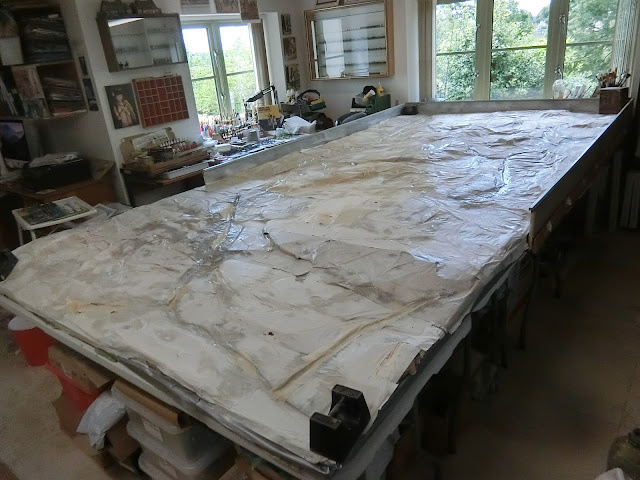 |
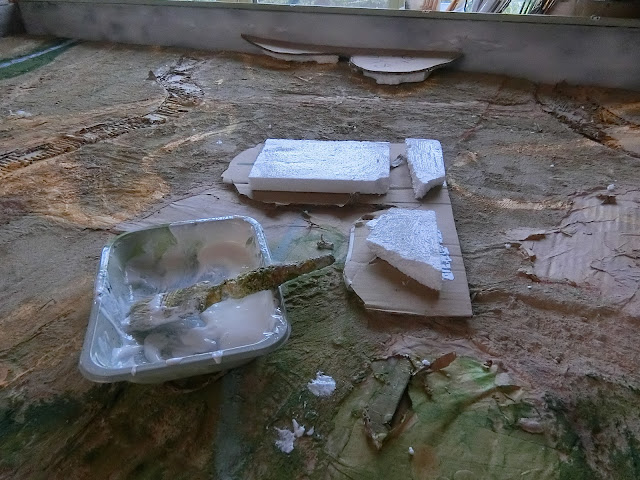
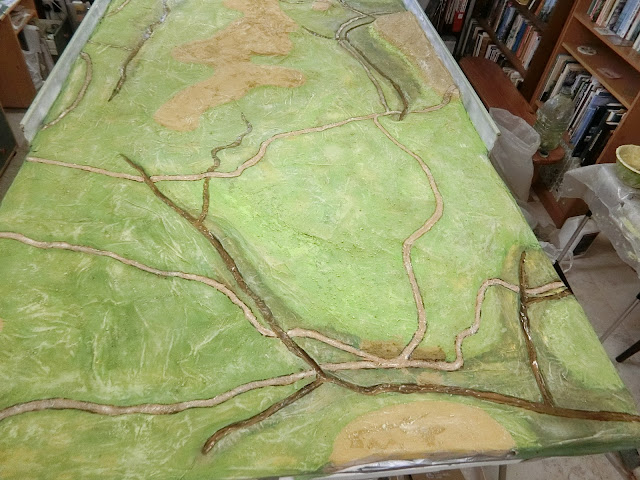
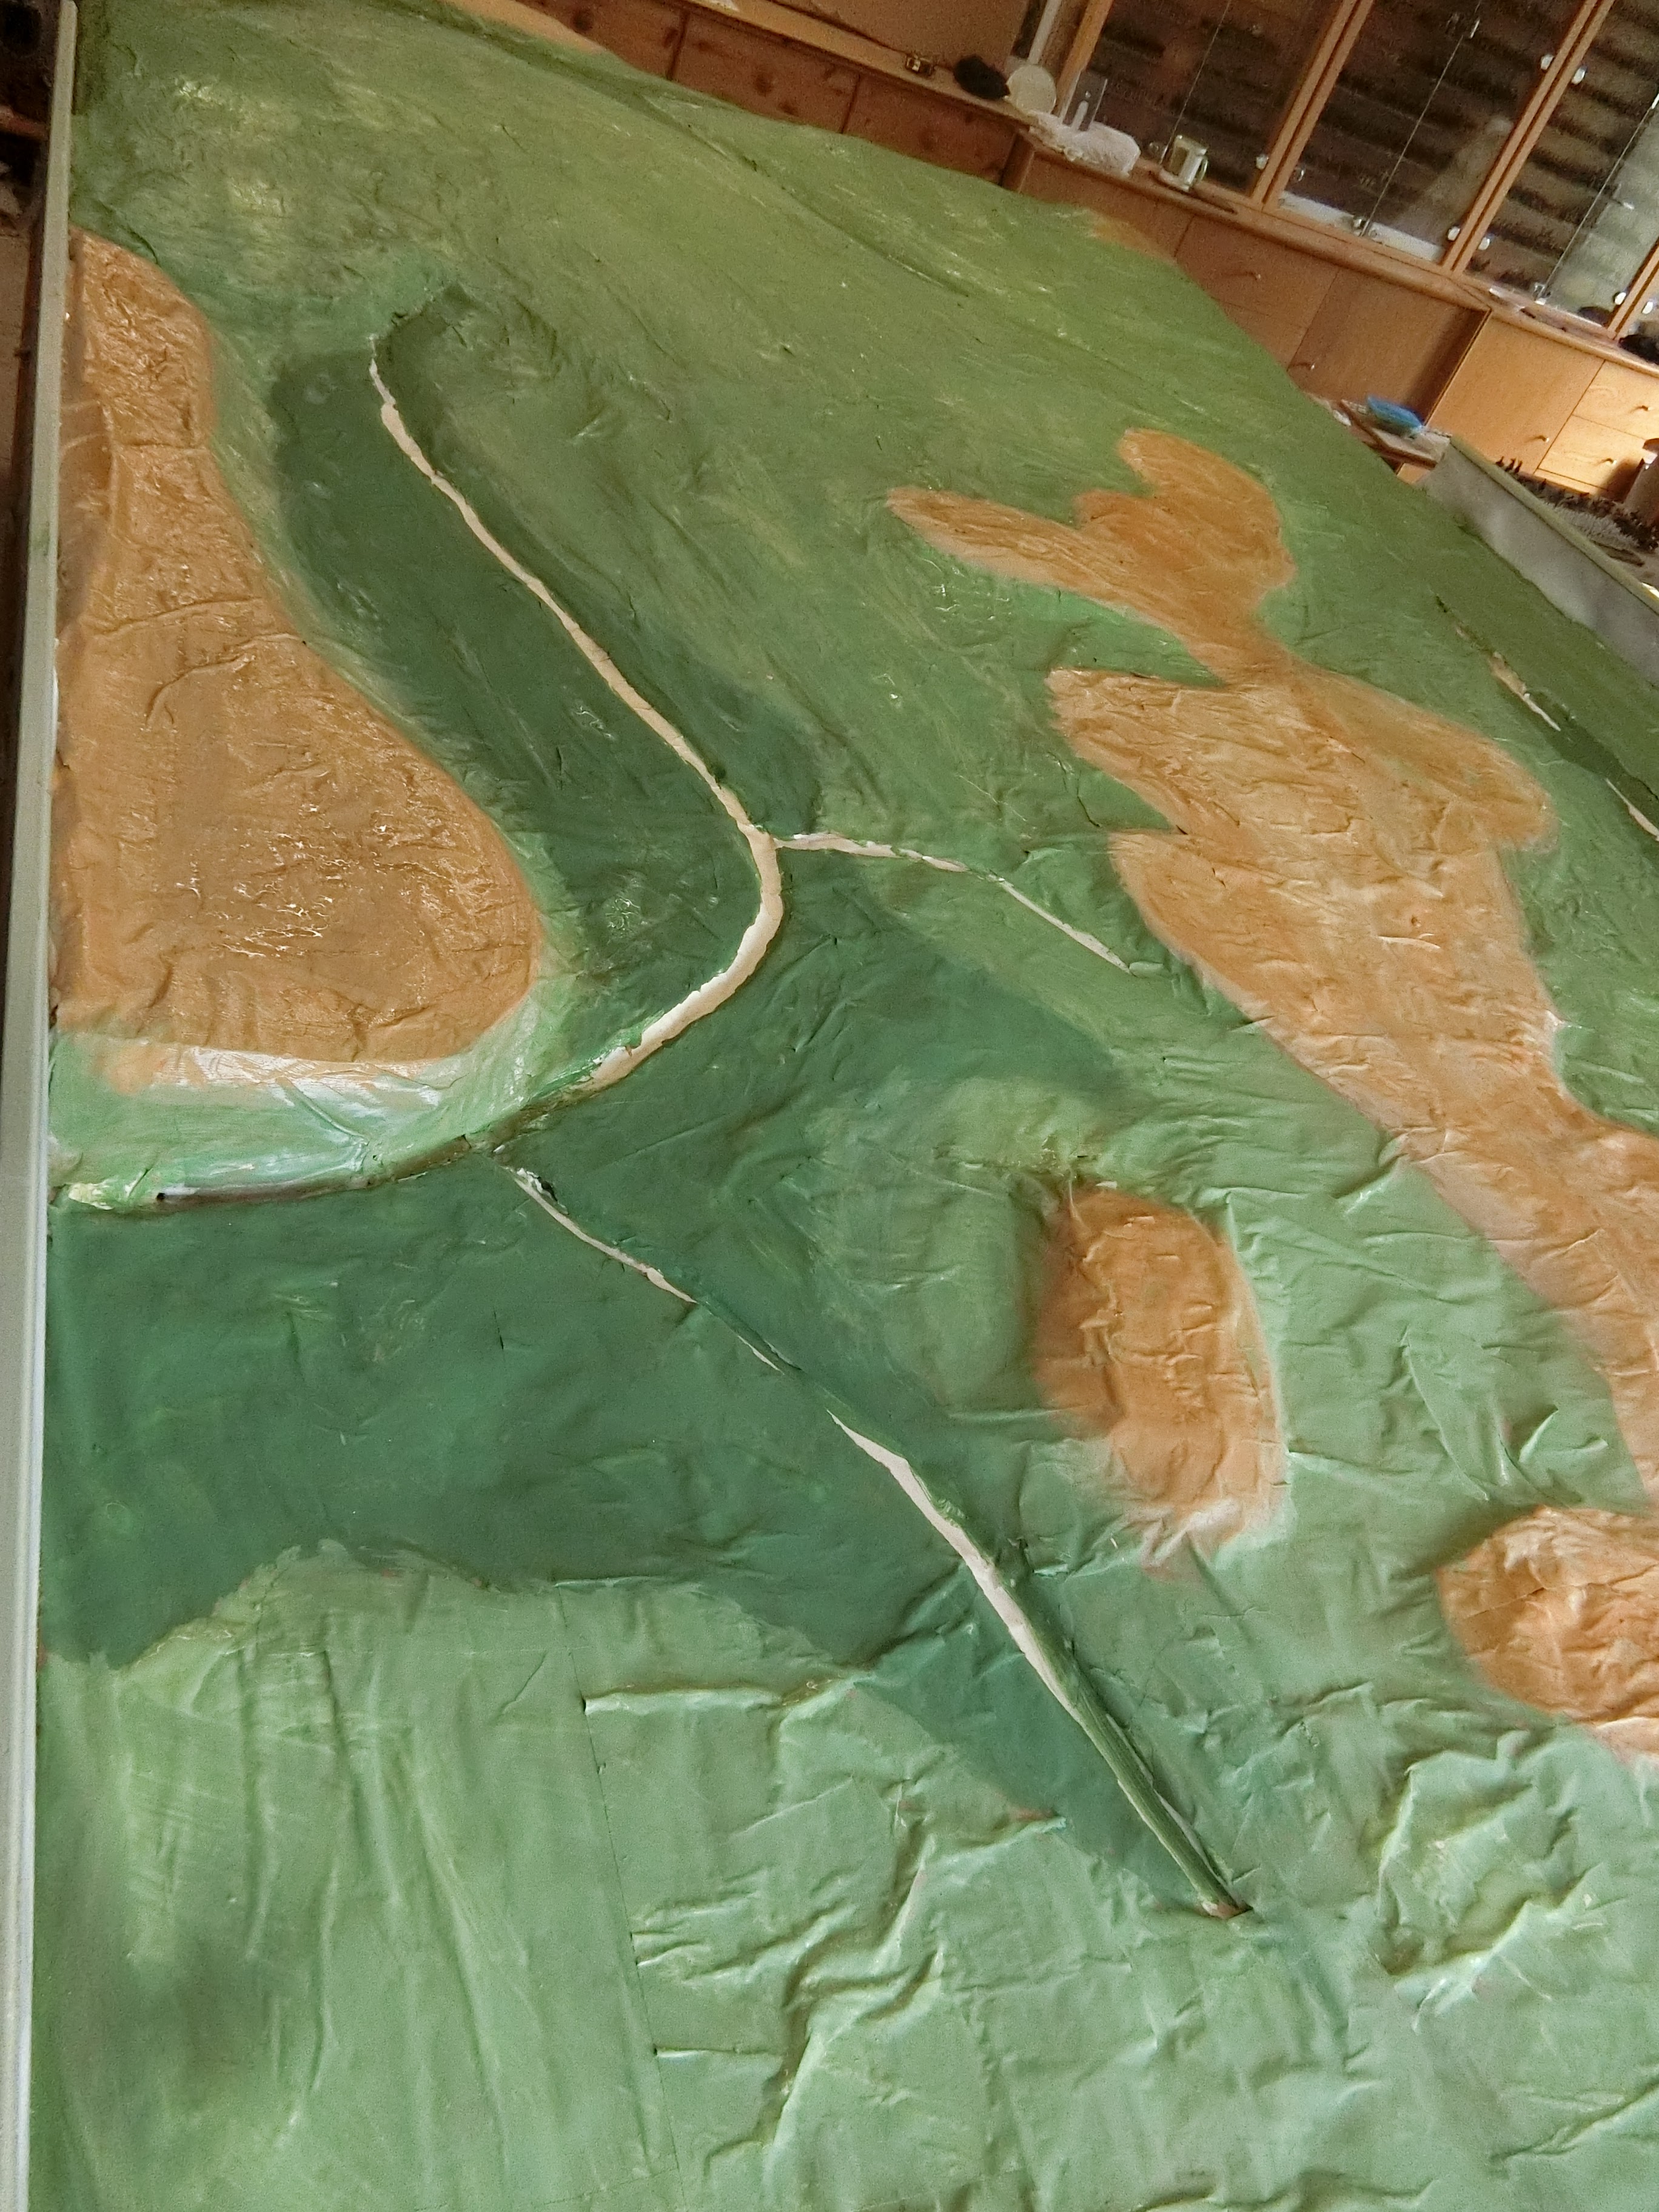
| The slopes down from the top contour templates were smoothed with other card and then the whole thing covered with a layer of reasonably substantial wrapping paper (such as comes with every Amazon parcel!) applied with thinned PVA glue and left to dry (note the weights at corners to limit warping). |
This sequence shows torn up pieces of wrapping paper being applied only 2 to 3 layers thick, as
papier maché with thinned PVA. When dry it makes a lovely solid surface to model onto, (and into if necessary)
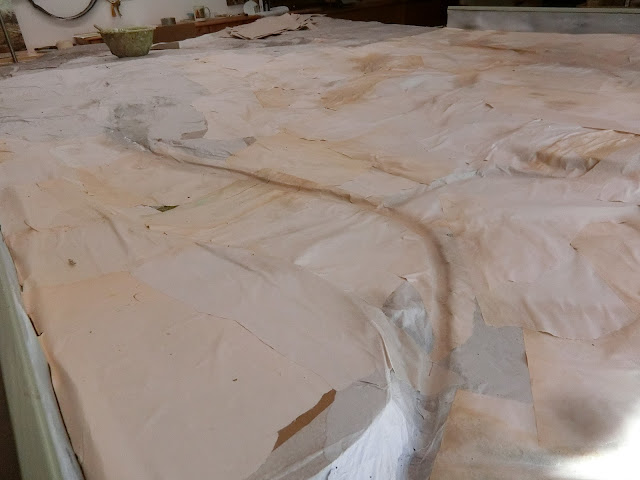 |
| Making sure that the course of the rivers was smoothed a bit without being obscured |
The next three photos show the effect of painting in the three contours in basic colours, leaving the rivers for now.
 |
| Beginning to develop the middle contour green, some texture is added to the paint (sawdust, sand, very small pebbles) but not too course for 15mm or smaller figures |
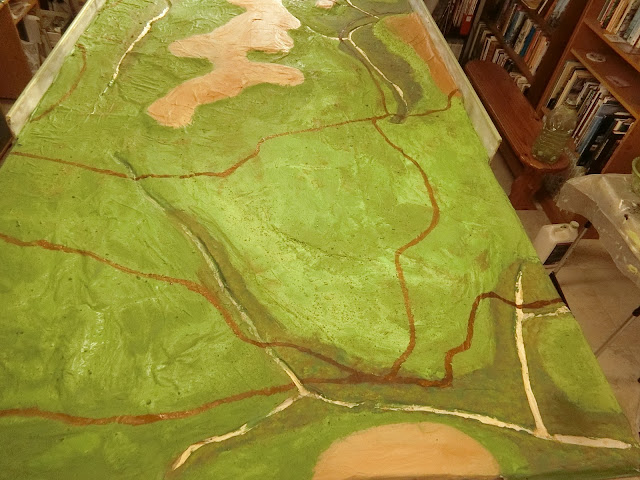 |
| Decided to paint a basic brown for the roads at this stage to help me focus |
 |
| Both green contours are getting more dry brush treatment with yellow, creams and browns. No right answers on this. and I never really know when I'm finished! |
 |
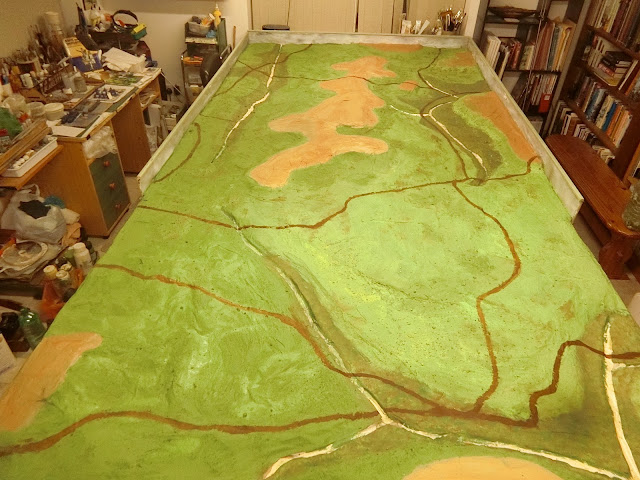
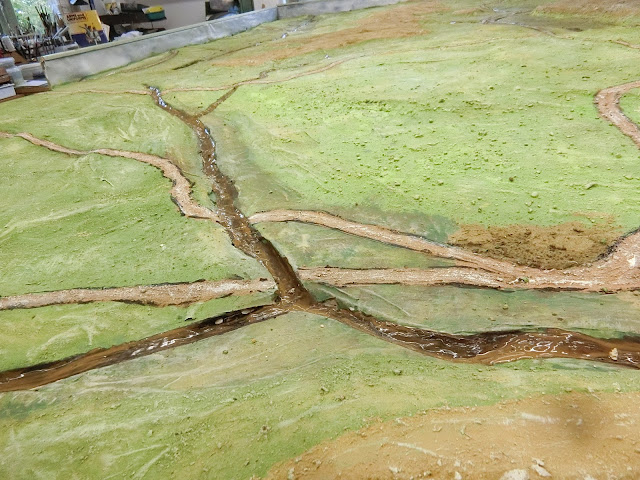
| The roads are treated with a thin gunge of builders filler, PVA, paint and sand and then some "ruts" scored in them when semi-set |
 |
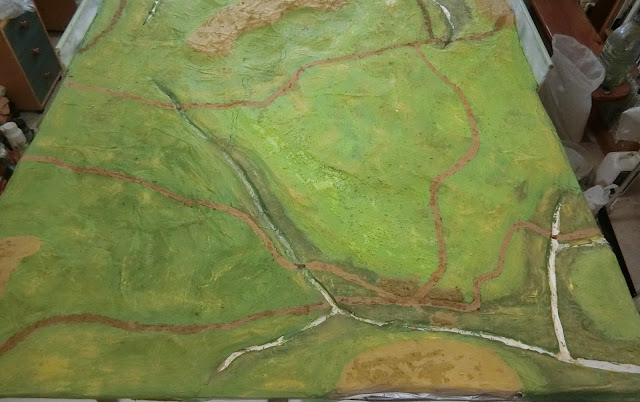
Dry brushing to lighten the roads, helped by thin dark outlining. Now I have painted the rivers with a thick but runny PVA and paint mixture in a natural muddy brown (as real rivers generally look from a helicopter or aircraft)
 |
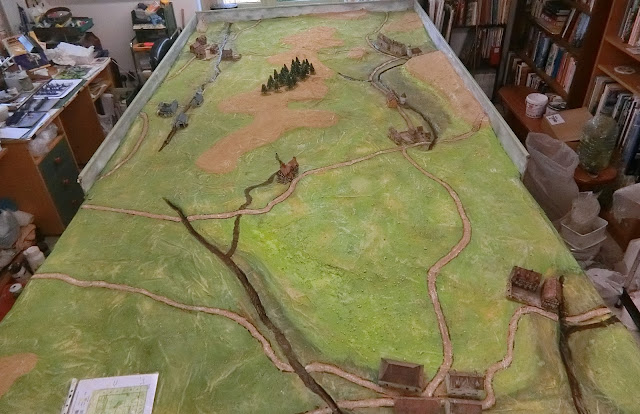 |
| I've now placed the buildings I want to fill the village footprints. A bit more painting and texturing can be done now for BUAs if desired; mostly I just tend to to loosely scatter sawdust |
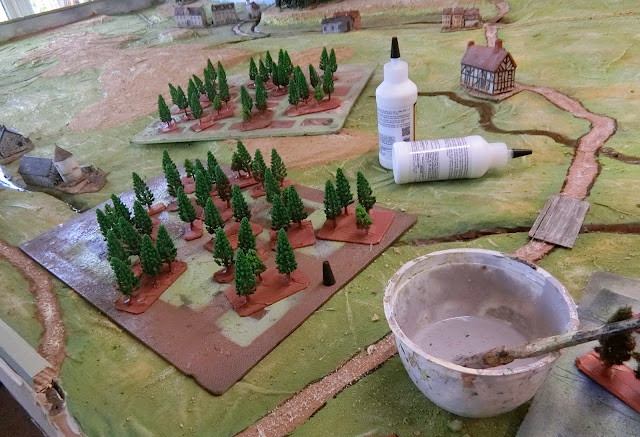
The trees shown above are 3D printed ones and I don't have nearly enough so I had acquired two different kinds of trees from Ebay outlets. The first batch (next 3 pics) were fairly bright green from China, but they are cheap and give scope for more work to make them acceptable.
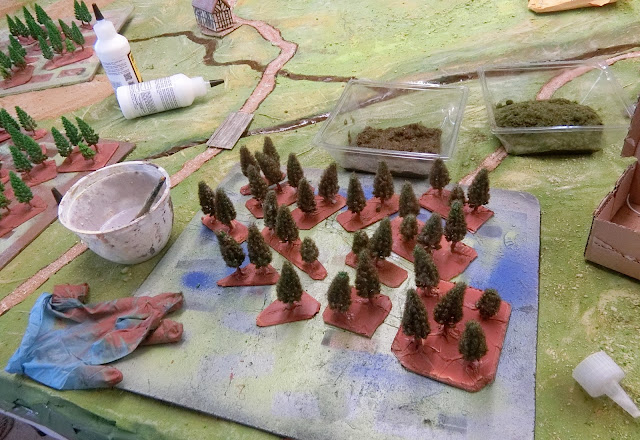 |
| I made small holes in cardboard bases then glued the trees in with a glue gun - it is quick and gives a bit of texture and substance to the trunks. I painted them a basic brown before applying the evergreen "foliage" |
 |
| My Woodland Scenics "Scenic Glue" was past its best but pouring into my paint bowl, stirring like mad to revive the viscosity, and then adding water, gave me a very usable mixture to attach the very light scatter material which is an evergreen mix. |
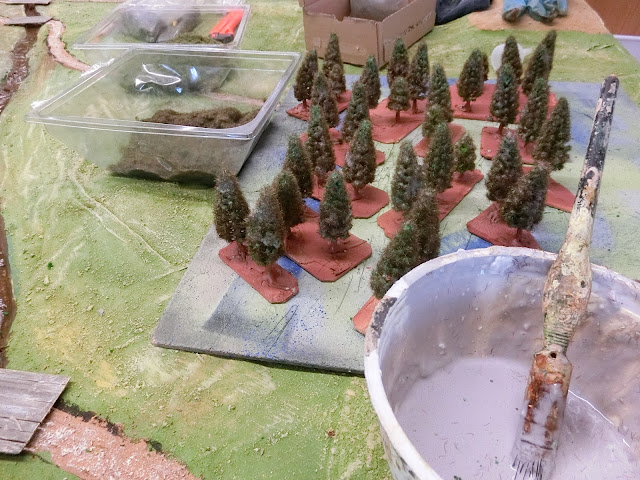 |
| Note: This watery mix is good for very light foliage but I'm not sure if it would hold substantial tree leaf clumps. I use Woodland Scenics Hob-e-Tac for that. |
The next 3 pics show the second batch - these are more commercial German model railway trees and are more expensive, but they come a dark green colour which is acceptable, however, I prefer a more natural, less uniform look, so I treated them the same as the Chinese ones.
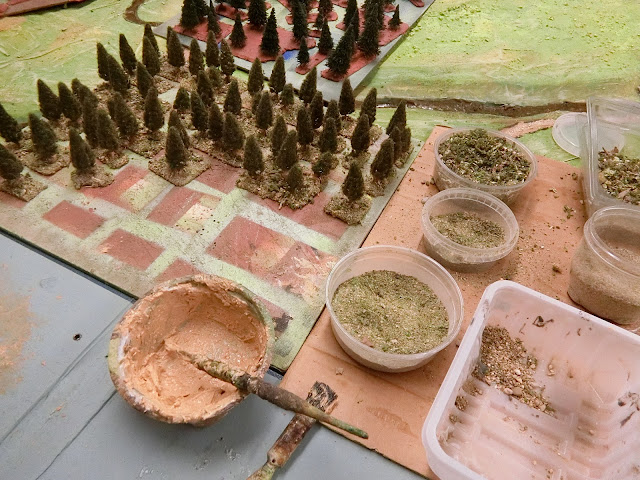 |
| Once dry the bases are all treated with acrylic paste/medium (such as Winsor and Newton Large Grain Structure Gel) mixed with paint and used as the glue for all kinds of scatter mixes to make the forest floor |
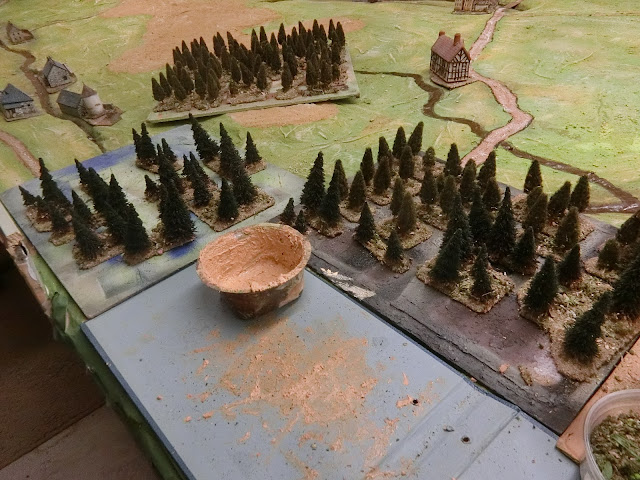 |
| I never throw anything away! - The scatter mixes from each terrain are collected up with large paint brush and dustpan, sieved for size if necessary, and sorted, so I always have loads of choice for the treatments to give the next project. These trees can be spayed with matt varnish to fix them for greater longevity |
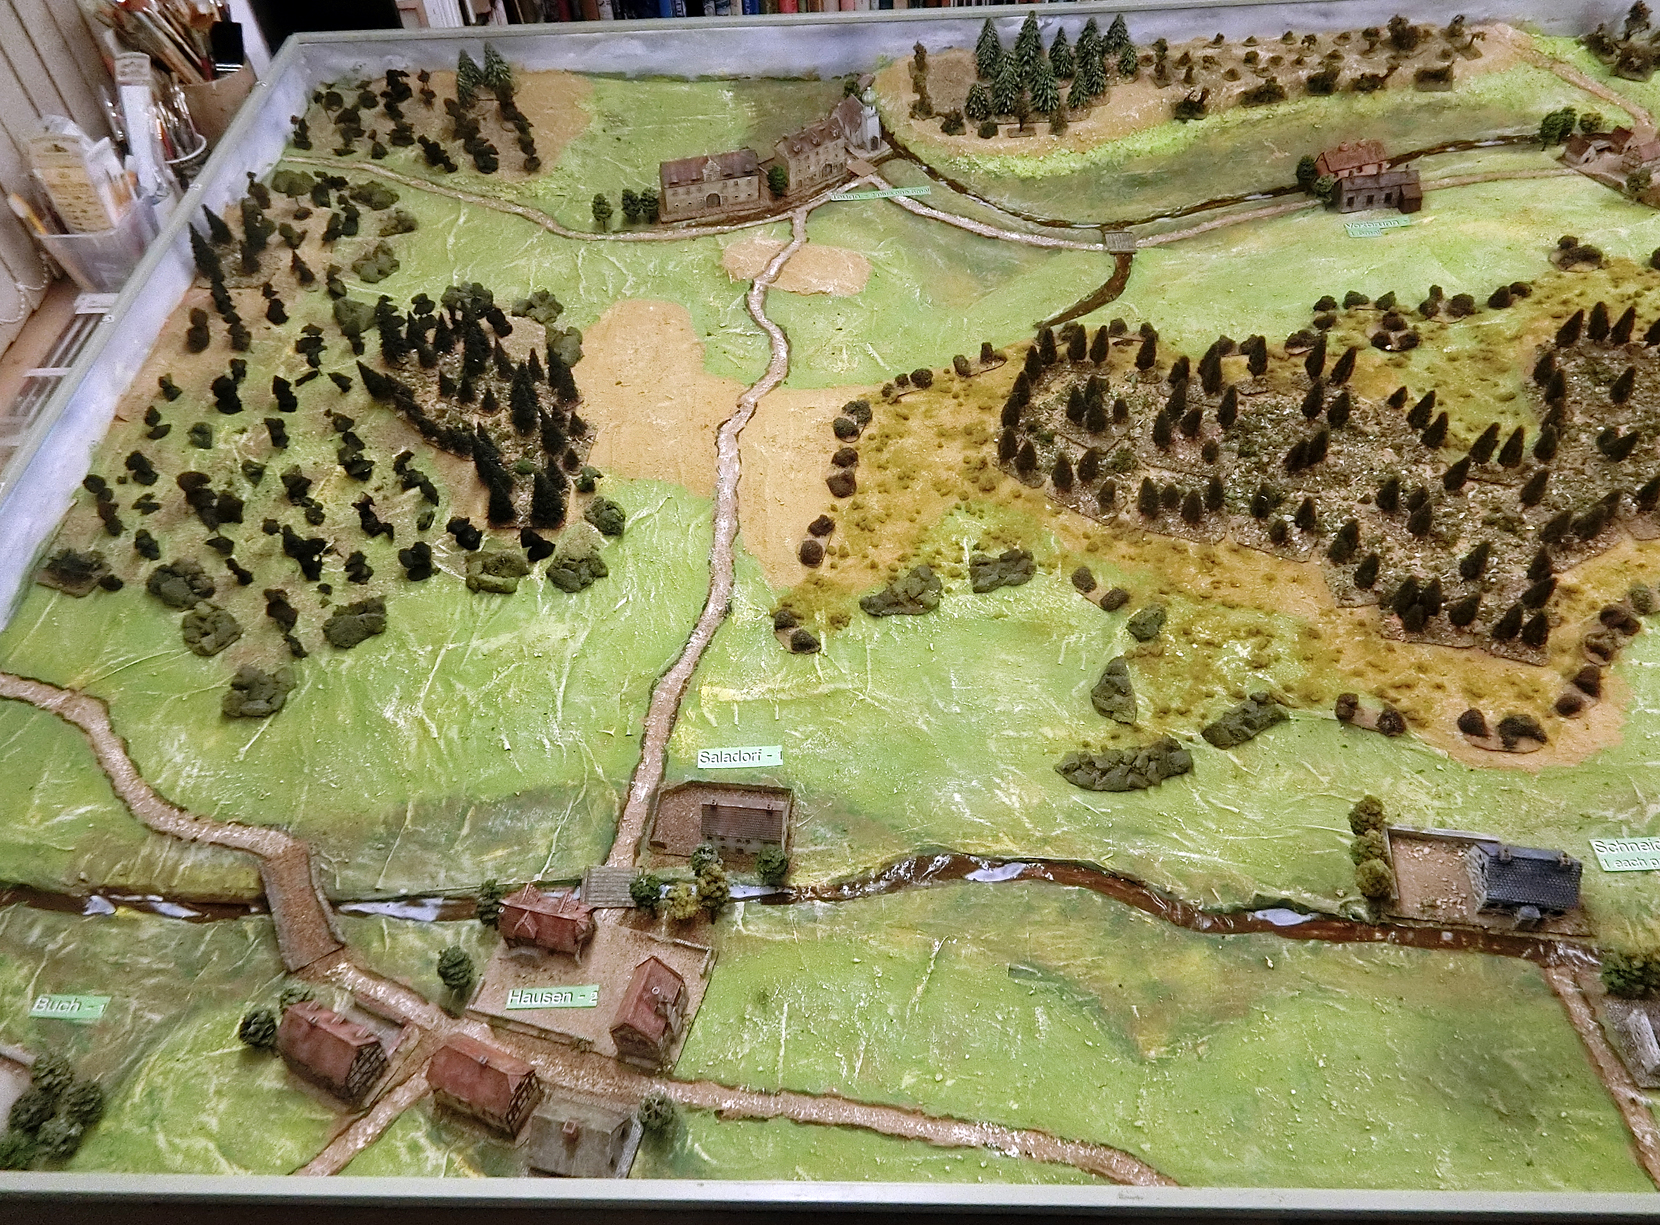
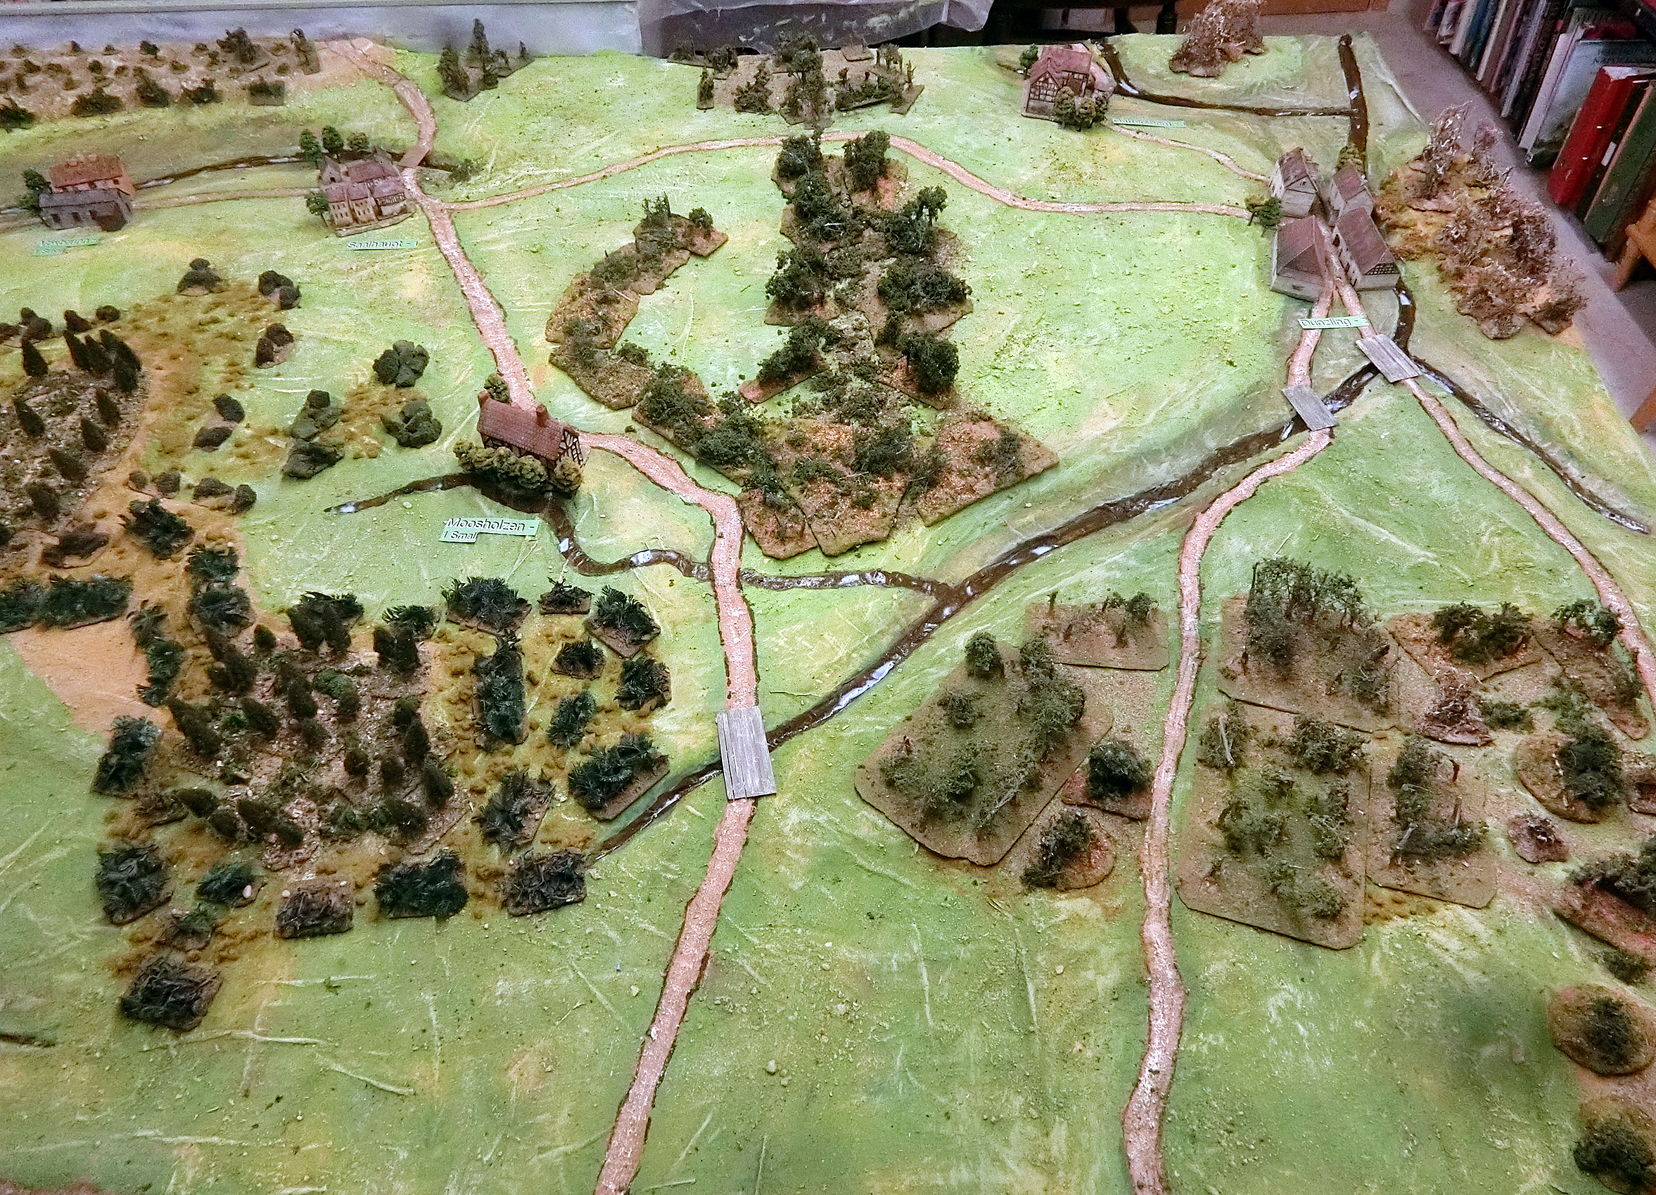
The Finished Terrain:
And a quick tour round the completed table (rivers are still drying out) before it was messed up by blind markers and troops
 |
| My new evergreen trees were used specifically to make the areas I had decreed on the map to be "dense woodland" (skirmish infantry only). I still did not have enough suitable, small scale trees for the less dense woodlands, so just marked them in various ways with scrub and other foliage. |
 |
| The top contour was left light brown as most is covered by woods. Not disguising it proved helpful to allow the players to know they were jumping up a contour. |


WOW! The attention to detail is mesmerising. Bravissimo!
ReplyDeleteThank you Anonymous - any chance of letting us know who you are?
DeleteLooks spectacular as always Chris. The work that goes into your terrain is always a rewarding visual feast for the eye.
ReplyDeleteSo pleased you like it James. The terrain is one of the best parts of the hobby for me.
DeleteI find it fascinating how you build your terrain Chris, a real work of art, really top notch.
ReplyDeleteVery glad to be of service Donnie. Thank you for always visiting and commenting
DeleteAs always I love to see how you go about creating your terrain Chris:). Very simple but very effective and your hard work certainly pays off for those of us luckily enough to be able to game over it!
ReplyDeleteYes Steve, pretty simple in concept but it is still a lot of work - nearly two weeks from start to finish, but worth it I think when those participating seem to enjoy the effect so much. Thanks so much for coming and contributing your skill and humour.
DeleteThis is seriously nice. Both the terrain which are spectacular, and i would also very much like to hear about your rule variations on a nice ruleset.
ReplyDeleteThanks Anony- mouse. It would be lovely to know to whom I am talking!.I plan to put a link to the rules set when I'm happy with it, which will probably be a couple of blog posts from now. To get an idea of what I'm aiming at kindly see the previous post (Landshut) and the one in June - Reviving my 1809 campaign.
DeleteLovely work as always, Chris. Not many of would have the patience (or skill) to do it. One day I hope I will have chance to game over one of your splendid terrains too! :-)
ReplyDeleteSorry - the word "us" is missing from between of and would!
DeleteThanks David. As you know it is one of my aims to get you here!
DeleteThanks, Chris. I'm sure we'll get to meet up in the not too distant future... :-)
DeleteLovely looking terrain
ReplyDeleteThanks Nick
DeleteHow did I miss this modelling masterclass! Its superb Chris
ReplyDeleteThanks a lot Kerry - I know how easy it is to let blog surfing slide!
DeleteFantastic modelling Chris, sorry I missed the post.
ReplyDeleteThanks for a wonderful display of artistic modeling and wargaming talent.
Willz.
You are welcome Willz hope you found something new in there.
DeleteReally interesting, gives me lots to think about with my own terrain. Thanks for sharing.
ReplyDeleteThanks for your comment. Please do also have a look at the next big game in this series in blog posts of Sept, Oct and December 2024 (Terrain building in the September one)
Delete